Category: Computer Hardware

Windows 10 to offer greater control over graphics processors

Article

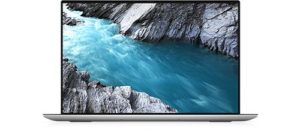
Dell XPS 17 laptop press picture courtesy of Dell Australia

Microsoft will be introducing support for better management of graphics processors in computers like the Dell XPS 17 that have Thunderbolt 3 and onboard discrete graphics processors

Windows 10 to give power users more control over their GPUs | Bleeping Computer

New Windows 10 Build 20190 brings default GPU & GPU per application settings along with new post-update experience in Dev channel | Windows Central

My Comments

Previously Windows provided operating-system-level support for handling multiple graphics processors. This is due to the reality of many mainstream laptops being equipped with a discrete graphics processor along with the integrated graphics chipset, providing the ability for users to switch between high-performance or power efficiency depending on whether the computer is on AC power or batteries.

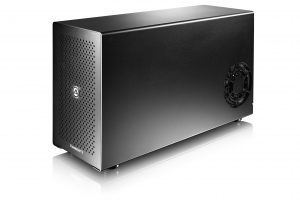
Akitio Node Thunderbolt 3 "card cage" external graphics module - press image courtesy of Akitio

.. so users can choose whether an app uses the onboard discrete graphics processor or a desktop graphics card installed in an external graphics module like this Akitio Node unit

This was achieved either at hardware or graphics-chipset level with special software like NVIDIA Optimus achieving this goal. Then Microsoft recently added this functionality to Windows to allow you to determine whether an application chooses the higher-performance or power-efficient graphics processor.

But in an upcoming feature upgrade, Microsoft will allow fine-tuned control over which graphics chipset applications use. The function is in testing through their Windows Insider beta-testing program.

It will cater towards users who run more than two discrete graphics processors on their system such as a gaming rig with two graphics cards or a laptop / all-in-one / low-profile desktop that has a discrete GPU and Thunderbolt 3 and is connected to an external graphics module. This kind of configuration is primarily offered on Intel-powered premium consumer and business clamshell laptops with a screen size of 15” or more as well as most of the Intel-powered performance-focused laptops.

Here, the users can specify which graphics processor is the one for high-performance computing or can specify that a particular application uses a particular graphics processor.

It is also being driven by the rise of USB4 and Thunderbolt 4, where there will be an effort to make these high-performance USB-C-based peripheral-connection ports ubiquitous and affordable. This could then open up the path for laptops and low-profile / all-in-one desktops to have these ports with their presence being sold on the ability to upgrade the computer’s graphics with an external graphics module.

In the case of a laptop equipped with a discrete GPU and Thunderbolt 3, users may find that the onboard discrete GPU is really a “mobile-grade” type that is intended to be power-efficient but doesn’t perform as good as a desktop graphics card. Here, they would install a desktop graphics card in to a “card-cage” external graphics module and connect it to the computer for better graphics performance.

This may work as a way to allow the use of “fit-for-purpose” graphics processors like a mobile-workstation GPU for a CAD program alongside a gaming-grade GPU for a game. Or a user could run a video-editing program specifically with a graphics processor that is good at rendering the video content while they have another graphics processor available for other tasks.

Personally, I would also like to see Windows offer the ability for users to create an order of preference for high-performance graphics processors either for default high-performance use or for a particular application’s needs. This would come in to its own for graphics-card reviewers who are comparing against their “daily-driver” graphics card, or people who are moving a Thunderbolt-3-equipped laptop between multiple external graphics modules.

Similarly, the control over multiple-graphics-processor setups that Windows is to offer could also evolve towards “task-specific” GPU use. Here, it could be about focusing a graphics chipset towards batch calculation workloads rather than display-focused workloads. This is because people involved with video-editing, media transcoding, statistics, cryptocurrency or similar tasks may prefer to use the kind of chipset that is a “number-cruncher” for those tasks rather than one that excels at interactive computing.

At least Microsoft is working towards answering the needs of power users who deal with two or more graphics processors as part of their personal-computing lives.

Apple to use the ARM microarchitecture in newer Mac computers

Article

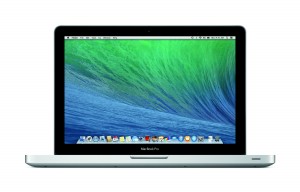
Apple MacBook Pro running MacOS X Mavericks - press picture courtesy of Apple

The Apple Mac platform is to move towards apple’s own silicon that uses ARM RISC microarchitecture

It’s Official: The Mac Is Transitioning to Apple-Made Silicon | Gizmodo

My Comments

This week, Apple used its WWDC software developers’ conference to announce that the Macintosh regular-computer platform will move away from Intel’s silicon to their own ARM-based silicon. This is to bring that computing platform in to line with their iOS/iPadOS mobile computing platform, their tVOS Apple TV set-top platform and their Watch platform that uses Apple’s own silicon.

Here, this silicon will use the ARM RISC instruction-set microarchitecture rather than the x86/x64 architecture used with Intel silicon. But Apple is no stranger to moving the Macintosh computing platform between microarchitectures.

Initially this platform used Motorola 680×0/PowerPC silicon which used a Motorola RISC instruction set microarchitecture. This platform initially had more chops compared to Intel’s x86 platform especially when it came to graphics and multimedia. Then, when Apple realised that Intel offered cost-effective microprocessors using the x86-64 microarchitecture and had the same kind of multimedia prowess as the Motorola processors, they moved the Macintosh platform to the Intel silicon.

But Apple had to take initiatives to bring the MacOS and Mac application software over to this platform. This required them to supply software development tools to the software-development community to allow programs that they write to be compiled for both Motorola and Intel instruction sets. They also furnished an instruction-set translator or “cross-compiler” called Rosetta to Mac users who had Intel-based Macs so they can run extant software that was written for Motorola silicon.

For a few years, this caused some awkwardness with Mac users, especially those who were early adopters, due to either the availability of software natively compiled for Intel silicon. Or they were finding that their existing Motorola-native software was running too slowly on their Intel-based computers thanks to the Rosetta instruction-set-translation software working between their program and the computer’s silicon.

Apple will be repeating this process in a very similar way to the initial Intel transition by the provision of software-development tools that build for Intel i86-64 based silicon and their own ARM-RISC based silicon. As well they will issue Rosetta2 which does the same job as the original Rosetta but translate i86-64 CISC machine instructions to the ARM RISC instruction set that their own silicon uses. Rosetta2 will be part of the next major version of MacOS which will be known as Big Sur.

The question that will be raised amongst developers and users of high-resource-load software like games or engineering software is what impact this conversion will have on that level of software. Typically most games are issued for the main games consoles and Windows-driven Intel-architecture PCs over Macs or tvOS-based Apple TV set-top devices, with software ports for these platforms coming later on in the software’s evolution.

There is an expectation that the Rosetta2 “cross-compiler” software could work this kind of software properly to a point that it can satisfactorily perform on a computer using integrated graphics infrastructure and working at Full HD resolution. Then there will be the issue of making sure it works with a Mac that uses discrete graphics infrastructure and higher display resolutions, thus giving the MacOS platform some “gaming chops”.

I see the rise of ARM RISC silicon in the tradition regular computing world and having it exist alongside classic Intel-based silicon in this computing space like what is happening with Apple and Microsoft as a challenge for computer software development. It is although some work has taken place within the UNIX / Linux space to facilitate the development of software for multiple computer types thus leading to this space bringing forth the open-source and shared-source software movements. This is more so with Microsoft where there is an expectation to have Intel-based silicon and ARM-based silicon exist alongside each other for the life of a common desktop computing platform, with each silicon type serving particular use cases.

Product Review–Brother DSMobile DS-940DW mobile scanner

Introduction

I am reviewing the Brother DSMobile DS-940DW Wi-Fi mobile scanner which is a highly-portable pure-play document scanner pitched towards the mobile office.

This battery-powered mobile scanner can scan to a regular computer via a USB connection or via a Wi-Fi link , whether you are using the one it creates or an existing small or home Wi-Fi network. As well, you can use it to scan documents to your iOS or Android mobile device using a Wi-Fi link, either one it creates or an extant small network.

As well, you can use it offline to scan documents to a removable microSD card so you can then download them as files to your computer at a later stage. In this case, you can remove the card and install it in your computer’s SD card reader to get at your documents or while you have the scanner connected to your regular computer you see that SD card as a removable storage device with all your scanned documents.

Photo – Insert high-resolution photo of product INLINE
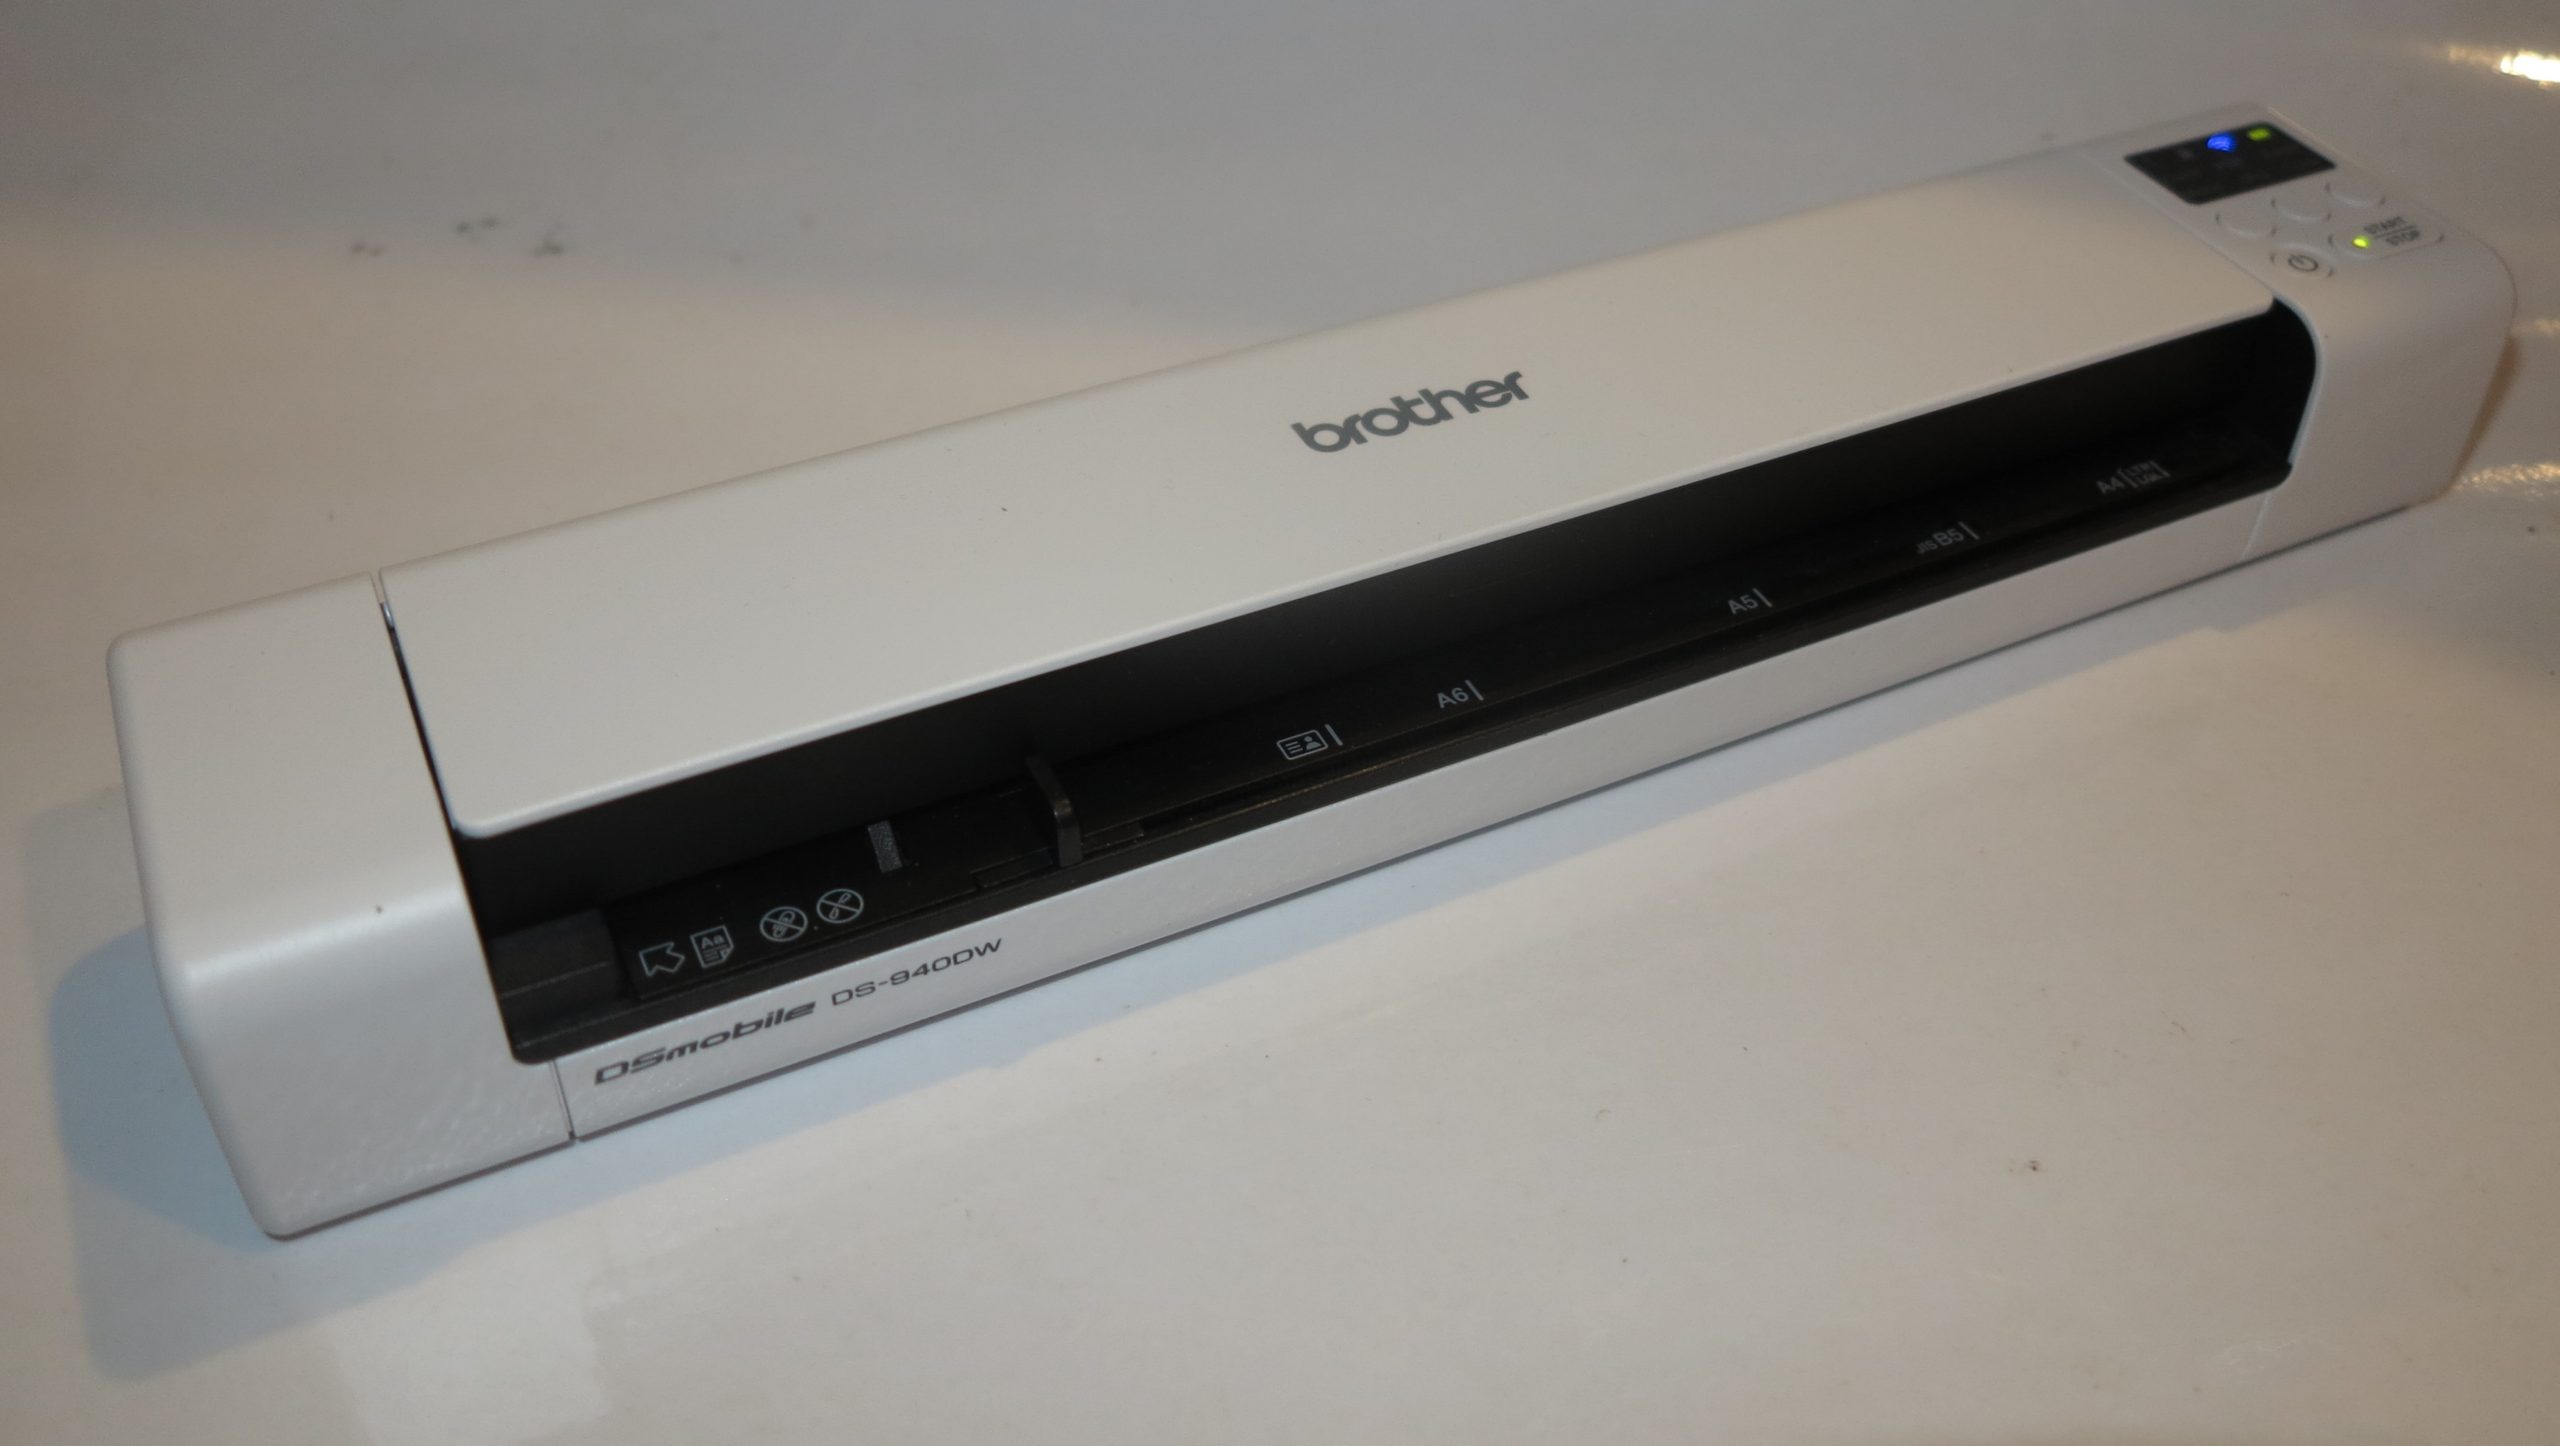
Brother DSMobile DS-940DW Wi-Fi mobile scanner

Scan Connections
Colour USB 3.0
600dpi x 600dpi

Single-pass auto-duplex

Wi-Fi
Own-access-point Wi-FiIPv6

Price

Scanner

Recommended Retail Price: AUD$299

The scanner itself
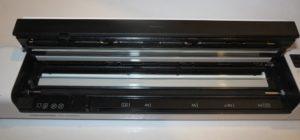
Brother DS-940DW Wi-Fi mobile scanner scan heads detail

Two scan heads allow the Brother DS-940DW Wi-Fi mobile scanner to scan both sides of a page simultaneously/
The clamshell design makes it easy to remove jammed paper.

The Brother DSMobile DS-940DW Wi-Fi mobile scanner is powered from an internal rechargeable battery or an external USB-based power supply which you have to provide. That could be through your computer, a USB charger or a USB powerbank. But the same USB power supply also charges the battery whether you are running the scanner or not.

Connectivity and Setup

The Brother DS-940DW mobile scanner has an easy-to-find slider switch on the right-hand side that selects between SD card operation, direct USB connection and Wi-Fi network connection. This makes it easier for the user to switch between the mode appropriate to their scanning needs, be it to scan to their laptop via USB or to their mobile device via Wi-Fi or simply to scan to the installed SD card.

Direct connection
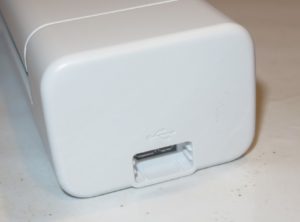
Brother DS-940DW Wi-Fi mobile scanner USB 3.0 microB socket

You connect the scanner to the host computer or a power supply using a USB 3.0 or USB-C cable with a USB 3.0 microB plug on it

If you intend to use the Brother DS-940DW scanner with your regular computer via USB, you connect it to the host computer using a USB 3.0 cable supplied with the scanner.

But if your computer is equipped only with USB-C connectors like some new Ultrabooks or you use a USB-C charger to power your scanner, you would need to purchase a USB Type-C to  USB 3.0 microB cable (OfficeWorks Australia, Office Depot USA, B&H Photo Video USA,Walmart, Amazon) rather than use the supplied USB Type-A cable.
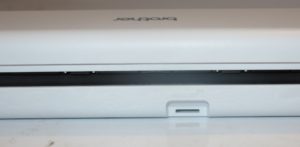
Brother DS-940DW Wi-Fi mobile scanner microSD card slot

microSD card slot for offline scanning to microSD cards

In this case, if you did use the scanner offline and scanned documents to an SD card installed within the machine, the SD card will be presented to your computer’s operating system as another logical storage volume. This is similar to what happens when you are using a USB memory stick or an SD card reader.

Wi-Fi network connection
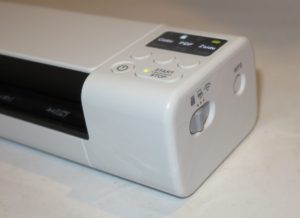
Brother DS-940DW Wi-Fi mobile scanner operation mode switch

It is easy to change between WI-Fi, dirrect or offline scanning at the flick of a switch

The scanner can be connected to the computer via a USB cable or via a Wi-Fi network, whether one that it creates or an existing small network. But setting it up to work with an existing Wi-Fi network requires you to work it as its own Wi-Fi access point then log in to a specified Web page which has a “Wireless Setup Wizard” to associate it with the existing network. You can use WPS-based push-button or PIN setup if your access point or router supports these methods. For this function, there is a hardware button located on the side of the scanner near the operation mode switch.

I am identifying the issue of having this mobile scanner on an existing small Wi-Fi network due to the idea of setting up these mobile devices as part of a mobile network where there are more than two devices to be on that network. It is in addition to having this same device work as part of your home or small-business network.
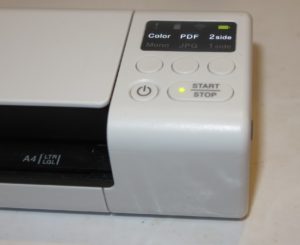
Brother DS-940DW Wi-Fi mobile scanner control panel detail

Control panel with buttons to start scanning, determine whether to scan in colour or black and white or scan both sides of the page. Another button allows you to determine whether the scanned results are to be a JPEG image file or a PDF document file

When the Brother DSMobile DS-940DW mobile scanner is connected to the host computer via USB, it exposes a Mass Storage device class for the internal microSD card reader. This is in conjunction to vendor-specific devices that depend on the host computer running a Brother-supplied driver and scan-monitor software.

There is a default arrangement that if you enable Wi-Fi mode on the scanner, it will check for previously-configured networks before it goes to own-access-point mode which is indicated by a steady Wi-Fi light. Successful connection to a previously-configured network is simply identified by a steady Wi-Fi light after a bit of flashing.

Software installation

If you are setting the Brother DS-940DW mobile scanner to work with your regular computer, you would need to install the drivers from the Brother support Website for this machine to work. You will also be supplied with the Brother iPront&Scan software which can do most of the essential scanning tasks.

Brother throws in complementary software like a business-card scanning app so you can scan your pile of customers’ or business partners’ business cards in to a contact-management database. This is software you can install when you download the driver and software package or install at a later date.

Mobile users will need to install the Brother iPrint&Scan app from their mobile platform’s app store. Here, they will need to use this simple software to scan the documents in to their device and “take them further” as they see fit.

Document Handling
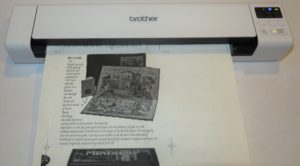
Brother DS-940DW Wi-Fi mobile scanner ready to scan A4 page

Scanning a standard A4 or letter document page

The Brother DSMobile DS-940DW can only handle one page at at time but can scan both sides of that page at once. The double-sided scanning approach is similar to some of Brother’s multifunction printers that use single-pass duplex scanning.

When you scan a document, you need to make sure that the black paper guide is lined up against the original document’s edge before you start the scanning process. Here, you are making sure that the document isn’t skewing or likely to jam.

To deal with paper jams, you press the front of the scanner above the document-feed slot in order to expose the scanning heads to remove the misfed original. Here, the “clamshell approach” makes it easier to rectify any paper jams.
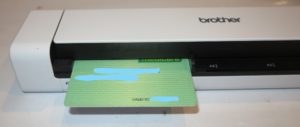
Brother DS-940DW Wi-Fi mobile scanner ready to scan an ID card

Ready to scan an ID card of standard “credit-card” thickness and with embossing – it can.

The Brother DS-940DW was able to scan ID cards, even those with embossed characters properly. I would see this as being important where users have to scan them to prove a customer’s identity during an “on-the-road” transaction.

Walk-up functions

The Brother DS-940DW has a built-in SDHC-compliant microSD card drive so you can scan documents offline to a microSD card. This is presented to the host computer as a standard USB Mass Storage Device and you use your operating system’s file manager to get at your scanned files which exist on that SD card.

I wouldn’t really expect this to work properly with the idea of showing your scanned photos through a smart TV or similar device that has its own USB port. It is because most of these dedicated-purpose devices don’t do a good job at handling multiple-function devices connected to their USB ports thanks to their firmware not supporting USB hubs as a device class.

Computer functions

I have used the scanner with the Brother iPrint&Scan software and found that it is competent as a basic scanning package whether to store the scan to your computer’s file system or to an online storage service.

At the moment, the Brother iPrint&Scan desktop scanning software works on a “pull-scan” approach where you have to start the scanning job from the software rather than a “push-scan” approach pressing the machine’s START/STOP button to initiate the scan job. This is due to the scan monitor software associated with the machine and providing this functionality not installing properly. I have addressed this issue previously on this site due to various scan-monitor programs taking time to respond properly when you start a scan job on the printer or scanner, with the idea of operating systems undertaking this role.

The Brother DSMobile DS-940DW network mobile scanner works with the Brother iPrint&Scan mobile app available on both the Apple and Google app stores. Here, it worked properly where you can simply save the scan to your mobile device or share it with other apps that handle the supported file types using the “share to” shortcut that iOS and Android provide.

Scan speed and quality

The machine can scan the pages you feed through it quickly and yields a high-quality reproduction of these pages. I had tried it with an ordinary A4 document, a snapshot photo, two till receipts and two ID cards and this was proven for each of them. With the photo, there wasn’t any difference with the colour saturation that was yielded.

If you are scanning till receipts with the scanner, it is a good idea to set the machine or your scanning software to scan the receipt single-sided. This will avoid problems with reverse-side text that may “come through” during the scan which may be a problem with receipts coming from devices that are loaded with “branded” paper that has advertising material printed on the back.

Limitations And Points Of Improvement

A key issue that I found with the Brother DS-940DW mobile scanner was a poor user experience when I enrolled it with an existing Wi-Fi home network from my smartphone. This could be improved upon through having a native mobile platform app for configuring this scanner’s network connectivity. It can include the ability to transfer a network’s connection details that are stored in your mobile device to the scanner as part of configuring that device.

For those of us who use a regular computer and the scanner’s Web user experience for configuring it to work with an existing Wi-Fi network, that user experience could be improved with an indicator that highlights successful connection to that network. As well, a hardware switch could be used to toggle between the scanner’s own network and an existing network, which may come in handy for troubleshooting or if you don’t want to use an existing network that you set up the scanner for.

It could also benefit from the full set of USB 3.1 specifications including the Type-C connection and USB Power Delivery for quick charging. Most likely I would see Brother offer this connection in a newer portable printing devices as the USB Type-C connection becomes the norm for portable computer equipment.

I also see the Brother DSMobile DS-940DW network mobile scanner being an ideal device to implement Mopria Scan driver-free scanning technology (Mopria Alliance press release PDF) which is currently implemented as an app for Android devices.

As well, it could support a transparency-scanning mode that capitalises on the single-pass auto-duplex scan method. Here, one of the scanning heads could simply be a white backlight while the other simply reads the image on the film. This would come in to its own with a wide range of applications like photographers with their negatives and slides, the medical profession with their film-based X-rays or businesses who have archived documents using microfilm and similar technologies.

Conclusion and Placement Notes

I do see the Brother DSMobile DS-940DW network mobile scanner as an agile highly portable pure-play document scanner that can answer many different needs. Here, it works well with anyone whose office is the driver’s seat of a car or the back of a van and can even answer the requirements to use mobile-platform devices as one’s primary workplace technology.

It is easy to consider a mobile scanner, especially a network-capable machine, to be a toy but I do see the Brother DSMobile DS-940DW mobile scanner as a tool. This is more so for mobile workers who need to scan receipts for work transactions incurred while travelling or to scan documents such as work authorisations and customer ID at the customer’s premises.

The fact that you can switch between scanning to an SD card, a USB-connected host or a Wi-Fi-connected host using a hardware switch makes the job of selecting the right mode for the job easier. For example, a mobile professional could switch the scanner over to “scan-to-card” mode and scan the fuel receipt to an SD card installed in the unit and serving as a “digital receipt shoebox”. Then they scan that work authorisation that their customer had signed when they visited and use the Wi-Fi link with their iPad running an email app to send the signed authorisation to their office.
Logitech improves on the XBox Adaptive Controller with a cost-effective control package

Articles

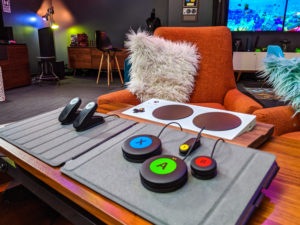
Logitech G Adaptive Gaming Kit press picture courtesy of Logitech International

Logitech G Adaptive Gaming Kit has what you need for the XBox Adaptive Controller

Logitech’s $100 kit for the Xbox Adaptive Controller makes accessible gaming cheaper | CNet

Microsoft went all in on accessible design. This is what happened afterwards | FastCompany

Previous HomeNetworking01.info coverage on the XBox Adaptive Controller

Microsoft runs a Super Bowl ad about inclusive gaming

From the horse’s mouth

Logitech

Adaptive Gaming Kit (Product Page, Press Release, Blog Post)

My Comments

Recently, Microsoft launched the XBox Adaptive Controller as an accessible games-console controller for people who face motion and dexterity-related disabilities. They even promoted it in a TV commercial ran during this year’s Super Bowl football match, which would have been considered to go against the grain for the usual sporting and video-game audiences.

This has been part of Microsoft’s step towards inclusionary gaming and I had written in the article about that controller not just to focus towards providing video gaming for disabled people. But I also called out the therapeautic value that some games can have for elderly people as well as disabled people with Microsoft offering a lower barrier to entry for independent game developers to create games that underscore that concept.

It has actually been underscored in a recent CNET video article about the XBox Adaptive Controller being used to help a US war veteran who lost some of his motion and dexterity in a motorcycle accident.

Click or tap here to play the video

But Logitech have taken this a step further by offering an accessory kit with all the necessary controls for US$99. This kit, known as the Adaptive Gaming Kit, makes it more affordable for these people so you can have an accessible gaming setup to suit your particular needs without having to choose and buy the necessary accessories. Here, it is important especially if a person’s needs will change over time and you don’t want to have to buy newer accessories to suit that need.

The package comes with rigid and flexible mats with Velcro anchor points for the various buttons and other controls. The flexible mats can even allow the controls to be anchored around a chair’s arms or other surfaces while the whole kit can allow for the equipment to be set up and packed up with minimal effort. The controls all have their own Velcro anchor points and screw holes for anchoring to other surfaces.

Logitech used their own intellectual capital in designing the kit while working with Microsoft to evolve the product. Here, they implemented their own mechanical-switch technology that is part of their high-end keyboards including their low-profile switches used in their low-profile keyboard range. The large buttons have stabilisers built in to them so you can press them from anywhere on the button’s surface. This leads to them not reinventing the wheel when it comes to the product’s design or manufacture because of the use of common technology.

What I have liked about Logitech’s Adaptive Gaming Kit is that the idea of accessible gaming comes at a price point that represents value for money. This is compared to various assistive-technology solutions which tend to require the user to pay a king’s ransom to acquire the necessary equipment. It has often led towards the government or charitable sector not getting their money’s worth out of their disabled-person support programs due to the high cost of the necessary technology.

Welcome to the new age of making assistive technology become more mainstream, not just for disabled users but for the realities associated with the ageing population such as ageing Baby Boomers and people living longer.

Using a TV as a computer monitor

A regular TV may not serve well as the only computer monitor for your computing and video-entertainment needs

An issue that will crop up with home computing nowadays is whether to use a TV as the only display device for your computer as well as providing video entertainment.

This is an idea that tends to appeal to those of us who are living in small areas like college dorms or small apartments or simply have this kind of space as our own personal living space in a shared environment.

In this context, I am assuming that you are using the screen as part of a desktop computing setup whether by using a traditional desktop computer or by connecting your laptop computer to the display and having it serve as the primary display. I am not talking about running the display you want to use as part of a multiple-screen setup or for occasional group-viewing use.

There will be issues that will preclude this kind of use for a TV serving this role for your computer.

Pixel Density

An issue you will need to pay attention to is the pixel density your display device offers especially if you are intending to use it as your only display device for your computing and entertainment needs.

A 15” Full HD laptop would offer a pixel density of 141.2 pixels per inch while a 32” Full HD TV would work at 68.84 pixels per inch. Apple’s iPhones that implement the Retina screen would work at 326ppi while their MacBook Pro Retina screen would work at 227ppi.

Here. the display that works at something like 141.2 pixels per inch or more would make text or graphics look sharp and clear especially if you are working close to the screen. It may not matter if you are playing video games or viewing multimedia content at a “lean-back” distance.

Here, if you are buying a TV or monitor with a screen size of 27” or less, make sure you are looking for a model that uses Full HD (1080p) resolution. Larger screen sizes can be served through the use of a value-priced 32”-55” 4K UHDTV device.

Your computer’s display infrastructure needs to have an HDMI 2.0 output, preferably HDMI 2.0a for HDR10-capable displays. This may be fulfilled by most recent discrete GPUs and some recent Intel integrated graphics setups may also support this specification. If your computer or external graphics module uses a DisplayPort video output, you may need to use a DisplayPort to HDMI adaptor. Beware some of these devices may require the use of an active DisplayPort to HDMI adaptor.

Input Lag and Display Responsiveness

This is an issue that will affect gameplay where you are expected to respond quickly to the situation that is taking place in a game you are playing. It is more of concern when you are playing any fast-paced game.

The input lag problem is the time between when you do something with your game controller, keyboard or mouse and when the effect of that is painted on the screen. Then there will be issues where the screen doesn’t appear with the latest activity or isn’t quick enough to represent all of the activity including what your opponents are up to.

This is brought about due to most domestic TVs being equipped with a lot of video-processing circuity logic that deals with the incoming signal before it is painted on the screen. The time it takes may be just enough for dealing with video content but not interactive gaming content.

Some sets will offer a “gaming mode” to minimise lag times and this typically reduces the use of video-processing circuitry or optimises it for fast response. Also be aware that a significant number of large-screen TVs are appearing with features and graphics performance very similar to gaming-class computer monitors with this as a growing trend. This is due to the fact that games consoles and “gaming-rig” computers including Thunderbolt-3-equipped laptops connected to gaming-class external-graphics-module setups are connected to the large screen TV for impressive multiplayer game play.

In a lot of cases, most TVs wouldn’t work well as a sole display device, with this applying more towards small cheap HDTVs. But they can work well as a secondary screen or for large-screen group-viewing use.

What about purposing a computer monitor for TV use

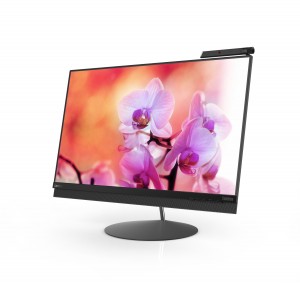
Lenovo ThinkVision X1 4K monitor

You could purpose a computer monitor with built-in speakers as a TV by adding a set-top box or similar peripheral

Another approach would be to use a suitably-sized monitor as your TV set, especially if it is equipped with integrated speakers. In most cases, the monitor won’t have a remote control for “lean-back” viewing because you intend to use it with your computer.

You may come across a “TV monitor” which is a computer monitor that has an integrated TV tuner and is pitched for desktop use. These are available in countries with strong support for free-to-air TV like UK, Europe, Asia and Oceania. Typically they will have a Full HD screen with a size of 32” or smaller but have display electronics optimised for computer use.

On the other hand, your computer monitor would need to be equipped with a spare HDMI input that has HDCP support. Here, you use a set-top box or PVR that has an HDMI output to receive TV broadcasts.

If you subscribe to traditional pay TV, your pay-TV provider will lease you a set-top box or PVR as part of the service and this can work well if free-to-air TV is provided via the pay-TV platform. On the other hand, your local consumer-electronics store will have set-top boxes or PVRs that work with free-to-air TV and these units will display high-definition channels at their proper resolution.

A broadcast-LAN setup like SAT>IP can work with your computer if it is running the appropriate client software. As well some platforms like SAT>IP are supported by set-top boxes that connect to your monitor’s HDMI input. You may also find that some Internet-based set-top-box platforms will offer access to real-time video streaming through the broadcasters’ video-on-demand platforms or a similar application.

You may find that some games consoles like the XBox One will have a TV-tuner module supplied as a first-party or third-party option. Similarly, you may be able to use a USB-based TV-tuner module or a TV-tuner card as a way to purpose your computer for TV-viewing.

On the other hand, if you are just content with Netflix and similar online services, you can just get by with using the service’s Website and viewing the video content on the monitor in a full-screen arrangement. As well, AirPlay (facilitated with Apple TV) or Chromecast can work when it comes to “throwing” the video content from your smartphone or tablet to the monitor.

Conclusion

You will find that using one display for your computing and video entertainment needs may cut it for some applications but not for others like full-on gaming.

USB 4.0 is to arrive as a local-connection standard

Articles

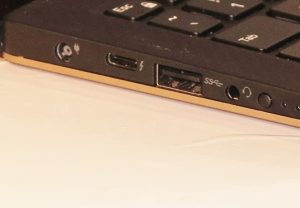
Thunderbolt 3 USB-C port on Dell XPS 13 Ultrabook

Thunderbolt 3 like on this Dell XPS 13 2-in-1 paves the way for USB 4

USB 4.0 to adopt Thunderbolt 3 with 40Gbps data transfer speeds | NeoWin

With USB 4, Thunderbolt and USB will converge | TechCrunch

USB 4 Debuts With Twice the Throughput and Thunderbolt 3 Support | Tom’s Hardware

From the horse’s mouth

USB Implementers’ Forum

USB Promoter Group Announces USB4 Specification (Press Release – PDF)

Intel

Intel Takes Steps To Enable Thunderbolt 3 Everywhere – Releases Protocol (Press Release)

My Comments

Intel and the ISB Implementer’s Forum have worked together towards the USB 4.0 specification. This will be primarily about an increased bandwidth version of USB that will also bake in Thunderbolt 3 technology for further-increased throughput.

USB 4.0 will offer twice the bandwidth of USB 3.1 thanks to more “data lanes”. This will lead to 40Gb throughput along the line. It will use the USB Type-C connector and will take a very similar approach to the USB 3.0 standard which relied on the older USB connection types like USB-A, where a “best-case” situation takes place regarding bandwidth but allowing for backward compatibility. There will also be the requirement to use higher-performance cables rated for this standard when connecting your host system to a peripheral device using this standard.

Opening up Thunderbolt 3

Intel is opening up Thunderbolt 3 with a royalty-free non-exclusive licensing regime. It is in addition to baking the Thunderbolt 3 circuitry in to their standard system-on-chip designs rather than requiring a particular “Alpine Ridge” interface chip to be used by both the host and peripheral. This will open up Thunderbolt 3 towards interface chipset designers and the like including the possibility of computing applications based on AMD or ARM-microarchitecture silicon to benefit from this technology.

This effort can make Thunderbolt-3-equipped computers and peripherals more affordable and can open this standard towards newer use cases. For example, handheld games consoles, mobile-platform tablets or ultraportable “Always Connected” laptops could benefit from features like external graphics moduies. It may also benefit people who build their own computer systems such as “gaming rigs” by allowing Thunderbolt 3 to appear in affordable high-performance motherboards and expansion cards, including “pure-retrofit” cards that aren’t dependent on any other particular circuitry on the motherboard.

It is also about integrating the Thunderbolt specification in to the USB 4 specification as a “superhighway” option rather than calling it a separate feature. As well, Thunderbolt 3 and the USB 4 specification can be the subject of increased innovation and cost-effective hardware.

Where to initially

Initially I would see USB 4.0 appear in “system-expansion” applications like docks or external-graphics modules, perhaps also in “direct-attached-storage” applications which are USB-connected high-performance hard-disk subsystems. Of course it will lead towards the possibility of a laptop, all-in-one or low-profile computer being connected to an “extended-functionality” module with dedicated high-performance graphics, space for hard disks or solid-state storage, perhaps an optical drive amongst other things.

Another use case that would be highlighted is virtual reality and augmented reality where you are dealing with headsets that have many sensors and integrated display and audio technology. They would typically be hooked up to computer devices including devices the size of the early-generation Walkman cassette players that you wear on you or even the size of a smartphone. It is more so with the rise of ultra-small “next-unit-of-computing” devices which pack typically desktop computer power in a highly-compact housing.

Of course, this technology will roll out initially as a product differentiator for newer premium equipment that will be preferred by those wanting “cutting-edge” technology. Then it will appear to a wider usage base as more chipsets with this technology appear and are turned out in quantity.

Expect the USB 4.0 standard to be seen as evolutionary as more data moves quickly along these lines.

The MicroSD card undergoes evolutionary changes

Articles

1TB microSD cards will boost the storage of your device, if you can afford it | TechRadar

From the horse’s mouth

SD Association

microSD Express – The Fastest Memory Card For Mobile Devices (PDF – Press Release)

Video – Click or tap to play

My Comments

The microSD card which is used as a removeable storage option in most “open-frame” smartphones and tablets and increasingly being used in laptops has gained two significant improvements at this year’s Mobile World Congress in Barcelona.

The first of these improvements is the launching of microSD cards that can store 1 terabyte of data. Micron pitched the first of these devices while SanDisk, owned by Western Digital and also a strong player with the SD Card format, offered their 1Tb microSD card which is the fastest microSDXC card at this capacity.

The new SD Express card specification, part of the SD 7.1 Specification, provides a “best-case high-throughput” connection based on the same interface technology used in a regular computer for fixed storage or expansion cards. The microSD Express variant which is the second improvement launched at this same show takes the SD Express card specification to the microSD card size.

The SD Express specification, now applying to the microSD card size, achieves a level of backward compatibility for host devices implementing orthodox SD-card interfaces. This is achieved through a set of electrical contacts on the card for PCI Express and NVMe interfaces along with the legacy SD Card contacts, with the interfacing to the storage silicon taking place in the card.

As well, there isn’t the need to create a specific host-interface chipset for SD card use if the application is to expressly use this technology and it still has the easy upgradeability associated with the SD card. But most SD Express applications will also have the SD card interface chipset to support the SD cards that are in circulation.

This will lead to the idea of fast high-capacity compact removeable solid-state storage for a wide range of computing applications especially where size matters. This doesn’t matter whether the finished product has a smaller volume or to have a higher effective circuit density leading to more functionality within the same physical “box”.

One use case that was pitched is the idea of laptops or tablets, especially ultraportable designs, implementing this technology as a primary storage. Here, the microSD Express cards don’t take up the same space as the traditional SATA or M2 solid-state storage devices. There is also the ability for users to easily upsize their computers’ storage capacity to suit their current needs, especially if they bought the cheapest model with the lowest amount of storage.

Photography and videography will be another key use case especially when the images or footage being taken are of a 4K UHDTV or higher resolution and/or have high dynamic range. It will also be of benefit for highly-compact camera applications like “GoPro-style” action cams or drone-mount cameras. It will also benefit advanced photography and videography applications like 360-degree videos.

Another strong use case that is being pitched is virtual-reality and augmented-reality technology where there will be the dependence on computing power within a headset are a small lightweight pack attached to the headset. Here, the idea would be to have the headset and any accessories able to be comfortably worn by the end-user while they engage in virtual-reality.

Some of the press coverage talked about use of a 1Tb SD card in a Nintendo Switch handheld games console and described it as being fanciful for that particular console. But this technology could have appeal for newer-generation handheld games consoles especially where these consoles are used for epic-grade games.

Another interesting use case would be automotive applications, whether on an OEM basis supplied by the vehicle builder or an aftermarket basis installed by the vehicle owner. This could range from a large quantity of high-quality audio content available to use, large mapping areas or support for many apps and their data.

The microSD card improvements will be at the “early-adopter” stage where they will be very expensive and have limited appeal. As well, there may need to be a few bugs ironed out regarding their design or implementation while other SD-card manufacturers come on board and offer more of these cards.

At the moment, there aren’t the devices or SD card adaptors that take advantage of SD Express technology but this will have to happen as new silicon and finished devices come on to the scene. USB adaptors that support SD Express would need to have the same kind of circuitry as a portable hard drive along with USB 3.1 or USB Type-C technology to support “best case” operation with existing host devices.

This technology could become a game-changer for removeable or semi-removeable storage media applications across a range of portable computing devices.

External or portable USB storage devices–what is the difference

Article

USB portable hard disk

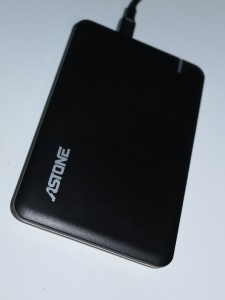
An example of a portable hard disk

Portable vs external hard drive: Which one to buy | Gadgets Now

My Comments

The type of outboard storage devices is becoming differentiated in to two distinct classes – a desktop-grade “external” device and a smaller “portable” device.

Typically, a desktop-grade “external” hard disk or enclosure will house a 3.5” or larger desktop-grade storage device intended for installation in a traditional desktop computer or a server. As well, they will have their own power supply that could be provided using integrated electronics or a power brick like what you would use for a laptop computer. Better designs may offer their own USB hub that will allow you to connect more USB devices to your computer or other functions or some will even be multiple-disk RAID setups. This class of device also extends to external graphics modules or USB expansion

On the other hand, a portable hard disk or enclosure will house a 2.5” or smaller storage device and be powered from the host computer via its USB port. Here, they are being optimised for use on the road and the hard disks will implement data-protection measures to factor the unpredictable nature of this use. These units will typically be more expensive “per gigabyte” compared to the desktop-grade units.

Hard-disk-based devices will use a 3.5” drive spinning at 7200rpm for external units or a 2.5” drive spinning at 5400rpm for portable units. It is assumed that the higher-speed drives will offer better data-access performance over the lower-speed devices. There are solid-state-storage devices being released as outboard storage devices, primarily for portable use most of these devices will be more expensive per gigabyte than portable hard disks.

The desktop-grade “external” devices may be a better solution if you intend to have the device staying at one location all the time. This could be to cater towards extra storage for a desktop or laptop computer where you intend to use the data at home or the workplace, to expand a NAS’s storage capacity or to connect to a router for use as a baseline NAS.

On the other hand, the portable devices can be useful if it is very likely that you will take your data with you or move the device around. This could be to: use as external backup or offload storage for your laptop computer; to store a disk full of confidential data in a locked filing cabinet and only connect the disk to your computer on an “as-needed” basis; create a “grab and run” backup of critical data; or to have a large amount of data that could be used on other computers.

What is worth noting is that the portable devices will be designed to be able to handle unpredictable storage environments where there is a likelihood of increased movement. This is while desktop “external” hard disks are primarily useful for a normally-sessile usage environment.

Product Review–Brother QL-1110NWB label printer

I am reviewing the Brother QL-1110NWB wide-format network label printer which is the premium model for Brother’s QL-1100 series of wide-format label printers. It is seen as something that can work with applications where barcodes, graphics or extra details like weights and use-by dates are to be placed on a label like with packaging or commercial-kitchen food management.

There are two machines that are part of the Brother QL-1110 Series label printer lineup – the QL-1110 and the QL-1110NWB. The QL-1110 can only connect to the host computing device via USB and also supports USB-host connectivity for HID-class USB barcode readers. Android users can use USB OTG or USB Type-C adaptor cables to connect their devices to this printer and print using the Brother apps.

Brother QL-1110NWB network label printer

The QL-1110NWB supports the abovementioned USB connections but also supports network connectivity via Wi-Fi or Ethernet along with support for wireless connectivity via Bluetooth or direct (own access point) Wi-Fi connectivity,

Both of these machines run from AC power using an integrated power supply where you are not dealing with a “wall-wart” or “power brick” to supply power to them. Rather you are simply using the same kind of AC cord that you would use to power a portable radio and that leads towards a cable you can easily replace if the original one goes missing.

Connection to your computer or network

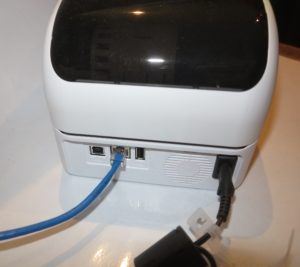
Brother QL-1110NWB network label printer connections - USB to host computer, USB for peripherals, Ethernet

Brother QL-1110NWB network label printer connections – USB for direct to host connection, USB for barcode readers and Ethernet

The Brother QL-1110NWB can connect to your network via Ethernet or Wi-Fi wireless as well as being able to print from mobile devices using either Bluetooth or Wi-Fi Direct connections. But if you are setting up this machine for Wi-Fi-based network connectivity, you have to connect it to a regular computer running Windows via USB and run the supplied Printer Setting Tool to configure it. This doesn’t apply if you use WPS “push-to-connect” Wi-Fi setup or Ethernet connectivity on a small network.

I had found that the Printer Setting Tool was not surefire in its approach for Wi-Fi network setup and couldn’t even get it connected to my home network. But I could simply plug it in to the Ethernet connection which can be of use for setups where your premises is wired for Ethernet or you use a HomePlug powerline setup.

There is support for Web-based configuration but this only applies if you have it connected to your network.

It also supports Apple’s AirPrint driver-free printing standard so it can work with iOS and MacOS hosts without needing driver software.

Personally, I had found that the Brother QL-1110NWB label printer yielded a surefire connection when I used it with an Ethernet connection or a USB direct-to-host connection.

The label printers also have an integrated guillotine which makes it simpler and more elegant to manage the labels. This works under programmatic control or you can cut the labels manually through a push-button on the machine’s control panel.

Loading label stock in the label printer

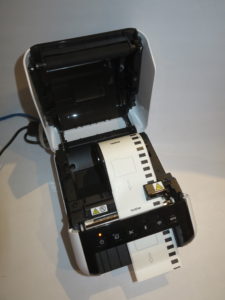
Brother QL-1110NWB network label printer loaded with standard label tape

Loading the label tape in the Brother QL-1110 Network Label Printer

The Brother QL-1110 Series label printers can take the same standard-width label stock as the rest of the QL series reel-feed label printers. But they can take label stock that is wider than normal thus allowing for the creation of larger labels including the possibility of printing out standard name-badge or address labels in landscape form.

Loading any of the Brother QL-1110 Series label printers is a relatively simple chore no matter whether you are using the wide label stock or the narrow label stock. These label printers use a clamshell design and you release the lid by operating two latches at the same time, which doesn’t require much pressure. Then you drop the label reel in, making sure it engages with the ridge on the right hand side of the compartment.

Then you thread the label paper through the machine taking care to make sure the paper is under a black sensor box on the right side of the compartment while it emerges through the front. Here, there is very little effort needed to make sure that the paper is threaded properly.

The Brother label printer uses microswitches that sense mouldings and holes on the reel along with other microswitches that sense the width of the reel to determine what kind of label tape is in the printer including whether it is a wide-format label tape. Here, you would have to be careful that the correct label tape is on the correct reel if you want this unit to work properly.

System-integration support

A systems integrator or yourself could upload label template designs created using P-Touch Editor and set up a “computer-free” label-creation arrangement for data read from barcodes. This can work with an HID-compliant barcode reader connected to the USB host port (both models) or linked via Bluetooth (QL-1110NWB only). That setup would then appeal to stock-control and similar applications.

There is also support for ESC/P printing codes so that these label printers can work with other third-party labelling or similar software that implements this kind of output control.

Supplied software

All the Brother label machines including these units support the P-Touch Editor software which works as a quick way to turn out labels. If you use a smartphone or mobile-platform tablet, the Brother iPrint&Label app works in the same vein for turning out labels from these devices.

If you use P-Touch Editor, you could set it that way by selecting “Vertical” in the Orientation setting under the Paper tab. This means that it will print out parallel to the printer. Here, I would recommend this if you want to exploit the wide-format label tape for turning out address labels or name badges.

Limitations and Points Of Improvement

Brother could make sure these label printers support any and all device classes to do with printing for POS, gaming and allied applications no matter the connection type as well as supporting other driver-free printing standards like Mopria Alliance and IPP Everywhere,

Similarly, Brother could look towards the use of other USB or Bluetooth input devices like keyboards or digital scales as a way to enter data for use with stored label templates. Here, it could work well with environments where you can’t use a smartphone or regular computer to enter data for a labelling environment.

I have always called on Brother to add a “measuring-tape” creation function to their P-Touch Editor software. Such a function would allow someone to use a label printer loaded with continuous-tape label stock to create a measuring tape that could be stuck to something like a worktop edge or door frame thus making that surface something to measure length or height with. This feature would appeal to laboratories, the medical profession, child care, education or a whole host of other professions who are always measuring things like people’s height for example.

As well, the P-Touch Address Book software could support country-specific addressing better by using nation-specific address layouts or omitting the ZIP Code barcode for non-USA addresses. It could be taken further through the implementation of machine-readable barcoding techniques that other countries may use to improve mail delivery.

Conclusion

The Brother QL-1100 Series label printers have become an example of legitimising wide-format thermal-based label printing for small businesses. This would be of importance for logistics and inventory-management applications where there is requirement for more detail on the label or to make heavy use of large barcodes.

But I would recommend the Brother QL-1110NWB specifically for those setups where you expect the printer to be located away from a regular computer.

Windows to introduce quick-pair for Bluetooth

Articles

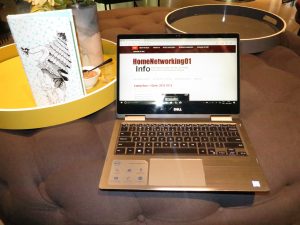
Dell Inspiron 13 7000 2-in-1 Intel 8th Generation CPU at QT Melbourne hotel

Quick pairing to come to Windows 10 to simplify connecting Bluetooth headsets to these computers

Bluetooth quick pairing feature in the works for Windows 10 | Windows Central

Bluetooth “Quick Pair” Feature is Coming to Windows 10 | Thurrott blog

Previous coverage on Bluetooth quick-pairing

Bluetooth Fast Pairing–to be part of the Android platform

My Comments

Google Fast Pair in action - press image courtesy of GoogleApple and Google have put up a simplified Bluetooth pair-up approach for commissioning newly-purchased Bluetooth headsets and other accessory devices with host devices based on their mobile operating systems.

This approach has the Bluetooth device sending out a short range “beacon” to compliant host devices, causing them to pop up a notification inviting the user to instigate the pair-up procedure. Google even had the ability to invite users to download and install any companion apps for devices designed with the “app-cessory” approach.

It is rather than having the user head to the Bluetooth menu on their host device and to make sure they choose the Bluetooth peripheral device they intend to pair to. This can be arduous where Bluetooth device names appear to be very confusing such as to only show a model number or the device is being set up in an area where other Bluetooth devices are being setup to be discoverable such as “always ready to pair” default setups like Alpine car stereos.

Now Microsoft is working on similar functionality that will appear in the next or subsequent feature release of Windows 10. In this case, Windows users will have the ability to enable or disable this feature and the notifications will appear as pop-up messages.

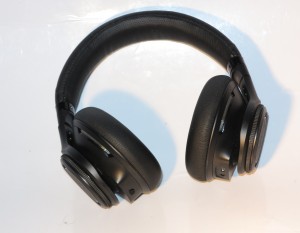
Plantronics BackBeat Pro Bluetooth noise-cancelling headphones

.. to make these easy to set up

The Windows 10 host computer would need to be equipped with a Bluetooth interface compliant to Bluetooth 4.0 Low Energy (Bluetooth Smart) standards for this function to work. It effectively makes the user experience for Bluetooth devices very similar to the “plug-and-play” experience that Microsoft achieved for peripherals directly connected to a Windows host computer.

Why would I suspect that a user be required to put a “fast-pair” Bluetooth device in setup mode?

One reason that I would see some manufacturers require a user to place a “fast-pair” Bluetooth peripheral device in a setup mode or specifically enable this feature on that device would be to conserve battery runtime on a portable device. Here, having a device broadcasting the beacon signal all the time may be taking power away from the device’s main functionality thus shortening the battery’s runtime.

It could also be a device security requirement to cater for environments where multiple compliant host devices are likely to exist and you want to make sure that your accessory device isn’t ending up pairing to someone else’s host device. It is an important issue with health and allied devices like fitness bands which work with your smartphone and these devices are dealing with very personal information. This can also be a user-experience issue regarding pop-up notificatiosn for other users’ devices.

What is showing up now is that a simplified user experience is being made available whenever you are commissioning a newer Bluetooth device.