Category: Operating Systems

Windows 10 to offer greater control over graphics processors

Article

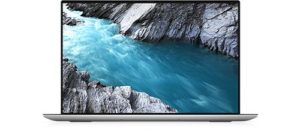
Dell XPS 17 laptop press picture courtesy of Dell Australia

Microsoft will be introducing support for better management of graphics processors in computers like the Dell XPS 17 that have Thunderbolt 3 and onboard discrete graphics processors

Windows 10 to give power users more control over their GPUs | Bleeping Computer

New Windows 10 Build 20190 brings default GPU & GPU per application settings along with new post-update experience in Dev channel | Windows Central

My Comments

Previously Windows provided operating-system-level support for handling multiple graphics processors. This is due to the reality of many mainstream laptops being equipped with a discrete graphics processor along with the integrated graphics chipset, providing the ability for users to switch between high-performance or power efficiency depending on whether the computer is on AC power or batteries.

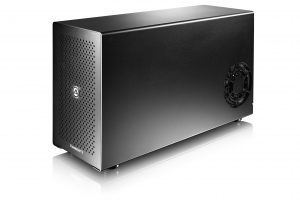
Akitio Node Thunderbolt 3 "card cage" external graphics module - press image courtesy of Akitio

.. so users can choose whether an app uses the onboard discrete graphics processor or a desktop graphics card installed in an external graphics module like this Akitio Node unit

This was achieved either at hardware or graphics-chipset level with special software like NVIDIA Optimus achieving this goal. Then Microsoft recently added this functionality to Windows to allow you to determine whether an application chooses the higher-performance or power-efficient graphics processor.

But in an upcoming feature upgrade, Microsoft will allow fine-tuned control over which graphics chipset applications use. The function is in testing through their Windows Insider beta-testing program.

It will cater towards users who run more than two discrete graphics processors on their system such as a gaming rig with two graphics cards or a laptop / all-in-one / low-profile desktop that has a discrete GPU and Thunderbolt 3 and is connected to an external graphics module. This kind of configuration is primarily offered on Intel-powered premium consumer and business clamshell laptops with a screen size of 15” or more as well as most of the Intel-powered performance-focused laptops.

Here, the users can specify which graphics processor is the one for high-performance computing or can specify that a particular application uses a particular graphics processor.

It is also being driven by the rise of USB4 and Thunderbolt 4, where there will be an effort to make these high-performance USB-C-based peripheral-connection ports ubiquitous and affordable. This could then open up the path for laptops and low-profile / all-in-one desktops to have these ports with their presence being sold on the ability to upgrade the computer’s graphics with an external graphics module.

In the case of a laptop equipped with a discrete GPU and Thunderbolt 3, users may find that the onboard discrete GPU is really a “mobile-grade” type that is intended to be power-efficient but doesn’t perform as good as a desktop graphics card. Here, they would install a desktop graphics card in to a “card-cage” external graphics module and connect it to the computer for better graphics performance.

This may work as a way to allow the use of “fit-for-purpose” graphics processors like a mobile-workstation GPU for a CAD program alongside a gaming-grade GPU for a game. Or a user could run a video-editing program specifically with a graphics processor that is good at rendering the video content while they have another graphics processor available for other tasks.

Personally, I would also like to see Windows offer the ability for users to create an order of preference for high-performance graphics processors either for default high-performance use or for a particular application’s needs. This would come in to its own for graphics-card reviewers who are comparing against their “daily-driver” graphics card, or people who are moving a Thunderbolt-3-equipped laptop between multiple external graphics modules.

Similarly, the control over multiple-graphics-processor setups that Windows is to offer could also evolve towards “task-specific” GPU use. Here, it could be about focusing a graphics chipset towards batch calculation workloads rather than display-focused workloads. This is because people involved with video-editing, media transcoding, statistics, cryptocurrency or similar tasks may prefer to use the kind of chipset that is a “number-cruncher” for those tasks rather than one that excels at interactive computing.

At least Microsoft is working towards answering the needs of power users who deal with two or more graphics processors as part of their personal-computing lives.

Newer Windows updates will have relevant information about what’s new

Article

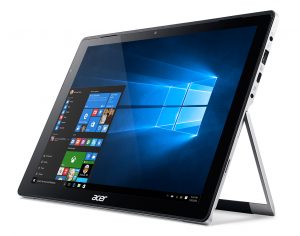
Acer Switch Alpha 12 tablet press image courtesy of Acer

Windows 10 major updates will see an improvement to how new functionality is discovered

Windows 10 Insider build 20190 hits Dev channel with new post-update experience | Windows Central

My Comments

When Microsoft officially releases a major Windows 10 feature update, it may be daunting to know what changes have existed to your computing environment as a result of that update.

Here, you may want to know what changes took effect including any new functionality that came about. It may also be about any significant changes to Windows 10’s user experience that you may have to get used to. For some people, finding that a significant change to the user experience may be daunting and that a feature may be delivered but they don’t know how to take advantage of it. This may cause some Windows 10 computer users to delay or avoid major-update cycles all together.

As well, it is more important for people who aren’t sure of any significant changes to how their technology operates, something that can be of concern for the older generations who haven’t had much computer experience. For them, it may be about relearning a skill they already have in order to adapt it to a newly-revised user interface.

Microsoft will be answering this problem with its “Tips” app in Windows 10 from the next feature update onwards. Here it will have a “What’s New” focus that appears after the update is rolled out to highlight any new features or changes to the user experience. This will be updated with every feature update so users are aware of the newly-added functionality.

But I would like to see added to this information relating to improved peripheral and network device support especially where it is relevant to the kind of connections your computer has and devices it is connected to.

For example, it may be about whether a peripheral or network device is gaining class-driver support within Windows or whether the current class drivers that are part of Windows and relevant to the device are gaining any significant improvement. This includes any newer settings that are available to the end-user so they have it working their way.

This can allow a user to rationalise the software that is running on their computer without worrying that they will lose the functions they are dependent on because they remove vendor-supplied software for that device. Similarly, they may want to know whether the installation of a device on a newer computer is going to be a true plug-and-play experience without the need to download and install any extra software. As well, users are then sure they won’t lose device functionality if the device vendor declares end-of-support on that device.

Microsoft is at least taking some steps towards improving the update experience for major updates within Windows in order to make them discoverable and user-friendly.

Thunderbolt dock may be behaving erratically under Windows 10. What can you do?

Article

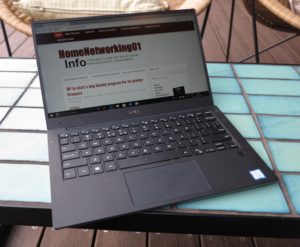
Dell XPS 13 8th Generation Ultrabook at QT Melbourne rooftop bar

Simply restarting your Thunderbolt-3-equipped computer may correct problems you have with any Thunderbolt 3 docks attached to it.

Microsoft Warns of Uncommon Windows 10 Thunderbolt Issue | Bleeping Computer

From the horse’s mouth

Microsoft Support

Devices connected through a Thunderbolt Dock stop working after the computer resumes from the S5 power state (Support article)

My Comments

You may find that your Thunderbolt-3-equipped computer may show up a problem with its Thunderbolt 3 connection if it is running a recent build of Windows 10.

This will happen when you are using a Thunderbolt 3 dock or a Thunderbolt 3 peripheral like a display or external graphics module that has dock functionality where you can connect multiple peripherals. As well, it may encompass Thunderbolt 3 devices that have user-removable or user-replaceable storage media like memory-card readers, SATA hard-disk interfaces or optical drives.

It will be common with those of us who have a laptop computer and establish one or more workspaces equipped with a full-sized keyboard, mouse and one or two large screens then use a dock for one-cable connection and disconnection. You may also be connecting one or more storage devices like USB hard disks, memory keys or optical drives to the dock for extra storage functionality.

The problem will manifest if you have Fast Startup enabled on your Windows 10 laptop. This mode, which will most often be set up by default and to come in to play when you close up your laptop, will dump from RAM to the internal hard disk or SSD what is needed to bring your computer to the login screen when you close the computer’s lid or quickly press the Power button.

The symptom will show up if you do the following practices regularly:

  1. connect the computer to the Thunderbolt dock, finding that all peripherals connected to the dock are present and functioning as far as Windows is concerned.
  2. power-down the computer by pressing the Power button for a long time or instigate a shutdown procedure from within Windows with the goal to have it fully turned off.
  3. disconnect the Thunderbolt dock from the computer once you see the screen go black
  4. let the computer completely power down
  5. connect the Thunderbolt dock to that computer and wait for it to stabilise
  6. turn on the computer like normal

Here, the peripherals connected to that Thunderbolt dock will register with Windows and be present in the operating system’s Device Manager. But they won’t function as expected like you won’t have any input from the full-sized keyboard or mouse nor would the storage devices be available for use by Windows and its applications.

This behaviour happens very occasionally and you may normally disconnect and reconnect the dock to force Windows to “rediscover” the associated peripherals.

But what can you do to rectify this problem? Here, it is a simple process of fully shutting down then restarting your computer using the Shutdown or Restart procedure in Windows without disconnecting the Thunderbolt dock. Here, you have to wait until all the lights on the computer are off, not just the screen, when you instigate the Shutdown procedure this time.

With this process, you are making sure that during the boot cycle, the Windows operating system is properly taking stock of all the peripherals that are connected to the Thunderbolt dock and making sure they are properly available “to the computer”. This includes enforcing the dock to reset itself and create a fresh inventory of what is connected to or integrated in it to present to the host operating system.

You may also find that fully restarting your computer if peripherals connected to a hub, dock or similar device aren’t working properly no matter the connection method or operating system.

Microsoft to allow streaming of games from your laptop to XBox One

Article

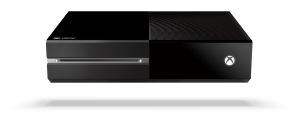
XBox One games console press image courtesy Microsoft

You can use the XBox One to play PC games hosted on your computer through the big screen

Microsoft’s Wireless Display app streams PC games to your Xbox | Engadget

Microsoft now lets you stream PC games to an Xbox One and use a controller | The Verge

My Comments

Microsoft is now making it feasible to stream your Windows 10 computer’s video output via your XBox One games console. It is being pitched at people who play Windows-based games on their computer, whether from a CD or an online games resource like Steam, GOG or the Windows Store.

This is based on the same Miracast technology used to stream PowerPoint presentations, video clips and the like from a laptop to the Surface Hub large-screen conference-room computer. There is also the ability to use the XBox One’s controllers attached to the XBox to provide player input to the PC game.

You have to have your Windows computer and your XBox One on the same logical network and have the latest version of the Wireless Display app on both devices. It can stream video and audio from most apps and games on the computer to the XBox. The only exception would be protected video content like iTunes or Netflix.

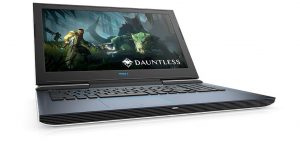
Dell G7 15 gaming laptop press picture courtesy of Dell USA

You could play a game that exists on this Dell G Series gaming laptop through your XBox One

As well, your XBox’s game controllers can become the player input for your Windows-based computer game, something that may be of benefit in those games where the keyboard may not be ideal. The software has variable latency configurations so you can set your controller input and display output’s behaviour in an optimum manner for the game you are playing.

At the moment, a keyboard or mouse connected to the XBox cannot serve as an input device for your regular computer, which may be of a limitation to game players who deal with “point-and-click” user interfaces or for combining remote-desktop / remote-assistance software with  the biggest screen in the house. You can get around this situation by using a keyboard and pointing device connected to or integrated in your computer.

Another question that will be worth raising with the evolution of this software is whether you are limited to stereo soundmixes when it comes to the sound that passes through this setup. This may be of concern with Windows games that are being offered with surround-sound mixes rather than just stereo mixes.

Here, I would see the new step towards linking your Windows PC to your XBox One as being beneficial for gamers who spend their gaming time between console and PC games. This is more so if they want to use the same large screen for both activities.

How to set Bedtime mode on iOS so you don’t miss important calls

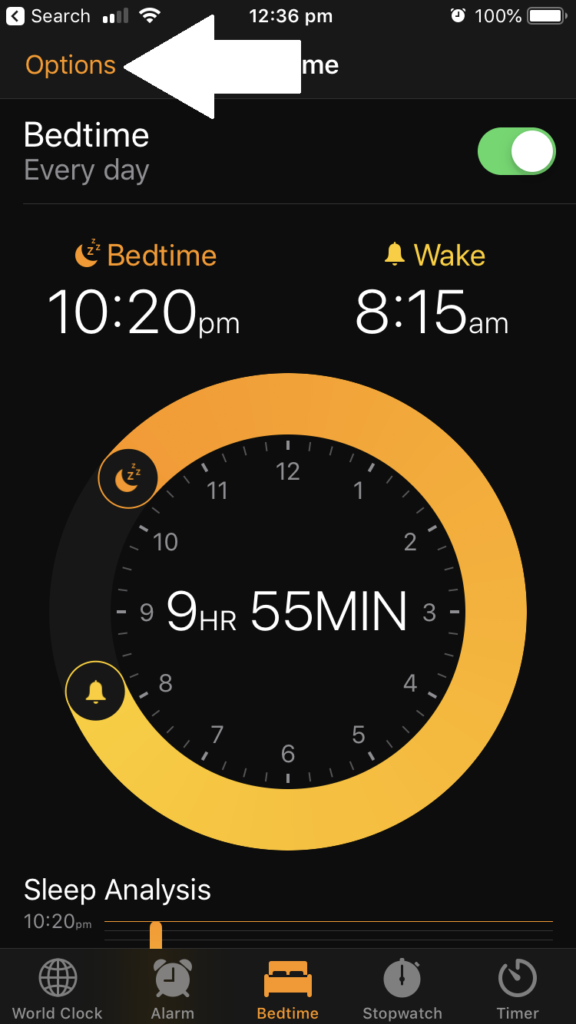
Options area in iOS Bedtime Mode screen

Select Options to set up the Bedtime Mode behaviour

Apple’s iOS operating system since version 12 have support for “Bedtime” mode which allows you to have a good sleep. This is achieved through optimising the display to reduce blue light in a sleep-friendly manner along with default automatic enablement of “Do Not Disturb” mode where the iPhone won’t ring through during the hours the Bedtime mode is in operation. This will be heralded by your iPhone ringing a phrase of Brahms’ Lullaby with a music-box sound when that mode is effective.

But some of us may don’t want to miss important calls that come through at night due to work or personal reasons. An example of this could be a person who is a registered keyholder for a premises and needs to know of alarm incidents affecting that premises. Or someone you expect home may be arriving late and wants to let you know they are on their way or changed plans. In a simple case, you may not want to miss that important call from someone who is on the other side of the world.

The default implementation for Bedtime mode has your iPhone in “Do Not Disturb” mode where your iPhone won’t ring or sound a notification tone for text messages while that mode is in effect. But you may want most of the sleep-friendly benefits of this mode while being able to be woken by those important calls.

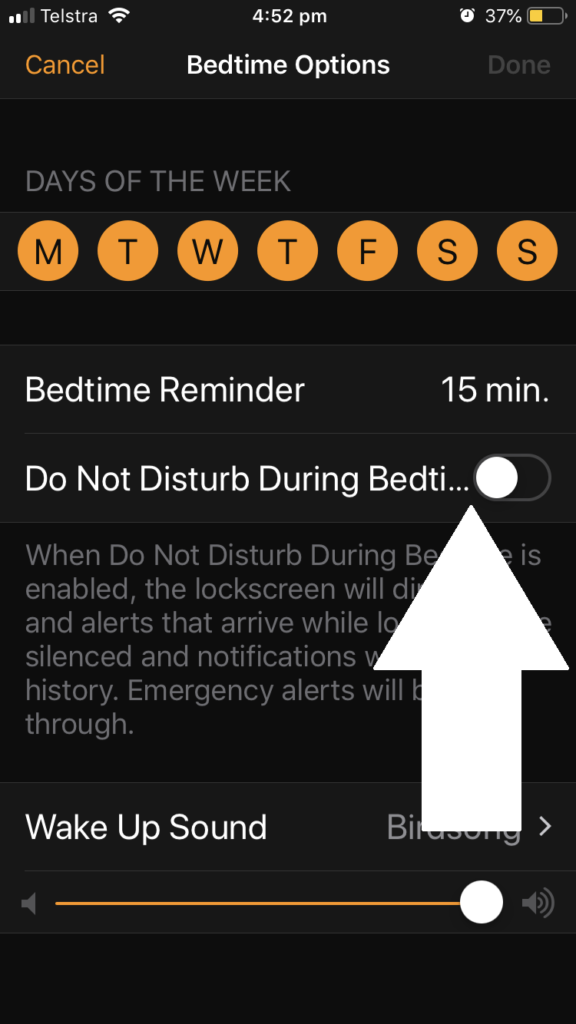
iOS Bedtime Mode options screen with Do Not Disturb option called out

Clear the Do Not Disturb option to allow calls and texts to come through during Bedtime Mode

To enable this, you need to go to the Clock app and select the Bedtime screen. Select “Options” and turn off the “Do Not Disturb” mode on that screen to allow calls to come through. The display will still be dimmed through this time but the iPhone will ring or sound a notification tone.

You may also have to check for scheduled “Do Not Disturb” times in case you used this feature to set up a “do-not-disturb” period surrounding your normal bedtime. This is a feature that an iOS user may have implemented before updating to iOS 12. You can check this feature in the “Do Not Disturb” option in the Settings app.

If you do use the “Do Not Disturb” option, you can allow certain caller groups to break through and cause your phone to ring irrespective of when this option is in effect. One of these is “Favourites” which allows you to mark contacts as a “favourite”. Or you can use the Groups option to allow calls from contact groups that you have pre-defined. This is important if you mark out your contacts in to contact groups like “work” or “family” and is a complex procedure that requires you to use your Apple iCloud.com account on a Web browser.

The use of a predefined caller list to override “Do Not Disturb” may not work well with callers who call you using VoIP or from behind a business phone system. This is because you may find that the caller ID for their call may be different from their phone number due to them, for example, calling from the nearest extension rather than their own extension.

iOS and Android could natively follow the Symbian (original Nokia feature-phone operating system) approach where you have different situation-specific alerting presets that affect your phone’s audio / vibration / indicator-light behaviour. This can also allow the use of one or more priority call lists so that callers you select for a particular situation can ring through. Such presets can be linked to operation modes like the “Bedtime” mode or alarm clock so they can be effective during these modes.

As well, Apple could simplify the process of creating and managing caller groups on the iOS contacts list while you are using your iPhone’s user interface. This is important for processes like adding new contacts to your list or revising your contacts, and can make the process more intuitive.

Computers that are secure by design are less likely to be bugs

Article

Dell XPS 13 8th Generation Ultrabook at QT Melbourne rooftop bar

Running modern always-updated operating systems and applications on your laptop is a way to keep your computing environment safe and secure.

Should you be scared of your laptop’s webcam? | ZDNet

Previous Coverage

Regular operating systems and their vulnerability to security threats

My Comments

An article appeared about whether one should be scared of their computer’s integrated Webcam and microphone. Here, a Webcam and microphone integrated in a computer or monitor or a USB Webcam that is always plugged in could turn the computer in to a surveillance device. But it highlighted the fact that recent versions of operating systems and productivity applications are “secure by design” when used to default settings.

It went through two different “what-if” hacking scenarios with different software combinations to see how hard they were to penetrate in order to “open up” the Webcam. The trigger point was to receive a “loaded” document with instructions that the user must follow, something that can be done through an email phishing attempt. Here, the document would have a macro that would install malware to open up the Webcam and stream its vision remotely.

The first scenario involves a Windows 10 computer running the latest version of Microsoft Word while the second scenario involved MacOS 10.14 Mojave and the latest version of LibreOffice. All operating systems and applications were run in the default protected mode but MacOS Mojave was temporarily configured to admit software from other sources in order to admit LibreOffice on to the Mac.

What was highlighted was the recent operating systems’ flagging or blocking of questionable software when the article’s author was asked to click on the required link within the document. The operating systems having their own basic endpoint-protection software underscored the ability to keep users safe from rogue software. Even productivity application software running documents supplied by email or from questionable sources in a protected mode to inhibit the execution of macros was also highlighted.

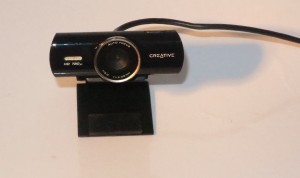
Creative Labs LiveCam Connect HD Webcam

Webcams, whether external like this one or integrated in a computing device, aren’t able to be bugs if you keep your computer software up-to-date with the latest patches and have it running “secure by default”.

This meant that neither the Webcam nor the microphone could not be accessed without the user knowing. It was demonstrating the recent “secure by design” approach of newer regular-computer environments that assured the average user of their data security. You may harden that attack surface by masking an integrated Webcam that is part of your computer or monitor, or disconnecting an external Webcam.

Unless you need to, keep your computer’s operating system, applications and endpoint-security utilities running in a “default-for-security” manner. This also includes updating them to the latest version, preferably with the software updating themselves.

If you are supporting other systems, don’t disable the computing environment’s security features unless you are sure they need to be disabled. Also educate the other users about data-security risks including the security warnings that will pop up on their computer.

If you are dealing with an old computer that is running a very old operating system and application software that doesn’t have the “secure by design” approach, you may have to cover or disconnect the Webcam. This is more so if it is found to be running the software “out of the box” without any patches or updates applied to it.

In most cases, the “secure-by-design” approach of most modern computing environments allows us to be able to use regular or mobile computer equipment in a secure manner.

Mopria driver-free printing now arrives at Windows 10

Article – From the horse’s mouth

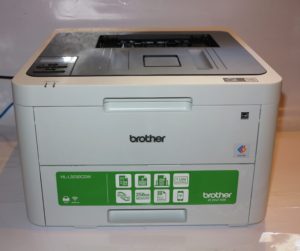
Brother HL-L3230CDS colour LED printer

Windows 10 users can print to these printers using a Mopria class driver baked in to the operating system

Mopria Alliance

Press Release (PDF)

Fact Sheet

Previous Coverage on driver-free printing

What is happening with driver-free printing

My Comments

There are sure steps being taken to print fully-formatted documents from a computing device without the need for driver or companion software to be installed by the user.

It is to allow a person to print a document like a boarding pass using the printer local to them without worrying about make or model it is in order to install any drivers. This effort has been focused towards mobile platforms like iOS and Android thanks to the inherently-portable nature of devices that run these operating systems. But there are other use cases like dedicated-function devices such as set-top boxes or accessible-computing scenarios where you use specially-designed hardware for people with particular challenges.

Dell Inspiron 13 7000 2-in-1 Intel 8th Generation CPU at QT Melbourne hotel

No need to find and install drivers for that printer you have to use with the Windows 10 laptop

But it can apply to regular computers, especially laptops that are likely to be taken from place to place. Apple facilitated this through integrating AirPrint in to the Macintosh platform since MacOS X 10.7 Lion so you can print to an AirPrint-compliant printer without needing to install drivers on your Mac computer.

Now Microsoft is using the Mopria Alliance technology to enable this kind of driver-free printing from Windows 10. This is facilitated through a class driver baked in to the operating system since the October 2018 feature update (Build 1809). The class driver is offered as an option of last resort if Windows 10 cannot find the device driver for a newly-installed printer through existence on the host computer or through Windows Update.

You can still install and update vendor-supplied driver software for your printer, something you would need to do if you want to exploit the scanner abilities on your multifunction printer or use advanced monitoring and quality-control abilities that the manufacturer offers. It would work if you are in a foreign place like your business partner’s office and you needed to print out a document “there and then”.

In the case of managed-IT scenarios, the Mopria approach avoids the need for inhouse or contracted IT personnel to install drivers on the computer equipment they are managing to have it work with a particular printer. It also applies to task-specific Windows 10 builds where you want to have the minimum amount of software on the device yet allow for printing. As well, creating a standard operating environment or a dedicated-function device based on Windows 10 code like a point-of-sale system can be made easier especially where you want flexibility regarding the printer equipment you deploy or your end-users end up using.

I would like to see Microsoft improve on this by having a standalone Mopria class driver available for prior versions of Windows and ready to download from their download sites. This is especially useful for organisations who maintain task-specific standard-operating-environments or devices based around these earlier operating systems.

What is happening is the idea of driver-free printing is being seen as a reality especially for mobile computing scenarios and all the popular operating environments are coming to the party.

Amazon Alexa is a native app for Windows 10 PC

Article

Dell Inspiron 13 7000 2-in-1 Intel 8th Generation CPU at QT Melbourne hotel

You can use Amazon Alexa on any Windows 10 computer thanks to a generally-available Microsoft Store app

Control Alexa from your Windows 10 PC | CNet

My Comments

Amazon are releasing a Windows 10 native app that serves as a gateway to their Alexa voice-driven home-assistant ecosystem. Initially this was a very limited release that was preinstalled on certain computer ranges like Lenovo’s Yoga laptop range, but they are making it generally available through the Microsoft Store in the USA. This means you could install it on any Windows 10 desktop, laptop or 2-in-1 rather than having to buy one of the certain computers that come with this function if you want to speak to Alexa through that computer.

It will be targeted for any regular computer that is running Windows 10 as long as it has a microphone and the usual keyboard. There will be the ability to invoke Alexa through a keyboard shortcut or to click / tap the Alexa button within the app. The “Wake On Voice” functionality where you can speak the “Alexa” keyword to invoke Alexa will be available on some supported computers.

At the moment, the Amazon Alexa native app for Windows 10 doesn’t provide the kind of management that its iOS or Android mobile-platform brethren provide. This means that you will have to use the Alexa management Web page to manage the Skills available to your Echo devices or the smart-home ecosystem that they are part of.

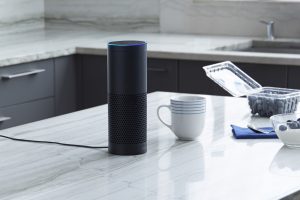
Amazon Echo on kitchen bench press photo courtesy of Amazon USA

This will make your Windows laptop work a bit like the Amazon Echo

The other question that may be raised by Amazon as part of developing the Alexa app further is whether the Alexa app will provide a visual interface of the “Echo Show” kind for those skills that have visual abilities. It may be seen as a further direction for third-party Alexa-platform devices to answer the Google Assistant (Home) platform.

I would expect that these features will come through in newer versions of this app. Similarly I would expect that this app would be rolled out in to all of the markets that Amazon has established the Alexa / Echo ecosystem in to over time.

The Alexa app is part of a strong effort by the two Seattle-based IT giants to provide a strong partnership between their efforts i.e. the Windows desktop operating system for Microsoft and the Alexa voice-assistant / smart-home ecosystem for Amazon.

This effort was initially represented through the availability of “pathway” skills between Microsoft’s Cortana and Amazon’s Alexa assistants. It is with the ability also to provide the necessary abilities to users to interlink their user accounts on each of these services for transparent operation.

It could be seen to be about Microsoft dumping the Cortana assistant’s home-automation roles. Or it could be about Amazon and Microsoft to fuse together their voice-driven assistants in a manner to build a highly-strung Seattle-based voice-driven assistant platform to take on what is being offered by Silicon Valley.

Why is there an audio driver with your computer’s graphics chipset?

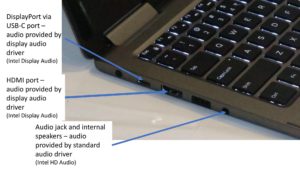
The HDMI and DisplayPort outputs make use of the display audio device driver for sound they send to the external display

Some of you may take stock of what device drivers and software exist on your Windows computer and may find two or more audio device drivers on your computer with one being referred to as an “HDMI” or “Display” audio driver. Such a driver will have a reference to the graphics chipsets that are installed in your computer. Why does this driver exist and how could I take advantage of this setup?

The standard audio setup

Most computers are nowadays equipped with an on-board audio infrastructure of some sort. This was initially a sound card but is nowadays an on-board audio chipset like Realtek or Intel HD Audio. Here, it would have its own digital-analogue audio circuitry and would be serving integrated speakers or audio equipment like computer speakers that are connected to the computer’s own audio jacks.

The better implementations would have an SP/DIF audio output which would serve an outboard digital-analogue converter or digital amplifier. In this case, the audio infrastructure would repackage the sound in to an SP/DIF-compliant form either as a PCM stream or a bitstream supporting Dolby Digital.

In this case, the above-mentioned sound infrastructure would work with its own driver software and be listed as a distinct audio device in Windows. With most of the recent laptops that have sound tuning provided typically by a name-of-respect in the professional-audio or hi-fi scene, this driver also has the software component that is part of this tuning.

HDMI and DisplayPort adds a point of confusion

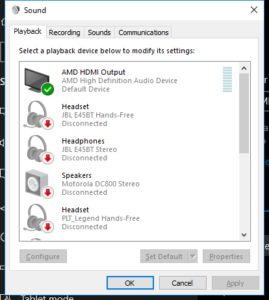
Windows Sound Control Panel

HDMI output for monitor as a unique audio playback device in Windows

HDMI and DisplayPort display connections have the ability to transport a digital audio stream along with the video stream over the same cable. Therefore, display-chipset and graphics card manufacturers have had to support digital-audio transport for host-computer audio through these connections.

In some early setups, it required that the computer’s sound card or audio chipset expose a digital-audio stream via the HDMI or DisplayPort connection. With graphics cards, this typically required a wired connection between an SP/DIF digital output on a sound card or motherboard audio chipset and a digital input on the graphics card.

But recent implementations used a cost-effective digital-audio processor as part of the graphics infrastructure which simply repackages the digital audio stream from the host computer to a form that can be handled by the display or audio device connected via the HDMI or DisplayPort connection. During the initial setup of an HDMI or DisplayPort connection, it will be about determining what audio codecs, bit-depths and sampling frequencies the connected monitor, TV, home-theatre receiver or other audio-equipped device can handle.

Sony STR-DN1060 home theatre receiver press picture courtesy of Sony America

If you connect your computer to your monitor or TV even via the HDMI connections on one of these home-theatre receivers, you will be using the HDMI audio subsystem and display audio driver as outlined here

This also applies to computers and display setups that use the USB-C port as a “DisplayPort alt” connection like some of the laptops that have come my way for product review. But if you are using a USB-C expansion module that has audio connections, you may find that this device may use a USB-based sound chipset to serve those connections. Typically this chipset will use the USB Audio Device class drivers that are part of the operating system rather than the “display audio” drivers.

If you connect your computer to your display via an HDMI audio device like a home-theatre receiver, soundbar or HDMI audio adaptor, you will find that the audio device will be identified as the sound-output device for the “display audio” device.

In this case, you would see another audio device listed in your computer’s audio device list with a name that references your computer’s graphics chipset like Intel Display Audio or AMD HDMI Audio. The only audio-endpoint device that these drivers refer to are whatever audio device is connected to your computer’s HDMI or DisplayPort connection.

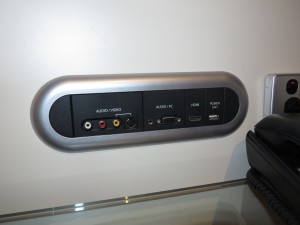
In-room AV connection panel

If you use the HDMI input on your in-room AV connection panel like this one at Rydges Melbourne, you would have to use the “display-audio” sound driver for your computer’s sound

Where you connect a computer to a speaker-equipped display or audio device that uses HDMI / DisplayPort alongside a traditional audio input connection like RCA or 3.5mm jack, the “display audio” driver would be used while you use the HDMI or DisplayPort connections. This also applies to the device connection panels you may find in your hotel room and you connect your laptop to the HDMI input on these panels. In this case, you have to use the “display audio” driver when you select the “virtual channel” or source associated with the HDMI input.

What do I do about the existence of these “display audio” drivers?

If you are trying to rationalise the driver software that exists on your computer, don’t remove the “display audio” or “HDMI audio” drivers associated with your computer’s graphics infrastructure. This is because if you connect a TV, monitor with speakers or home-theatre audio device to your computer via the HDMI or DisplayPort connections and you remove the “display audio” driver, the sound won’t play through devices connected via those connections.

Instead, keep these “display audio” drivers up-to-date as part of updating your computer’s graphics-infrastructure software. Here, it will preserve best compatibility for the communications, games and multimedia software and Websites you run on your computer if you are using audio-capable devices connected via HDMI or DisplayPort along with this audio-capable hardware hanging off these ports.

Also remember that if you are using an audio-capable display device connected via the HDMI or DisplayPort connections, you need to use the “diisplay audio” driver to hear your computer’s or application’s sound through that device. This may require you to have it as a “default sound playback device” for software that doesn’t support audio-device switching like Spotify or Web browsers.

Computer systems with multiple graphics chipsets

Computer systems that implement multiple graphics chipsets may also run multiple “display audio” drivers for each chipset. Here, the audio to be sent via the HDMI or DisplayPort output would be processed by the “display audio” chipset for the currently-used chipset.

Some setups may require you to manually select the “display audio” chipset that you are using when you are directing the sound via your audio-equipped display device. This may especially apply to the use of external graphics modules.

But on the other hand, a multiple-graphics-chipset computer may implement a virtual “display audio” or “HDMI audio” driver that automatically steers sound output to the HDMI or DisplayPort device via the currently-used graphics chipset without you needing to intervene. This kind of driver will be relevant with computers that implement NVIDIA Optimus or similar logic to automatically select the appropriate chipset depending on whether you are after high graphics performance or longer battery runtime.

A solution for “steering” Windows sound output towards the devices you want

You can steer particular applications’ sound through your laptop’s HDMI output using the display audio driver

When I installed the Windows 10 April Update (Build 1803) on my computer, I had found the improved sound-management ability that this operating system update offers can make better use of this arrangement. I chose to create a sound setup to steer multimedia to better sound outputs while keeping the audio prompts that Windows makes during errors towards a lower-quality output and documented how this is done.

Here, the “display audio” driver will earn its keep as a way to allow the speakers in your smart TV, home-theatre setup or audio-equipped monitor connected to your computer’s HDMI or DisplayPort output to be used only by the software that you want.

There are two situations that this will encompass. One is to have a laptop connected to the large TV or home-theatre setup for some Netflix binge-watching or full-on game-playing but you rather have Windows sound its notification sounds through the laptop’s own small speakers.

The other is where you use a monitor with not-so-great speakers as your primary display but want music or other multimedia to come out through a better sound system connected to your computer. It also includes desktop computers used in an AV playout role with a projector and PA system conveying the audio-video content to the audience but using a monitor with not-so-great speakers as the operator’s display.

The first situation involving a laptop would have the standard audio driver serving the integrated speakers set up as a “default” sound device while the Web browser, game or multimedia software uses the display-audio driver as the output device. The second situation using a monitor with not-so-great speakers would have the display-audio driver as the default driver while the Web browser or multimedia software handling the AV content to be played to the audience uses the audio driver associated with the better sound system.

Conclusion

Simply, the “display audio” or “HDMI audio” driver works with your computer’s graphics infrastructure as a separate audio driver to present sound from your computer to an audio-capable monitor or A/V device connected via its DisplayPort or HDMI connections.

Windows 10 answers the problem of system sounds playing through that good sound sound system

This arrangement documented here will work with Windows 10 computers running the April Update (Build 1803) version of that operating system or newer versions.

I have just applied the latest feature update to my Windows 10 installation on my regular computer and it has come across with a feature that most of you will want to benefit from when you use your computer to play audio or video content.

This feature update called Windows 10 April Update or formerly Windows 10 Spring Update (Build number 1803 in the System dialog) implements the ability to determine which sound device a program uses. Some Win32 (traditionally-developed) programs, namely well-bred media editing and management programs or VoIP programs have the ability for a user to determine which sound device they want that program to use. But the Web browsers, along with Spotify or TuneIn Radio and most of the Microsoft Store apps don’t offer this ability.
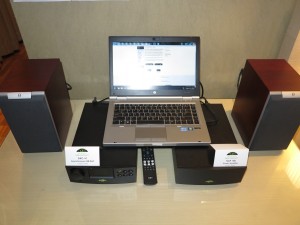
HP Elitebook 2560p playing through Naim DAC-V1 USB DAC

Windows 10 April Update allows the speakers in this USB-based audio setup to play only the music while the audio alerts play through the laptop’s integrated speakers

This means that you could set things up so that the system sounds like that Windows error “ding” or the email alert sound don’t blast through the good sound system but play through the cheaper speaker setup like your laptop’s speakers. It is while Spotify or that other audio program plays through the good speakers or hi-fi system. Similarly, you may want that YouTube video or the game you are playing to have its sound come through your big TV’s speaker but don’t like the idea of the Windows audio prompts being a distraction by barging through those speakers.

Praise and worship at church

You can set things up so that the playout computer doesn’t play Windows audio alert sounds through PA systems like this church’s setup

This feature will be essential for those of you who use your computer with a PA system as an audio/video playout device and end up using baseline software that doesn’t offer the ability to manage the audio devices the software plays through. Here, you avoid having those PA speakers “magnifying” the audio prompts that Windows makes when a dialogue box pops up or new email comes in. Similarly, you could then have one audio-output device like headphones or low-powered speakers serve as a “cue” device that you use to verify or line-up the content you want to
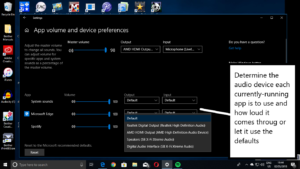
Sound devices that you can send an app’s sound output through

play before you have it playing through the main speakers.

How do you go about this?

You would need to make sure that your computer is running with another sound device that is attached to the good sound system. This could be a separate sound card, USB sound module or DAC, or a Bluetooth audio adaptor. If you have the computer connected to a sound system equipped with Bluetooth, USB or similar audio functionality, you have effectively set up the secondary sound device. It also applies if you have connected it to the big TV or home-theatre setup using an HDMI cable.

Identifying the sound devices

Then you identify the two different sound devices – the one that you want as your “primary” device for monitoring audio prompts that Windows provides and the “secondary” one you want your multimedia content to play through.

The sound functionality that is built in to a laptop computer or a desktop computer’s motherboard will typically be represented by something like a Realtek, Intel HD Audio or similar chipset name. In most cases, this integrated-sound chipset serve the internal speakers in a laptop or a pair of cheap computer speakers connected to the audio sockets on a desktop computer’s motherboard.
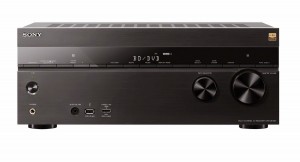
Sony STR-DN1060 home theatre receiver press picture courtesy of Sony America

If you connect your computer to your monitor or TV through one of these home-theatre receivers using the HDMI connections on these sets, you will be using the separate HDMI audio subsystem facilitated by your computer’s graphics infrastructure for the sound that comes through the receiver

Display setups connected to your computer via HDMI or DisplayPort that have audio abilities will have those abilities seen as an audio function of the display infrastructure. Some of these cases like Intel integrated graphics chips will properly refer to the arrangement as “display audio” or “HDMI display audio” due to the function being separate from the computer’s main sound chipset. This arrangement also holds true if you are connecting HDMI audio devices like soundbars, HDMI audio adaptors and home-theatre receivers between your computer and your display using the HDMI cable.

Let’s not forget that USB or Bluetooth devices that use the Windows audio-device class drivers will still identify themselves by their device or chipset make and model. This is to avoid confusion that can exist if you connect multiple USB or Bluetooth audio devices to the same host computer.

Configuring your setup

Go to Settings (the gear icon in your Start menu) and click on the System option. Then click on the Sound menu on the left of the System menu page. Make sure the current sound device is the primary one that will drive your laptop, monitor or other cheaper speakers. Then click on “App volume and device preferences” to bring up the menu to determine which speakers Spotify or your other multimedia app will use.

If you added a new audio output device to your computer, Windows will automatically assume it is the default audio device. Here, if you want this device to be the secondary device, you would have to use the above-mentioned Settings – Sound panel to select the primary sound device to be the default device.

In my setup, I used my LG monitor which has an HDMI link and built-in speakers but yields laptop-quality sound as the primary sound device while a Motorola Bluetooth audio adaptor connected to an older boombox serves as the secondary sound device. Because I am using a traditional desktop PC, the Bluetooth link is facilitated through a USB Bluetooth modem.
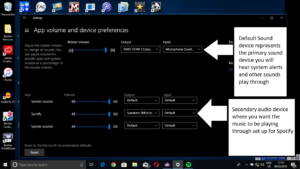
Windows - System - Sound menu for app-based audio device selection

Spotify set up to play

Next to the app you wish to direct the sound output for, click on the drop-down box in the Output column. At the moment, this will say “Default”, but use this to select the output device you want to have the app come through such as the USB DAC or Bluetooth speaker.

Here, I tested the setup with a Win32 app in the form of the Windows Media Player and it does work properly even though that program provides the ability for users to determine the sound output device that they use. Then I tried it with a UWP (Microsoft Store) app in the form of Spotify’s Windows 10 port and this worked reliably. Subsequently, I also found that this setup worked with Google Chrome when playing a YouTube video. Through these tests, I made sure that the Windows sounds were playing through the primary speakers.

You may have to run totally different browsers if you want the sound from one Webpage to pass through one device while the sound from another Webpage passes through another. This can be of concern if, for example, you are running a YouTube playlist or something similar as background music while you are playing a Web-based social-media game.

Going back to normal operation

To get back to your normal settings, click the “Reset” button in the “App volume and device preferences” window to have all the sound sources work through your default devices.

You may find that some media content may stop if you switch audio devices while it is running. If you do use this ability to maintain a “cue” device and a “main” or “front-of-house” device for playout purposes, you will have to pause the media file before you switch audio devices or simply restart the media content after you switch.

Other abilities

There is the ability to determine which input device an app uses which can be good for Web-based, Microsoft Store or similar apps that don’t provide an option for you to choose which microphone device you are to use. This can come in handy if you want to use a more accurate microphone with Cortana, courseware apps or baseline notetaking apps rather than your 2-in-1’s built-in microphone.

In this case, you choose the Input device you want to use for each program or Web browser rather than choosing the Output device.

What improvements could be provided

This feature could be taken further through the use of a “Default Multimedia Audio Device” definition that is expressly used for media-player software and/or a “Default Game Audio Device” definition used for games.This could then allow a user to have an audio device work as the one to use for multimedia or gaming purposes while another is used for the system sounds. It can then lead to the ability to create an “audio device ladder” for each audio device class where connection of certain audio devices like headphones, HDMI-equipped TVs or USB DACs overrides other audio devices in a particular order.

Another issue that will crop up with this new ability that Windows 10 April Update provides is sending different audio content to different “jacks” served by the same audio infrastructure. It may come about through cheaper computer designs that only have one audio chipset for HDMI, internal-speaker and audio-jack output rather than allowing for a separate audio function that is part of a graphics infrastructure to support HDMI digital audio.

Conclusion

Now you are able to make sure that your Windows computer’s multimedia software can play through the speakers that would suit it best without having the various audio prompts that the Windows shell or office software creates blasting their way through those speakers.