Category: Systèmes d’exploitation

Thunderbolt dock may be behaving erratically under Windows 10. What can you do?

Article
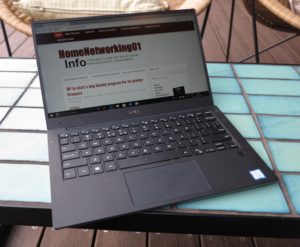
Dell XPS 13 8th Generation Ultrabook at QT Melbourne rooftop bar

Simply restarting your Thunderbolt-3-equipped computer may correct problems you have with any Thunderbolt 3 docks attached to it.

Microsoft Warns of Uncommon Windows 10 Thunderbolt Issue | Bleeping Computer

From the horse’s mouth

Microsoft Support

Devices connected through a Thunderbolt Dock stop working after the computer resumes from the S5 power state (Support article)

My Comments

You may find that your Thunderbolt-3-equipped computer may show up a problem with its Thunderbolt 3 connection if it is running a recent build of Windows 10.

This will happen when you are using a Thunderbolt 3 dock or a Thunderbolt 3 peripheral like a display or external graphics module that has dock functionality where you can connect multiple peripherals. As well, it may encompass Thunderbolt 3 devices that have user-removable or user-replaceable storage media like memory-card readers, SATA hard-disk interfaces or optical drives.

It will be common with those of us who have a laptop computer and establish one or more workspaces equipped with a full-sized keyboard, mouse and one or two large screens then use a dock for one-cable connection and disconnection. You may also be connecting one or more storage devices like USB hard disks, memory keys or optical drives to the dock for extra storage functionality.

The problem will manifest if you have Fast Startup enabled on your Windows 10 laptop. This mode, which will most often be set up by default and to come in to play when you close up your laptop, will dump from RAM to the internal hard disk or SSD what is needed to bring your computer to the login screen when you close the computer’s lid or quickly press the Power button.

The symptom will show up if you do the following practices regularly:

  1. connect the computer to the Thunderbolt dock, finding that all peripherals connected to the dock are present and functioning as far as Windows is concerned.
  2. power-down the computer by pressing the Power button for a long time or instigate a shutdown procedure from within Windows with the goal to have it fully turned off.
  3. disconnect the Thunderbolt dock from the computer once you see the screen go black
  4. let the computer completely power down
  5. connect the Thunderbolt dock to that computer and wait for it to stabilise
  6. turn on the computer like normal

Here, the peripherals connected to that Thunderbolt dock will register with Windows and be present in the operating system’s Device Manager. But they won’t function as expected like you won’t have any input from the full-sized keyboard or mouse nor would the storage devices be available for use by Windows and its applications.

This behaviour happens very occasionally and you may normally disconnect and reconnect the dock to force Windows to “rediscover” the associated peripherals.

But what can you do to rectify this problem? Here, it is a simple process of fully shutting down then restarting your computer using the Shutdown or Restart procedure in Windows without disconnecting the Thunderbolt dock. Here, you have to wait until all the lights on the computer are off, not just the screen, when you instigate the Shutdown procedure this time.

With this process, you are making sure that during the boot cycle, the Windows operating system is properly taking stock of all the peripherals that are connected to the Thunderbolt dock and making sure they are properly available “to the computer”. This includes enforcing the dock to reset itself and create a fresh inventory of what is connected to or integrated in it to present to the host operating system.

You may also find that fully restarting your computer if peripherals connected to a hub, dock or similar device aren’t working properly no matter the connection method or operating system.

How to set Bedtime mode on iOS so you don’t miss important calls

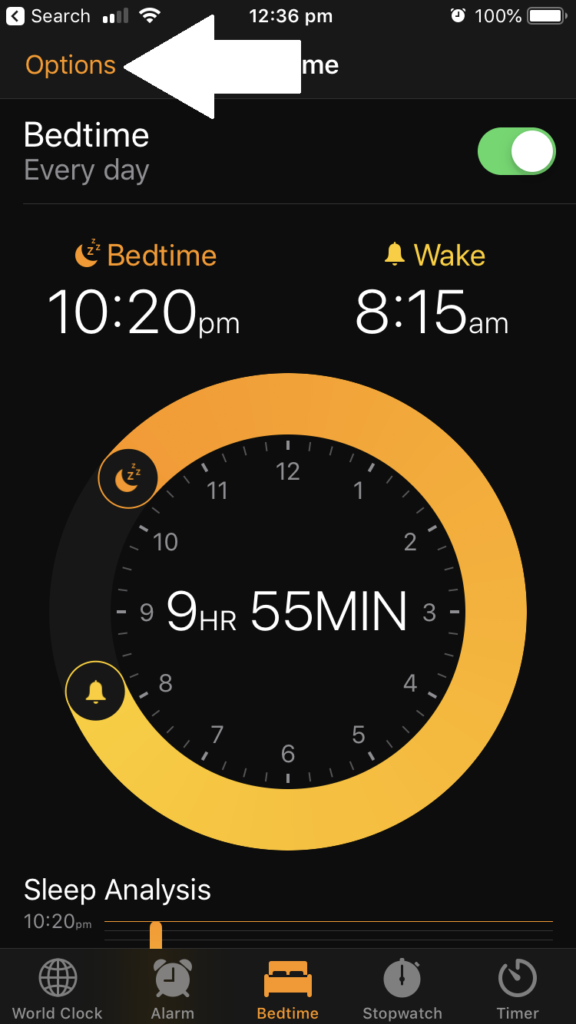
Options area in iOS Bedtime Mode screen

Select Options to set up the Bedtime Mode behaviour

Apple’s iOS operating system since version 12 have support for “Bedtime” mode which allows you to have a good sleep. This is achieved through optimising the display to reduce blue light in a sleep-friendly manner along with default automatic enablement of “Do Not Disturb” mode where the iPhone won’t ring through during the hours the Bedtime mode is in operation. This will be heralded by your iPhone ringing a phrase of Brahms’ Lullaby with a music-box sound when that mode is effective.

But some of us may don’t want to miss important calls that come through at night due to work or personal reasons. An example of this could be a person who is a registered keyholder for a premises and needs to know of alarm incidents affecting that premises. Or someone you expect home may be arriving late and wants to let you know they are on their way or changed plans. In a simple case, you may not want to miss that important call from someone who is on the other side of the world.

The default implementation for Bedtime mode has your iPhone in “Do Not Disturb” mode where your iPhone won’t ring or sound a notification tone for text messages while that mode is in effect. But you may want most of the sleep-friendly benefits of this mode while being able to be woken by those important calls.

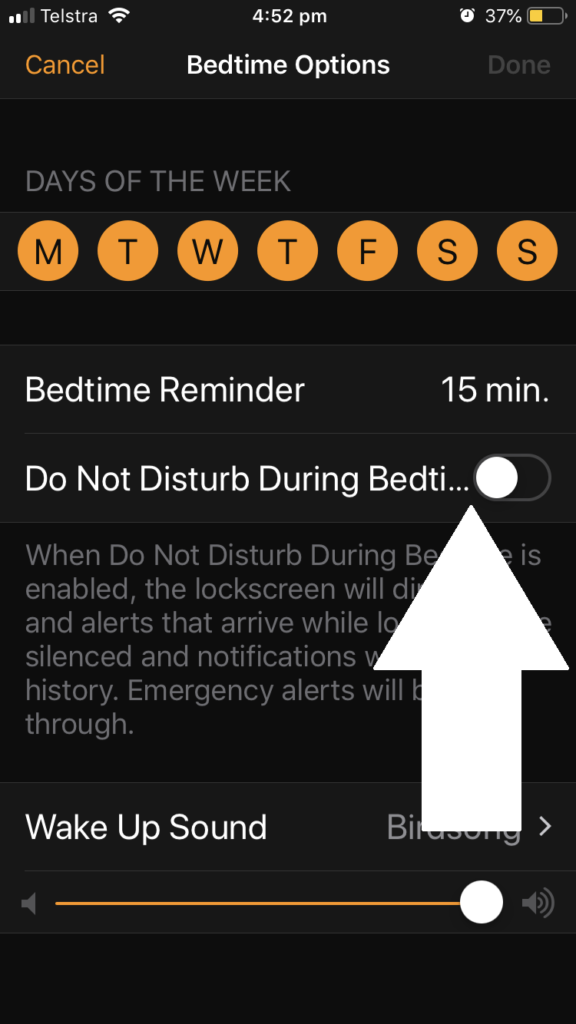
iOS Bedtime Mode options screen with Do Not Disturb option called out

Clear the Do Not Disturb option to allow calls and texts to come through during Bedtime Mode

To enable this, you need to go to the Clock app and select the Bedtime screen. Select “Options” and turn off the “Do Not Disturb” mode on that screen to allow calls to come through. The display will still be dimmed through this time but the iPhone will ring or sound a notification tone.

You may also have to check for scheduled “Do Not Disturb” times in case you used this feature to set up a “do-not-disturb” period surrounding your normal bedtime. This is a feature that an iOS user may have implemented before updating to iOS 12. You can check this feature in the “Do Not Disturb” option in the Settings app.

If you do use the “Do Not Disturb” option, you can allow certain caller groups to break through and cause your phone to ring irrespective of when this option is in effect. One of these is “Favourites” which allows you to mark contacts as a “favourite”. Or you can use the Groups option to allow calls from contact groups that you have pre-defined. This is important if you mark out your contacts in to contact groups like “work” or “family” and is a complex procedure that requires you to use your Apple iCloud.com account on a Web browser.

The use of a predefined caller list to override “Do Not Disturb” may not work well with callers who call you using VoIP or from behind a business phone system. This is because you may find that the caller ID for their call may be different from their phone number due to them, for example, calling from the nearest extension rather than their own extension.

iOS and Android could natively follow the Symbian (original Nokia feature-phone operating system) approach where you have different situation-specific alerting presets that affect your phone’s audio / vibration / indicator-light behaviour. This can also allow the use of one or more priority call lists so that callers you select for a particular situation can ring through. Such presets can be linked to operation modes like the “Bedtime” mode or alarm clock so they can be effective during these modes.

As well, Apple could simplify the process of creating and managing caller groups on the iOS contacts list while you are using your iPhone’s user interface. This is important for processes like adding new contacts to your list or revising your contacts, and can make the process more intuitive.

Mopria driver-free printing now arrives at Windows 10

Article – From the horse’s mouth

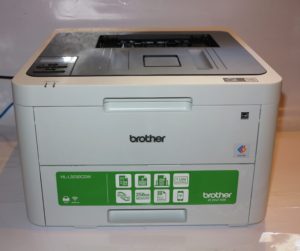
Brother HL-L3230CDS colour LED printer

Windows 10 users can print to these printers using a Mopria class driver baked in to the operating system

Mopria Alliance

Press Release (PDF)

Fact Sheet

Previous Coverage on driver-free printing

What is happening with driver-free printing

My Comments

There are sure steps being taken to print fully-formatted documents from a computing device without the need for driver or companion software to be installed by the user.

It is to allow a person to print a document like a boarding pass using the printer local to them without worrying about make or model it is in order to install any drivers. This effort has been focused towards mobile platforms like iOS and Android thanks to the inherently-portable nature of devices that run these operating systems. But there are other use cases like dedicated-function devices such as set-top boxes or accessible-computing scenarios where you use specially-designed hardware for people with particular challenges.

Dell Inspiron 13 7000 2-in-1 Intel 8th Generation CPU at QT Melbourne hotel

No need to find and install drivers for that printer you have to use with the Windows 10 laptop

But it can apply to regular computers, especially laptops that are likely to be taken from place to place. Apple facilitated this through integrating AirPrint in to the Macintosh platform since MacOS X 10.7 Lion so you can print to an AirPrint-compliant printer without needing to install drivers on your Mac computer.

Now Microsoft is using the Mopria Alliance technology to enable this kind of driver-free printing from Windows 10. This is facilitated through a class driver baked in to the operating system since the October 2018 feature update (Build 1809). The class driver is offered as an option of last resort if Windows 10 cannot find the device driver for a newly-installed printer through existence on the host computer or through Windows Update.

You can still install and update vendor-supplied driver software for your printer, something you would need to do if you want to exploit the scanner abilities on your multifunction printer or use advanced monitoring and quality-control abilities that the manufacturer offers. It would work if you are in a foreign place like your business partner’s office and you needed to print out a document “there and then”.

In the case of managed-IT scenarios, the Mopria approach avoids the need for inhouse or contracted IT personnel to install drivers on the computer equipment they are managing to have it work with a particular printer. It also applies to task-specific Windows 10 builds where you want to have the minimum amount of software on the device yet allow for printing. As well, creating a standard operating environment or a dedicated-function device based on Windows 10 code like a point-of-sale system can be made easier especially where you want flexibility regarding the printer equipment you deploy or your end-users end up using.

I would like to see Microsoft improve on this by having a standalone Mopria class driver available for prior versions of Windows and ready to download from their download sites. This is especially useful for organisations who maintain task-specific standard-operating-environments or devices based around these earlier operating systems.

What is happening is the idea of driver-free printing is being seen as a reality especially for mobile computing scenarios and all the popular operating environments are coming to the party.

Windows to fully manage multiple graphics processor setups

Article – From the horse’s mouth

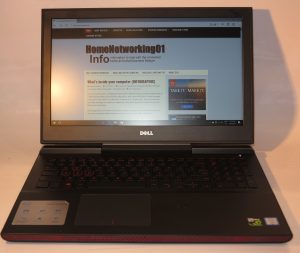
Dell Inspiron 15 Gaming laptop

The Dell Inspiron 15 7000 Gaming laptop – the process of selecting which graphics processor  an app or game should use in this Optimus-equipped laptop will soon be managed by Windows 10

Microsoft

Announcing Windows 10 Insider Preview Build 17093 for PC (Windows Experience Blog)

Previous Coverage

What is a GPU all about?

My Comments

Over the last few years, an increasing number of laptop-computer manufacturers worked with graphics-card vendors to implement dual-graphics-processor setups in their portable computing products.

This offered a function that works in a similar manner to the “performance / economy” or “sports mode” switch present in an increasing number of cars. Here, the transmission can be set to give the car sports-like performance or to allow it work more efficiently, typically by determining when the transmission changes gear in relation to the engine’s RPM. NVIDIA markets this function as Optimus while AMD markets it as Dynamic Switchable Graphics.

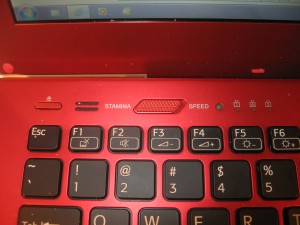
Sony VAIO S Series ultraportable STAMINA-SPEED switch

Sony VAIO S Series – equipped with dual graphics with an easy-to-use operating-mode switch

Initially Sony implemented a hardware switch to select the graphics processor on their VAIO S Series that I previously reviewed but you manage this function through a control app offered by NVIDIA or AMD depending on the discrete graphics chipset installed. From my experience, these programs can be very confusing to operating especially if you want to allow particular software to run in high-performance or economy mode, or simply override these settings.

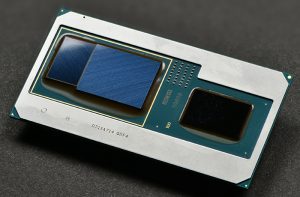
Intel Corporation is introducing the 8th Gen Intel Core processor with Radeon RX Vega M Graphics in January 2018. It is packed with features and performance crafted for gamers, content creators and fans of virtual and mixed reality. (Credit: Walden Kirsch/Intel Corporation)

This Intel CPU+GPU chipset will be the reason Microsoft will be providing operating-system management of multiple graphics processors

Microsoft have now integrated in to a preview build of the next iteration of Windows 10 the ability to manage these settings using the operating system’s interface. This setup also applies to desktop systems equipped with two discrete GPUs such as a baseline graphics card and a performance-focused graphics card; or systems connected to an external graphics module. It can cater towards a situation where a computer is equipped with two built-in graphics processors and an external graphics module, a situation that can be made real with Intel’s new CPU+discrete GPU system-on-chip or a gaming laptop with a regular games-grade GPU, when computers with this kind of hardware also have Thunderbolt 3 ports.

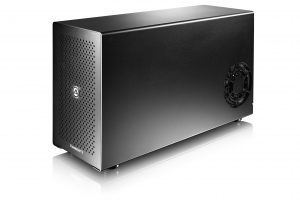
Akitio Node Thunderbolt 3 "card cage" external graphics module - press image courtesy of Akitio

.. as will external graphics modules like this Akitio Node Thunderbolt 3 “card cage” external graphics module

The user experience requires you to select a program, be it a Classic (traditional Windows desktop) app or a Universal (Windows Store) app, then choose whether to let the system choose the GPU to use, or to use the GPU offering the highest performance, or the GPU that is the most economical. Here, it could cater for the external graphics modules or systems with three graphics processors by choosing the one with the most horsepower, typically the graphics processor in an external graphics module.

There is the ability for an application or game to choose the graphics processor to work with and this management ability won’t override that choice.  The ability to choose the graphics processor for a program to work with on the basis of whether it is power-saving or higher-performance makes it feasible to work with setups where you may connect or disconnect GPUs on a whim such as when you use external graphics modules.

What users may eventually want is to allow Windows to select the graphics processor for an application based on the kind of power source the host computer is using. Here, such an option could allow an app to use high-performance graphics like a discrete graphics chipset while the computer is running from AC power, but use a power-conserving graphics setup while running on batteries.

Other goals that may be seen would include the ability for Windows to manipulate multiple graphics processors to optimise for higher graphics and system performance for particular situations. This could range from using an integrated graphics processor in a setup using a discrete or external graphics processor for its graphics needs to improve performance for supplementary tasks to allocating GPUs to particular display clusters.

At least Microsoft has started on the idea of “baking in” multiple-graphics-processor management into Windows 10 rather than relying on software supplied by graphics-processor vendors to do the job.

Microsoft Paint–here to stay but available down another path

Articles

Windows Paint – here to stay but will be available through Windows Store

Microsoft Paint isn’t dead yet, will live in the Windows Store for free | The Verge

Classic MS Paint is coming to the Windows Store, for FREE! | Windows Central

From the horse’s mouth

Microsoft

Windows Experience Blog

My Comments

Recently the computer press has been awash with articles that Microsoft was killing the Paint app that always came with Windows since 1.0 . But they are keeping it available for Windows users to continue working with by allowing them to download it for free from the Windows Store.

The Paint app was simply a basic bitmap-driven graphics editor that allowed users to get used to using a mouse for creating computer graphics. It was based on ZSoft’s PC Paintbrush which was the PC’s answer to the various baseline graphics editors that came with every mouse-driven graphical user interface since 1984 when that kind of computing came on board with the Apple Macintosh.

This app ended up being the answer for any basic computer-graphics work at home or in the office, whether it be children creating computer drawings through to designers creating rough prototypical images of what they are designing in the office. I have infact used Paint as part of creating screenshots for this Website by editing the various screenshots whether to redact private information or to call out particular menu options that I am talking about in the accompanying article. This was thanks to an easier learning curve that this software implemented from Day 1.

A common fear that I would have expressed in relation to the press coverage about Microsoft abandoning or paying less attention to Paint and other bundled or cost-effective graphics tools (remember PhotoDraw?) is that they could end up stripping down their application-software portfolio of titles seen to be less valuable. Then they would just focus their efforts on the popular premium business software like the “Office” essentials such as Word, Excel and PowerPoint.

At least those of you who buy a computer with Windows 10 Fall (Autumn) Creators Update in situ don’t have to miss that basic Paint app because it’s not delivered “out of the box”. Rather they can raid the Windows Store and find this app.

But could this be the path for evergreen software that was always distributed for free as a standalone package or with operating systems like graphics or sound editors by the major operating-system vendors?

Microsoft dropping features from Windows 10 Fall Creators Update

Article

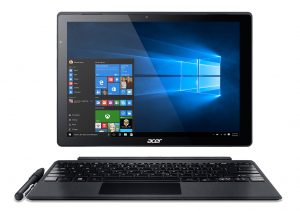
Acer Switch Alpha 12 2-in-1 with keyboard press image courtesy of Acer

There is the risk of over-promising and under-delivering when there is a short time between major operating system updates

Where do we stand with features for the Windows 10 Fall Creators Update? | Supersite Windows

My Comments

An increasing trend for regular-computer and mobile operating systems is for them to be updated on a regular basis along the model of “software-as-a-service”.

With this model, the companies behind these operating systems will typically license the operating system with new hardware, but not require the user to pay to acquire newly-developed functionality. It is in conjunction with making sure that all bugs and security exploits are removed from the system.

A problem that has been found with this method of delivery is that it can be easy to over-promise and under-deliver as what Microsoft commonly does. This has shown up more so with the Fall Creator’s Update of Windows 10 where Microsoft removed Windows Timeline and Cloud-Powered Clipboard, two highly-promised features, from the feature list for that update.

What is underscored here is the frequency of major updates that add significant amounts of functionality to an operating system, along with calling out the promised improvements for these updates. Apple and Google implement a yearly cycle when it comes to delivering major operating-system updates that are about adding extra features while Microsoft undertakes this on a six-monthly basis.

The advantage of the long lead-time that Apple and Google run with is that they can deliver on their promises by writing in the code and subjecting it to a long debug and optimisation cycle including delivering it in publicly-available beta-test packages. This is conversant with Microsoft calling out features for a major functionality update and having to have all of them work to expectation by the time the update is considered “feature complete”.

But how can Microsoft and others who implement the short lead times for major functionality updates avoid the issue of over-promising? Here they could announce that some features are being destined for the upcoming functionality update while others are being destined for the subsequent update.

Similarly, they could deliver the functionality in an “out-of-band” form such as free-to-install apps provided through the platform’s app store, a practice Google is undertaking with the Android platform. In the case of functionality dependent on a particular peripheral class, it may be delivered as part of the onboarding process that the operating system performs when that peripheral is connected for the first time.

Personally, I would like to see some effort put towards fine-tuning the peripheral and network interface software code to encourage more “driver-free” peripheral connectivity that occurs in a secure stable manner to the latest specifications for that device class.

What is being highlighted here is the risk of over-promising and under-delivering when it comes to delivering major functionality updates for an operating system.

Controlled folder access to come to Windows 10 soon

Articles 

Windows 10 preview build protects your files from ransomware | Engadget

Windows 10 will hide your important files from ransomware soon | The Verge

Microsoft previews new ransomware protection feature | Bit-Tech

From the horse’s mouth

Microsoft

Windows Experience blog post

My Comments

If you have heard the news over the last few month, you will have heard about ransomware activity in the form of the WannaCry and Petya ransomware variants getting at major installations including the NHS and the Victorian traffic-camera infrastructure.

But Microsoft has attacked this problem in a different way by providing application-level control for the next major update for Windows 10 – the Fall Creator’s Update. It is part of refining the Windows Defender security software that is part of the operating system for improved business-tier data security.

It is a very similar process to what Android and iOS do in relation to allowing the user to control what apps have access to what resources and features on their smartphone or tablet. It is also in contrast to how regular-computer operating systems work when it comes to controlling the level of access granted to a computer’s file system, where users or groups of users are typically granted particular levels of access to folders or files.

Here, once you enable the Controlled Folder Access function, applications can’t add, modify or delete files in folders where this control exists unless the app is part of a user-defined whitelist.  The routine for adding an app to the whitelist will be very similar to what you do on your iPhone or Android phone when it comes to allowing that app you newly downloaded to have access to a particular resource on your smartphone and could occur during installation or when you first use that app after enabling Controlled Folders.

By default, this feature would be enabled for the Documents, Desktop, Pictures and Videos folder trees but you can enable this feature for other folders such as “ad-hoc” work folders created on the system disk or other fixed storage on your system. I am not sure is this is also to apply to removable storage like USB hard disks, USB memory keys or SD cards, or whether this can also apply to network and online storage like your NAS shares or your Dropbox folder.

A question that can also be raised is whether the Controlled Folder feature will also provide a way to limit access to other system resources by apps. Here, it could range from access to network and Internet resources to prevent spyware from “phoning home” or to limit access to your computer’s Webcam and microphone to limit use of these resources as a surveillance tool.

Android Auto now for every car independent of the head unit

Article – From the horse’s mouth

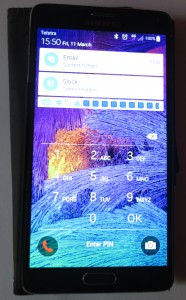
Android main interactive lock screen

Your Android phone could become its own driver-friendly interaction screen for Android Auto

Google

Android Auto Available In Every Car (Blog Post)

My Comments

Android Auto provides a driving-friendly “extension” for your Android-based smartphone on your car’s dashboard. This yields a simplified user interface for audio, navigation, communications and allied apps so you can use them at the wheel.

Increasingly most of the vehicle builders are offering Android Auto compatible infotainment setups for most of the models with a few car-audio manufacturers running with aftermarket head units that have this functionality. But not everyone can benefit from this technology at the moment, perhaps due to a vehicle builder like Toyota not providing support or you maintaining an existing car that doesn’t have this functionality.

Google has answered this problem with version 2 of Android Auto which has the ability to use your Android phone’s screen as an Audroid Auto user interface. This is being rolled out during the current major update cycle for the Android Auto app.

Cassette adaptor in use with a smartphone

An Android phone running Android Auto 2.0 can bring this cassette-adaptor-based setup for classic car stereos to current expectations

Here, you would install your phone on an in-vehicle mounting kit such as the kind that uses a suction cup to anchor to your vehicle’s windscreen. This will allow for your phone to be operated in a stable and road-legal manner while you are driving.

But you can have the sound come through your car’s speakers via a hands-free kit or car stereo that has Bluetooth communications-level or multimedia-level audio compatibility. Or you can use a 3.5mm auxiliary cable or cassette adaptor connected to your smartphone to have its sound through your car stereo. For those of us who have the Bluetooth-based setup, you can set the app to start automatically when your phone connects to the Bluetooth in-car audio device.

This update is infact taking advantage of the Android phablets and smartphones that have the larger display, making it viable for us to use them as a control surface for Android Auto setups. As well, some accessory builders are even taking advantage of this ability by offering Bluetooth-capable mounting kits that provide automatic enablement for Android Auto setups.

I also can see this benefiting the “two-wheeled” community once appropriate mounting kits become available for installation on to bikes and motorcycles. Here, they could use a Bluetooth headset or helmet and benefit from the reduced-interaction abilities that Android Auto offers so their hands are effectively on the handlebars and their eyes on the road all the time.

A good question to raise would be whether Android 2.0 could support a dual-device setup where an Android tablet could serve as a Android Auto display/control device, which could please those of us who want to integrate a 7”-8” tablet to bring Android Auto to our vehicles. Similarly, implementing Android Auto over a MirrorLink setup could open up paths for increased compatibility with infotainment setups.

Windows 10 Start Menu–not your father’s old station wagon

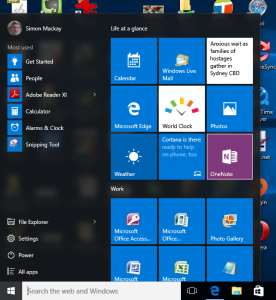
Windows 10 Start Menu

Start Menu in Windows 10 – the pop-up look from Windows 7 with the tiles from Windows 8

Windows 7 and its predecessors had a traditional pop-up start menu with an option to see all the programs or the frequently-used programs on your computer. This was presented in a list rather than a cluster of icons or tiles.

But Windows 8 headed down a totally different path with a dashboard-style layout hat has all of the programs or a user-defined set of programs represented as tiles. This had thrown many computer users off the operating system and caused some unnecessary worry.

The Start Menu

Windows 10 brought back the pop-up Start Menu that looks like a combination of the traditional Start menu and Windows 8’s tile-based look. This includes the famed “Live Tiles” that are always updated with new content thus working like a dashboard.

In the early days of your experience with Windows 10, you can mess around getting that tile-based Start Menu area looking how you want. If you run Windows 10 on a touchscreen laptop or a computer with a touchscreen monitor, this menu style can work just as well for you.

Getting it right!

You can organise your tiles in to groups by dragging them in to the space between two groups to create a group or dragging them in to a group to have them part of that group. This can be done in both the traditional pop-up view and the Tablet Mode view mentioned later on at the end.

Then you can name each group by right-clicking or “dwelling” your finger on the group name then typing in the name you want to give it.

Browsing for that program

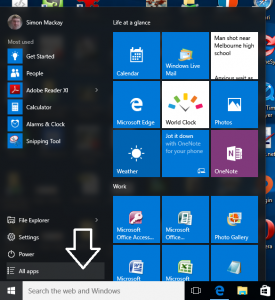
Windows 10 Start Menu - All Apps highlighted

Looking for that program – click All Apps on the Start Menu

This will be a situation for those of you who have held out with Windows 7 or its predecessors, where you will be wanting to know where all of your programs have gone even though they aren’t on the Start Menu or Taskbar.

Browsing for that particular program? Click on “All Apps” to see a list of all programs on your computer. Then, click on any of the letters to bring up a list of alphabetical letters. Subsequently, you just need to click on the first letter of the program’s title to be sent straight to a list of the programs beginning with that letter.

You then have two options to have your program readily accessible. One is to “pin” your program to the Taskbar so it is always accessible and this setup may remind you of the station-preset buttons on your car radio. On the other hand, you could “pin” your program to the Start Menu where it will appear as a tile which you shift around until it is in the right place for you.

Tablet Mode

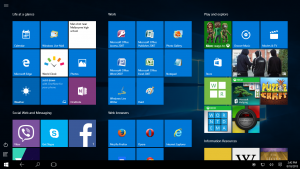
Windows 10 Tablet Mode

How Windows 10 looks when you use Tablet Mode

The Tablet Mode gives you a view that is not dissimilar to how you have operated your Windows 8 or Windows 8.1 computer. It is automatically selected if you detach a keyboard from your detachable-style “2-in-1” tablet or fold over a convertible notebook so the screen becomes a tablet. But you can manually select this mode on any Windows 10 computer.

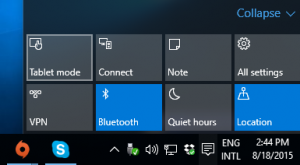
Windows 10 Notification Menu buttons wiht Tablet Mode highlighted

How to select Tablet Mode manually

As I have said just before, this doesn’t just those of you who work with tablet computers or 2-in-1 devices. You can use it with a laptop or desktop computer and it doesn’t need a touchscreen to benefit from this function. Rather you would use your mouse or trackpad to navigate around the screen and a scroll-enabled mouse earns its keep by allowing you to scroll downwards. In the Notification Menu, you have a button labelled Tablet Mode which you can use to toggle between this mod and the regular Desktop Mode.

I would recommending having your screen in the Tablet mode if you are trying to sort out the Start Menu groups after an upgrade because you can use the whole of your screen’s real estate to do this.

Search Bar

There is an always-visible Search Bar on the Taskbar which you can fill in your search requests for local or Web-hosted resources. This works with Cortana which is the personal digital assistant in the same vein as Siri or Google Now.

Here, ordering a search is as simple as clicking or tapping on the search area and typing in what you are after.

Conclusion

Anyone who has worked with any of Windows’ incarnations will find the Windows 10 Start Menu as something that doesn’t daunt you but allows you to get more out of the operating system.

Windows 10 to benefit from the FIDO authentication standards

Article

Microsoft to support Fido biometrics | NFC World

From the horse’s mouth

Microsoft

Windows For Your Business blog post

FIDO (Fast IDentity Online) Alliance

Press Release

My Comments

Microsoft is to enable Windows 10, which is the next version of Windows, to work with the FIDO (Fast Identity Online) Alliance standards for its authentication and authorisation needs.

But what is this about? FIDO is about providing a level playing field where authentication and authorisation technologies like biometrics, electronic keys and the like can work with applications and sites that support these technologies.

The goal with FIDO is to remove the need for drivers, client-side software and certificate-authority setups for 2-factor authentication or password-free authentication. As well, one hardware or software key can be used across compatible services and applications without user parameters being shared between them.

There are two standards that have been defined by FIDO Alliance. One is UAF which supports password-free login using biometrics like fingerprints; USB dongles; MiFare NFC cards; Bluetooth-linked smartphones and the like as the key to your account. The other is U2F which allows these kinds of keys to serve as a “second factor” for a two-factor authentication setup.

But what could this mean? With a UAF setup, I could set things up so I could log in to Facebook using my fingerprint if the computer is equipped with a fingerprint reader but not have to worry about using a password vault that plays nicely with that fingerprint reader. With a U2F setup, I could make sure that I have a tight two-factor login setup for my Website’s management account or my bank account but use a preferred method like a USB key or a smartcard reader that reads my EMV-compliant bank card.

The current implementation tends to ride on client-side software like browser plugins to provide the bridge between a FIDO-enabled site and a FIDO U2F-compliant key and this can impair the user experience you have during the login. It is because of you having to make sure that the client-side software is running properly and you use a particular browser with it before you can interact with the secure site. There is also the risk that the software may be written poorly thus being more demanding on processor and memory resources as well as providing an inconsistent user interface.

Microsoft will bake these authentication standards in to Windows 10 for the login experience and authentication with application-based and Web-based services. This will cut down on the client-side software weight needed to enhance your Internet security and allows those who develop the authentication methods to focus on innovating with them, just as Microsoft has done with other functionality that it has baked in to the various Windows versions. It will apply to Azure-based cloud-hosted Active Directory services and on-premises Active Directory services for business users; along with the Microsoft Account which is used for home and small business users with Windows 8 login and Outlook.com (Hotmail).

The question yet to raise with FIDO UAF and U2F functionality is whether this will be provided for application-based “client-to-server” authentication for situations like word-processors being used to upload blog posts or native clients for online services like Dropbox and Evernote. Similarly, would this technology allow a device to serve as a temporary or conditional authentication factor such as a smart lock that has just been used with your electronic key; or allow a card like a SIM card already installed in our smartphone or a MiFARE-compliant transit pass to serve as an electronic key for our Webmail.

Personally, I find that Windows implementing FIDO Alliance standards will allow us to make more use of various authentication technologies on our home or business computers.