Tag: Windows 7

Showing photos on the large screen in your dual-screen setup

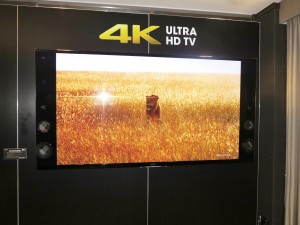
You may want to show pictures from a laptop to a big TV screen

You may want to show pictures from a laptop to a big TV screen

You have ended up with a collection of photos on your computer that you want to show using the video projector or large-screen TV. This may be like having that carousel of slides ready to show on the old slide projector – here you had this collection of slides ready after you came back from that trip or event.

This situation can apply to a range of use cases such as:

  • A person who is previewing pictures they have taken on a large screen so you can assess them in a better manner
  • Returning travellers who want to show their relatives or friends pictures they have taken during their travels
  • Businesses showing pictures of their latest products or pictures from a trade show
  • Churches who are showing their congregations the photos taken during outreach or missionary events

You may think that your presentation, AV-playout, worship-lyrics-projection or similar software may do the job for you but this will typically involve copying or importing each and every photo to a presentation and creating a presentation file which can be very inefficient. This is more so if you have had the images properly edited and sequenced so they are in a ready-to-show manner on another computer, then transferred them to the computer you are showing them with using some form of removeable media.

Similarly, you may be going through the pictures that you just took with your digital camera then imported to your computer and want to use the large screen such as your home or hotel-room TV so you can assess them more critically.

What do you need to be sure of

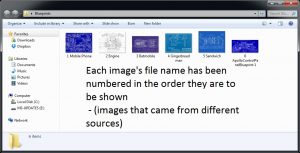
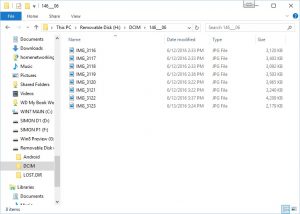
Windows folder with pictures in numerical sequence

Pictures in numerical sequence in known folder

The pictures, which are of a bitmap format that your computer’s  operating system can handle directly like JPEG or PNG, need to be kept in a known folder anywhere on your computer’s file system. This means that they can exist on your computer’s hard disk, on an optical disc that you or someone else “burned”, on a USB memory stick or an SD card such as what you took out of your camera. In some cases, it can also extend to online storage services if they are in sync and you are using native software to integrate them as part of the file system. As well, this may apply to your camera or smartphone if you have “tethered” it to the computer using a USB cable and it works to PTP requirements.

Photos on your camera's memory card

Pictures on your digital camera’s memory card or downloaded from your camera will be numbered in this order

The pictures will also be in a known numerical sequence. If they came off a digital camera or mobile phone, they will have a file name with a number that increases with every shutter-click. If you have edited them or had images from other sources, you will most likely make sure they are numbered to reflect the order in which they are shown as highlighted in the illustration.

What I refer to as the “large screen” in these instructions is a projector or a large-screen TV/monitor connected to your computer as a secondary display and what you want your pictures to be shown on. This display has to be configured to “extend” your computer’s main operating screen which I refer to as the “computer screen”.

Windows 7, 8.1 and 10 with Windows Photo Viewer

Here, you use Windows Photo Viewer which comes standard with Windows from version 7 onwards. This program can run a slide show based on image files without taking up too much computer resources/

  1. Open the folder where the pictures that you want to show are located
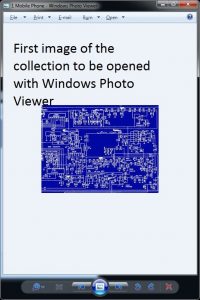
  2. Open the first picture in the folder or the first picture you want to show in the case of a large collection with Windows Photo Viewer 

    Image in Windows Photo Viewer

    First image of the collection opened in Windows Photo Viewer

  3. Click Play or press F11 to have the picture full screen on the computer’s screen. This will also start the pictures automatically advancing
  4. Pause this slide-show by right-clicking the currently-showing image and selecting Pause
  5. Press “Windows”-“Shift”-“Right Arrow” together to throw the image to the projector or large screen. This step is important or you won’t have it on that big screen.
  6. To manually advance the pictures, press the right arrow key to go forward or the left arrow key to go back. This option is useful when you are showing the pictures to accompany a presentation in order to avoid them being “out of sync” with the presenter, or if you are going through a collection of images like what you just took.
    When you have finished, press ESC on the keyboard to close the program
  7. To automatically advance the pictures, right-click the picture on the large screen and click Play or press F11 (auto advance). This is the option best used for images to be shown in the background.
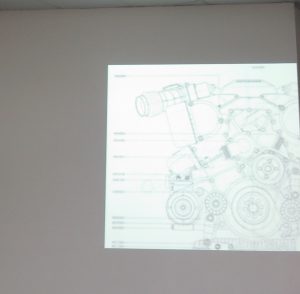
    Image on screen

    One of the pictures now up on the screen after you follow this procedure

    You have the ability to vary the slide show will appear by clicking on “Shuffle” to have the slides shown in random order (useful when showing as background “wallpaper”) or to vary how long they stay on the screen by clicking the “Slow”, “Medium” or “Fast” options.
    Press “Windows” to regain control if you want to use the computer during an automatic slide-show. You will also see a square “picture” icon in the Taskbar on your computer screen, which is an indicator that Windows Photo Viewer is running.
    To stop, click on that “picture” icon that represents Windows Photo Viewer and press ESC on the keyboard

Once you know how to quickly run a slide show with a pre-edited collection of images and using software that doesn’t require you to “prepare” them for showing, you can make use of the large screen more easily to show those photos.

This article will be updated as I gain more knowledge on how to use other cost-effective or supplied software in other platforms to quickly show a bunch of image files on the large screen without having to prepare a presentation.

You can still claim the Windows 10 free upgrade after July

Article

Making Sure You Are Eligible For The Windows 10 Free Upgrade Before It Expires | Supersite For Windows

My Comments

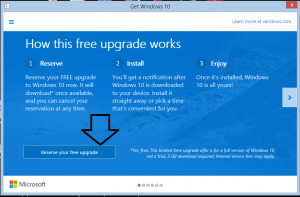
Windows 10 Free Upgrade screen

This is where you will reserve your copy of Windows 10

Microsoft is terminating the free Windows 10 upgrade offer for Windows 7 and 8.1 users in July but you may be able to reserve that upgrade and “make hay while the sun shines”. This can be achieved by you clicking on the Windows 10 icon in the Notification tray and going through the processes as if to upgrade to effectively reserve that upgrade for your current hardware.

But if you want to stay with your current operating system, you would have to roll back the update so that you and your current computer are effectively registered with Microsoft as if you have taken advantage of the free upgrade. You can also supply the Windows Product Key for your existing operating system in order to reserve your copy of Windows 10.

Some of you who are in the market for a new Windows-based computer may want to skip this process and focus on benefiting from Windows 10 whenever you have your new computer. But if you are “spinning out” your older computer as, perhaps, a secondary computer existing on your home network while you are buying the newer unit it would be worth proceeding with the upgrade. On the other hand, you can download and apply Convenience Rollup Updates from Microsoft to effectively keep the older computer to a similar security standard as the newer equipment.

Similarly, you could download the Windows 10 Media Creation Tool from Microsoft which allows you to create an optical disc or a USB stick as an installation / upgrade media source, then use this tool to deploy the Windows 10 update on to your computer. You could do this as part of registering your computer with Microsoft to reserve the free upgrade.

Making it easier to safely remove that USB flash drive in Windows

Safely Remove Hardware icon in Notification area

Notification area space where hidden icons exist – click on Customize to determine how they will appear

You may want to be sure you are doing the right thing when it comes to properly and safely removing that USB flash drive, external hard disk or SD card but it may be hard to find the “Safely Remove Hardware” icon in the Notification bar at the bottom right of your screen.

What tends to happen if you haven’t been doing anything regarding removable storage is that icon becomes sidelined and available behind the up-arrow on the Taskbar. This is more so if other applications have claimed space on the Notification Bar and seldom-used icons exist behind that up-arrow.

Notification Area Icons customisation screen - when you click on Customize

Notification Area Icons customisation screen – when you click on Customize

There is a way to work around this problem by customising the Notification Bar icons to make sure that certain icons appear always.

To do this, click on the up-arrow at the left of the Notification Bar to pop up all of the icons. These will appear in a white square and you will also see the word “Customize”. Click “Customize” to see a list of the icons with each icon having its own drop-down box that determines how and when it will appear.

Options available for each icon in the Notification Area Icons customisation screen

Options available for each icon

The different modes are:

  • Show icon and Notifications. This will have the icon appear at all times and “pop up” any notification messages. Here, you may want to have the icon always visible and accessible especially if you instigate tasks from that icon.
  • Hide icon and Notifications: The icon won’t appear at all in the Notification Bar even if there is a relevant notification or it changes state. This may be useful where you find an icon always popping up messages
  • Only show notifications. The icon pops up when there is a relevant notification and will show that notification. In some cases, this icon may appear if it changes state. It may apply to “sentinel” icons that appear to crowd out the Notification Bar even though they seldom yield a notification or change state.
Preferred seting for Safely Remove Hardware And Eject Media icon

Preferred seting for Safely Remove Hardware And Eject Media icon

Here, having the “Safely Remove Hardware” icon set to “Show icon and Notifications” means that while there is a USB storage device connected to the computer or an SD card inserted in the computer, this icon will appear. This will make it easy for you to know what to click when you need to remove the USB hard disk USB memory key or memory card.

You may also find this of us with other Notification Bar icons where you are always instigating tasks from or needing to keep an eye on incase they change state like the Skype icon.

It could be touch-to-connect for Wi-Fi devices very soon

Article

WiFi Alliance adds support for NFC | NFC World

My Comments

Two “quick-setup” features that I have liked are coming together very shortly for wireless routers and network-enabled devices. These features are being exploited by device manufacturers who want to be part of the level playing field and desire to see innovation.

One of these features is the WPS-PBC “push-to-connect” functionality where you invoke a WPS setup option on a client device you want to enrol then press the WPS button on your wireless router to “enrol” your client device in to your home network’s Wi-Fi segment. This feature has made it easier to bring new Windows  7/8 computers, Android mobile devices amongst most other Wi-Fi-capable devices in to a home network without having to transcribe in long WPA-PSK passphrases. I even set up one multiple-access-point network to allow this to happen on both access-point devices when I was fixing up network-connectivity issues. Similarly, I was pleased with a TP-Link TL-WPA4220 HomePlug wireless access point that used “Wi-Fi Clone” to learn network parameters from an existing Wi-Fi network segment at the push of a WPS button so it can be quickly set up as an extension access point.

Another feature that I am pleased about is NFC-based Bluetooth pairing. This is primarily used on most Sony Bluetooth-capable devices but other manufacturers are increasingly enabling it. It allows you to touch your phone or computer to the Bluetooth-capable device to instantly pair and connect both these devices. When I bought the Sony SBH-52 Bluetooth headset adaptor with FM radio, it didn’t take me long to “get going” with this device because I simply touched my Samsung Galaxy Note 2 Android phone to it to achieve this goal.

Now the Wi-Fi Alliance have merged both technologies and defined NFC “touch-and-go” setup as part of WPS-based wireless network setup standards. This functionality was seen as part of a “long-tail” vision for the WPS secure-network-setup standards with routers having to support the PIN-based and “push-to-go” methods. They defined a framework based around certain access-point and client chipsets including the Google Nexus 10 Android tablet. For that matter, Android, Linux and Windows 7/8 users could find this functionality either as a small app or “baked in” to an operating-system update.

This is another innovative step that will assure quick setup for Windows and Android devices with small-network Wi-Fi segments especially as most of the recent crop of these devices are equipped with NFC “touch-and-go” functionality and Wi-Fi connectivity.

Managing multiple sound devices in Windows

A common situation that will face most of us who use Windows or Macintosh regular computers is the issue of dealing with multiple sound-output devices with these computers.

There are examples of this such as:

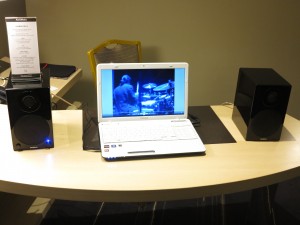
  • USB speakers with a laptop

    USB-driven hi-fi speakers with a laptop

    Desktop or laptop with regularly-used sound system (integrated speakers, desktop speakers served by installed sound card or integrated sound subsystem)

  • A hi-fi-grade “USB DAC” connected to or integrated in a hi-fi amplifier or home theatre receiver for high-quality sound reproduction.
  • Bluetooth speakers, headsets, and audio adaptors or AV equipment that has Integrated Bluetooth A2DP functionality as I have covered in another article.

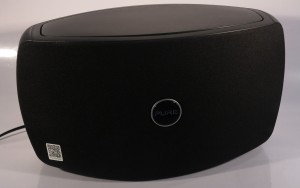
    Pure Jongo T6 wireless speaker

    A Bluetooth speaker that could be an extra speaker for a laptop

  • A media hub or “jack pack” in a hotel room that works with a flat-screen TV installed there, or a home theatre receiver or flat-screen TV that is connected to the computer via HDMI or DisplayPort
  • Virtual-sound-card programs like Airfoil or Jamcast that use network-connected devices as a computer’s sound card.
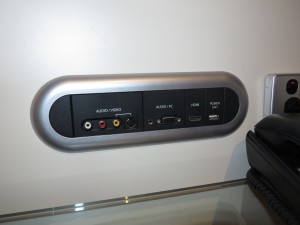
In-room AV connection panel

In-room AV connection panel at Rydges Hotel Melbourne – HDMI connection

But you can have problems with these kind of setups. Some programs like Windows Media Player, Skype or some games may allow you to determine the sound-output device they use but you may have to switch the default sound device you are using to suit most programs like Web browsers and Spotify where you can’t determine the sound-output device for the program. A few of the games may allow you to run a headset from a separate sound device for online game chat or voice recognition.

Similarly, a computer’s audio subsystem may have different output or input connections such as a line-out jack or an SP/DIF jack on a good sound card or an integral microphone and an audio-in jack on a laptop’s sound subsystem. These can be listed as separate sound devices depending on the device driver in place.

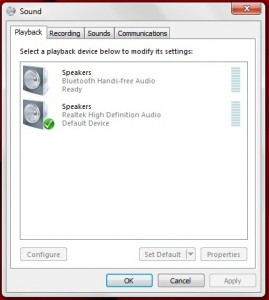
Bluetooth device listed alongside default audio device

List of audio playback devices in Windows – the one with the green tick is the Default Device

Microsoft Windows from version 7 onwards allows you to determine two “default sound devices”:

  • Default Communications Device, which defines devices you would use for VoIP, video telephony and similar applications
  • Default Device, which covers all sound-output needs including music, video, games and system notifications as well as communications sound.

The idea behind this setup is that you could have a device like a mono Bluetooth headset or not-so-good speakers like your laptop’s speakers being used by a softphone application while a pair of good speakers or a hi-fi system is used for music playback or game sound-effects purposes.

It is feasible to determine a device as being a Default Communications Device or Default Device in the context of recording or sound-capture only. This is achieved in the Recording Devices menu when you right-click on the Speaker icon.

Selecting a Default Device in Windows

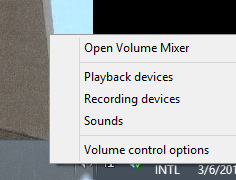
Right-click sound menu

Pop-up menu when you right-click on the Speaker icon on the Taskbar

Windows 8 and 8.1 users will need to use the Desktop view rather than the Modern tiled view to select the Default devices.

  1. Right-click on the Speaker icon on the Taskbar
  2. Select Playback Devices
  3. You will see a list of audio output devices on the screen
  4. Right-click the device you intend to use and select Default Device or Default Communications Device depending on your needs.

How do you cope with temporary devices?

A temporary device like a Bluetooth headset or HDMI-connected TV is one you wouldn’t be connecting to your computer all the time.

Here, you make your temporary device the “Default Device” when you start using it. What happens when you disconnect the device, whether logically or physically, is that the computer will fall back to the sound subsystem it last used before you connected the temporary device.

Bluetooth devices

A computer will remember all Bluetooth devices that have been paired with it previously but those that aren’t logically connected to the computer are listed as “disconnected” devices.

If you use a Bluetooth device between multiple source devices, you will have to make sure you disconnect it from the existing source device before you logically connect it to your PC. Some source devices like iOS devices may require you to “unpair” the device rather than logically disconnect it. Then, when you want to use that source device with your Bluetooth device, you have to connect it or pair it again.

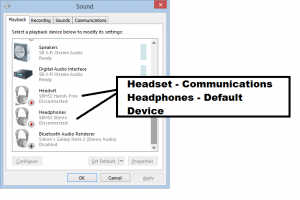
Bluetooth headset as two devices

A Bluetooth headset or other device with A2DP and Hands-Free functionality is represented as two devices

A Bluetooth headset, car Bluetooth subsystem or other Bluetooth with A2DP audio playback and hands-free / communications-headset functionality will be listed as two sound devices – a Headset device which represents its communications functionality and a Headphones device which represents its A2DP music-playback functionality. Here, once you have logically connected the headset, you make the Headset device the Default Communications Device if you just intend to use it as a communications headset for VoIP and similar applications. On the other hand, you make the Headphones in that device the Default Device when you want to play music and other audio content in private and this also makes the Headset in the same physical device the Default Communications Device.

Sony devices with NFC have simplified the process of connecting and disconnecting by allowing you to touch the source device to the output device to connect or disconnect them. But this may only work with computers that have the NFC functionality in them.

To connect a previously-paired Bluetooth device in Windows 8.1

Windows 8.1 has introduced a “connect / disconnect” routine to Bluetooth audio devices so you can properly connect and disconnect these devices without having to go through a pair-up routine.

  1. Make sure the device is logically disconnected from your phone or other source devices and is paired to your computer or set up your Bluetooth device to work in Multipoint mode.
  2. Right-click on the Speaker icon in your Desktop
  3. Select “Playback Devices”
  4. Right-click on the device you want to connect
  5. Select “Connect” to connect the device to your system
  6. Once it says “Connected” under the device’s icon, right-click on the device and select “Default Communications Device” or “Default Device” to suit which of your computer’s sound output will come through that device.

To disconnect a previously-paired Bluetooth device in Windows 8.1

  1. Right-click on the Speaker icon in your Desktop
  2. Select “Playback Devices”
  3. Right-click on the Bluetooth device you are currently using
  4. Select “Connect” to disconnect the device from your system

What can be done here?

Allowing a user to class certain devices as “temporary” devices or “permanent” devices.

A common situation that can happen here is the use of temporarily-connected devices like Bluetooth headsets, USB DACs or HDMI connections. Here, a user could class these as “temporary” devices and the computer determines them as default audio or communications devices when they are connected.

But when they are disconnected, the computer falls back to its “permanent” devices such as its integrated speakers or regular desktop speakers.

Other “default sound device” classes for audio-video playback, games or system notifications

It could be easier to implement an application-specific “default sound device” for applications beyond communications. Here, it could be feasible to implement an application class for audio-video playback or gaming so that you could make sure that system notification sounds don’t play through the hi-fi speakers for example but you have Spotify playing through those speakers.

A Tile or Charm on the Modern view for selecting sound output devices.

The Windows 8 Modern view a.k.a. Metro view could benefit with an option directly selectable from that interface for managing the sound devices. This could be in the form of a Modern-View app downloadable from the Windows Store that puts up a dashboard for managing your sound input and output devices.

Feature Article–DLNA Media Network Series: Getting Started With DLNA Media Sharing

Updated: 13 October 2013
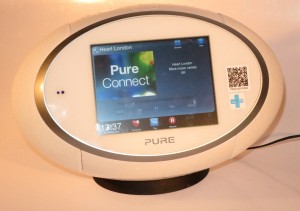
Pure Sensia 200D Connect Internet radioMost of us will end up with a large collection of picture, music or video files on our computers, especially if we use our computers as a large media library. It would be nice to have access to this content without having to copy it out to thumbdrives, SD cards or iPods before we can enjoy it.

As for music, this is more so as we buy music as digital-download files rather than buy physical media and copy it to our conputer’s hard disk. It will also become a trend if we visit video sites that offer video content on a download-to-own basis.

The instructions in this article are more focused with a person who is pressing a regular desktop or laptop computer running Windows, MacOS X or Linux as a media server and may be the way to go when you start out with DLNA especially if you are using a desktop comptuer.

Why share your music, pictures and video the DLNA way?
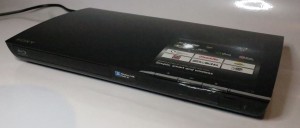
Sony BDP-S390 Blu-Ray Disc Player

Sony BDP-S390 Network Blu-Ray Player – a Blu-Ray player that adds DLNA to an existing TV

An increasing number of dedicated network media client devices are on the market and nearly all of these devices work according to the UPnP AV / DLNA media-client standards.  Most manufacturers who are selling premium table radios are supplying at least one which can pick up Internet radio broadcasts through a home network and these sets are also capable of picking up media made available to them from a UPnP AV media server. We are also seeing an increasing number of wireless speakers that connect to your home network and receive music via Apple’s proprietary Airplay system or the common DLNA system. These units can be controlled by mobile devices equipped with controller apps.

Similarly, DLNA is becoming an important feature for any well-bred “smart TV” or similar video peripheral like a Blu-Ray player or home-theatre system that is connected to the Internet. The ubiquitous Xbox 360 and Sony PlayStation 3 games consoles that every teenage boy dreams of having both work according to these standards and this feature is becoming a requirement for up-and-coming TV-connected games consoles.

By using a DLNA-based setup, you don’t need to install different media-server programs for each network-media client that you happen to buy. In some situations, you may only need to run whatever is supplied with the computer’s operating system.

Setting up your network for DLNA media
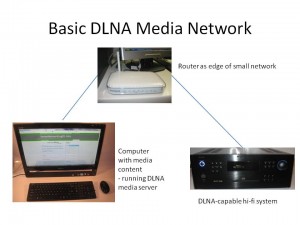
Basic DLNA Media Network

Basic DLNA Media Network

Most home, small-business and some branch-office networks don’t require any revision because they typically are one logical network that spans the premises with the router that exists at the network-Internet “edge” being the device that handles basic network housekeeping. This doesn’t matter whether the network has one or more media segments like WiFi wireless, Cat5 Ethernet or HomePlug powerline cabling.

You will need to know the ESSID and the WEP or WPA security key for your wireless network. This may be obtained through the router’s Web administration page or through your client PC’s wireless-network-setup parameters such as in Windows Connect Now. If you are connecting your DLNA media client to the network via wireless, you will need to make sure that the wireless access point or router is broadcasting the ESSID so you can pick it from a list using the device’s user interface and be sure you are “in reach” of the network. This practice would be important when you run a multi-access-point wireless network or simply to help with making sure that neighbouring wireless networks are set up properly. As well, you will need to be ready to enter the WEP or WPA security passphrase by “picking out” characters from a list using buttons on the device or its remote control.

Some networks such as the public-access networks provided by cafes and the like, including the headline “Wi-Fi Internet” that resort apartment developments provide won’t work well with DLNA. This is due to implementation of a Web-based login system as well as client isolation which doesn’t work with most DLNA-capable devices.

Setting up your PC jukebox or media server software for DLNA
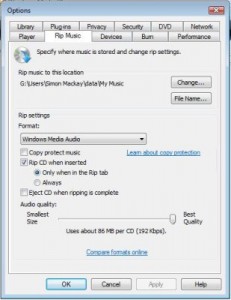
Settings for ripping CDs in Windows Media Player

Settings for ripping CDs in Windows Media Player

If you are running any Microsoft Windows version since Windows XP, you can use Windows Media Player 11 or newer versions as your media server. Before you start “ripping” CDs to the hard disk, make sure the program is set to rip without DRM (Copy Protect Music checkbox in the Rip Music options tab is cleared) and that it is set to rip CDs at 192kbps WMA or 320kbps MP3. The reason I would rip at these settings is to be assured of sound reproduction that is as close to the CD album as possible. You may use the MP3 codec for maximum compatibility or WMA for efficient storage if your DLNA media clients can handle WMA.

As well, you will have to set Windows Media Player 11 to automatically permit devices to benefit from its media library. This is done by going to “Library”, then selecting “Media Sharing” and clicking on “Settings”. The “Media Sharing – Default Settings” dialog box will open whereupon you make sure that the “Allow new devices and computers automatically” checkbox is selected.

If you don’t use any sort of ratings in your media as far as sharing is concerned, you may have to select “All ratings” in both the “Star Ratings” and “Parental Ratings” options. This will make sure all media is available for all of the devices.
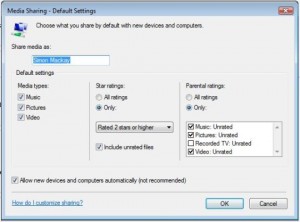
Windows Media Player Sharing settings for DLNA

Windows Media Player Sharing settings for DLNA

For your pictures and videos, you will have to add the folder that contains your photos to Windows Media Player’s media library. Similarly, you will have to do this for your video folders.

Linux users have access to a large plethora of media-server software such as TwonkyMedia and TVersity as well as a large collection of open-source media-server software. You will still have to use a CD jukebox program set up to rip CDs at 320kbps MP3.

Apple and Windows users who use iTunes as their CD jukebox but will need to use either TwonkyMedia, PS3 Media Server or NullRiver MediaLink. They will need to make sure that the iTunes directory is the one to be provided by the media server. Again, iTunes will need to be set up to rip at 320kbps MP3 for best compatibility and quality. The program may support transcoding to lower bandwidth settings for use whenever music is being transferred out to an iPod.

Infact, I have written up some more detailed information about setting up an Apple Macintosh computer to work as part of a DLNA-based home media network because of the increasing popularity of these computers. The article, “UPnP AV (DLNA) for the Apple Macintosh platform”, covers other media server programs that exist for that platform.

The media server would need to be set up to work with the folders that are being used as the primary folders for music, photo and video storage.  I have explained how to go about this for your music, especially if you use iTunes or Windows Media Player. For your photos and videos, you simply add the folders used by your photo management and video management software to store your images.

As well, if you, a friend or associate uses SkyDrive, Dropbox or similar cloud-based storage services to share a media collection, you may need to copy the media that you received through the sharing to your media library to share them via DLNA. Similarly, images shared through the Social Web may need to be downloaded from the service to your media folder.

The DLNA media-server programs typically index music files according to artist, album, track, genre, and some may support separate identification of composers, contributing artists (important for soundtracks and compilation albums) and other metadata for pictures and videos. Some, like TwonkyMedia, allow for alphabetical clustering and other efficient sorting arrangements. This is typically because UPnP AV / DLNA allows for the server to determine how it presents the library to the client devices.

As far as playlists are concerned, they will typically be listed in a “Playlists” collection with each playlist being its own collection in that tree. By having a playlist as a collection of tracks rather than a reference to a playlist file, it means that the media clients don’t have to be compatible with the playlist file format that the jukebox program works with.

Some of the media servers like Windows Media Player 11 or TwonkyMedia support transcoding to common file formats for situations where a DLNA media client cannot handle a particular media type. This can come in handy for file types like WMA or high-definition audio files which aren’t handled by all UPnP AV media players.

Setting up the DLNA clients

Enrolling the DLNA clients in to your network

You will need to make your DLNA media client become part of the network. This can be a simple task of plugging it in to your Ethernet network segment or into your HomePlug powerline network segment using a HomePlug-Ethernet bridge.

Integrating wireless-enabled DLNA clients to the wireless network

If you are connecting your wireless-enabled DLNA media client to the WiFi network, you will need to configure it for this network. This will require you to enter the device’s setup menu and select the option pertaining to wireless network setup. Then you get the device to search for your network’s ESSID which is commonly referred to as the SSID, Network Name or something similar. Once your device has detected your wireless network, you will be prompted to enter the WEP or WPA security passphrase. At this point, enter the passphrase in to the device. These procedures will have to be done as mentioned in the “Setting up your network for DLNA media” section.

Nearly all of the recent DLNA network media clients may use a “quick set-up” method like Windows Connect Now or WPS. This will typically involve either transferring a USB memory key between a Windows XP or Vista wireless-equipped notebook computer and the device; or registering the device with the wireless router. This procedure may be as simple as pressing a “register” or WPS button on the router and the device or copying the device’s PIN number (which would be on the device itself or in a WPS setup option in the device’s setup menu) in to the wireless router’s setup menu.

If you use MAC-address filtering on your wireless router, you will need to register the DLNA media device as an “accepted” network device. This will require you to copy the device’s wireless MAC address, which will be on a sticker attached to the device itself, in to the router’s trusted MAC-address list.

Making sure the DLNA clients detect the media server
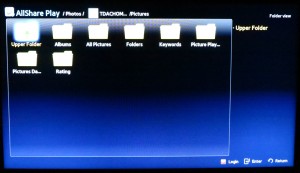
DLNA media directory provided by server PC

DLNA media directory shown on TV screen as provided by PC

You will need to make sure that the media server program is running on the PC that has the media that you are sharing. Most such programs may run a media server component as a background task while the computer is fully on but some may require the jukebox program to be running all the time. Similarly, you may bave to stop your computer going to sleep or hibernate mode under automatic control for this to work properly.

Another thing to check is the desktop firewall software. This should be set to allow the media server software outbound and inbound access to the network as a server. The Windows Firewall software that is part of all Microsoft desktop operating systems since Windows XP Service Pack 2 makes this easy by allowing immediate access to Windows Media Player or asking you if you want to allow the application to have network access. Other third-party firewalls may require the server application to be allowed Internet access by you adding the software to their application “white lists”.
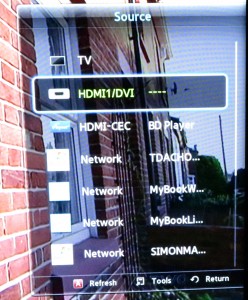
DLNA collections listed as sources on the TV

DLNA content collections listed as sources on a Samsung Smart TV

You may have to select “Network Music”, “PC Music” or something similar on most network-enabled music devices like Internet radios in order to gain access to the music library that you have made available.  Then you select the “hostname” of the PC, which may be commensurate to its standard computer name or its primary owner’s name. The DLNA client will then show the media type that it can work with. You then select that type and use the controls to select the media you are interested in.  Some devices like the recent crop of Samsung Smart TVs list each DLNA server on the home network they are connected to either as a source alongside the integrated TV tuner or external connections on that device.

Summary

Once you have your network and media-server computer set up properly, you can work with providing music and other media to network media receiver devices without much hassle.
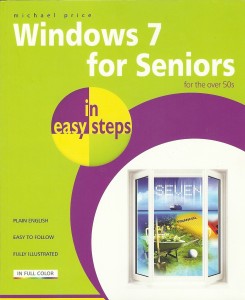
Book Review–”Windows 7 For Seniors” by Michael Price

A lot of my computing-support work has been to help many friends of mine who haven’t had much exposure to computers with many different computing skills. Typically, they would buy a Windows-based desktop or laptop or have their business buy one of these machines, but I often end up having to show them through various techniques associated with using this computer.

Windows 7 For Seniors In Easy Steps

Publisher Easy Steps Limited
ISBN 978-1-84078-386-5
Recommended Price US$14.99
GBP£10.99
CN$16.95

I had come across this book title and others in the “For Seniors” series at Belgrave Book Barn in Melbourne and bought this one for AUD$29.95 tax inclusive. Amazon currently have this book online for US$9.53.

This book is part of the “For Seniors” series of computer books that are pitched at older people who haven’t had much experience with computers. There is a similar book called “Laptops For Seniors” which focuses on the use of Windows-7 laptops rather than desktop computers which this book focuses on.

This book covers Windows 7, whether you install it yourself such as through an upgrade or have the operating system delivered with your new computer, which will be the most popular way to acquire it. Here, it will show what can and can’t be done on different versions of the operating system, especially with the user interface.

All techniques are covered complete with illustrations, easy to read typesetting and reduced jargon. If they need to use jargon, they explain it out properly. Even the pictures used to illustrate Web pages and digital-imaging techniques are based on landscapes and other similar imagery.

As far as Internet connection goes, this book talks about “dial-up” or PPPoE connections where the computer’s operating system manages the connection and pushes the now-common network-based Internet connections to the “Networking” chapter later on in the book. At least they tell users who use the network-based methods to head to that particular page.

When it talks of email use, it describes how to do email using Windows Live Mail or using the free webmail setups. The free webmail setup that is illustrated in this book is the ubiquitous GMail service and it explains how to work your existing account or set up a new account with GMail.

As far as anti-virus programs are concerned, it had suggested the use of free programs like the AVG Free antivirus program. This is even though the new Microsoft Security Essentials anti-malware program had come out recently, but has at least it has exposed a free program that can do the job.

What I have liked about this book is that it covers most computing tasks that can be done with Windows 7 and treats the older novice computer user with respect. Even the title comes across to the reader in a respectful manner. As well, it covers the common usage scenarios that the older people will encounter as they use their new Windows 7 computer.

So I would recommend this book, along with the “Laptops For Seniors” and other books in this series as a computer guidebook for older novice computer users.

Will more Windows-based laptops appear on the “Cool Wall”?

Article

Windows PCs take New York | The Microsoft Blog

My comments

Last year, when Windows 7 and Apple MacOS X “Snow Leopard” came out, a lot more Windows-based laptops and “all-in-one” computers appeared that excelled on their aesthetics as well as their functionality. This has been reinforced with a few of the computers that have come my way for review on this site.

The Envy laptop (product review) has a laser-etched “filligree” pattern on the back of the computer’s lid and on the palm rest whereas the ProBook 4520s (product review) has a “brushed” florentine-bronze finish on those same places. Dell had used a “piano-black” gloss finish on the lid of two of the computers – the Studio 15 (product review) and the Inspiron 13z (product review) while their Mini 10 netbook (product review) had that “gloss-white” finish that was common with previous generations of Apple iPods and Macintosh products for the back of the computer.

If you, like me, are a regular viewer of “Top Gear” which is a very funny BBC TV car show which is pitched at the petrolheads and car enthusiasts amongst us , you may have seen the “Cool Wall” segment on this show (WikiPedia article). Here, there is a very large board that is divided up in to four segments – “Seriously Uncool”, “Uncool”, “Cool” and “Sub Zero”. Here, the Top Gear Boys (Jeremy Clarkson, Richard Hammond and James May) place photos of various cars on this wall according to how cool they think these cars are. Some of us may have noticed a so-called “Super-Cool Fridge” which was a box shaped like a fridge where pictures of cars deemed to be “Super-Cool” went. The Top Gear Boys tended to vary the definition of “coolness” based on the car’s powertrain, body style or other factors, even on whether certain celebrities and high-profile individuals were driving it or not.

If you thought of a “Cool Wall” existing for laptop computers, it may have looked like this with all of the recent-issue Apple MacBook laptops being considered either “Sub-Zero” or in the “Super-Cool” fridge and all of the Windows-based laptops appearing on the “Uncool” side. This is because of the grey finish with that Apple logo glowing on the back of the computer. What is now happening is that the machines from HP, Dell, Acer, ASUS and Sony are now in a position to fill in most of the “Cool Wall”.

This latest crop of laptops that have been shown in the preview show detailed in the Windows PCs take New York article is now showing that more of these manufacturers are showing up with machines that can look as good as the Apple units. Similarly, there have been people who have used Windows-7-based computers to do creative work including music production and this has led to MacOS X “Snow Leopard” and Windows 7 ending up on an even footing as far as desktop computing is concerned.

Some Apple pundits may think that Apple moving away from the Motorola PowerPC processor platform to the Intel processor platform as well as integration of Microsoft technologies into MacOS X may have denied the Apple Macintosh platform its perceived  exclusivity and superiority over other platforms. This is even though Apple had licensed intellectual property from Microsoft ever since they used the Microsoft BASIC code for the Applesoft BASIC interpreter in the Apple II lineup of computers.

At least there is more activity underway with yielding a functionally and aesthetically level desktop-computing field between the two main players.

Understanding the Browser-Choice Screen – Updated

News articles

Microsoft offers web browser choice to IE users | BBC Technology (UK)

Microsoft about to offer Windows users a browser choice screen | The Guardian Technology Blog (UK)

La concurrence entre navigateurs web relancée en Europe | DegroupNews (France – French language)

From the horse’s mouth

The Browser Choice Screen for Europe: What to Expect, When to Expect It | Microsoft On The Issues (Microsoft)

UPDATE: The Browser Choice Screen for Europe – Microsoft On The Issues (Microsoft)

European Union press release about the Browser Choice screen

Browser Choice Screen shortcut (available anywhere in the world)

http://browserchoice.eu

Advocacy site

OpenToChoice.org (Mozilla)

My comments and further information

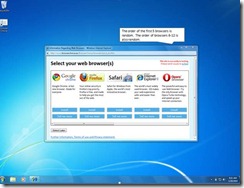
If you run a version of Windows XP, Vista or 7 that you bought in Europe and your default browser is Internet Explorer 8, you may be required to complete a “browser-selection” ballot screen, known as the Browser Choice screen, to determine which browser your computer should run as its default browser. It may not happen if you ran another browser as a default browser, then came back to Internet Explorer 8. It also will happen to European migrants who had brought out their Windows computers with them.

You will have to work through a “wizard” which has an introduction screen then the list of browsers presented in a random order. Once you choose that browser, it will be determined as your default Web-browsing tool every time you go to a Web page. If the browser isn’t installed on your system, the software will be downloaded from the developer’s site and installed in to your system. browser_choice_1_clip_image002_136F9F12

If you run Windows 7, the Internet Explorer “e” logo will disappear from the Taskbar, but you can still find it in your Start Menu. Then, you will be able to reattach it to your Taskbar by right-clicking on the program in the Start Menu and selecting “Pin to Taskbar”.

The Browser Choice screen will subsequently become available as another method of changing default browsers, alongside the options available when you install, update or run a Web browser.

There are some issues you may run into if you move from Internet Explorer 8 to another browser. One is that you won’t have your RSS feeds held in the Common Feed List which works as part of Windows Vista and 7. This may affect the addition of new feeds to programs that make use of the Common Feed List as their RSS data store. Similarly, Windows 7 users won’t benefit from having the tabs viewable in Aero Peek’s multi-window preview. This issue may be resolved with versions of the alternative browsers being built to work tightly with the host operating system’s features, which can be achieved with the Windows application programming interface information being made available by Microsoft.

At the moment, there isn’t a program that adds installed browsers to the shortcut menu when you right-click on a Web link. Such a program would benefit Web developers and bloggers who want to test a page under different browsers or people who want to “spread the Web-viewing load” amongst different clients.

Author recommendations (in no particular order)

I recommend any of these browsers because users don’t have to relearn the user interface if they switch between any of them.

Mozilla Firefox

Internet Explorer

Opera

Safari

A laptop that will directly please the Beo-enthusiasts

ASUS NX90: Bang & Olufsen ICEpower Laptop [CES 2010] | Laptop at Hardware Sphere

Dual-touchpad laptop from Asus and Bang & Olufsen – CNET Crave

My comments

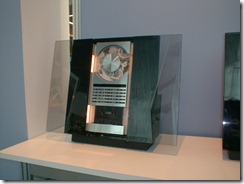
Beosound Ouverture There are those of you who may own or have used Bang & Olufsen hi-fi systems or TVs and have become amazed at the beauty of these Danish design masterpieces. Then when you switch on any of these masterpieces, your experience with them is so special, with such benefits as high-quality sound and pictures and a distinct “feel” and user experience.

You may be wondering when this kind of experience will appear on your computer and may have thought of using the Apple Macintosh as a way of coming closer to this experience.

Now Asus have brought this experience closer to the Windows PC user through the release of a laptop computer that has been designed in conjunction with this company. David Lewis, who is a freelance industrial designer who has designed most of the classic B&O masterpieces such as the Beosound 9000 music system and the Beovision LX and MX series of television sets, has been responsible for the key aspects of this design. Similarly, the pictures of this computer when it was open reminded me of the Master Control Panel that was part of the Beosystem 6500 music system, especially with the black keyboard area and the polished-aluminium palm rest. The screen bezel had the speakers integrated in it and was wider than the keyboard area. This made it have the look of one of B&O’s newer flatscreen TVs.

None of this design is complete without there being improvements in the sound-reproduction department. Here, they also used the B&O’s ICEPower Class-D switch-mode power amplification technology, which is known to be one of the few amplifier designs of this type that yield high-quality sound.  The main reason that the speakers are in the screen bezel, rather than facing upwards from the keyboard area, are to focus the sound at the user. This is the common setup practice for sound playing to the audience and is used for hi-fi, TV sound, desktop PCs and other common speaker-based sound reproduction tasks.

With Asus becoming involved with one of the few “audio companies of respect” to design a high-end laptop computer, this certainly shows that there is effort being taken in improving the sound quality of these computers. If this happens further, the quality of the sound that emanates from this class of computer could be improved rather than us having to stick with the usual weak tinny sound or connect these computers to external speakers for better sound reproduction.

These computers also used a “dual-touchpad” design which is often described as being similar to how a master DJ cues up records on his two turntables. This then allows for increased control of the computer, especially when scrolling through material.

Of course, the specifications and software provision are not dissimilar to a high-end multimedia laptop running Windows 7.

This also means that people who work with the Windows operating system can still benefit from classy and elegant computer designs. Once we see computers like this appearing on the market, there will be the desire to offer something that bit extra when it comes to the business-personal laptop computer.