Tag: Apple Macintosh

Apple AirDrop has a compatibility mode to cater to older Macs

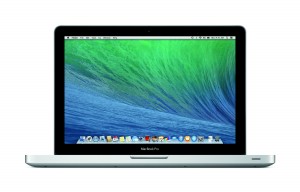
Article Apple MacBook Pro running MacOS X Mavericks - press picture courtesy of Apple

AirDrop Not Working? Use Compatibility Mode for New Mac to Old Mac AirDrop Support | OS X Daily

My Comments

You have two Macintosh computers with one running an older version of MacOS X. Then you want to try that AirDrop file-transfer lark that Apple encourages for its platforms.

Here you may find that your Macs can’t “see” each other on AirDrop. What can you do?

You may have to run AirDrop on the newer Mac in a “compatibility mode” that allows it to behave properly for older interations of Apple’s file-transfer utility.

  1. To do this, you have to open a Finder window on the Macintosh running the latest OS X version.
  2. Then you choose AirDrop on that same Mac and make an attempt to discover older Macs that are enabled and “exposed” for AirDrop. A quicker way in would be to press Shift+Command+R together to start your AirDrop session.
  3. The result will be that AirDrop will show up Macs and iOS devices running suitable versions of their operating systems and open for discovery. If you don’t see the Mac you are looking for – the one which is running an older operating system, click the “Don’t see what you are looking for” text. This will pop up a dialog box with an option to “Search for an older Mac”.
  4. Clicking this will place your Mac in to “compatibility mode” which allows it to discover older iterations of AirDrop. Here, you wait a moment and your newer Mac will show up the Macs running the older operating system as an AirDrop target (destination). Then you begin your file transfer.

If you intend to transfer files between newer Macs or iOS devices, you need to disable compatibility mode. Here, if you are performing a subsequent AirDrop file-transfer and your Mac says that it is looking for older Macs, you just click “Cancel” then look for targets that are based on the new OS X or iOS operating systems.

I would recommend using the Compatibility mode if you are in doubt about the version of OS X the Mac you want to transfer files to or from to is running and you are not sending or receiving files from an iPhone or iPad.

Web page on a big screen–How?

Facebook and Dropbox desktop

You may want to use the large screen to show people how to use social media to promote their business

Do you want to show that Web-based resource to a large group of people?

You may want to do this as part of training for concepts like social media, Web analytics and the like. Perhaps, you may want to show a particular blog post to a group or even show pictures and video from a Website or video platform but the device doesn’t have native support for that.

There are two different methods of going about this:

  • Mirroring – you see the same display on both the device’s screen and the large screen
  • Extended or Dedicated View – you can see what you want to show on the large screen but have a minimal control view on your

I will be listing the options available to you by the different equipment combinations.

Using your home or other small network

This involves using devices that connect to your computer via your home or other small network.

The common requirement for these setups is that the set-top device connected to your display and your host computer must be on the same logical network. It doesn’t matter what medium (Wi-Fi wireless, Ethernet or HomePlug powerline) is used to connect the host computer or the set-top device to your network.

This setup may not work properly if you are attempting to use a public-access network to connect your set-top device or host computer and this network implements Web-based authentication.

iOS + Apple TV

Equipment Requirements:

  • Relatively recent iOS devices (iPad 2 onwards, iPhone 4 onwards, iPod Touch 5th generation onwards) running iOS 6 or newer
  • Apple TV (3rd generation onwards)

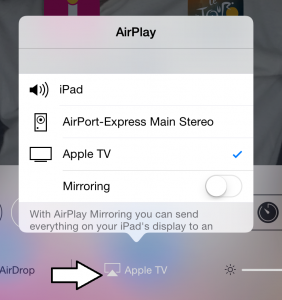
    AirPlay devices discovered by iPad

    AirPlay devices discovered by iPad – when you tap AirPlay icon

Mirror your iPad’s display

  1. Go to Shortcut menu (tap Home button twice, slide to right)
  2. Click AirPlay button and select Apple TV
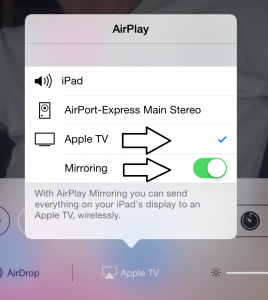
  3. Select Mirroring
  4. Bring up Web page using Safari

Dedicated Display

This requires you to use one of two apps that you buy from the iTunes App Store: AirWeb ($1.99) or AirBrowser ($6.49). These are Web browsers which present the page on to the display that is connected to the Apple TV device and use your device as a tool to navigate the Web page.

Apple TV - Mirroring on - iPad

Set up iPad for mirroring to Apple TV

AirWeb simply has your iOS device work as a mouse with the external display serving as a screen while the more expensive AirBrowser offers a more polished response and has more capabilities.

Apple Macintosh + Apple TV

Equipment Requirements

  • Apple Macintosh to run MacOS X Mountain Lion (10.8) or newer
  • Apple TV 3rd generation onwards

To connect your Apple Macintosh to your Apple TV

  1. Click AirPlay icon on the Menu Bar at the top of your screen
  2. Click the “Connect To AirPlay Display” option and select the Apple TV device you want to use
    This procedure makes the AirPlay-connected Apple TV device work as an extra monitor similar to if you had connected another monitor or projector to your Mac.

Mirrored Display

  1. Select the Mirroring option to show your system’s Desktop display on the big screen
  2. Open the Web page using your preferred browser

Extended or Dedicated Display

  1. Select the Extended Desktop option
  2. Open the Web page using your preferred browser and drag it to the new screen

Google Chromecast + Google Chrome on Windows or MacOS

Equipment Requirements:

The computer you are using to bring up the Web pages with has to run the latest version of Google Chrome browser and have the Google Cast extension installed.

Mirrored Display

  1. Click the Cast square at top right corner on Chrome in Windows
  2. Using the drop-down menu, select the “Cast this screen / window” option

Dedicated Display

  1. Start Chrome and browse to the Webpage you want to show on your large display
  2. Click the Cast icon on the tab and choose the Chromecast you want to show it to

Google Chromecast + Chromecast App on Android

Equipment Requirements

Your Android smartphone or tablet has to run the latest version of the Chromecast app, which you can download from the Google Play store.

Mirrored Display

  1. Run Chromecast app on Android device
  2. Click on the Navigation drawer (hamburger icon) on the Chromecast app’s user interface
  3. Select the Cast Screen option
  4. Select the Chromecast that you want to use, The Android device’s screen will appear on your larger screen
  5. Use Google Chrome or your favourite Android Web browser to load your site

Dedicated Display

Like the iOS platform, you will have to install a browser that shows its output on the external screen. Here, your Android device will be the control surface while you see the Webpage on your large screen.

For Android users, you will need to purchase and install the Web2Cast app which costs $1.99.

Directly-connected screen

These setups require you to connect your host computer directly to the display device, preferably via HDMI. It is a task you can perform easily with the regular-computer platforms i.e. Windows, Macintosh or Linux because this practice is performed more commonly in offices for multi-screen displays or to show presentations using a projector.

Therefore the procedure to use a directly-connected external display to show that Web page comes across as being simple.

The setup procedures are very consistent across the different major versions of these operating systems.

If you are using some “all-in-one” desktop computers, you may find that an HDMI port may be used as an input port or output port. This functionality is typically to allow one to use the computer’s display and speakers with another video peripheral like a games console or set-top box. Here, make sure that this port is set up to become an “output” port for use with external displays when you are showing a Web page on a larger screen that is connected to this HDMI port.

Windows computer

Equipment preparation

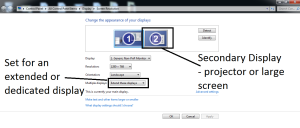
Display setup for a secondary display as a dedicated screen - Windows 7

Display setup for a secondary display as a dedicated screen – Windows 7

Connect the external display to Windows computer and make sure that Windows detects the presence of the display. Here, you may have to use Display Settings to verify that this display is properly detected. You may also have to make sure the external display is switched on and the correct input is selected.

Mirroring

  1. Right click on the Desktop and select “Display Settings
  2. Select Duplicate These Displays to see same screen
    Most laptops may allow you to invoke this setup by pressing Windows+P together
  3. Load the Webpage on your preferred Web browser and browse it as normal

Extended Display

  1. Right click on the Desktop and select Display Settings
  2. Select Extend These Displays
  3. Drag the screen which represents the external display, which should be marked as 2, to the top or right of your main screen. This is a way to help you remember that you are setting up a “big screen”.
  4. Load page on your preferred Web browser, and drag to “big screen” before you browse it.
    Windows 10 makes this process easier by allowing you to click the square “All tasks” button where there will be icons representing both the screens. Then you just drag the Web browser to the “other” screen

MacOS X

Equipment Preparation

Like with Windows, connect the external display to your Mac and make sure that MacOS X detects the presence of this display. As well, make sure that the correct source is selected on your display.

Mirrored Display

  1. Click the System Preferences menu in the Apple menu
  2. Select the Displays menu in the View menu
  3. Check Mirror Displays to show the Desktop on big screen
  4. Open the Web page in your preferred browser

Dedicated Display

  1. Click the System Preferences menu in the Apple menu
  2. Select the Displays menu in the View menu
  3. Uncheck Mirror Displays for extended desktops
  4. Drag the newly-created screen to the top of your existing screen and make sure that your existing screen is kept as the primary screen. This is a way to help you remember you are setting up and using a “big screen”.
  5. Open the Web page in your preferred browser and drag it to the external display.

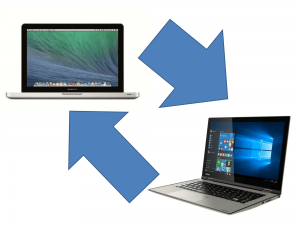
Moving between Macintosh and Windows

Article – From the horse’s mouth

Use these resources together if you are working both Windows systems and the Apple Macintosh.Working on both Macintosh and Windows

Microsoft

Making The Switch: MacBook to Microsoft Surface Book

Apple

Switching PC Habits

My Comments

Increasingly Windows computers have reached or eclipsed the kind of aesthetic and stability calibre associated with Apple’s Macintosh computers especially the MacBook portable-computer family.

But a person who works on the Apple Macintosh platform will typically find it hard to move their computing life over to a Windows-based computer. This situation may also be of use for anyone who is working a “multi-platform” environment where they maintain a Macintosh and a Windows-based computer.

Microsoft’s article is focused on their new Surface Book but the instructions apply more or less to anyone who is moving from MacOS X to Windows 10 or a Mac user who is wanting to be familiar with the new Windows 10 operating system or know how it works.

Apple does provide similar resources for people who are used to the Windows platform moving towards the Macintosh platform ever since people moved from Windows because of Windows Vista.

Most of the basic keyboard shortcuts are:

Apple Windows
Undo Command-Z Ctrl-Z
Select All Command-A Ctrl-A
Cut Command-X Ctrl-X
Copy Command-C Ctrl-C
Paste Command-V Ctrl-V
Save this document Command-S Ctrl-S
Print this document Command-P Ctrl-P
Refresh Webpage / screen Command-R Ctrl-R or F5
Switch between open programs Command-Tab Alt-Tab
Hide current program Command-H
Command-M (Minimise)
 Windows-(Down Arrow)
Hide all programs  Command-(Mission Control) Windows-M
Stop current program Command-Q Alt-F4
Force a program to stop Command-Option-Esc

Macintosh

The Command key on the Macintosh is the one with a snowflake and / or Apple symbol on it.

The “Mission Control” key will be the F3 key on recent equipment or F11 on older equipment.

Windows

The Windows key on Windows computers has a window icon and / or the Start word on it.

How to “save as” on Mac OS X Lion and newer versions

Article

How to enable “Save As” in Mac OS X Yosemite | AppleWorld.Today

My Comments

Those of you Mac users who worked with a previous version of Mac OS X may have been able to use the “Save As” command to save that document under a different name or in a different Folder. But this feature is missing on Lion and newer versions of Mac OS X and may confuse those of you who “climbed the operating-system ladder” by installing subsequent versions of MacOS X on your Macintosh.

But you can bring back this function through a procedure that is very simple. Here, you bring up the File menu as normal then press the Option key on your keyboard where the option that was previously “Duplicate File” becomes “Save As”. Click on this or subsequently press CommandShiftS together to bring up the Save As dialog box so you can save it under a different name.

This function is important if you have to create a new different version of that document or wish to save it in a particular location like a removable drive or a special folder and you realise you needed to do this after the fact.

Regular operating systems and their vulnerability to security threats

Article

Which Is More Vulnerable To Viruses And Hackers: Windows 10 or Mac OS X? | Gizmodo

My Comments

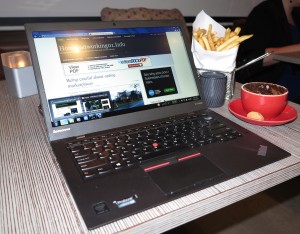
Lenovo ThinkPad X1 Carbon Ultrabook

The Lenovo ThinkPad X1 Carbon – an example of a laptop based on a regular computing platform

During the 2000s, the personal computing scene focused on so-called “regular” personal computers i.e. desktop and laptop computers that ran a desktop-grade operating system. The main platforms were the Windows platform heralded by Microsoft and with hardware made by plenty of other manufacturers and the Macintosh platform that was made by Apple. Of course, there were a few personal computers that ran one of many open-source Linux distributions which were effectively UNIX.

There was the issue of security risks magnified due to an increased amount of personal and business computing time spent online through the Internet. In most cases, especially with the Windows platform, these risks were mitigated using a desktop or endpoint security program installed on the client computer. Although I have constantly seen the Apple Macintosh platform at risk of security exploits, that platform wasn’t at risk because there were fewer computer users using that platform.

Enter Windows Vista. This operating system had improved security features like operating as a regular user unless necessary but these were tacked on to the Windows XP codebase. This led to poor performance and computer users saw the value of switching to the Apple Macintosh platform for regular computing needs with some even using Apple’s iWork office tools as a way simply to dump Microsoft.

This led to the Apple Macintosh platform becoming more vulnerable due to its increased popularity and the use of “write once run anywhere” code like Java. Apple had to pull their finger out to improve the Macintosh platform’s security and, like Microsoft, engage in regular software updates and patches.

Improvements

Major upgrades for pennies’ worth or free

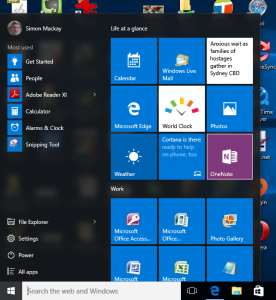
Windows 10 Start Menu

Windows 10 – a free upgrade from Windows 7 or Windows 8.1

Microsoft and Apple had even started to offer newer iterations of their operating systems to home users and small businesses at prices that would represent chump change or, later on, offer these iterations for free.

Apple started the ball rolling with Mac OS X for pennies’ worth starting with OS X Lion and for free starting with Mavericks. Subsequently Microsoft used Windows 8 to facilitate a software upgrade for pennies’ worth and used Windows 10 to instigate a free software upgrade program.

The major upgrades typically had security improvements like creation of app stores and newer secure codebases.

Blind updates for security patches

A way software developers keep their software going strong is to deliver updates and patches that rectify software bugs and allow the software to improve in performance. The delivery of these updates is being used to harden the software against known security exploits, often as soon as these holes are discovered.

Windows Update - one stop shop for software patches along with automatic delivery

Windows Update – one stop shop for software patches along with automatic delivery

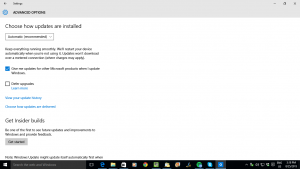
This process typically involved users finding patches or newer code on the developer’s Website but Microsoft and Apple have put an end to this. Initially they set up a “one-stop-shop” program for downloading these updates including any peripheral-driver updates but have improved on this by providing for “blind updating”. This is where the operating system automatically downloads and installs these patches as soon as they become available.without you needing to do anything except, perhaps, reboot the computer when prompted.

Microsoft and Apple are even working on having these patches become effective once they are installed without you needing to reboot your computer. This is being achieved in the newer operating-system variants and with some newer patches.

The option for secure boot

Apple implemented in the Macintosh standard firmware a way to only let MacOS X boot on their Macintosh computers and this provided a sense of security because it can only allow these computers to run Apple-authorised code.

Microsoft and Intel are now implementing this through UEFI and Secure Boot which allows for authorisation of operating systems and pre-boot software that runs on a computing device. This has been considered controversial because it would wrest control of the computer from uses who may want to deploy Linux, especially a custom Linux distribution or wish to run with a dual-boot setup.

App stores and walled gardens

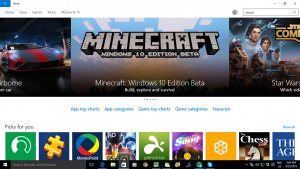
Windows 10's own app store

Windows 10’s own app store

Another weapon that Microsoft and Apple are deploying comes from the world of mobile computing where mobile operating systems implement an “app store” which is a one-stop software “shopping mall”.

Like a suburban shopping mall with its physical goods, these app stores have tight controls on who can sell their software there. Here, the software has to be provided by an identifiable developer and approved and audited by the operating system developer who runs that app store.

There is also a requirement for the software to be sandboxed and have access to certain parts of the operating system rather than having full run of your computer.

Another factor that is also considered important is that if an application “does the right thing” by its users and the operating-system vendor, it is typically highly recommended or featured such as being given an “editor’s choice” or put in the “spotlight”. This gives the program increased exposure which attracts more installations and more purchases. As well, there are user-review mechanisms where people can uprate or downrate the software.

But both the Macintosh and Windows platforms require the ability to work with established software deployments that are typically installed via removable media or a download from the developer’s site. This is due to their legacy where people installed software from floppy disks or CDs or downloaded software from bulletin boards and download sites.

Windows 10 is providing a way to harden things further when it comes to this software in the form of Device Guard. This is a form of sandboxing which allows only certain programs to run on a computer but is made available to the Enterprise Edition only. It is because the process for setting up this whitelist would be considered very difficult for householders, small businesses and community organisations.

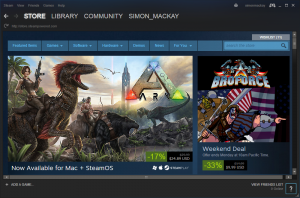
Steam - one of the most common games managers

Steam – one of the most common games managers

For games, major games studios are implementing their own app stores and games delivery systems in order to allow for cross-platform game and supporting-content delivery. Here, they want regular-computing gaming to have that same level of confidence associated with console or mobile gaming. This is although Apple and Microsoft deliver games through their app stores. The best example of this is Valve’s Steam online games shop but there are others like EA’s Origin.

Conclusion

What is happening is that for both the Windows and Macintosh computing platforms, they are being made more secure and malware-resistant and it is becoming a race between Apple and Microsoft to keep the regular computing environment as safe as a mobile computing environment.

Tech support scams now affecting the Macintosh platform

Article

Mac users: Beware of increased tech support scam pop-ups | MalwareBytes Unpacked blog

My Comments

The Apple Macintosh has been seen by its users as a safe regular-computer (desktop / laptop) platform mainly because it didn’t have as much of a foothold as the MS-DOS / Windows platform. Now this platform is starting to appeal to malware authors due to the fact that more people are heading towards it as a regular-computer option along with the fact that Microsoft has been continually hardening the Windows platform.

Windows users had suffered the bane of various unsolicited “tech-support” scams ranging from Website popups through to phone calls. Now the Mac platform is under attack because these scams implement JavaScript to take over the machine in a similar way to what happens with Windows. Also the same scam targets iOS devices due to their use of Safari with the same codebase and JavaScript implementation.

Of course, don’t follow through with the prompts to call these numbers or download the software because this involves activities like malware downloads or paying exorbitant fees to dodgy overseas-based businesses. But what do you do to close these nag screens?

On the Macintosh, you would have to kill the browser session by using the Force Quit routine. The best way IMHO to do this is to press Command+Option+Shift+ESC together if the browser has the foreground. You can also press Command+Option+ESC to bring up the Force Quit menu and use the mouse or trackpad to select the application to stop. The reason I suggest using the keyboard shortcuts is because some of the nuisance dialog boxes can effectively “take over” the pointing device.

iOS users can stop the browser by double-clicking the Home button and swiping the window representing the troublesome app to kill that app.

On both platforms, you clear out the browser cache and history to stop the fake tech-support Website cropping up. This is more important for the iOS platform because if you open up Safari, it will come up with the last-opened Website. For the OS X implementation, you click the “Clear History” option in the “History” menu, which also clears the cache. For the iOS implementation, you go to the Safari option in the Settings app and then tap the Clear History button to stop it from reopening.

The current direction for computing versus the Post-PC direction

Article

So What Ever Happened To Post-PC? | Gizmodo

My Comments

What was the “Post-PC” vision?

Samsung Galaxy Note 4 press picture courtesy of Samsung

Samsung Galaxy Note 4 – an up-and-coming Android smartphone

The 2000s era saw the use of larger computers for regular Windows-based or Macintosh-based computing. Steve Jobs who was Apple’s visionary leader talked of the “Post-PC” era with computing centred around mobile devices such as the iPad and iPhone and “cloud+app” services which benefited from data held at one or more data centres and accessed using a lean client-side app running on the mobile device.

Current trends

Mobile-platform tablets

But current trends are leading towards mobile-platform devices like the recent iPads and Android tablets having the increased capability, and running more of the native apps with increased local functionality. Some of these apps can even run under their own steam without the need to regularly gain access to data.

Regular-platform computers being more compact, powerful and portable

9mm fanless tablet concept with regular computing power - Press image courtesy of Intel

9mm fanless tablet concept with regular computing power

The regular-computer scene is heading towards equipment that is more compact, powerful and portable such as an increased variety of portable form-factors like the Ultraboooks and the convertibles or detachables. Even the desktop computers are becoming more compact with baseline equipment that is the size of a large book or an increasing number of “all-in-one” computers where the computing power is located in the monitor like the iMac.

Gaming laptops and mobile workstations

Some manufacturers have released laptop computers that are best described as either “gaming laptops” or “mobile workstations”. These have been highly optimised for performance and highly-responsive graphics that is required of highly-advanced graphics software or “full-on” games. Previously, this class of performance was only relegated to desktop computers but is showing up in the portable class of computers.

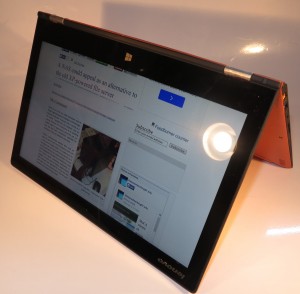
Lenovo Yoga 2 Pro convertible notebook - as a tent card

Lenovo Yoga 2 Pro convertible as a tablet

It is augmented with steps being taken to improve quality control when it comes to writing games for regular-computing platforms. This was because of issues relating to games studios turning out inefficiently-coded games that needed more to run or Apple and Microsoft not becoming proper gatekeepers for quality-control logos that affect game software.

A return to the late-1980s multiple-platform computing era

What was the late-1980s multiple-platform computing era?

The late 1980s microcomputing era saw the presence of multiple computer platforms in wide circulation: DOS/Windows/OS2 (IBM Compatible), Apple Macintosh, Commodore Amiga, Apple II and Atari ST. Different people preferred the different platforms for particular applications like having DOS/Windows for business-information-handling, the Apple Macintosh for desktop-publishing and the Commodore Amiga for gaming, desktop-video or interactive-user-interface design.

The multiple platforms that exist nowadays
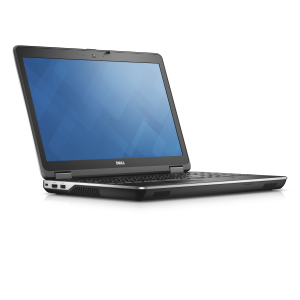
Dell Precision M2800 Mobile Workstation courtesy of Dell USA

Dell Precision M2800 – an example of a mobile workstation

Now, we are starting to see the same number of regular and mobile computing platforms in circulation: Microsoft Windows, Apple Macintosh, Linux, Google Chrome OS, Apple iOS, and Google Android. The mobile platforms, especially Google Android, are being implemented in a desktop-style user environment with, for example, Philips releasing monitors that can run as standalone Android computers. Similarly, the Apple iOS and Android tablet platforms are appealing as platforms for baseline secondary computing tasks through people equipping tablets with USB or Bluetooth keyboards.

As for the hardware, we are seeing equipment that is based on the Intel x86/x64 microarchitecture or the ARM RISC microarchitecture with some specimens of both microarchitectures moving towards 64-bit variants of that microarchitecture. Some of these platforms are even showing up with hardware that has impressive graphics and gaming prowess such as the NVIDIA Tegra processors and the newer Apple processors for the mobile platforms along with Intel and AMD integrated-graphics systems that can stomach intense graphics work for the regular computing platforms.

Philips S221C4AFD Smart All-In-One Monitor - press image courtesy of Philips

Philips Android-driven monitor

It is becoming increasingly common for households to become less “pure-play” when it comes to choosing the platform they use for their computing devices. For example, I have seen an increasing number of households use a Windows-based desktop or laptop along with an iPad and either an iPhone and/or an Android smartphone.

Business computing is facing this reality with having to implement “BYOD” (Bring Your Own Device) information-technology solutions and utilise “mobile-device-management” solutions and “corporate app stores” to assure that these devices are working to spec for secure computing in the workplace. It is also a challenge that is facing schools, airlines, hotels and others who are providing computer resources for the general public.

I do see it as a pity that Apple doesn’t seem to play properly and smoothly with other platforms, rather users either load up their Apple devices with apps that “bridge the gap” by offering DLNA functionality for example, or work around the various incompatibilities by using cloud services for example. Similarly, peripheral designers have to make sure their devices do pair properly with the Apple devices along with the Windows or Android devices that may support advanced paring techniques like NFC.

Conclusion

It is so easy for one computer visionary to determine what is to be the “status quo” but as the industry evolves with different computer devices and platforms and makes these devices and platforms more capable, it is hard to really determine what is to happen for consumer and business IT.

Macintosh users–keeping your computer secure

Article

Apple users: Try these five tips for better Mac security | Naked Security

My Comments

Just lately, I have heard over the dinner table that a few Apple Macintosh computer users have been facing issues with malware and other software with questionable behaviour. Some of these attacks were mainly “overlay attacks” that worked with the user’s Web experience.

What previously used to happen was that Windows computers were the target for viruses, worms, Trojans and similar malware due to them having a stronger installed base compared to the Apple Macintosh platform. This caused some people to switch to the Apple Macintosh platform because of less malware threats occurring on that platform.

But even in 1989 when I was made aware of the virus issue, the awareness about viruses and similar malware was targeted across all personal-computing platforms that were in operation through that year i.e. the MS-DOS-based IBM PC, the Macintosh, the Commodore Amiga and the Apple II amongst others. At that time, there was awareness about keeping a “clean” system and keeping control over how you shared your files.

Similarly, we started to see the arrival of signature-driven anti-virus programs that could scan hard disks or removable “floppy disks” for viruses. Some of these initially scanned the boot sector but moved towards checking files for these viruses. They became a very important part of every computer user’s software toolkit as the virus activity increased. But through the 1990s as the Internet came on the scene, the malware activity was more focused on the MS-DOS / Windows platform with Apple Macintosh users not having as much of that activity. At that time, the MS-DOS / Windows platform was effectively the computing platform for most personal and business computing applications including gaming with the Macintosh being used by creative types due to its inherent prowess with multimedia.

This lead to a sense of complacency concerning secure computing for the Macintosh platform on both Apple’s and their users’ part. Microsoft took proper steps in updating and patching the Windows computing platform since 2001 with the arrival of Windows XP and hardening that platform with the arrival of Windows Vista and 7. Similarly, Windows users jumped over to the Macintosh platform for their home computing because they saw Windows as being slow and virus-ridden; and also due to the arrival of Apple’s iPod and iPhone products.

Lately, the Apple Macintosh has become the target for various malware campaigns including “write-once run-anyone” attacks based on Adobe Flash and Java software platforms. This is due to the increased new-found popularity that the Macintosh has acquired and, in another context, activities involving the Internet, networks or removeable media are still being seen as vectors where the Mac can share Windows-targeted malware.

Upgrade to Mavericks if you can

To stay secure, Apple Macintosh users need to upgrade to the 10.9.2 Mavericks version of MacOS X, with this version being equipped with various security improvements in a similar way to what Microsoft did with Windows 7. This can be done with newer Macintosh computers and for free with Macs running Lion or Mountain Lion versions.

Keep the operating system and software up-to-date

As well, as part of proper computer housekeeping, it is important to keep the Mac “lock-step” with the latest operating-system updates. Here, you can use the Apple-Menu / System Preferences / App Store option to have the Mac check for and download the updates from Apple by itself; or go to the Apple-Menu / Software Update menu to cause it to check for updates. The latter option can be of use with a MacBook that is used “on-the-road” and you are able to check in at a Wi-Fi hotspot or other Wi-Fi network.

Similarly, keep Adobe Flash and Oracle Java up-to-date by using options in the Apple-Menu / System Preferences menu to check for automatic or manual updating for these programs. If any other “write-once run-anywhere” software-development platforms show up on the Macintosh platform, treat these like you would with Adobe Flash – they can become a path for distributing malware that “hits across all platforms”.

This also applies to the application software and utilities you also run on your Mac and, here, you go to whatever software-option menu there is to check for software updates or cause automatic software updating to occur.

Don’t enable Java if you don’t need it.

As for Java which appeals as a “write once run anywhere” coding system, don’t enable it unless you are intending to run a known trusted program that uses this language or are developing Java software. OS X Mavericks comes with this deactivated by default but you can deactivate this in your Web-browser option menus.

Take advantage of full-disk encryption if you have confidential data

Another practice you could use for all computer platforms is to take advantage of full-disk encryption. Most operating systems provide this as a function that you can use with MacOS X providing it “across the board” for recent iterations in the form of FileVault. Similarly, a commercial or open-source third-party full-disk-encryption tool can do the job better than what the operating system provides.

These tools encrypt and decrypt on an “on-the-fly” basis and mainly protect the local volumes on the computer with some business-tier USB memory keys providing a similar full-disk encryption for their own volumes.

Use a good anti-malware or desktop security program for the Macintosh

Check for and use a good anti-malware program for the Mac platform like Kaspersky, Sophos, AVG or ClamXav . As well, keep the anti-malware program that you run on automatic update in order to keep them ahead of the malware game.

It is also worth noting that the good programs in this field can also keep the Macintosh from being a conduit for spreading Windows-based malware around the Windows platform. This is whether the files are passed through email, message-based file transfers, network-hosted / Internet-hosted file sharing points or removeable media.

Another sign of a good anti-malware program is the ability for it to scan your computer’s primary storage (RAM and paging files) to protect against malware that works on data being held in this space. This is because most data normially encrypted on a secondary storage or in transit is kept “in the clear” in the RAM and is vulnerable to RAM-scraping malware.

Keep stock of what is installed on your Mac

Another way malware gets on to computers is when you load software “in a hurry”. Typically what can happen with some freeware tools is that they can “push” browser extensions and toolbars or utilities of doubtful provenance on to a computer. This can lead to it underperforming or malware creeping in and taking over the system.

If you download from the Mac App Store or similar download locations, check for the app’s reputation by looking at comments, star-ratings and the like. This is something I have raised previously in relation to app stores for mobile-computing platforms along with the newer App stores that are opening up for regular computers and dedicated-purpose devices.

With your browsers and other applications, keep tabs on what plugins, extensions, toolbars and other add-on modules are running and if you notice something being awry about the module since you installed, don’t hesitate to remove it. A good article on this topic concerning uninstalling applications on the Mac is this one on MacRumors.com which highlights that dragging an application bundle to the Trash may not be the only method available.

Conclusion

The main issue here is that the Apple Macintosh is a computing platform vulnerable to malware and will become more so as it be becomes more popular as a mainstream computing platform. So you would need to continue with proper computer-housekeeping practices to keep your Mac from these threats.

Quality control to arrive for regular-computer gaming

Article

PC Gaming Alliance Launching Certification Program in March | Tom’s Hardware

From the horse’s mouth

PC Gaming Alliance

Program Page

My Comments

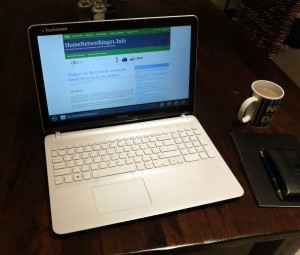
Sony VAIO Fit 15e on dining table

Quality is now part of the games experience on these computers

A major part of the personal computer’s history has been about integrating the playing of games on these computers and every personal-computer platform had ended up with many different game titles available in a retail context or, in some cases, available for download. This has been the basis for heroes like Leisure Suit Larry and Carmen Sandiego in the late 1980s and early 1990s let alone people practising flying and golfing or solving puzzles on these computers as a spare-time activity.

There are those of us who still like to game on with our regular computers, be they desktops, all-in-ones or laptops or that they run Windows, MacOS X or Linux. This is although mobile devices like smartphones and tablets, along with games consoles of the XBox One and PS4 variety are being viable alternatives to the regular computer. Similarly, newer tablet and touchscreen-equipped convertible computers have been showing up, working under Windows 8.1 which is still considered a “regular-computer” operating system. This has extended to the likes of the Sony VAIO Tap 20 and its ilk which have a strong gaming appeal.

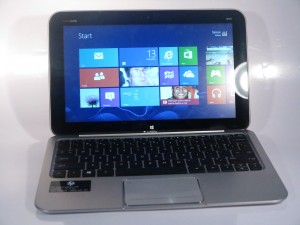
HP Envy X2 detachable-screen hybrid tablet-notebook computer

HP Envy X2 detachable-screen hybrid tablet-notebook computer – now to be a viable games machine

Of course, a significant amount of time on a regular computer is spent on various games whether they be conquering many worlds, setting up many empires, mimicking real life or engaging in car races or test flights. And I wouldn’t put it past flight attendants who work the long-haul flights to see these games being played on laptops through these flights.

But, unlike the games consoles and the mobile platforms where there is oversight through the companies behind these platforms, there hasn’t been a strong level of oversight when it comes to game quality. Some people have continued to raise issues about EA’s software quality especially in the light of the recent SimCity fiasco.

Sony VAIO Tap 20 adaptive all-in-one computer as a desktop

These “adaptive all-in-one” computers like the Sony VAIO Tap 20 are ending up as games machines

There have been a few quality-assurance programs out theire like the Microsoft “Games For Windows” program and Apple’s developer-assistance program for the Macintosh platform along with Valve’s Steam ecosystem. But the PC Gaming Alliance want to have a quality-assurance platform that is open and not bound to a particular developer in order to keep with the open nature of the regular-computing platforms.

One technical goal is to have a regular computer paint the graphics for a game to the 720p HD specification at 30 frames per second under load as a median requirement. This could allow the game to run on a modest processor like the Intel i5 processors which could typify a modest computer. Similarly, games titles that benefit from a console-style game controller as their user interface should benefit from these controllers and the games should take advantage of large-screen displays. The latter requirement would come in to its own with someone who wants to connect their laptop to a large-screen TV or projector to get the most out of their game.

Personally, I would like to see this apply across Windows, Macintosh and Linux builds of a game title so that no matter the platform, there is consistent software quality across the games. The companies representing these platforms could then be part of this alliance in order to encourage quality games development for their platforms.

Similarly, the games would have to be as though they are a part of the operating environment like what used to happen with Sierra’s and Broderbund’s output where these games worked smoothly with their host platform, exploiting what these platforms offered. It could also encompass network-game compatibility whether online or local-hosted and encompass multi-platform games where console players cam play alongside regular-computer or mobile-device players or play part of a game across different devices.

Could this be a chance for EA and others to lose their tarnished image when it comes to software quality for regular-computer gaming?

Feature Article–DLNA Media Network Series: Getting Started With DLNA Media Sharing

Updated: 13 October 2013
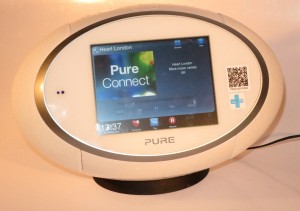
Pure Sensia 200D Connect Internet radioMost of us will end up with a large collection of picture, music or video files on our computers, especially if we use our computers as a large media library. It would be nice to have access to this content without having to copy it out to thumbdrives, SD cards or iPods before we can enjoy it.

As for music, this is more so as we buy music as digital-download files rather than buy physical media and copy it to our conputer’s hard disk. It will also become a trend if we visit video sites that offer video content on a download-to-own basis.

The instructions in this article are more focused with a person who is pressing a regular desktop or laptop computer running Windows, MacOS X or Linux as a media server and may be the way to go when you start out with DLNA especially if you are using a desktop comptuer.

Why share your music, pictures and video the DLNA way?
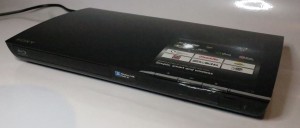
Sony BDP-S390 Blu-Ray Disc Player

Sony BDP-S390 Network Blu-Ray Player – a Blu-Ray player that adds DLNA to an existing TV

An increasing number of dedicated network media client devices are on the market and nearly all of these devices work according to the UPnP AV / DLNA media-client standards.  Most manufacturers who are selling premium table radios are supplying at least one which can pick up Internet radio broadcasts through a home network and these sets are also capable of picking up media made available to them from a UPnP AV media server. We are also seeing an increasing number of wireless speakers that connect to your home network and receive music via Apple’s proprietary Airplay system or the common DLNA system. These units can be controlled by mobile devices equipped with controller apps.

Similarly, DLNA is becoming an important feature for any well-bred “smart TV” or similar video peripheral like a Blu-Ray player or home-theatre system that is connected to the Internet. The ubiquitous Xbox 360 and Sony PlayStation 3 games consoles that every teenage boy dreams of having both work according to these standards and this feature is becoming a requirement for up-and-coming TV-connected games consoles.

By using a DLNA-based setup, you don’t need to install different media-server programs for each network-media client that you happen to buy. In some situations, you may only need to run whatever is supplied with the computer’s operating system.

Setting up your network for DLNA media
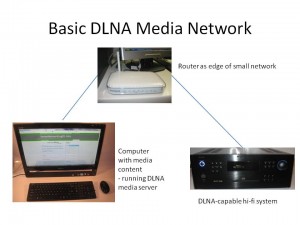
Basic DLNA Media Network

Basic DLNA Media Network

Most home, small-business and some branch-office networks don’t require any revision because they typically are one logical network that spans the premises with the router that exists at the network-Internet “edge” being the device that handles basic network housekeeping. This doesn’t matter whether the network has one or more media segments like WiFi wireless, Cat5 Ethernet or HomePlug powerline cabling.

You will need to know the ESSID and the WEP or WPA security key for your wireless network. This may be obtained through the router’s Web administration page or through your client PC’s wireless-network-setup parameters such as in Windows Connect Now. If you are connecting your DLNA media client to the network via wireless, you will need to make sure that the wireless access point or router is broadcasting the ESSID so you can pick it from a list using the device’s user interface and be sure you are “in reach” of the network. This practice would be important when you run a multi-access-point wireless network or simply to help with making sure that neighbouring wireless networks are set up properly. As well, you will need to be ready to enter the WEP or WPA security passphrase by “picking out” characters from a list using buttons on the device or its remote control.

Some networks such as the public-access networks provided by cafes and the like, including the headline “Wi-Fi Internet” that resort apartment developments provide won’t work well with DLNA. This is due to implementation of a Web-based login system as well as client isolation which doesn’t work with most DLNA-capable devices.

Setting up your PC jukebox or media server software for DLNA
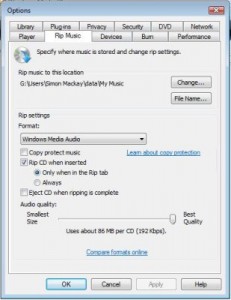
Settings for ripping CDs in Windows Media Player

Settings for ripping CDs in Windows Media Player

If you are running any Microsoft Windows version since Windows XP, you can use Windows Media Player 11 or newer versions as your media server. Before you start “ripping” CDs to the hard disk, make sure the program is set to rip without DRM (Copy Protect Music checkbox in the Rip Music options tab is cleared) and that it is set to rip CDs at 192kbps WMA or 320kbps MP3. The reason I would rip at these settings is to be assured of sound reproduction that is as close to the CD album as possible. You may use the MP3 codec for maximum compatibility or WMA for efficient storage if your DLNA media clients can handle WMA.

As well, you will have to set Windows Media Player 11 to automatically permit devices to benefit from its media library. This is done by going to “Library”, then selecting “Media Sharing” and clicking on “Settings”. The “Media Sharing – Default Settings” dialog box will open whereupon you make sure that the “Allow new devices and computers automatically” checkbox is selected.

If you don’t use any sort of ratings in your media as far as sharing is concerned, you may have to select “All ratings” in both the “Star Ratings” and “Parental Ratings” options. This will make sure all media is available for all of the devices.
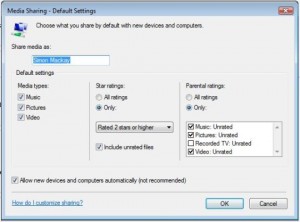
Windows Media Player Sharing settings for DLNA

Windows Media Player Sharing settings for DLNA

For your pictures and videos, you will have to add the folder that contains your photos to Windows Media Player’s media library. Similarly, you will have to do this for your video folders.

Linux users have access to a large plethora of media-server software such as TwonkyMedia and TVersity as well as a large collection of open-source media-server software. You will still have to use a CD jukebox program set up to rip CDs at 320kbps MP3.

Apple and Windows users who use iTunes as their CD jukebox but will need to use either TwonkyMedia, PS3 Media Server or NullRiver MediaLink. They will need to make sure that the iTunes directory is the one to be provided by the media server. Again, iTunes will need to be set up to rip at 320kbps MP3 for best compatibility and quality. The program may support transcoding to lower bandwidth settings for use whenever music is being transferred out to an iPod.

Infact, I have written up some more detailed information about setting up an Apple Macintosh computer to work as part of a DLNA-based home media network because of the increasing popularity of these computers. The article, “UPnP AV (DLNA) for the Apple Macintosh platform”, covers other media server programs that exist for that platform.

The media server would need to be set up to work with the folders that are being used as the primary folders for music, photo and video storage.  I have explained how to go about this for your music, especially if you use iTunes or Windows Media Player. For your photos and videos, you simply add the folders used by your photo management and video management software to store your images.

As well, if you, a friend or associate uses SkyDrive, Dropbox or similar cloud-based storage services to share a media collection, you may need to copy the media that you received through the sharing to your media library to share them via DLNA. Similarly, images shared through the Social Web may need to be downloaded from the service to your media folder.

The DLNA media-server programs typically index music files according to artist, album, track, genre, and some may support separate identification of composers, contributing artists (important for soundtracks and compilation albums) and other metadata for pictures and videos. Some, like TwonkyMedia, allow for alphabetical clustering and other efficient sorting arrangements. This is typically because UPnP AV / DLNA allows for the server to determine how it presents the library to the client devices.

As far as playlists are concerned, they will typically be listed in a “Playlists” collection with each playlist being its own collection in that tree. By having a playlist as a collection of tracks rather than a reference to a playlist file, it means that the media clients don’t have to be compatible with the playlist file format that the jukebox program works with.

Some of the media servers like Windows Media Player 11 or TwonkyMedia support transcoding to common file formats for situations where a DLNA media client cannot handle a particular media type. This can come in handy for file types like WMA or high-definition audio files which aren’t handled by all UPnP AV media players.

Setting up the DLNA clients

Enrolling the DLNA clients in to your network

You will need to make your DLNA media client become part of the network. This can be a simple task of plugging it in to your Ethernet network segment or into your HomePlug powerline network segment using a HomePlug-Ethernet bridge.

Integrating wireless-enabled DLNA clients to the wireless network

If you are connecting your wireless-enabled DLNA media client to the WiFi network, you will need to configure it for this network. This will require you to enter the device’s setup menu and select the option pertaining to wireless network setup. Then you get the device to search for your network’s ESSID which is commonly referred to as the SSID, Network Name or something similar. Once your device has detected your wireless network, you will be prompted to enter the WEP or WPA security passphrase. At this point, enter the passphrase in to the device. These procedures will have to be done as mentioned in the “Setting up your network for DLNA media” section.

Nearly all of the recent DLNA network media clients may use a “quick set-up” method like Windows Connect Now or WPS. This will typically involve either transferring a USB memory key between a Windows XP or Vista wireless-equipped notebook computer and the device; or registering the device with the wireless router. This procedure may be as simple as pressing a “register” or WPS button on the router and the device or copying the device’s PIN number (which would be on the device itself or in a WPS setup option in the device’s setup menu) in to the wireless router’s setup menu.

If you use MAC-address filtering on your wireless router, you will need to register the DLNA media device as an “accepted” network device. This will require you to copy the device’s wireless MAC address, which will be on a sticker attached to the device itself, in to the router’s trusted MAC-address list.

Making sure the DLNA clients detect the media server
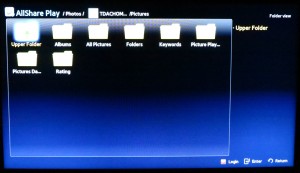
DLNA media directory provided by server PC

DLNA media directory shown on TV screen as provided by PC

You will need to make sure that the media server program is running on the PC that has the media that you are sharing. Most such programs may run a media server component as a background task while the computer is fully on but some may require the jukebox program to be running all the time. Similarly, you may bave to stop your computer going to sleep or hibernate mode under automatic control for this to work properly.

Another thing to check is the desktop firewall software. This should be set to allow the media server software outbound and inbound access to the network as a server. The Windows Firewall software that is part of all Microsoft desktop operating systems since Windows XP Service Pack 2 makes this easy by allowing immediate access to Windows Media Player or asking you if you want to allow the application to have network access. Other third-party firewalls may require the server application to be allowed Internet access by you adding the software to their application “white lists”.
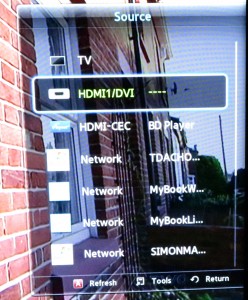
DLNA collections listed as sources on the TV

DLNA content collections listed as sources on a Samsung Smart TV

You may have to select “Network Music”, “PC Music” or something similar on most network-enabled music devices like Internet radios in order to gain access to the music library that you have made available.  Then you select the “hostname” of the PC, which may be commensurate to its standard computer name or its primary owner’s name. The DLNA client will then show the media type that it can work with. You then select that type and use the controls to select the media you are interested in.  Some devices like the recent crop of Samsung Smart TVs list each DLNA server on the home network they are connected to either as a source alongside the integrated TV tuner or external connections on that device.

Summary

Once you have your network and media-server computer set up properly, you can work with providing music and other media to network media receiver devices without much hassle.