The best path for turning a PowerPoint presentation to PNG or JPEG files
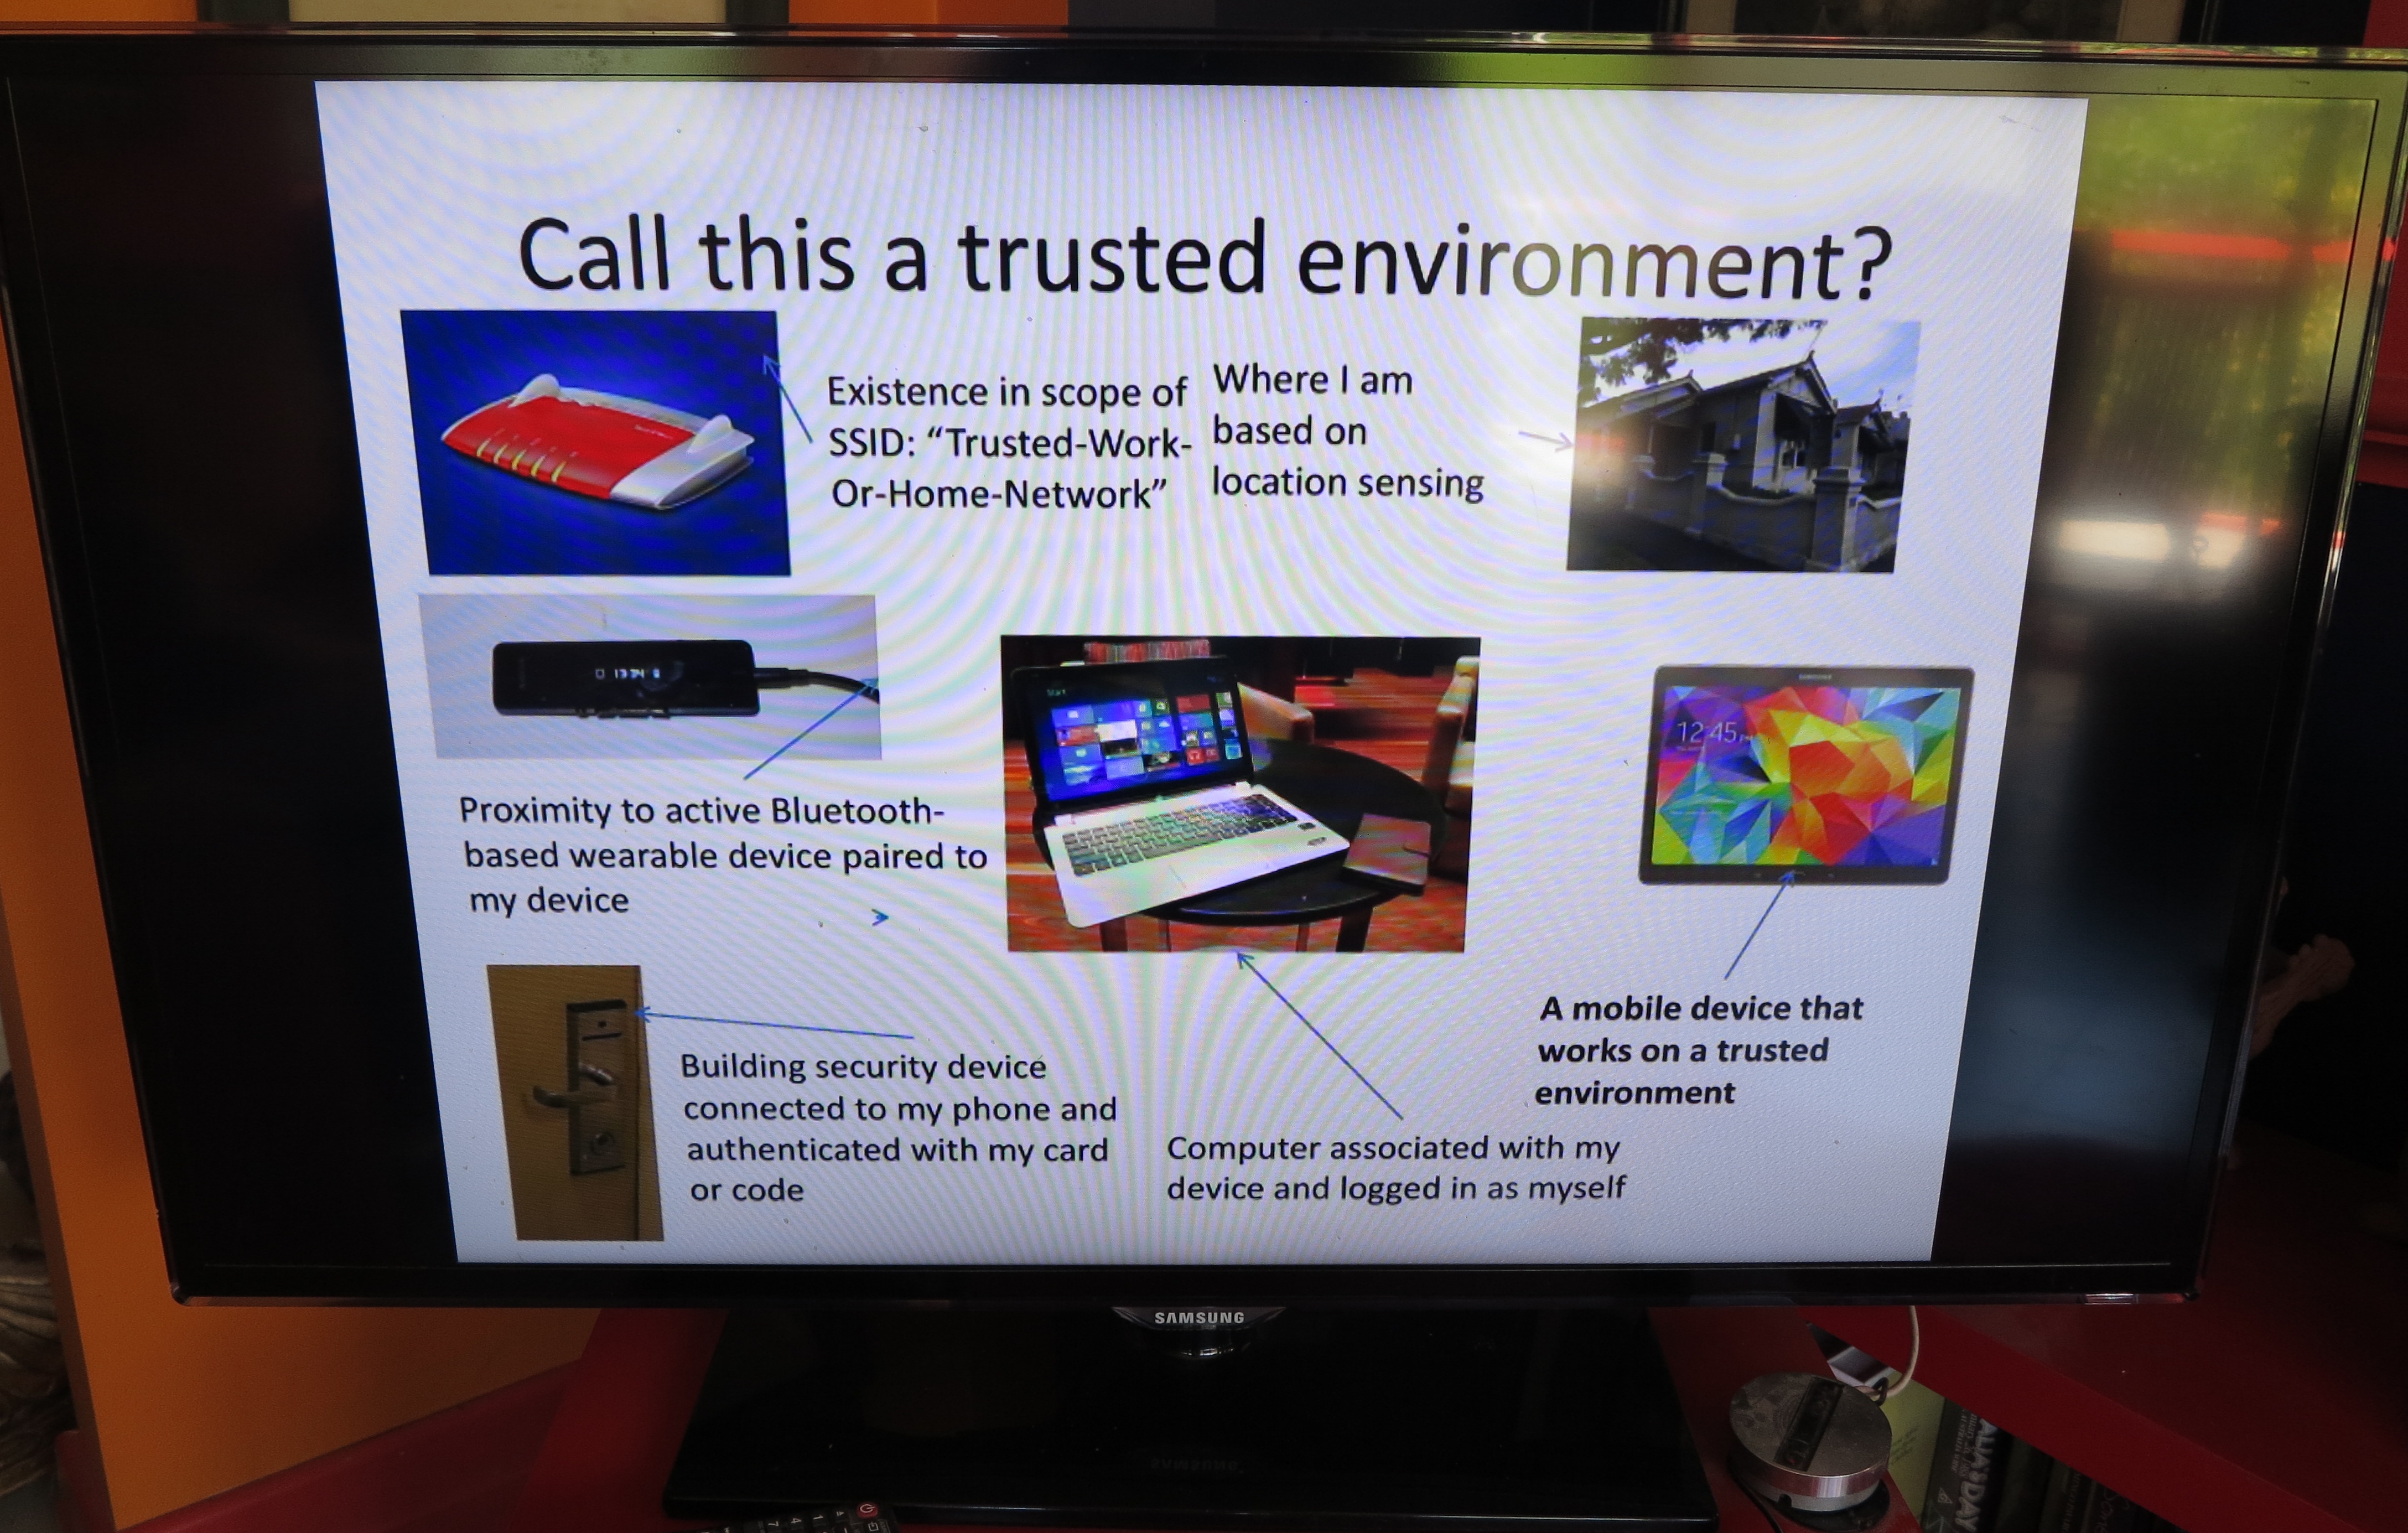
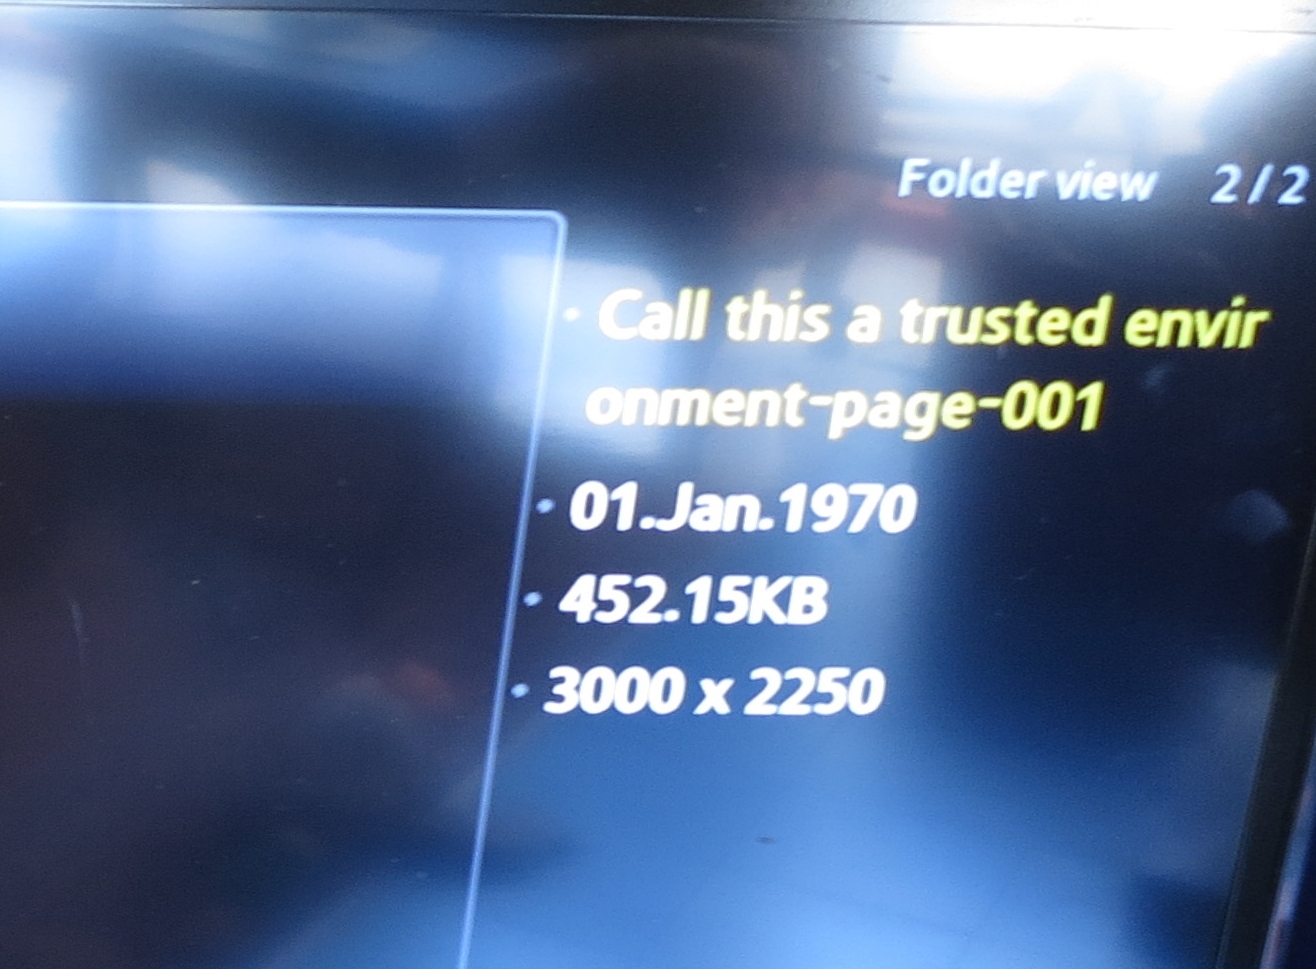
A high-resolution image from PowerPoint on a DLNA-capable Smart TV
I have discovered a weakness that Microsoft PowerPoint has when it comes to exporting presentations to PNG or JPEG raster-file formats. Here, the built-in rasterising function that this common presentation software has can only rasterise the presentations to resolutions that are very low for today’s expectations. This problem may also beset some other desktop presentation programs and may frustrate you when you want those high-resolution bitmaps.
The technique also applies to illustration software, CAD software and similar graphics programs as long as they can export to PDF or other common vector-based formats.
Why the need for high-resolution PNG and JPEG files?
Your camera, smart TV and similar devices work natively on high definition
But why have the PowerPoint presentations turned out to high-resolution formats? A typical digital camera in current circulation can take a picture with a resolution of at least 3000 x 4000 pixels and this applies to the cameras integrated in to smartphones and tablets. As well, the typical flat-screen TV has a resolution of at least 1080p for high-definition TV.
PowerPoint works to preserve sharpness when showing presentations
But all the artwork in a typical PowerPoint presentation i.e. the text, the pie-charts and other graphs, but excepting any of the photos, is typically vector graphics that is drawn by the program.
This doesn’t lose any resolution no matter how big the display that the presentation is shown on is. Some of us may insert high-resolution photos such as pictures off our digital cameras in to the presentations and scale or crop them to suit the presentation. Here.the software could preserve the resolution of the photo or excerpt and implement this as a “relative scaling” to preserve the positioning, but keep the sharpness that is in the picture.
Allow our Web-site visitors to view a presentation, graph or diagram in detail
Some of us may want to use the PNG or JPEG files on a Web page which is handled by software that supports high-resolution delivery and server-side scaling. This would allow for “detail viewing” of photos and diagrams or best-quality display on high pixel-per-inch screens like the Retina-equipped Apple iPad. This is very important for diagrams, charts and similar graphics that can convey extra detail.
High-resolution bitmap-graphics layers for photo and video editing projects
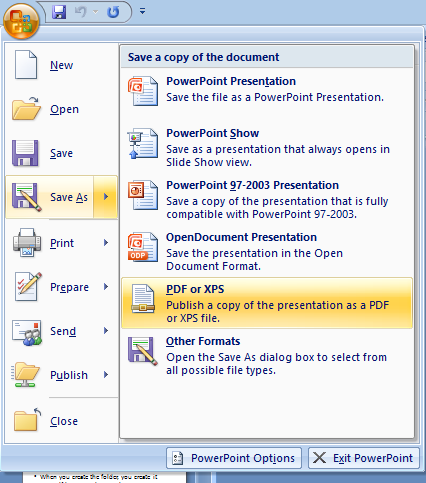
Use PowerPoint to export presentation as a PDF file
Similarly, we would be using PowerPoint to create simplified graphics layers to use with a photo-editing tool like Photoshop. To the same extent, you could be using PowerPoint to prepare the menu tree for your DVD or Blu-Ray project and your DVD / Blu-Ray authoring program can only handle the raster files when you are preparing the menu screens.
Impressive and clear on large high-resolution displays
As well, we could be using PowerPoint to create digital signage and want to use a DLNA-based setup to show the signage on a DLNA-capable Smart TV, or a video projector or regular flat-panel TV hooked up to a DLNA-capable Blu-Ray player or network media player. It also extends to plugging a USB memory key full of the slides in to the side or back of the TV to show them on its screen as best as it could do.
In this case, you are able to benefit from the high resolution that a lot of these display devices offer. This also extends to you using the recent crop of mobile tablets, such as the Apple iPad 3 with Retina Display or the Samsung Galaxy Tab S, as digital picture frames but benefiting from their ultra-sharp displays.
How do you do this?
-
Prepare your presentation
Make up your presentation using PowerPoint or similar software as you would normally do. Keep saving the work in the software’s native format to avoid losing your work.
-
Export to a PDF file
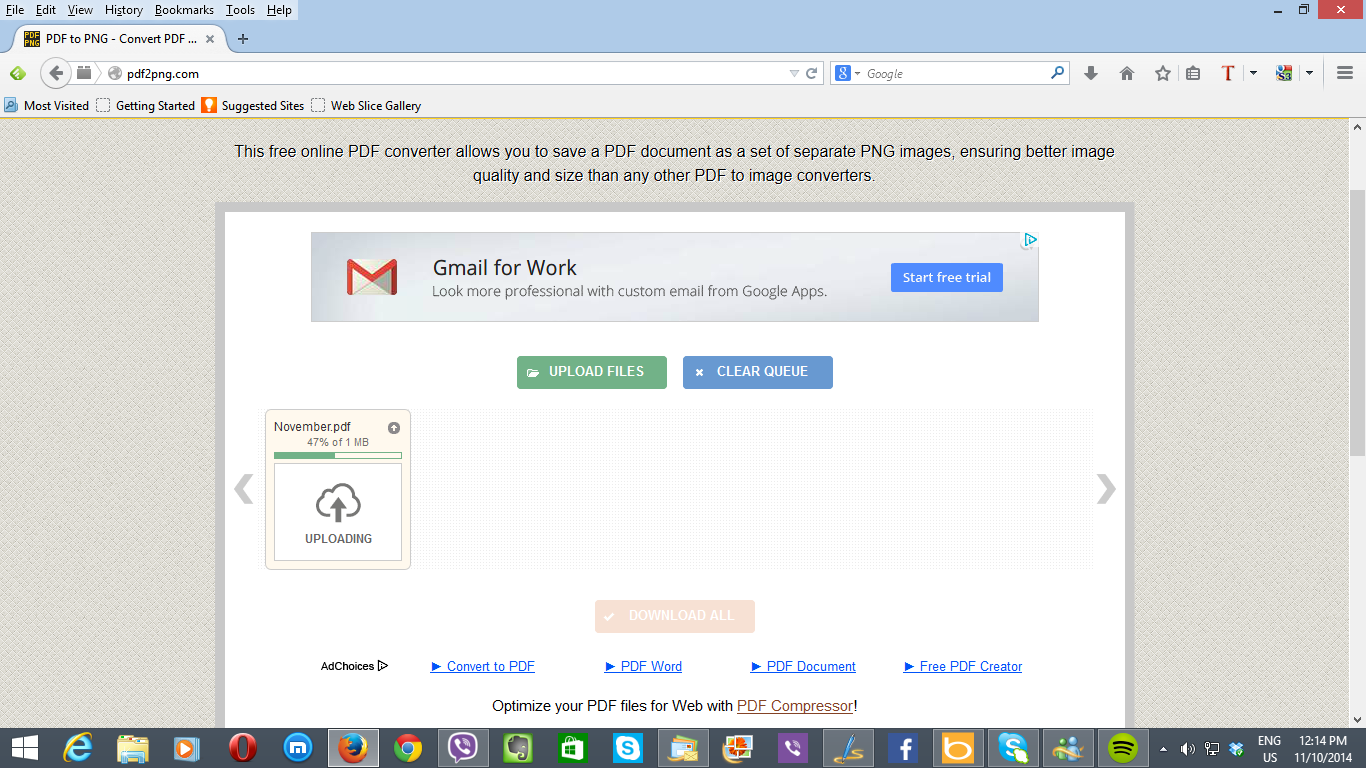
Exporting using PDF2PNG, preferred for Web-targeted applications
Export the presentation as a PDF file. This is typically offered as the PDF file type for PowerPoint’s “Save As” option. This will have PowerPoint turn out a vector-based multi-page PDF of your presentation.
-
Convert the PDF file to a PNG or JPEG file
Use a Web-based PDF-rasterising tool that can rasterise to a PNG or JPG file. Good examples of these converters include PDF2PNG.com or PDF2JPG.net which turn out high-resolution PNG or JPG files respectively. There may be also some desktop PDF-rasterising tools available for all of the regular-computer platforms (Windows, Mac OS X, Linux) that can rasterise PDF files at high resolutions, which you could download or buy. These include Adobe Acrobat and some of the good PDF-management tools.

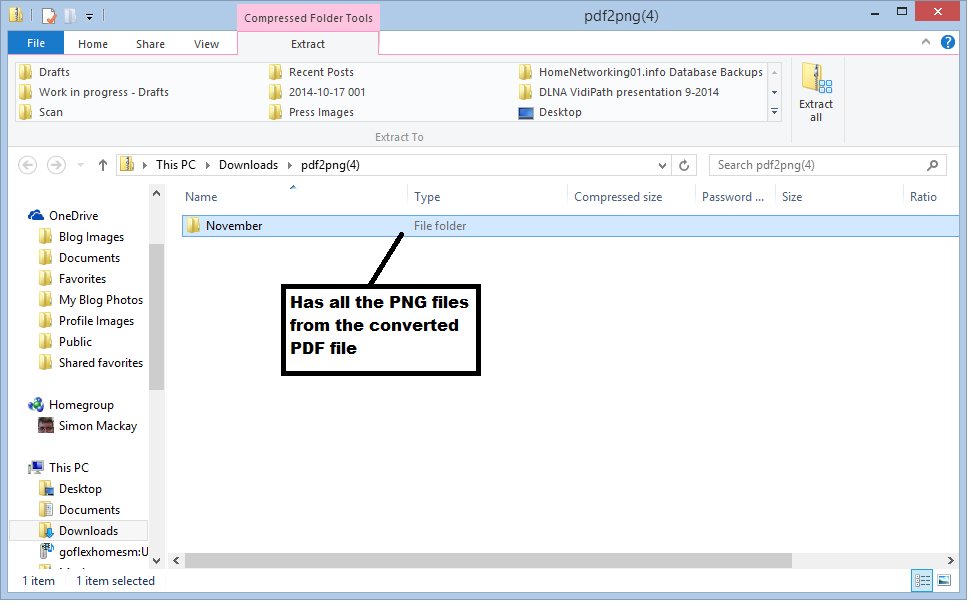
The download file exported by PDF2PNG if you collect the ZIP file.
In the case of the Web-based tools, you upload the PDF file and select the “Convert” option. If you have a resolution option, I would suggest using the higher-resolution options if they are available to you. Then, after you have submitted the conversion job, you will receive a ZIP file with all the slides as PNGs or JPGs.
As well, there are similar online or desktop tools that can rasterise common vector-based graphics formats to high-resolution PNG or JPEG images, which may come in handy for your favourite graphics software.
It is also worth knowing that JPGs may work more reliably when you are intending the image to be used on a TV screen or digital picture frame. This doesn’t matter whether you are using a USB memory key / SD card to directly transfer the images or use the display as part of a DLNA-capable network setup. It is because most of these devices can handle images from a digital camera or camcorder, and this may also apply to baseline video-editing or DVD-authoring software. -
Use the converted bitmap files how you want

These are turned out as best-case high-resolution images fit for even a 4K UHDTV
Expand the ZIP file to your computer’s file system in order to claim all of your bitmap files that resulted from your conversion job and store them where you want to get to them.
In the case of showing them on a TV or digital picture frame, you can expand this file to a USB memory key that you are going to plug in to the side of the set, or move the JPG or PNG files to a (computer or NAS) folder that is used to share images by your computer’s or NAS’s DLNA media server.
Once you know how to rasterise you PowerPoint presentations to a high definition using external software, you can dodge PowerPoint’s bullet that limits you when you want to create high-resolution images fit for Webpages or today’s smart TVs.