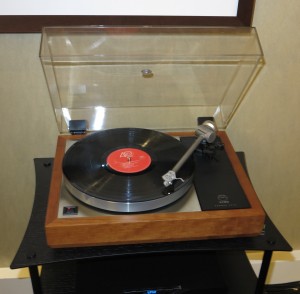
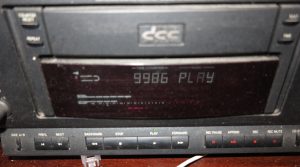
A task that you will want to do is to record content held on vinyl, cassettes and other legacy media to your computer. This may be to copy it to a CD or have as audio files that you can play on a computer, mobile device or through your home network. It is a task you will end up doing either for family-memory recordings or recorded material where there isn’t a chance of it being reissued on modern audio formats.
What do you need?
Here, you will need to use an audio-interface device such as a sound card or sound module to connect the turntable or tape player to the computer; along with an audio-editing program which records the sound and allows you to edit these recordings.
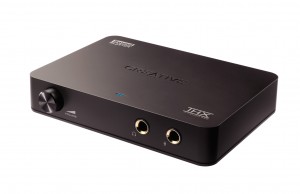
Creative Labs Sound Blaster Digital Music Premium USB sound module – useful for copying old media to your home network
Audio-interface devices need to be equipped with line-level input connections so you can connect them to an amplifier’s tape-recorder connections or to a source device like a tape deck that has these kind of connections. On the device’s side you will typically have a 3.5mm stereo audio phone jack that is typically highlighted in green or marked LINE IN or some better sound modules may be equipped with a pair of RCA sockets that are similarly marked.
If you are using a laptop computer, an “all-in-one” computer or a small desktop computer, it is a good idea to purchase a sound module that connects via USB, Thunderbolt or similar connectivity technology and use that as your audio-interface device because most of these computers don’t implement line-level input connections on their integrated sound hardware. Similarly, a dedicated sound card may work wonders for sound quality and computer stability if you are using a traditional desktop computer that can be outfitted with standard expansion cards.
One common software tool is the open-source Audacity program which is highly capable advanced tool but may take a bit of time learning. On the other hand, there is NCH’s Wavepad which comes across as a “free-for-personal-use” program for basic tasks or you can buy a fully-function program for under $100. This one does provide an interface that you can easily get a grip of for most editing tasks. It is also worth noting that you may have ended up with an audio-editor program if you bought an audio-interface device for your computer like a USB sound module; or it may have been bundled with a comprehensive multimedia package or perhaps your computer.
How do I go about this?
Create a software monitor path using your audio-editing software
Here, you create a “confidence monitoring” path to be sure that the sound that you want to record is getting from the source device to the software. This can be useful if you want to hear the source coming through that software or as a troubleshooting tool.
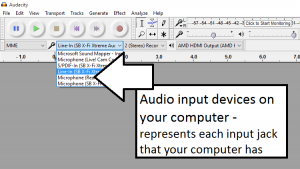
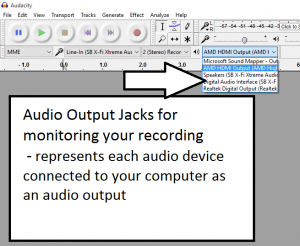
Select the “recording device” or “source input” that your source device or amplifier is connected to directly on the audio-editor software. Typically this refers to the actual jack on the sound-card or sound-module that your source device is connected to. Then you select the “playback output” or “playback device” directly on audio-editor software if the software allows you to do so.
If you use a hi-fi amplifier with a “tape-monitor” switch, connect the sound module’s audio input and output to the amplifier’s tape input and output connections. Then you select the source you want to record using the input selector and enable the tape-monitor function on the amplifier if you want the monitoring ability.
Some highly-sophisticated amplifiers have the ability to select which audio source is recorded by a connected tape deck such as through a “record select” switch, or there are amplifiers and receivers that have two tape loops but have a “dubbing” switch that determines how the sound flows between those connections. In the former situation, you may have to set the “record select” switch to the appropriate input and in the latter situation, you may have to select “Source” on the tape-dubbing switch unless you are recording from a tape deck connected to the other tape loop, where you would select that recording device using the tape-dubbing switch.
For the software, you would have to select the sound-module audio input connected to the tape output as the recording device and the sound-module audio output connected to the amp’s tape input as the playback device. Then you would have to enable software monitoring, also known as “software playthrough” in the audio-editing software to verify that the sound is coming through. On the other hand, modern Windows operating systems have the “Listen” tab in the Recording Devices Properties dialog box to allow you to “listen” to the source through your computer’s default audio-output device or an audio output device of your choosing, again useful for verifying your setup.
Setting recording level and parameters
Most of the software will have a level meter but this may require you to enable a “monitor” function on the software to see the meter in action. It is also the time where you can troubleshoot any connection problems.
If you are playing a a recording on a playback device equipped with VU meters that show the output level during play, check these meters for audio output coming from that recording. As well, if the equipment uses an adjustable level for its line-level outputs, adjust this control to at least 75% or 80% of its maximum level. Then you use the software’s level meters to determine the recording level, making sure you allow a bit of headroom on the meters. On the other hand, you may try adjusting the software’s recording level to maximum and winding back the source equipment’s output-level control to achieve the right signal level if the source equipment is connected directly to the audio-capture device.
As well, you set the digital-recording parameters to 16 bit quantisation and 44.1 kHz sampling rate for all legacy recording media if you use an analogue signal path. Also set up the recording parameters to record in stereo unless the recording was recording from a mono source or recorded with mono equipment, whereupon you set the parameters for mono recording. Using 44.1 kHz sampling rate works properly for burning to CD, or you could use 48 kHz if you are working towards using the material in a video project, but you can use either
You may find that using one of the audio filter functions on your amplifier like a “subsonic filter” may come in handy when recording vinyl for example. Similarly, using the Dolby noise-reduction function on your cassette deck may benefit the transfer process for a suitably-recorded tape.
Assuring proper computer performance
It may be a good idea to make sure that as few applications and tasks are running on your computer before you commence recording. This is because you need to dedicate your computer’s processor and RAM resources to the recording task and make sure that it will record reliably and properly.
This may involve closing email clients, games, office applications and Web sessions before you commence the recording session. Then, while you are recording, you make sure you aren’t using any other app on the computer that is doing the recording.
For laptops, it may be better to have them connected to AC power so that the recording session isn’t destroyed due to the battery dying. Sometimes, you may have to set your computer’s power-usage behaviour to “full-on” or “high-performance” for your recording job so that it doesn’t go to sleep during recording.
Recording
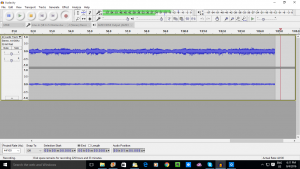
When you are ready to record, start the software recording then start your legacy media playing. Once the recording is complete, make sure that you save the sound file or project depending on the software so you don’t lose the recorded sound.
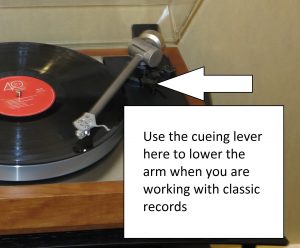
If you are recording from vinyl using a manual or semi-automatic turntable, use the cueing function if it has one to lower the stylus to the record rather than actually lifting the arm on. It is typically represented by a lever at or near the arm’s pivot or some turntables have a button on the front of the base or near the front edge. This will protect the stylus from being chipped and avoids unnecessary loud clicks.
What you will end up with is a large WAV or AIFF uncompressed PCM file for the whole recording or a side of the recording if you record different files for each side or program.
Changing the media during recording
If you have to attend to the medium such as to change sides on a record or tape, you could pause the software’s recording function before you turn the record or tape over. This has all of the album recorded as one file and may be found to reduce glitches.
On the other hand, you may want to stop and save the recording before you attend to the medium then start recording the other side to a new file. This can work well with most studio recordings which are centred around individual tracks or where each side represents a logical part in the recording.
Some audio-editing programs support a silence-based automatic pause or stop function so as to have the recording stop when the source material hits the end of the side.
Editing
Most such software offers the ability to edit a recording that you have made. This can range from simple “cut-and-splice” editing such as to split a recording in to multiple files, combine two recordings in to one recording or remove unwanted noise from a recording. Anyone who has worked with open-reel tapes or MiniDisc will be familiar with these editing techniques. Your first recording will be a time to become familiar with how your software implements these editing techniques and the way you perform them.
Audacity and some other audio-editing tools allow you also to “mark up” a recording file with index markers kept as a separate file or as part of a logical “project” file. This may be used to facilitate exporting of the file as individual tracks, but allow you to use the effects to adjust the sound across the whole of the audio recording. On the other hand, you may use the cut-and-splice editing techniques to break up the audio files in to individual tracks.
These audio-editor programs also offer the ability to adjust the sound of the recordings courtesy of built-in “effects” or audio-processing routines. There are the elementary effects like equalisation (tone adjustment) or dynamic-range compression but a lot of the programs offer routines geared towards this activity like audio-level normalising, noise-removal and speed adjustment (handy for tapes that have been recorded on portable equipment with half-dead batteries, using a turntable that is only capable of working at 33rpm and 45rpm to work with 78s or salvaging open-reel tapes recorded at speeds not supported by the deck you are playing them on).
A good practice is to save your recording when you get your editing perfect. Sometimes you may want to save the recording as a copy if you are trying an edit or effect out so you don’t ruin your original recording or a successful edit or effect treatment. This may be an important practice as you become familiar with your editing software and will be of value if you are trying to “bring out” poorly-recorded material like cassette recordings made using portable recorders with their integrated microphones.
Editing techniques for legacy media transfer
A good editing technique would be to trim off silence at the start and end of the whole recording and excess silence that has existed between sides or programs of that recording. For example, some recordings especially those that are on a tape have a longer silent period before the end of the side to preserve a logical program break but have extra space available on the medium for that side.
You could also be removing unnecessary clicks and pops, especially those that are loud and are typically of equipment being started or stopped.
As well, you use the normalising function to bring the tracks’ peak volumes louder but preserve any dynamic range that exists in the recordings. You may have to set up channel-independent normalisation if you have recorded form most consumer-focused equipment because there is a tendency to make one of the stereo channels stronger than the other.
Similarly, the amplify function can come in handy for those recordings that have come through very weak but this is simply about multiplying the volume in that recording and can lead to clipping and distortion if you aren’t careful.
Various filter and equalisation function can be of use to remove unwanted noise such as tape hiss or vinyl rumble. Here, you may have to save a “reference” version of your file and toy around with these filters if you are trying to remove the noise.
Exporting
Most audio-editing software allows you to export the audio content in to different file formats like MP3, FLAC, WMA or AAC compressed forms or a WAV or AIFF uncompressed form. Some of the programs even allow you to “burn” an audio CD from the files you create thanks to an integral CD-burning software engine.
If you use another program to burn audio CDs, make sure that you export your audio content to WAV or AIFF uncompressed PCM files with one file per track. These are the best-quality audio files you can work with when you are targeting these CDs.
Most exporting procedures also allow you to add metadata to CDs as CD-Text data or to files as integral ID3 data. Here, fill in as much metadata as you can about the recording and assign genres particular to the recording’s content. It is important when you copy the files to your DLNA media server or smartphone, or make use of CD-Text when you burn CDs.
Then, you can get away with exporting your legacy-media salvage effort to FLAC files which are a lossless file being handled by most good-quality audio equipment. Similarly, you could export the recording to a 320kbps MP3 file if you want widest compatibility with older MP3-playing equipment.
Conclusion
Once you use a suitably-capable audio interface device connected to your hi-fi equipment along with audio-editing software, you can use your computer as a tool for recording LPs that won’t ever be released anymore or salvaging family memories thus having them on your home network.

