Category: Feature Article

Chromecast or Apple TV within a public-access Wi-Fi network

Chromecast and similar devices are being used as an alternative to smart TVs

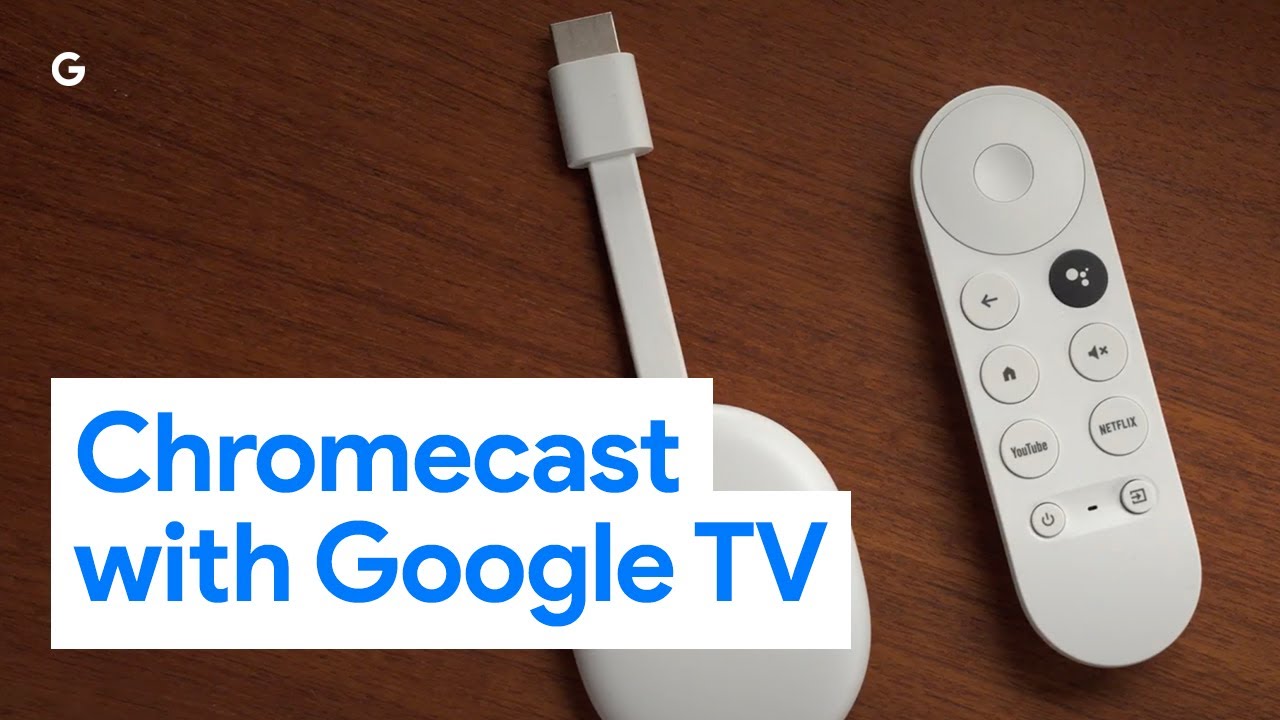
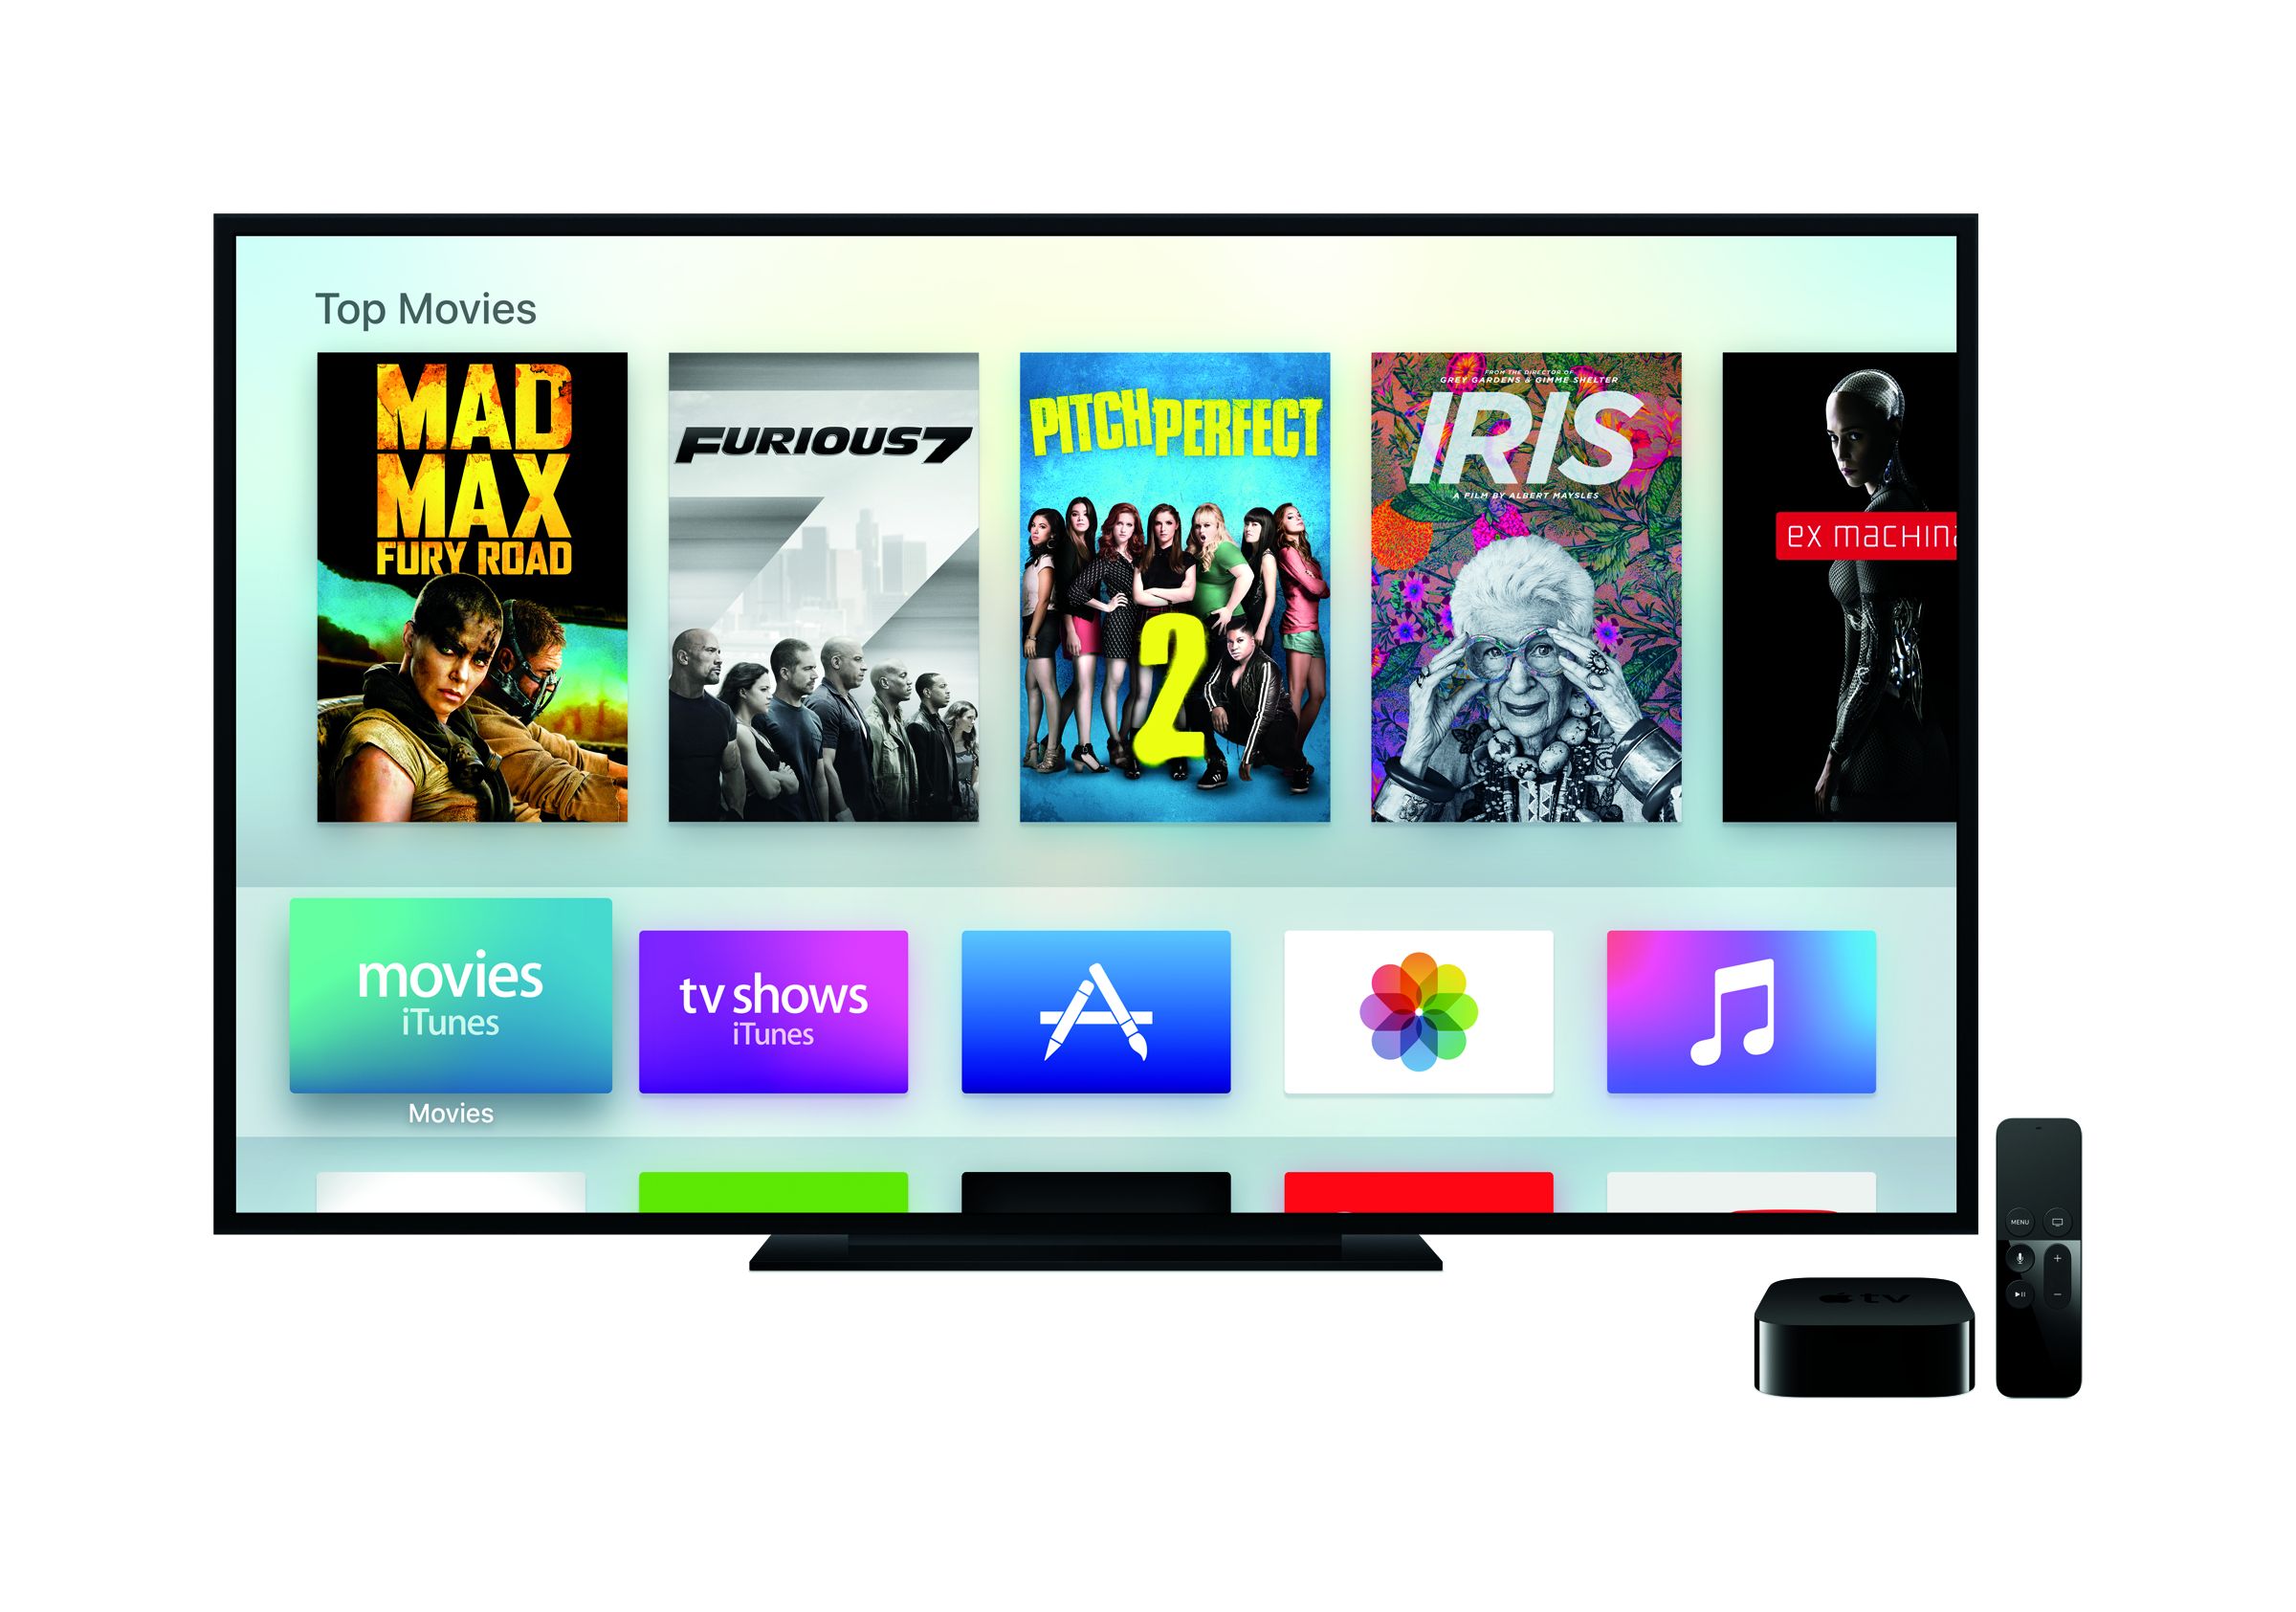
How you can use a Chromecast or Apple TV in that hotel room

There are situations where you may want to use a device like a Chromecast, Apple TV box or a network printer in a place like a hotel that has that headline public-access Wi-Fi network facility. Or you may want to make use of a portable Internet radio to listen to that Internet-hosted radio station at the worksite you are working at which has a public-access Wi-Fi network.

But you will find it difficult to use these kinds of devices on these networks for many reasons.

One of these is that if a public-access Wi-Fi network is properly setup, each device that is on the network is to be logically isolated so that other devices on that network can’t discover your devices. This is more to assure user privacy and data security for all network users.

But this will interfere with arrangements where you need to discover another device that you own that is on the network in order to use it, such as to “cast” media to a Chromecast or Apple TV. It can also interfere with file sharing between two computers or the use of portable NAS devices.

Sony CMT-MX750Ni Internet-enabled micro music system

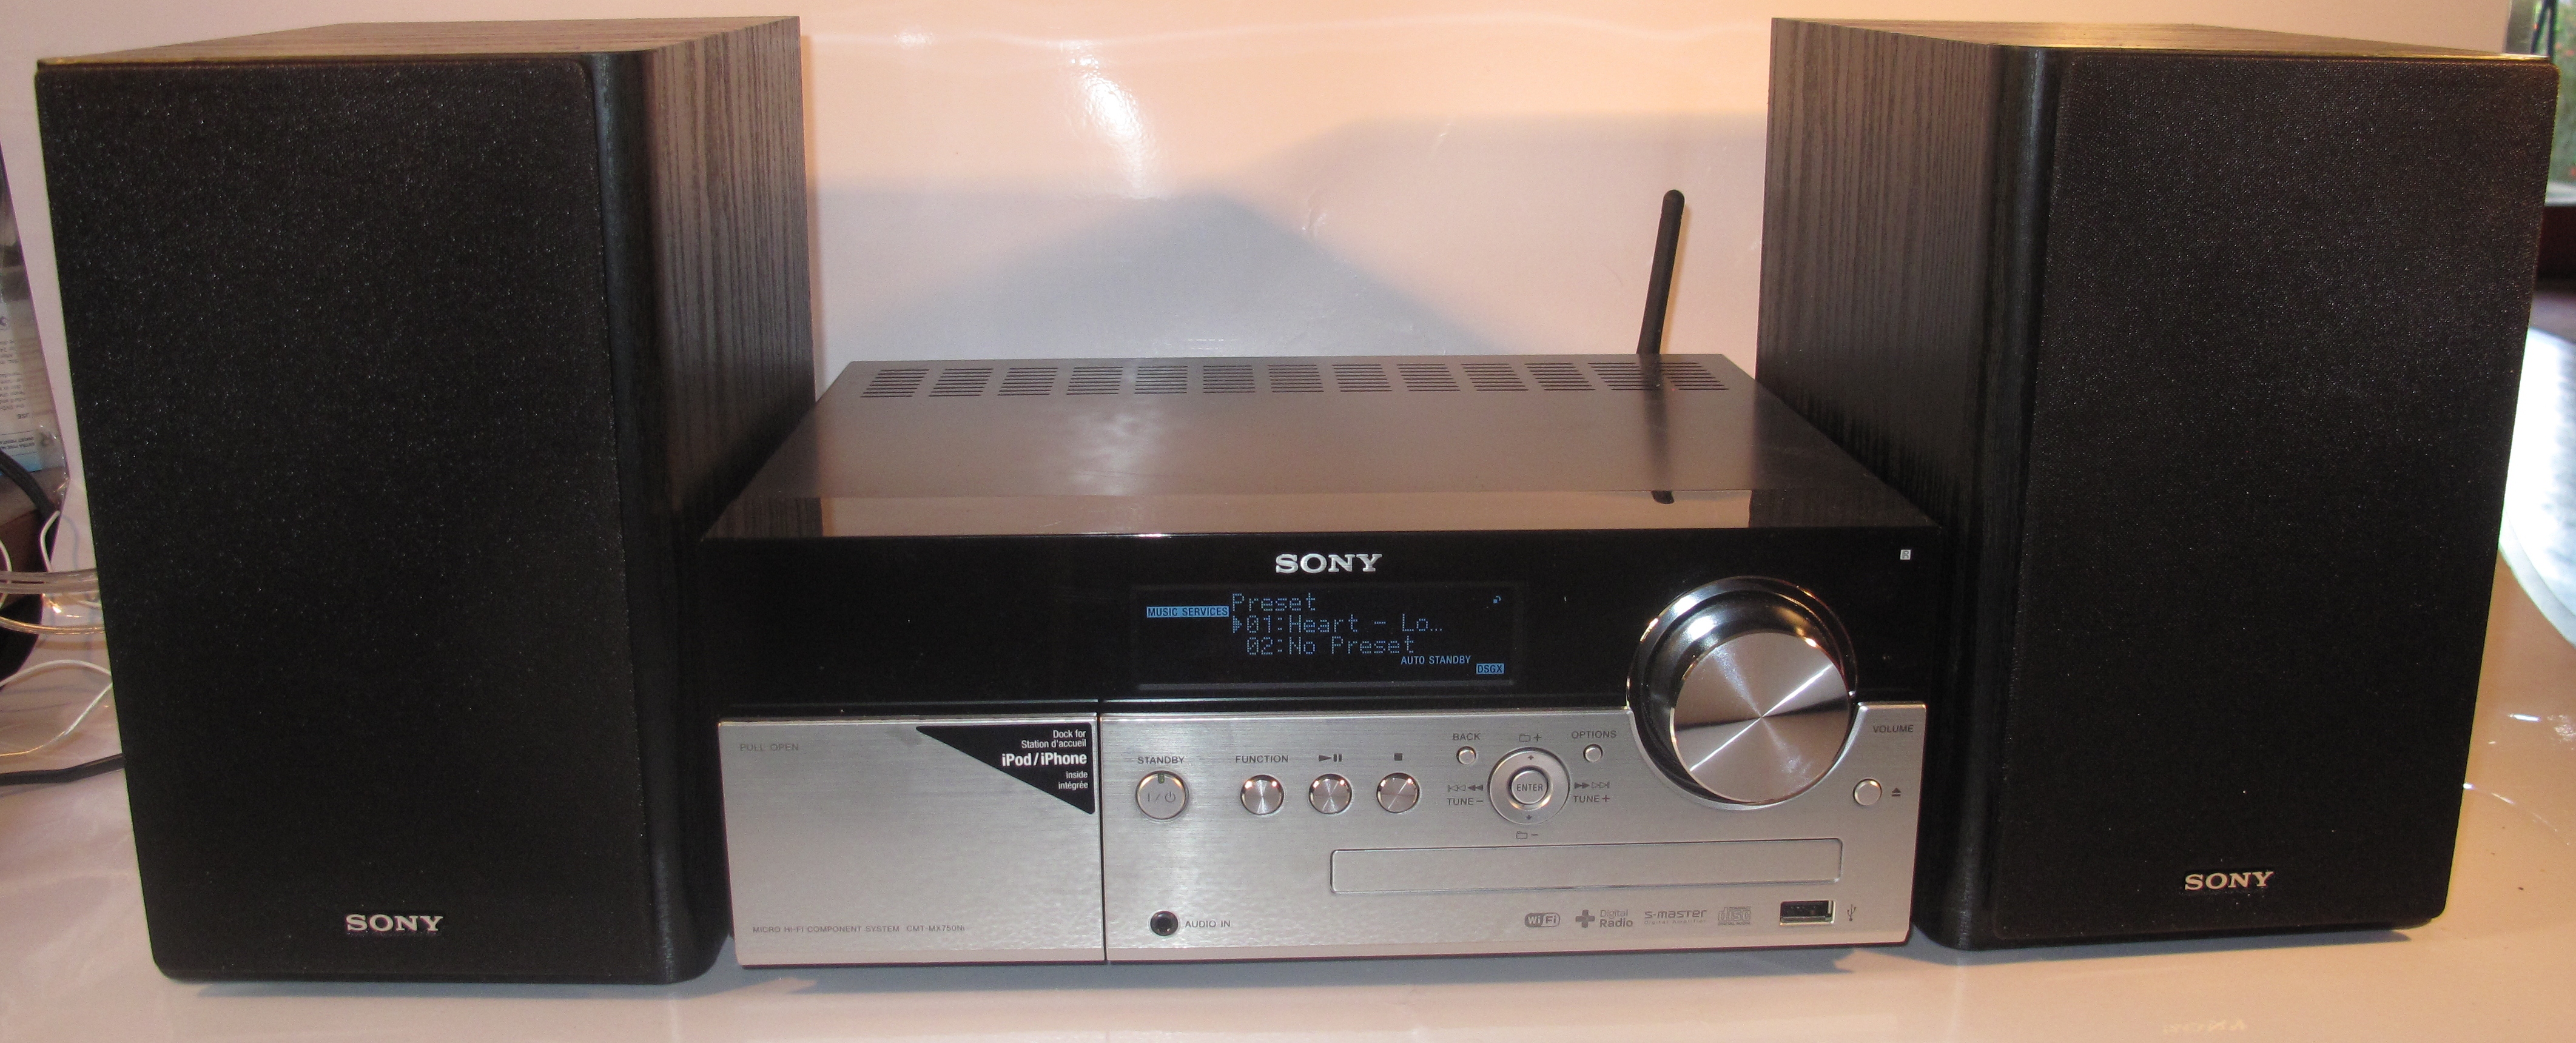
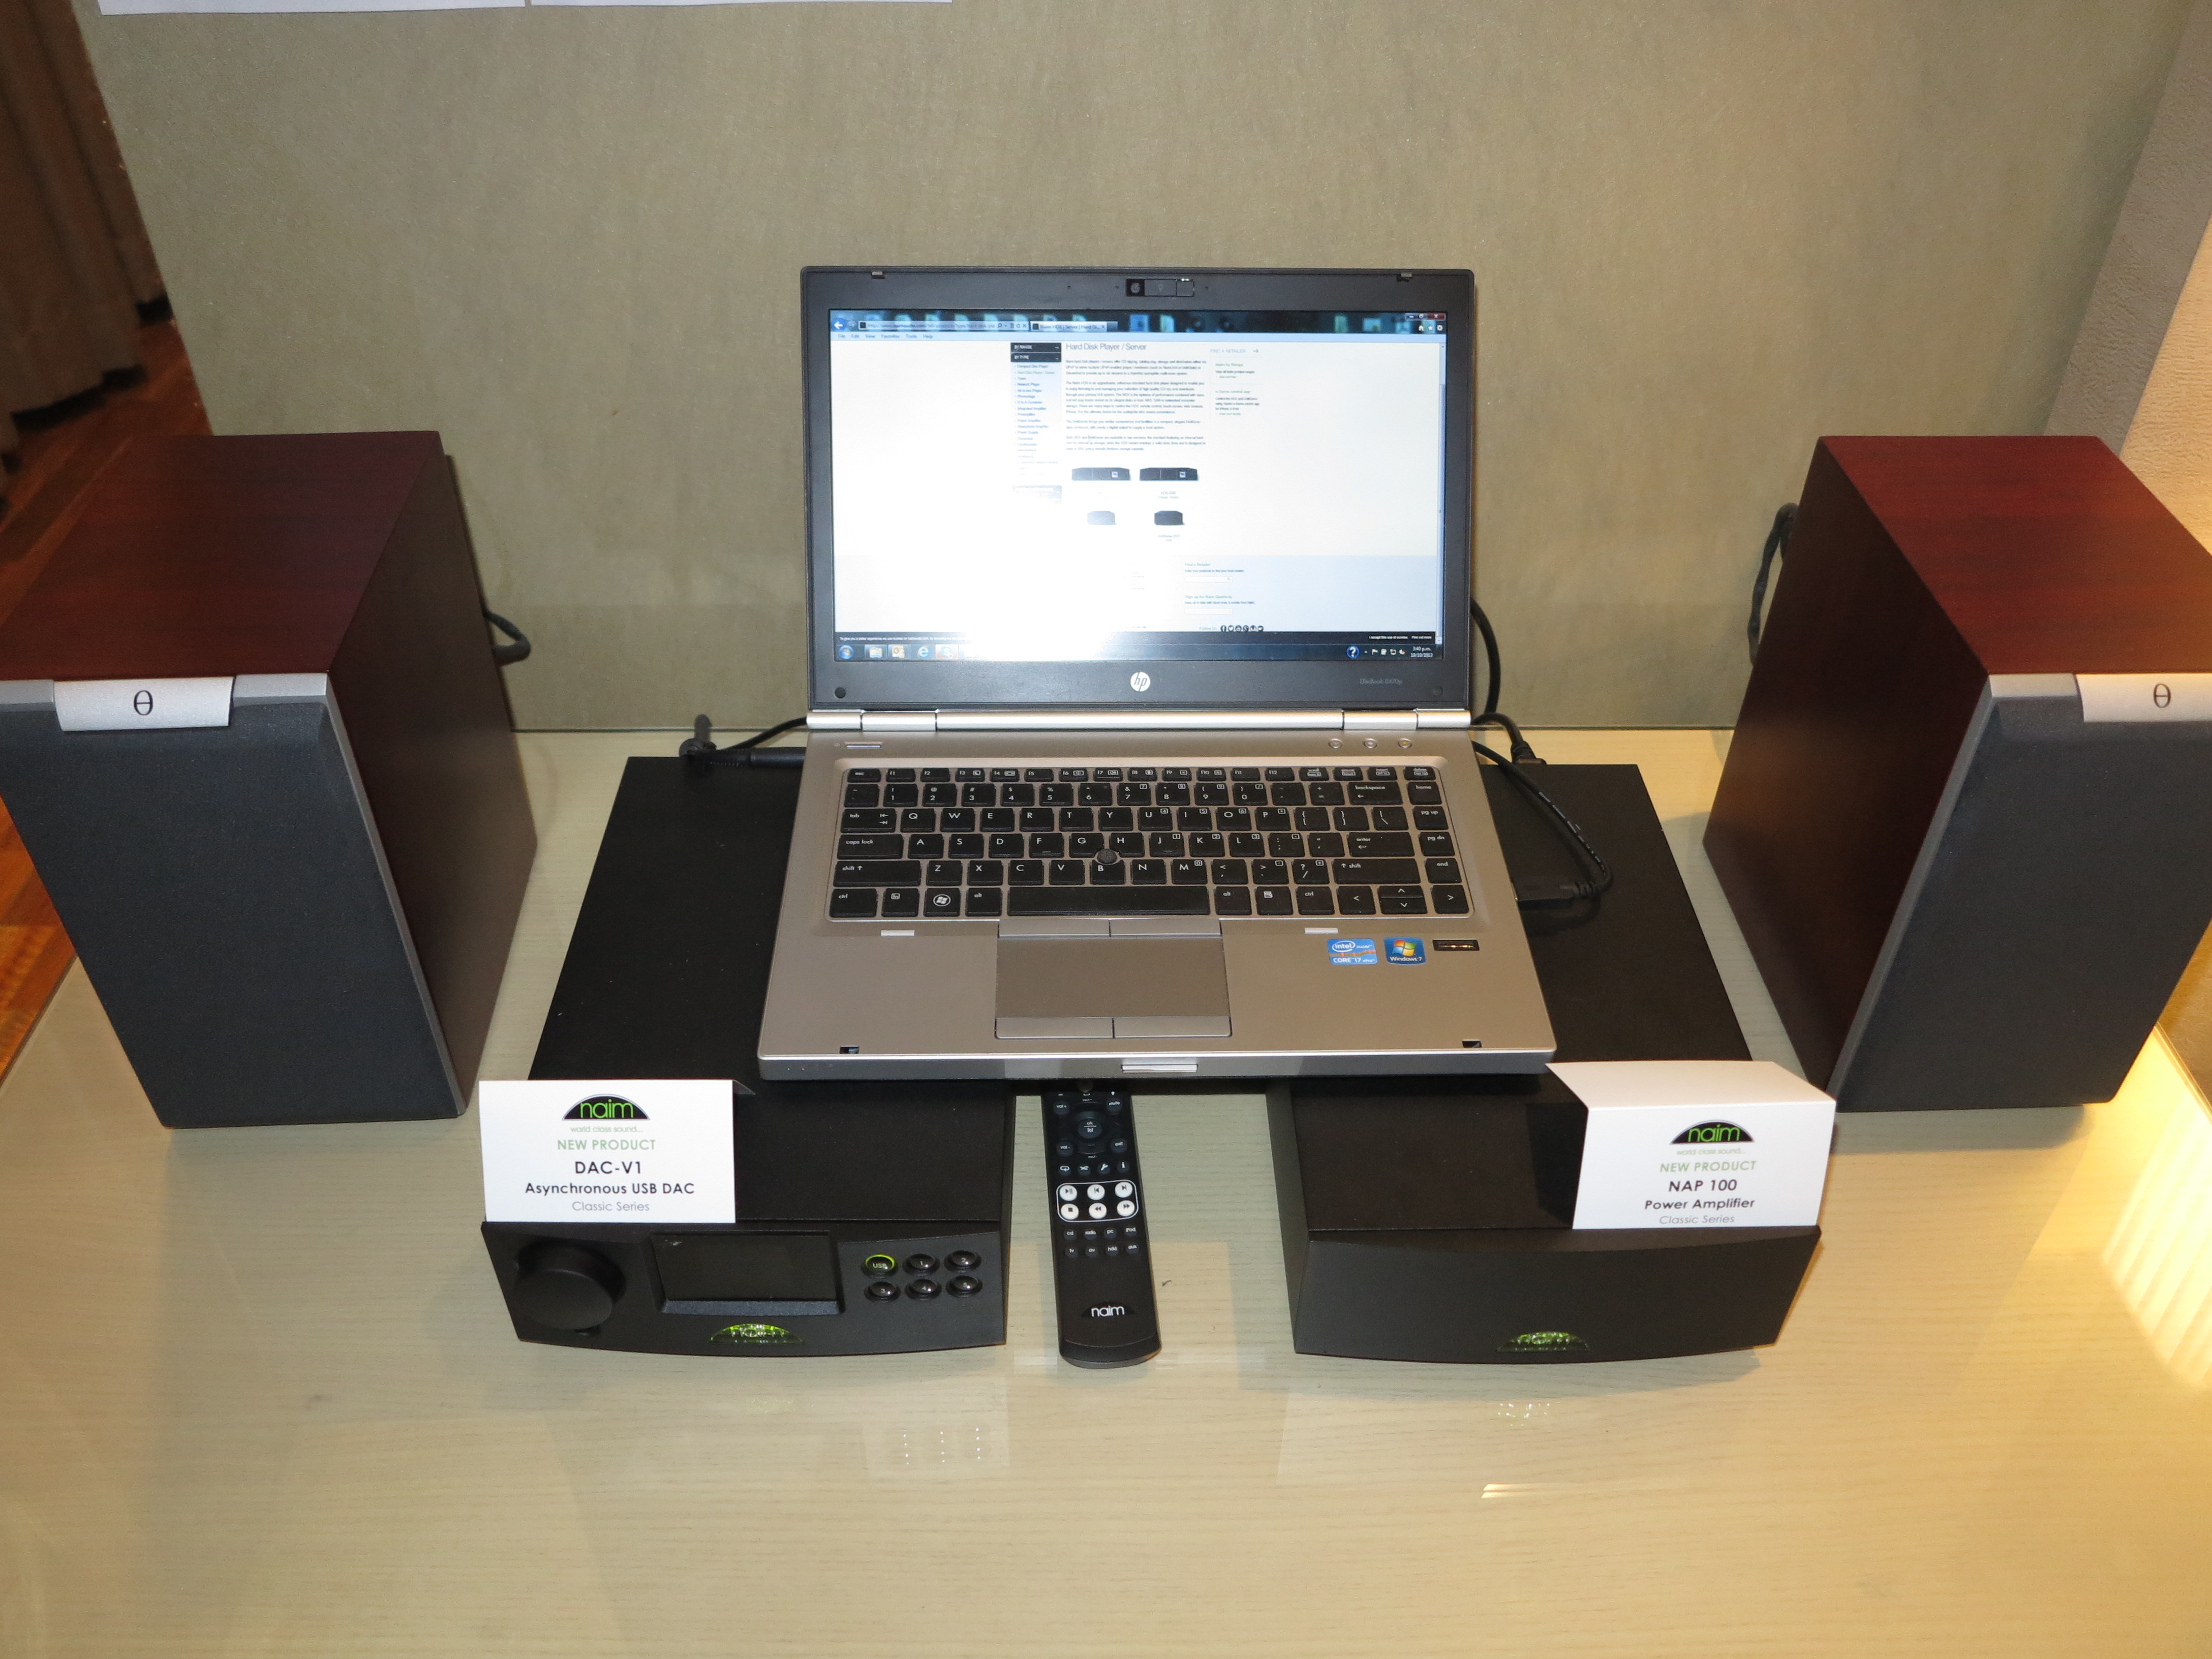
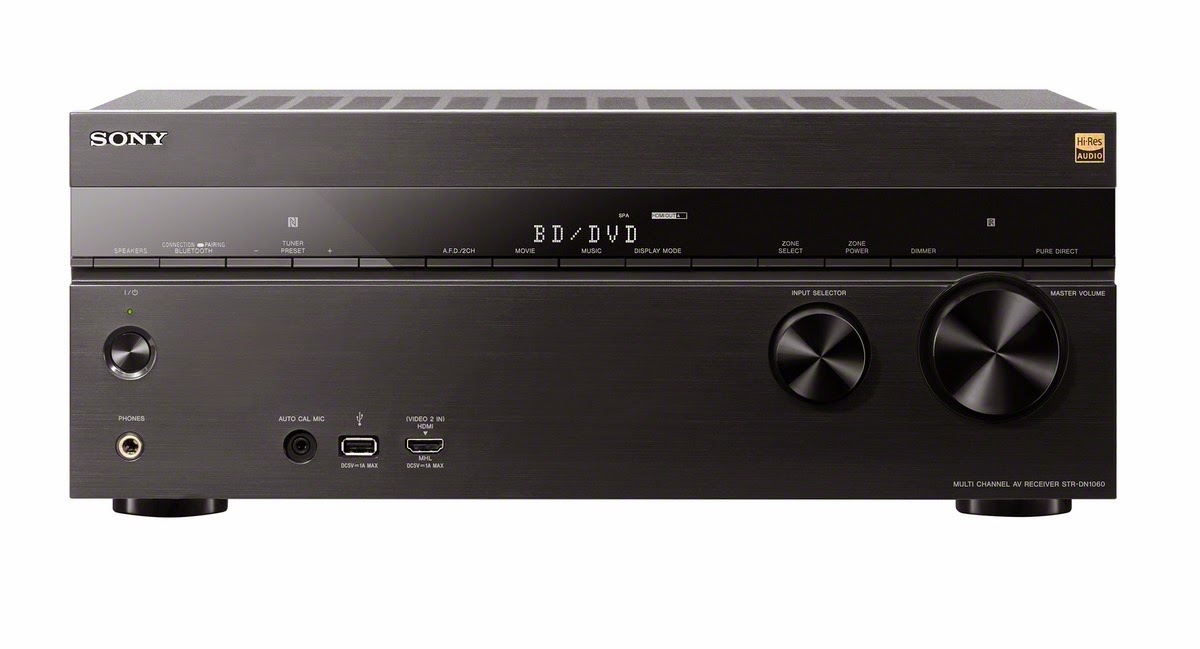
Sony CMT-MX750Ni 3-piece music system – this has been used to try Internet-radio functionality via a public-access Wi-Fi network

As well, some of these networks are set up with a Web-based captive portal or implement Wi-Fi PassPoint / Hotspot 2.0 or other authentication approaches. This is even if it is about assenting to the terms and conditions of service for use of the public-access Wi-Fi network. Here, these kinds of login experiences don’t work at all with devices that have a limited user interface like a small display or a user interface based around a D-pad. In a lot of cases, you will deal with devices that don’t even have a Web browser at all to work with these captive portals.

I previously covered Wi-Fi mobile networks and how they work. This included the use of travel routers or Mi-Fi devices, or NAS and similar devices that support “Wi-Fi to Wi-Fi routing”.

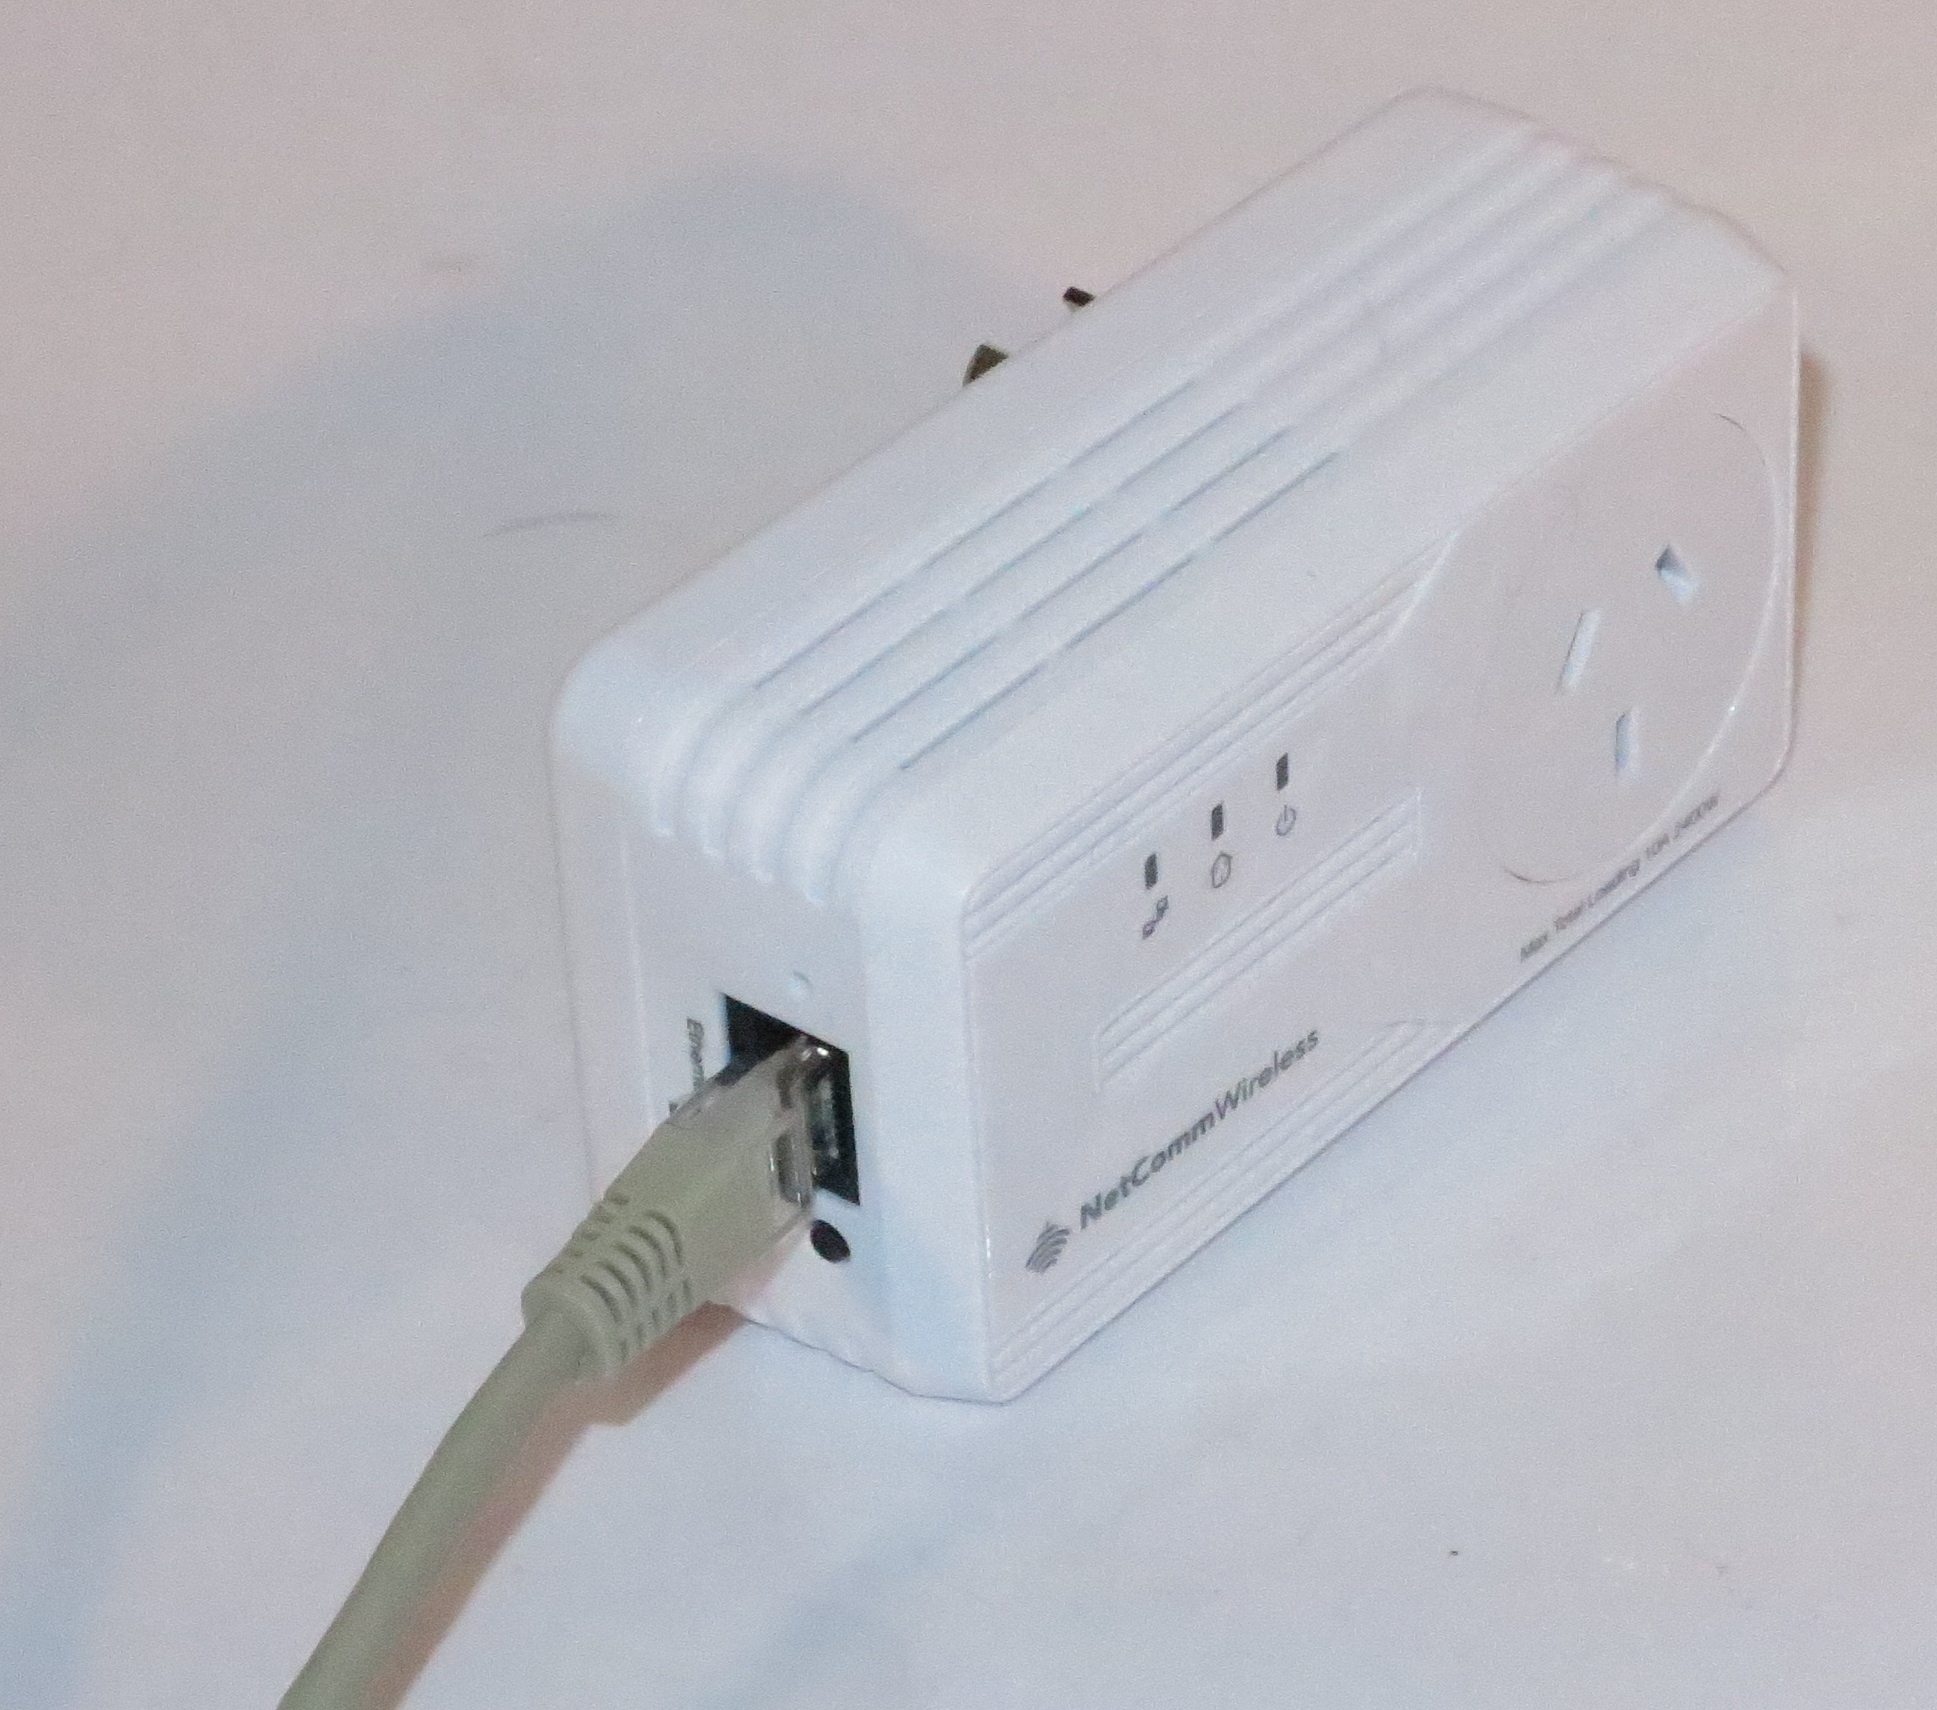
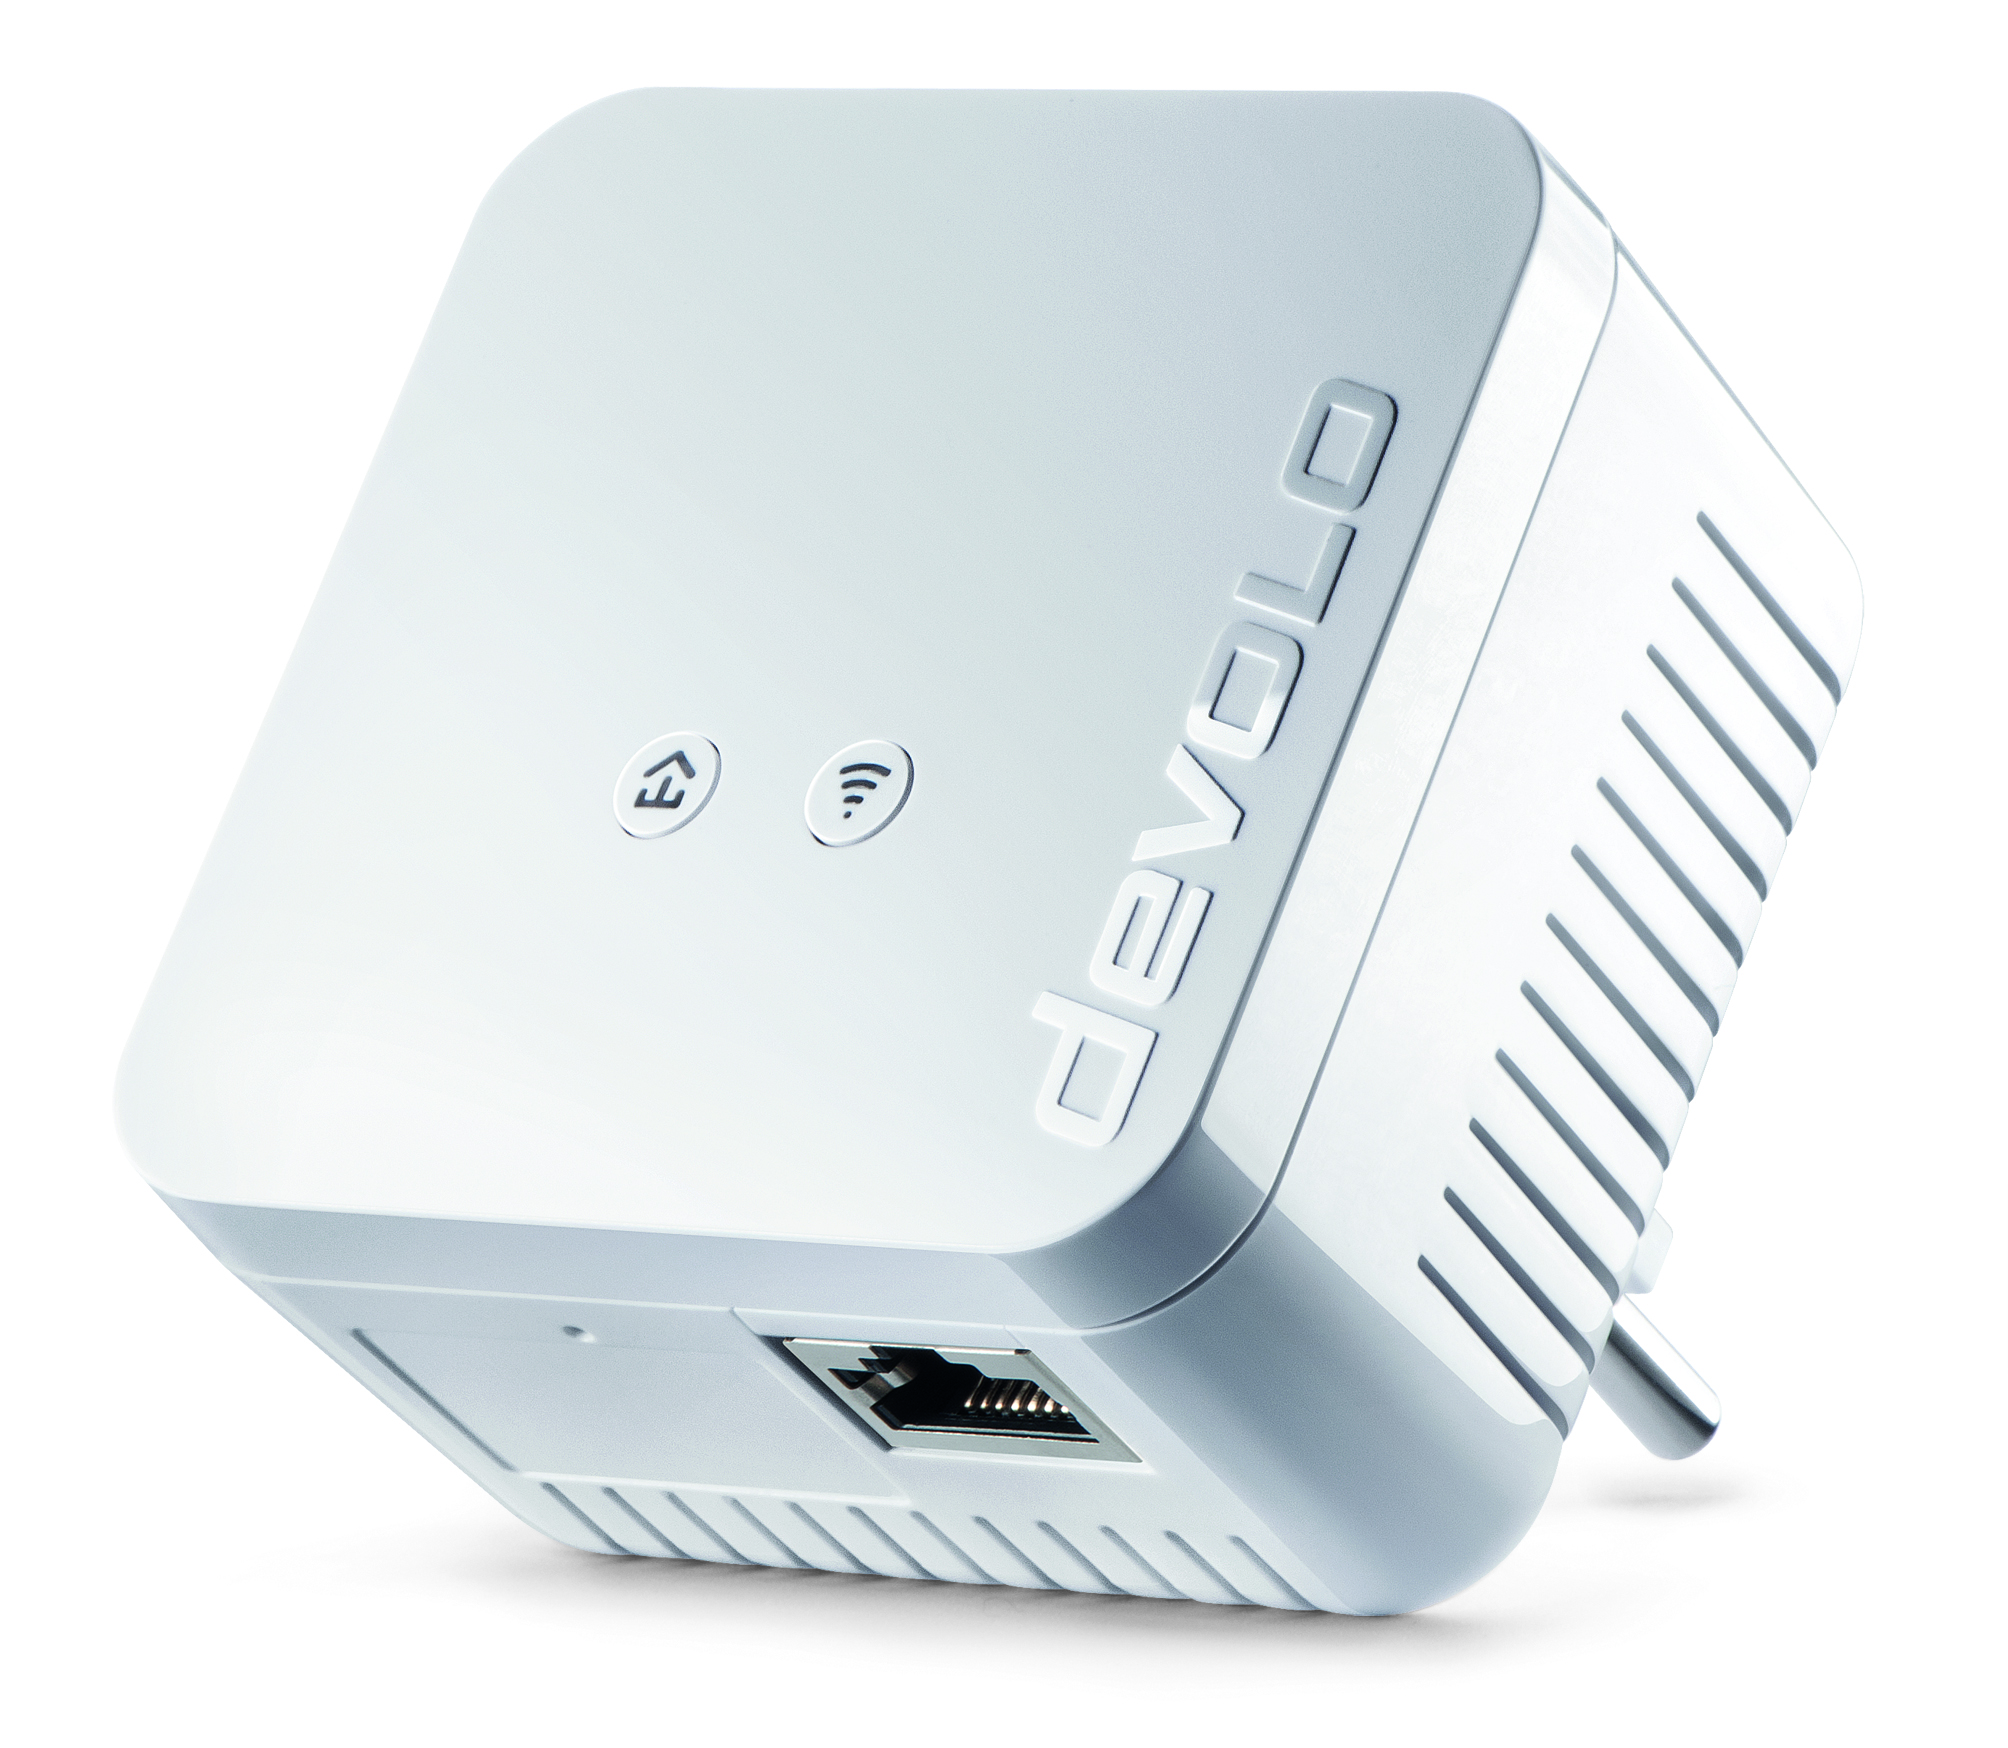
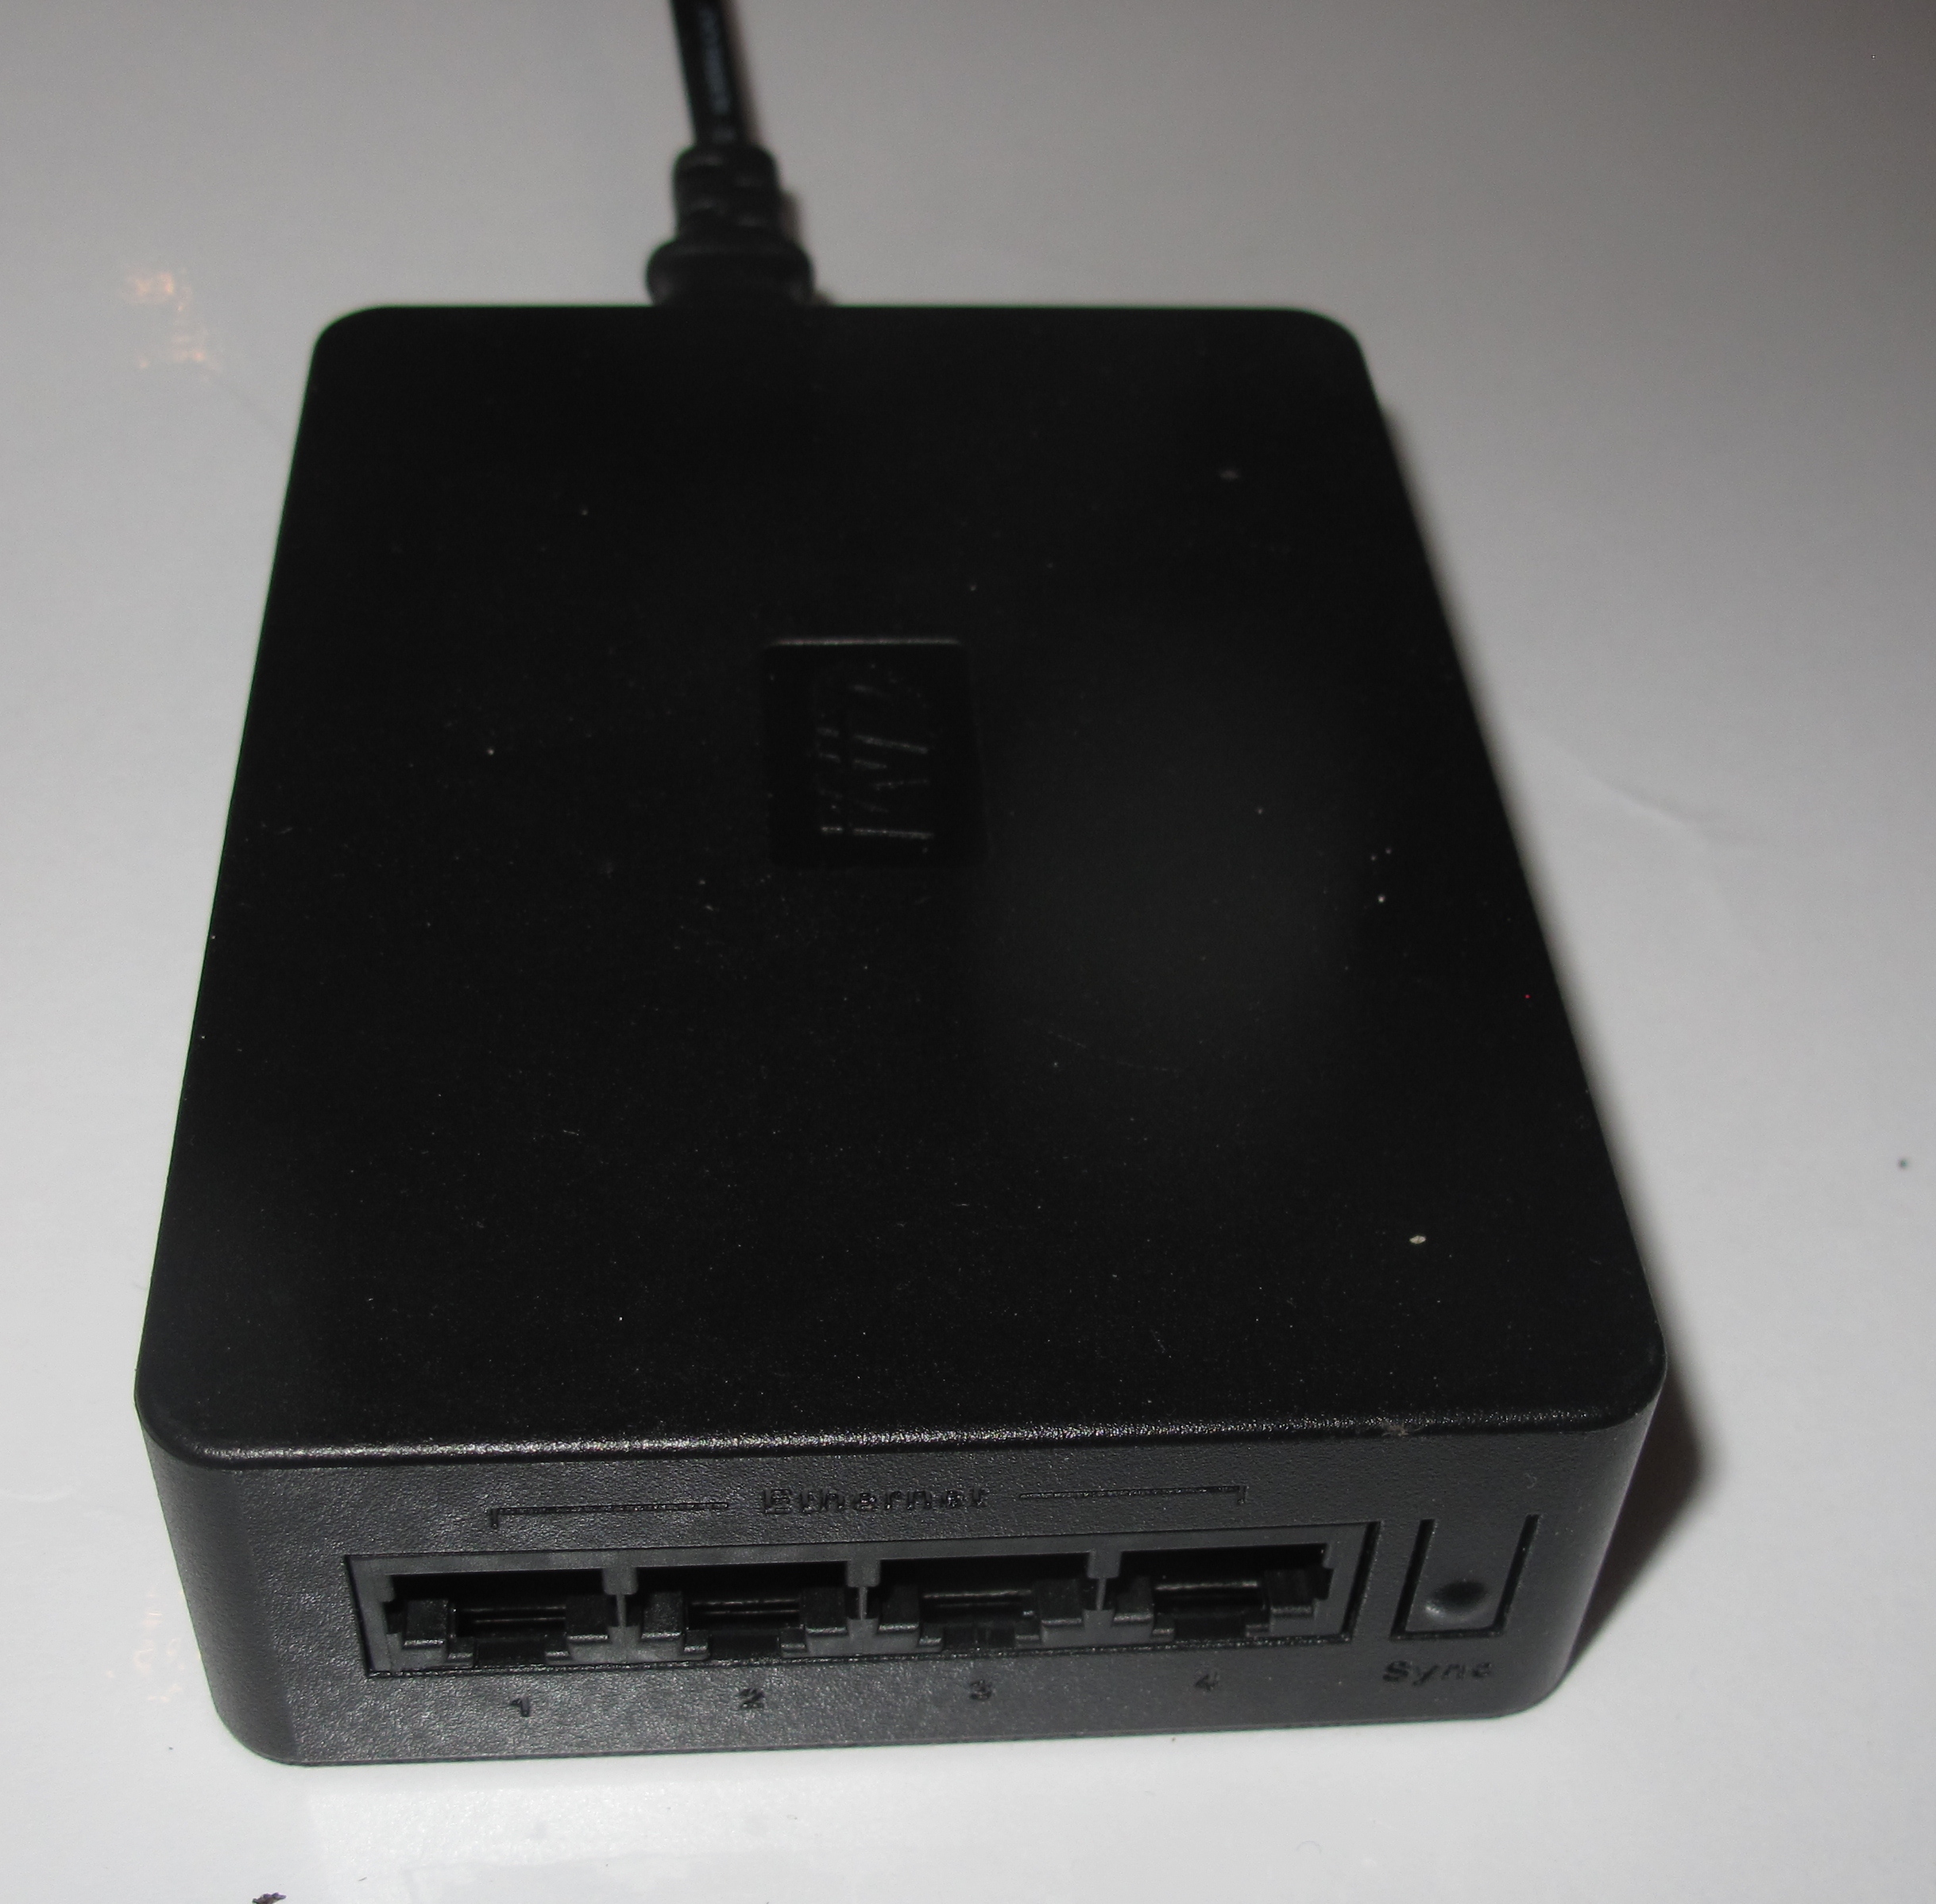
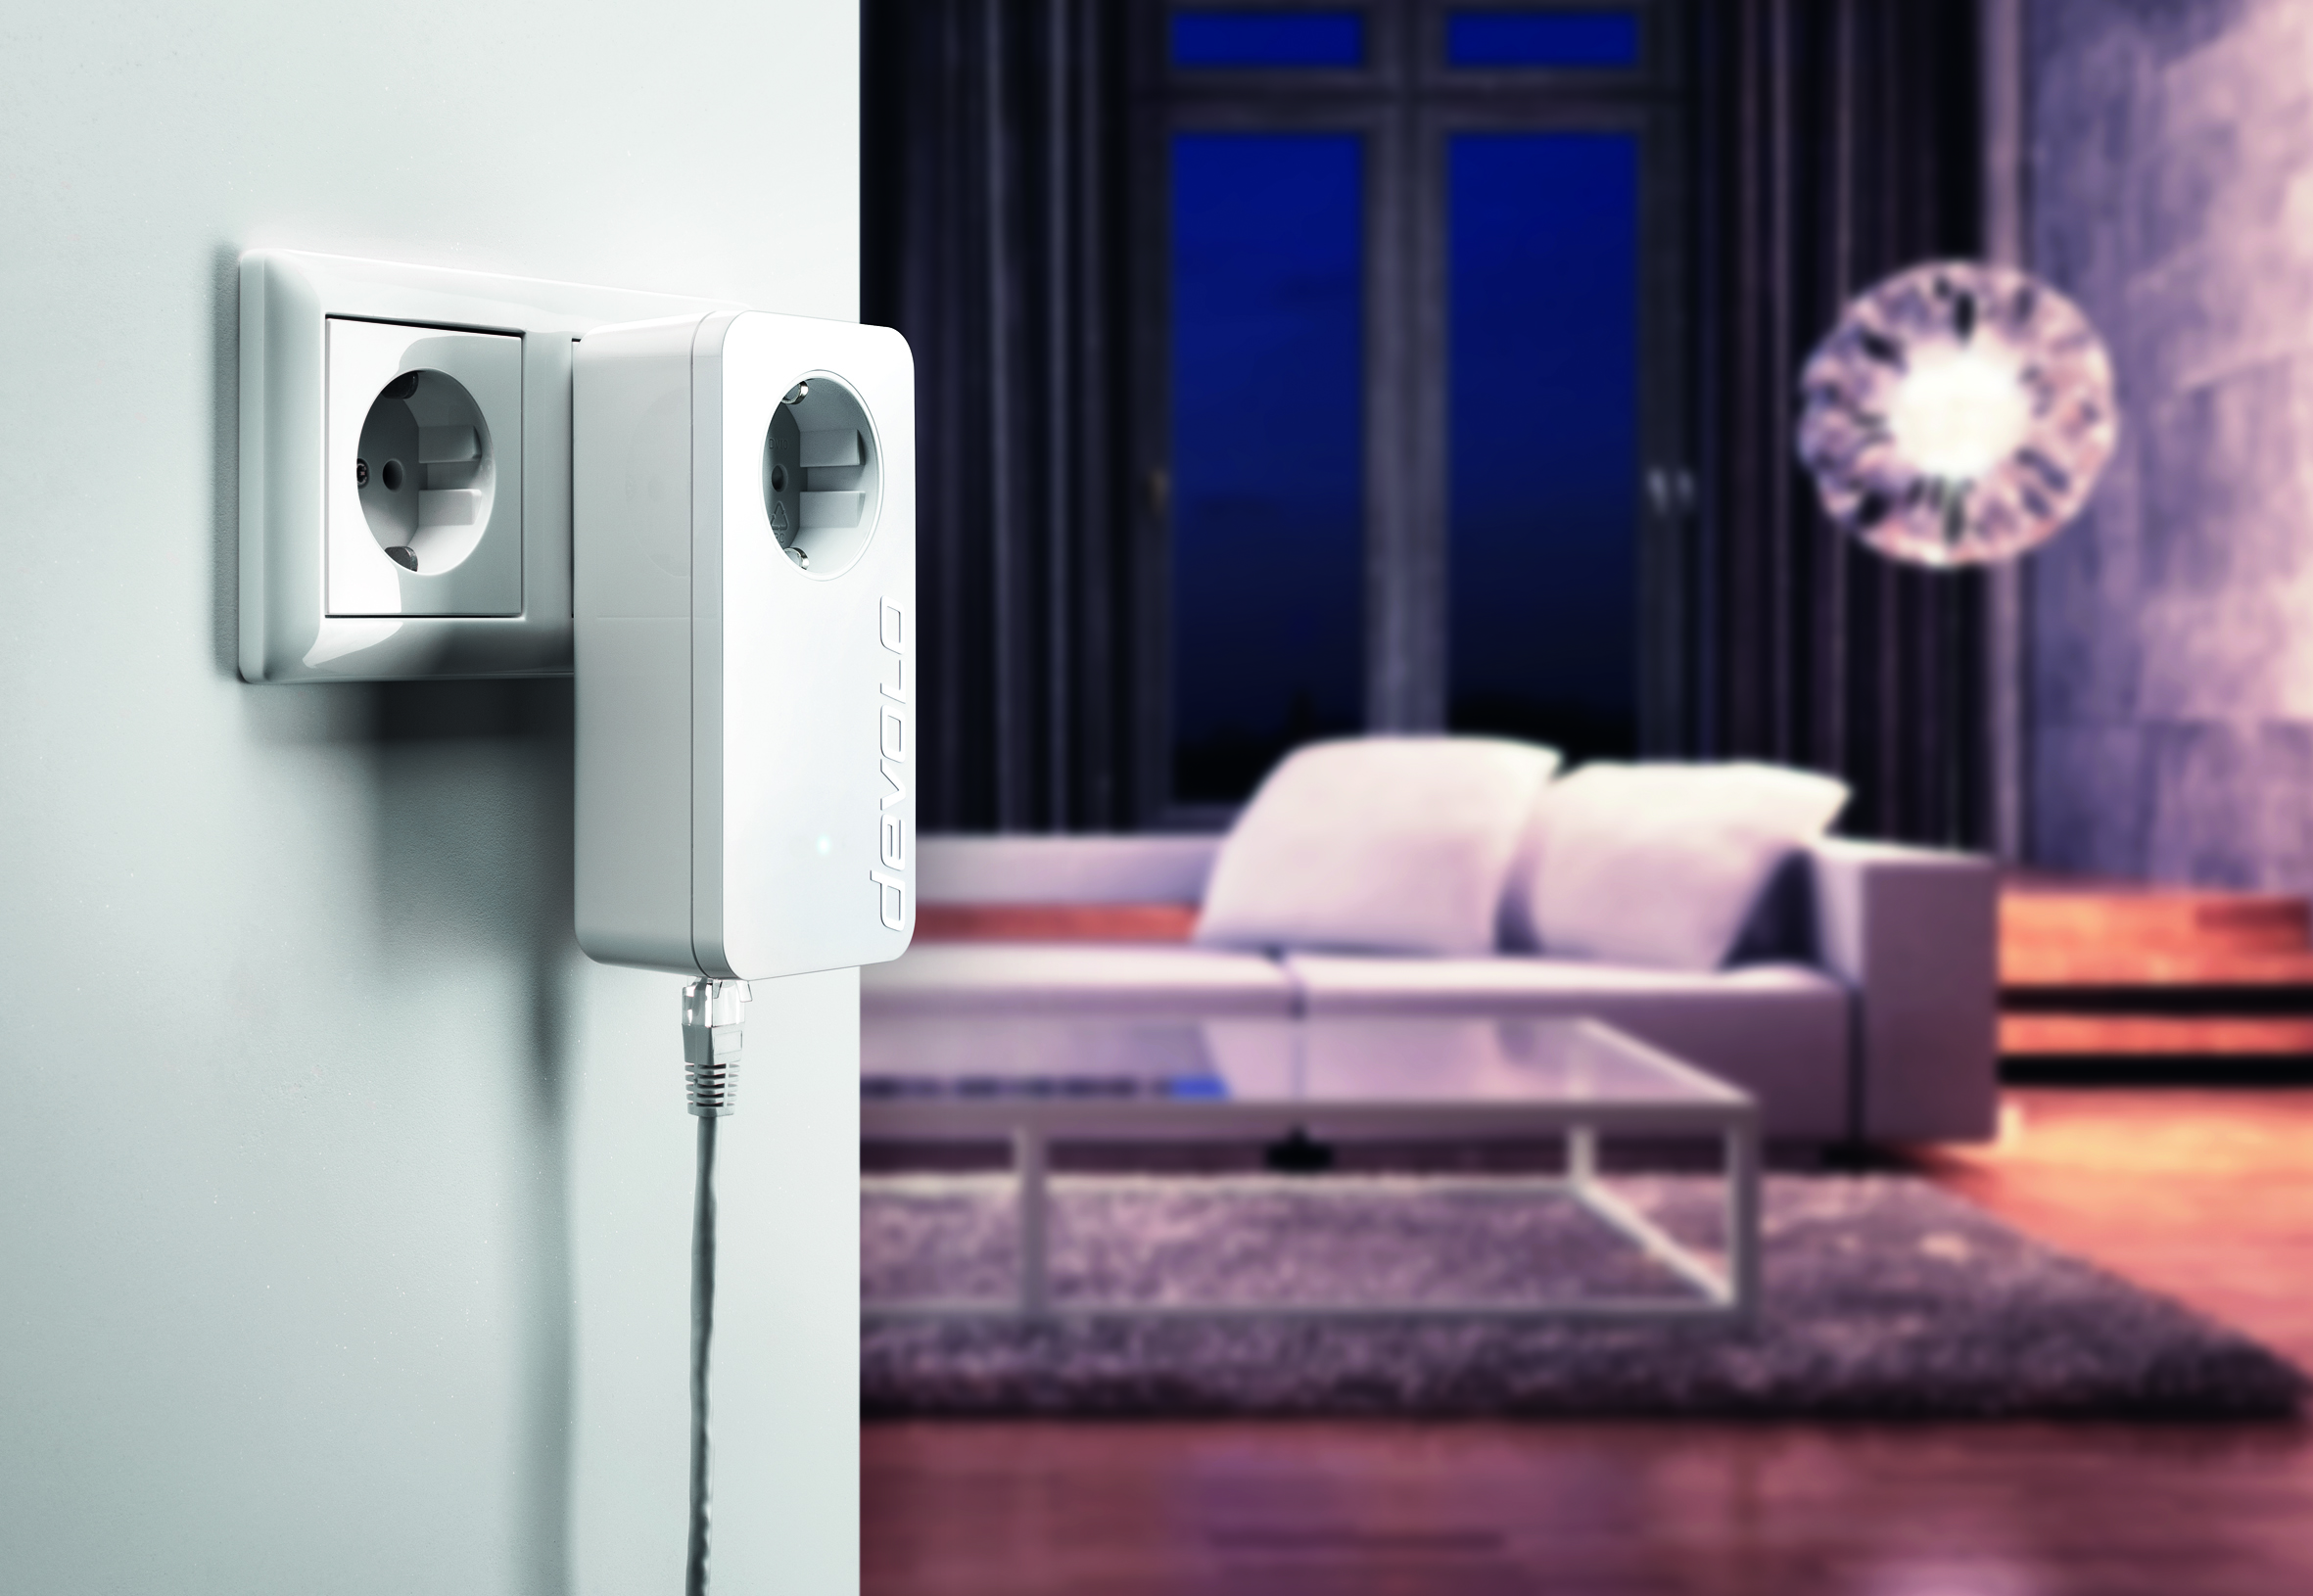
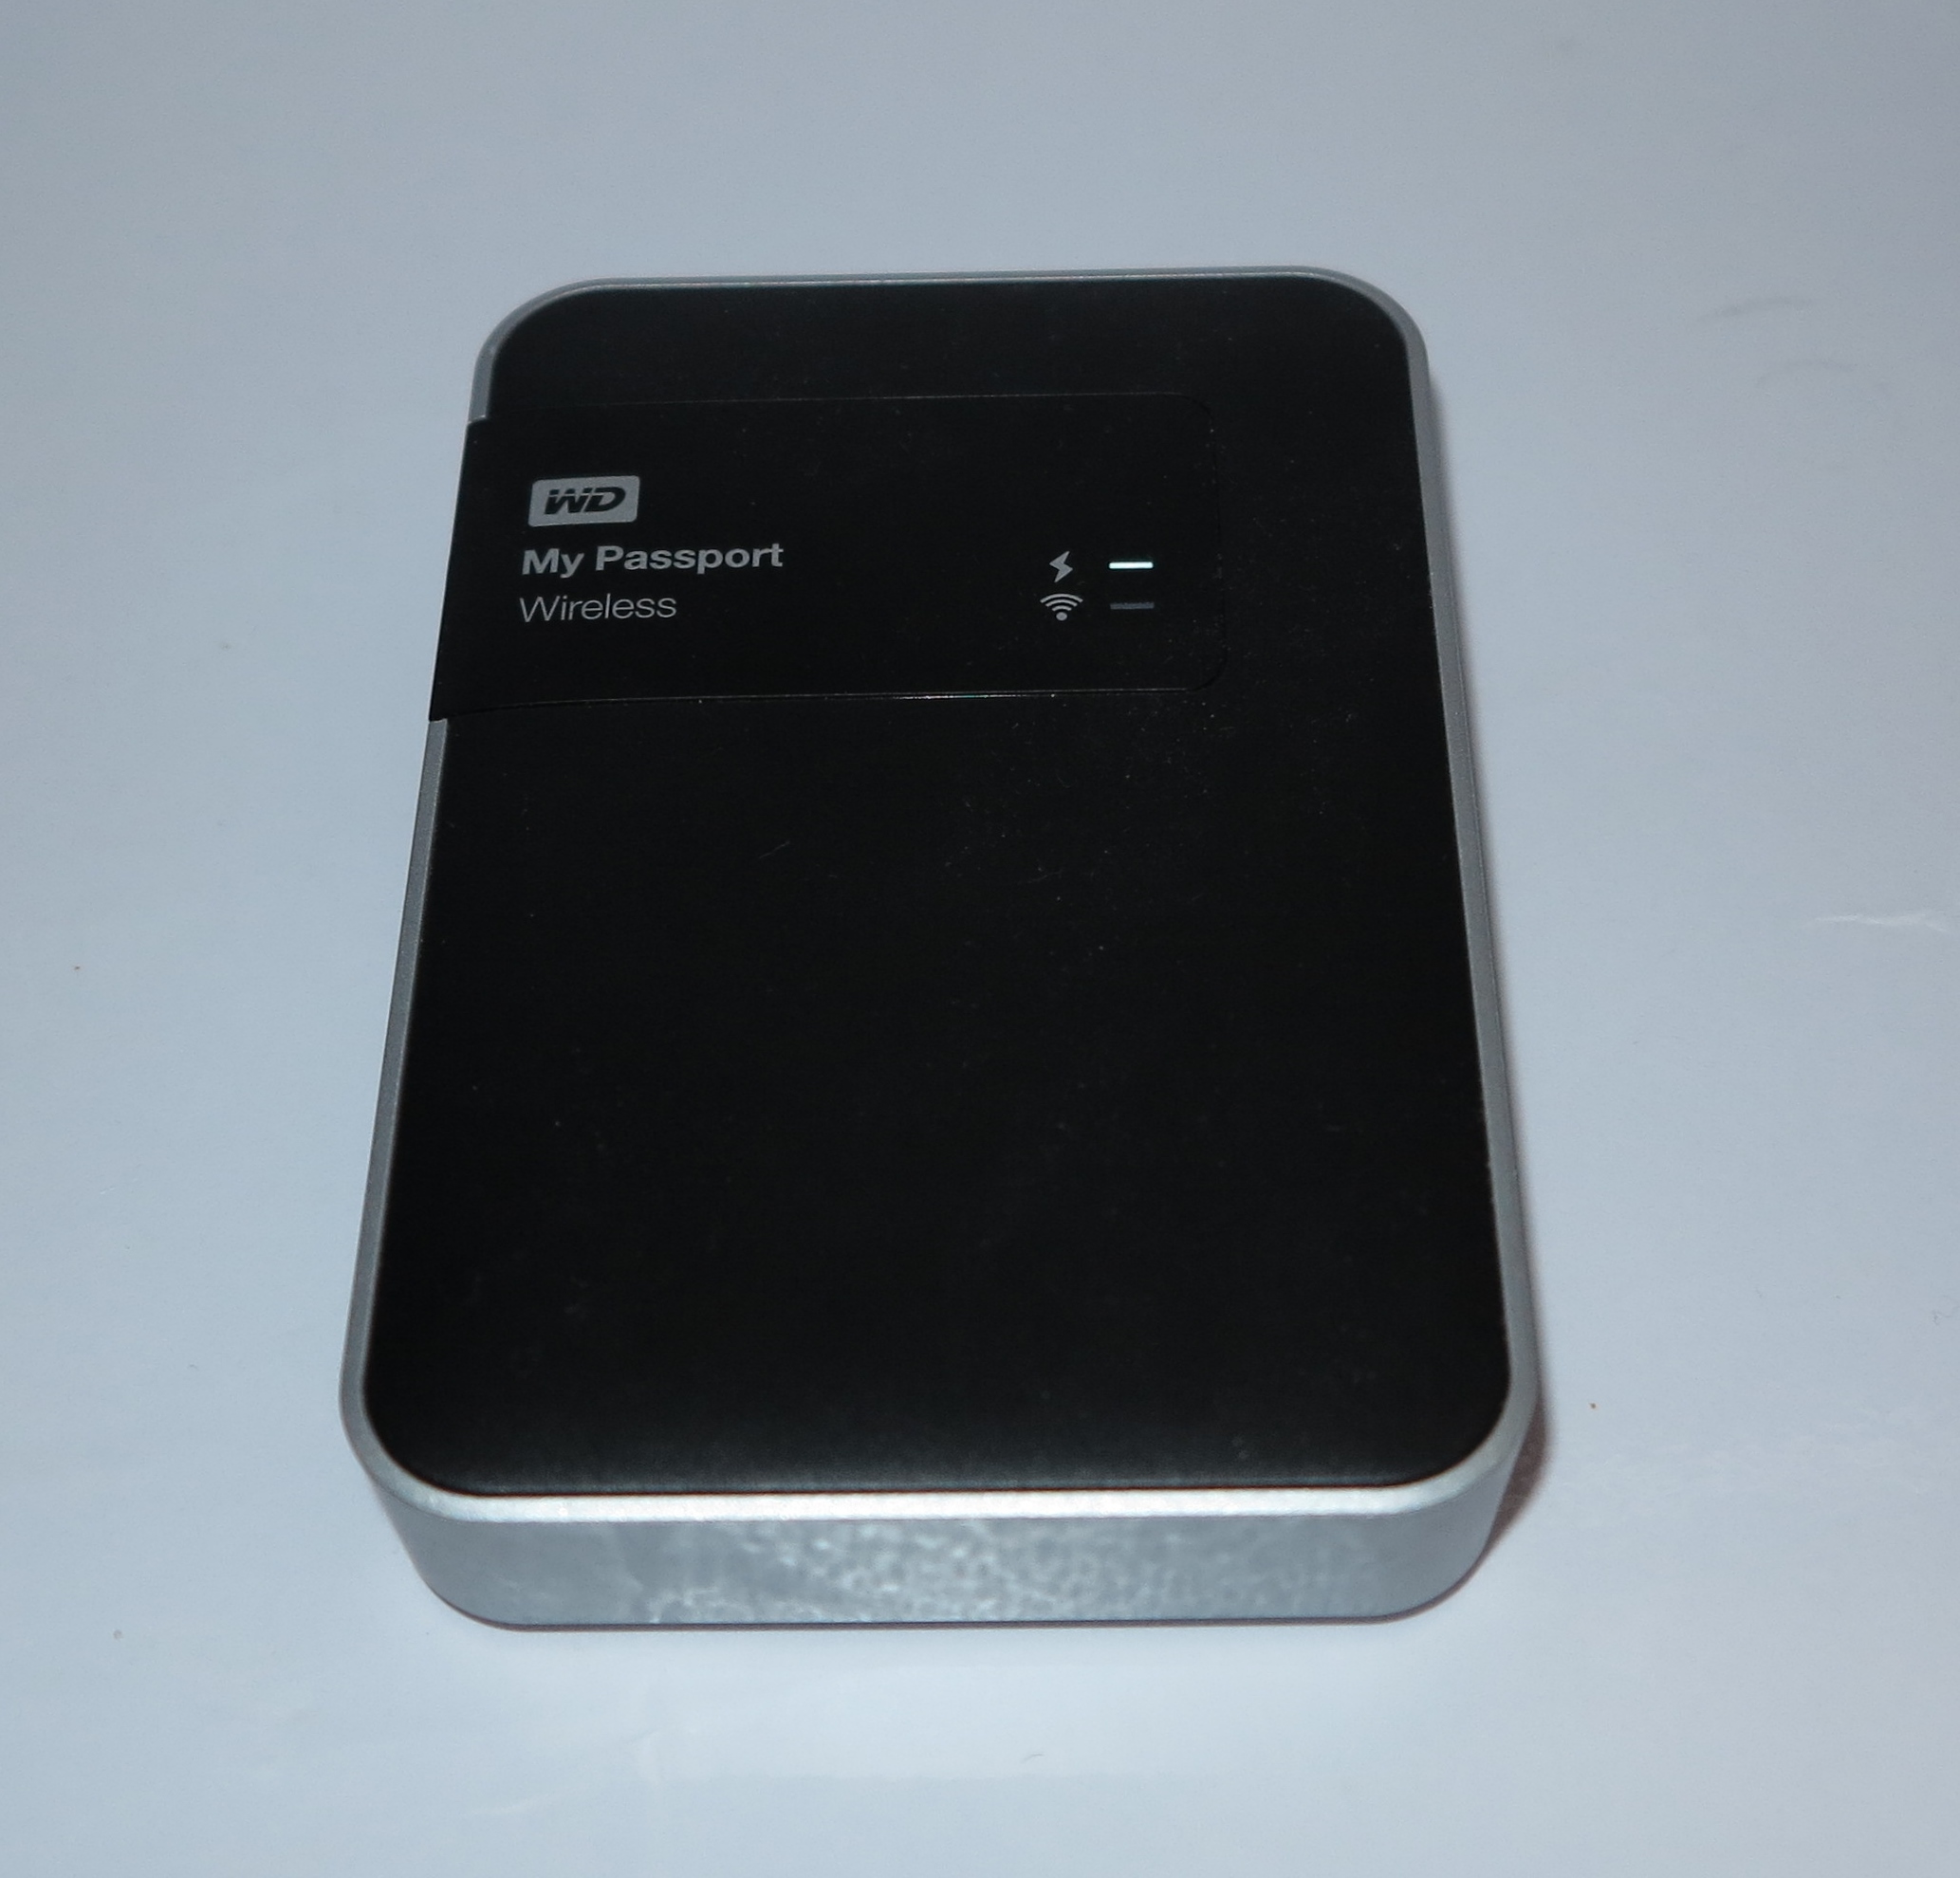
Travel Routers and portable NAS devices

Mobile NAS as bridge setup

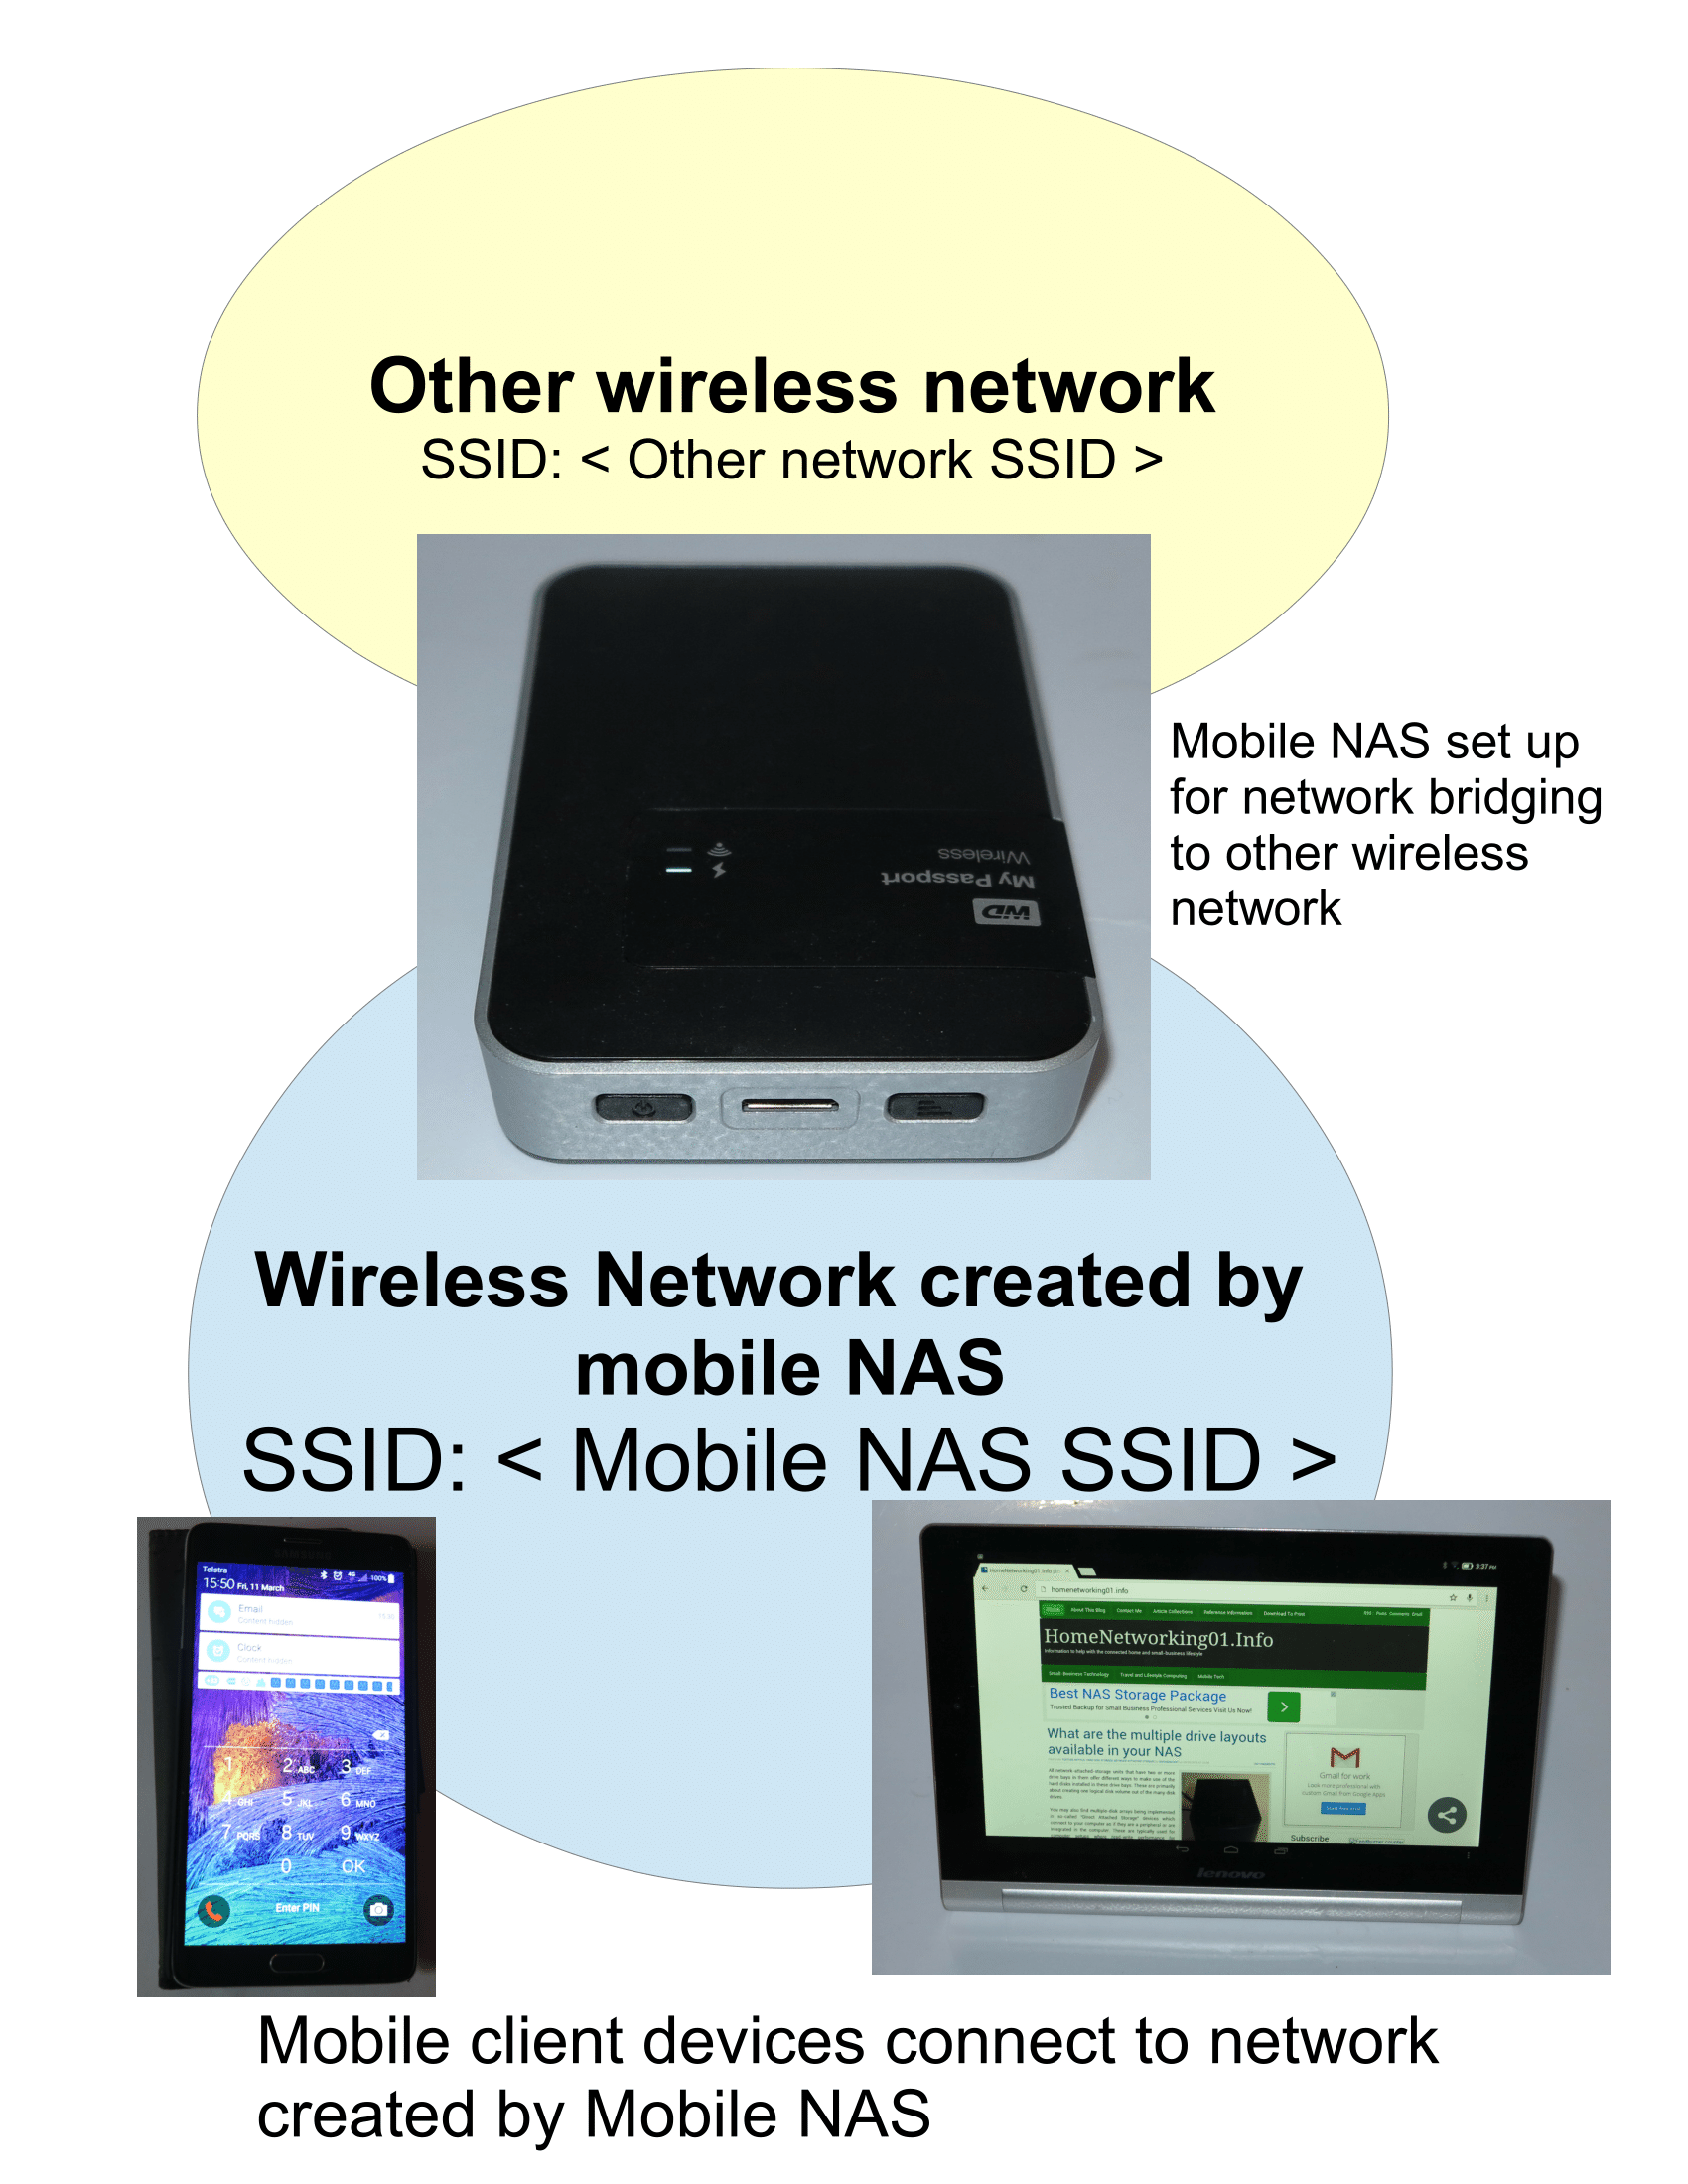
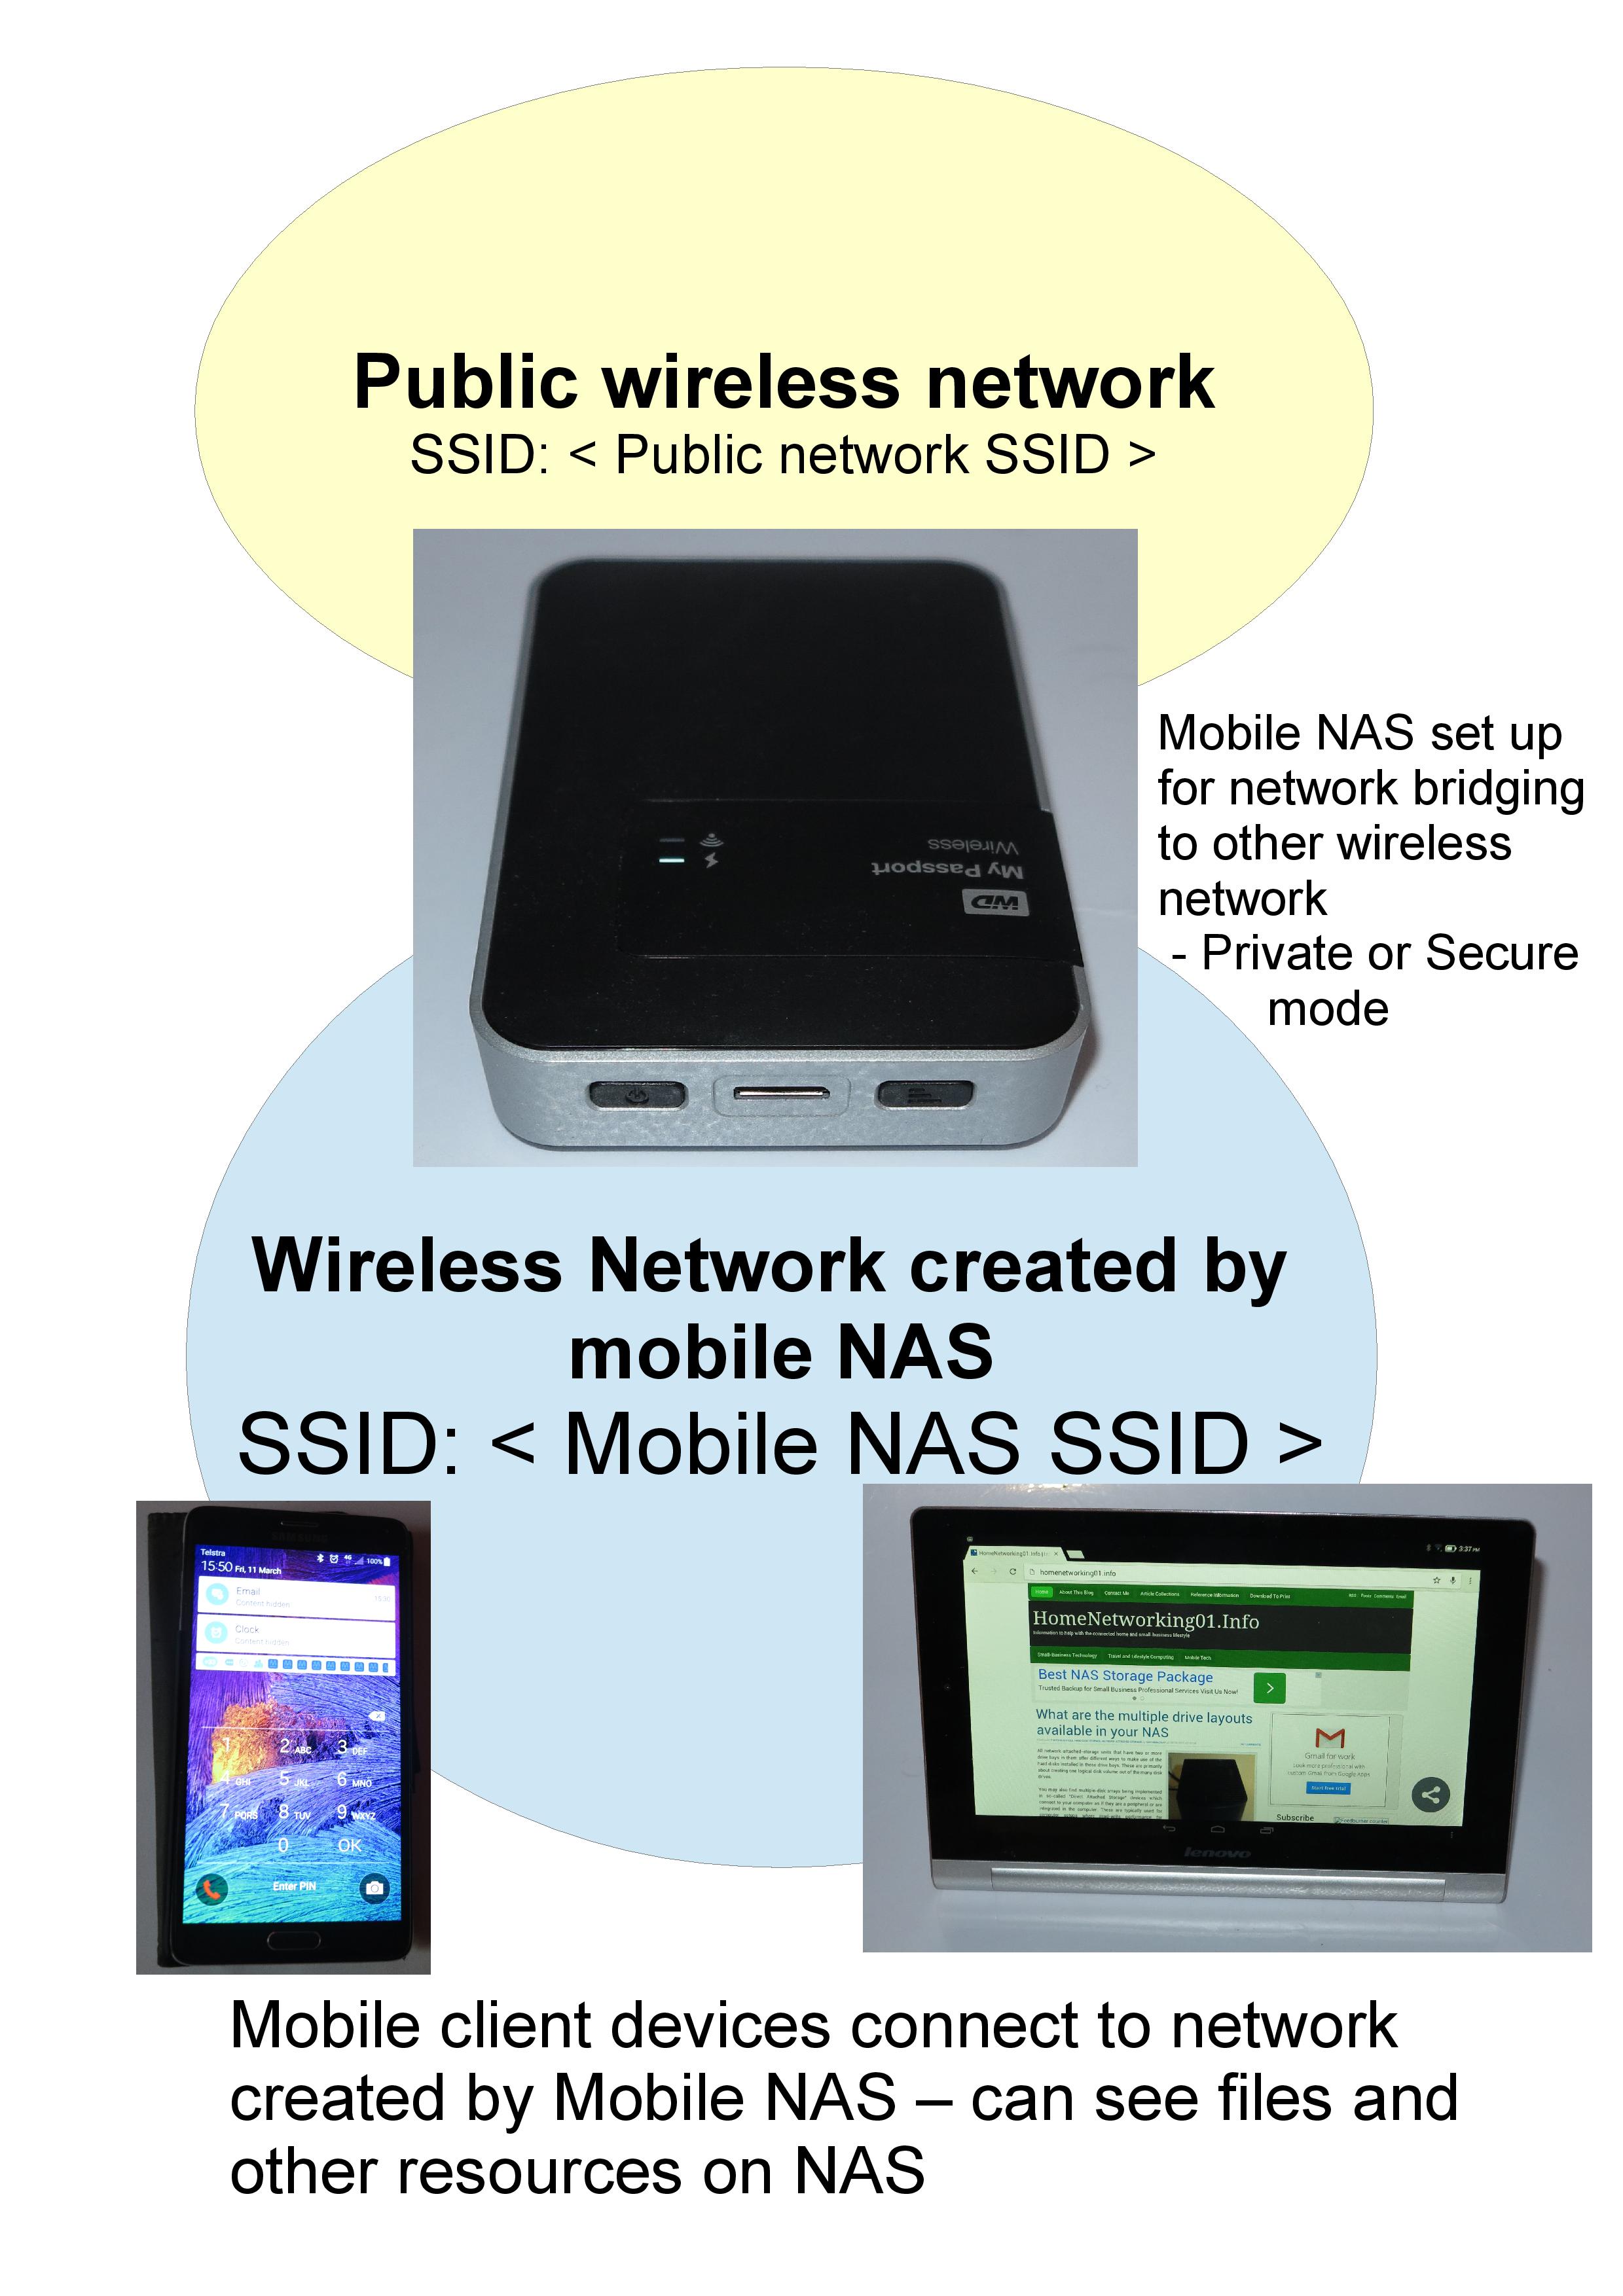
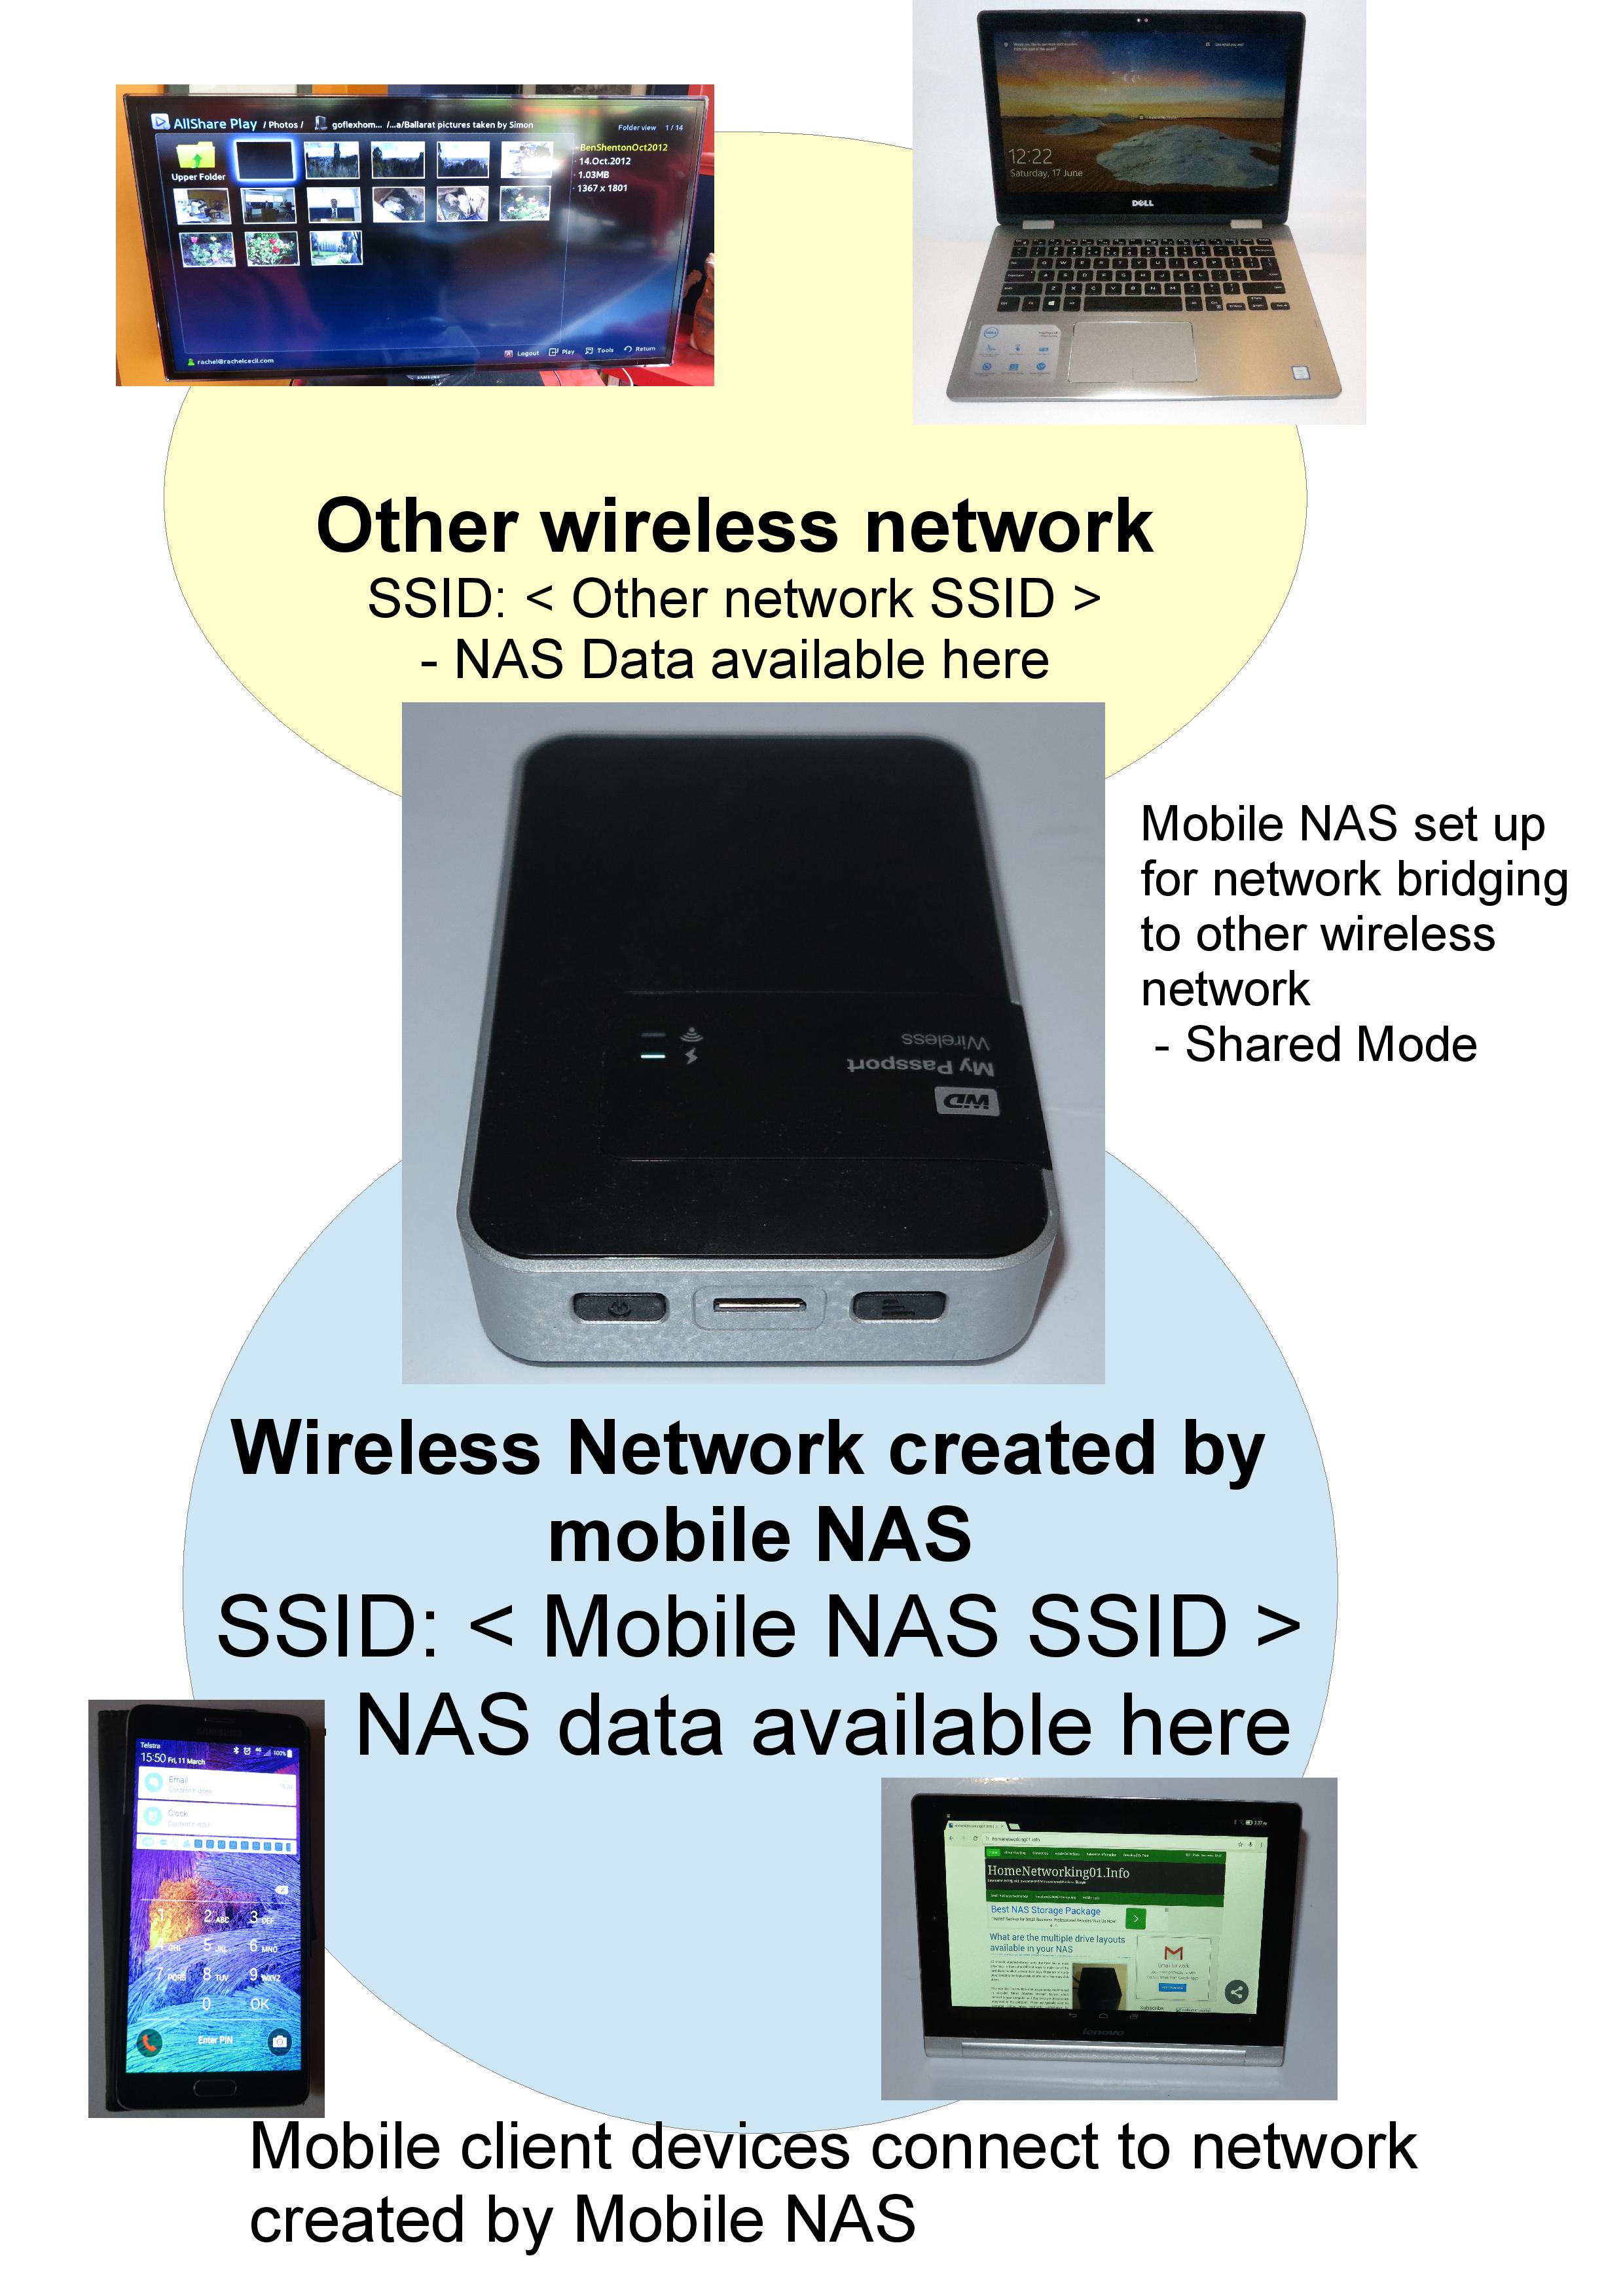
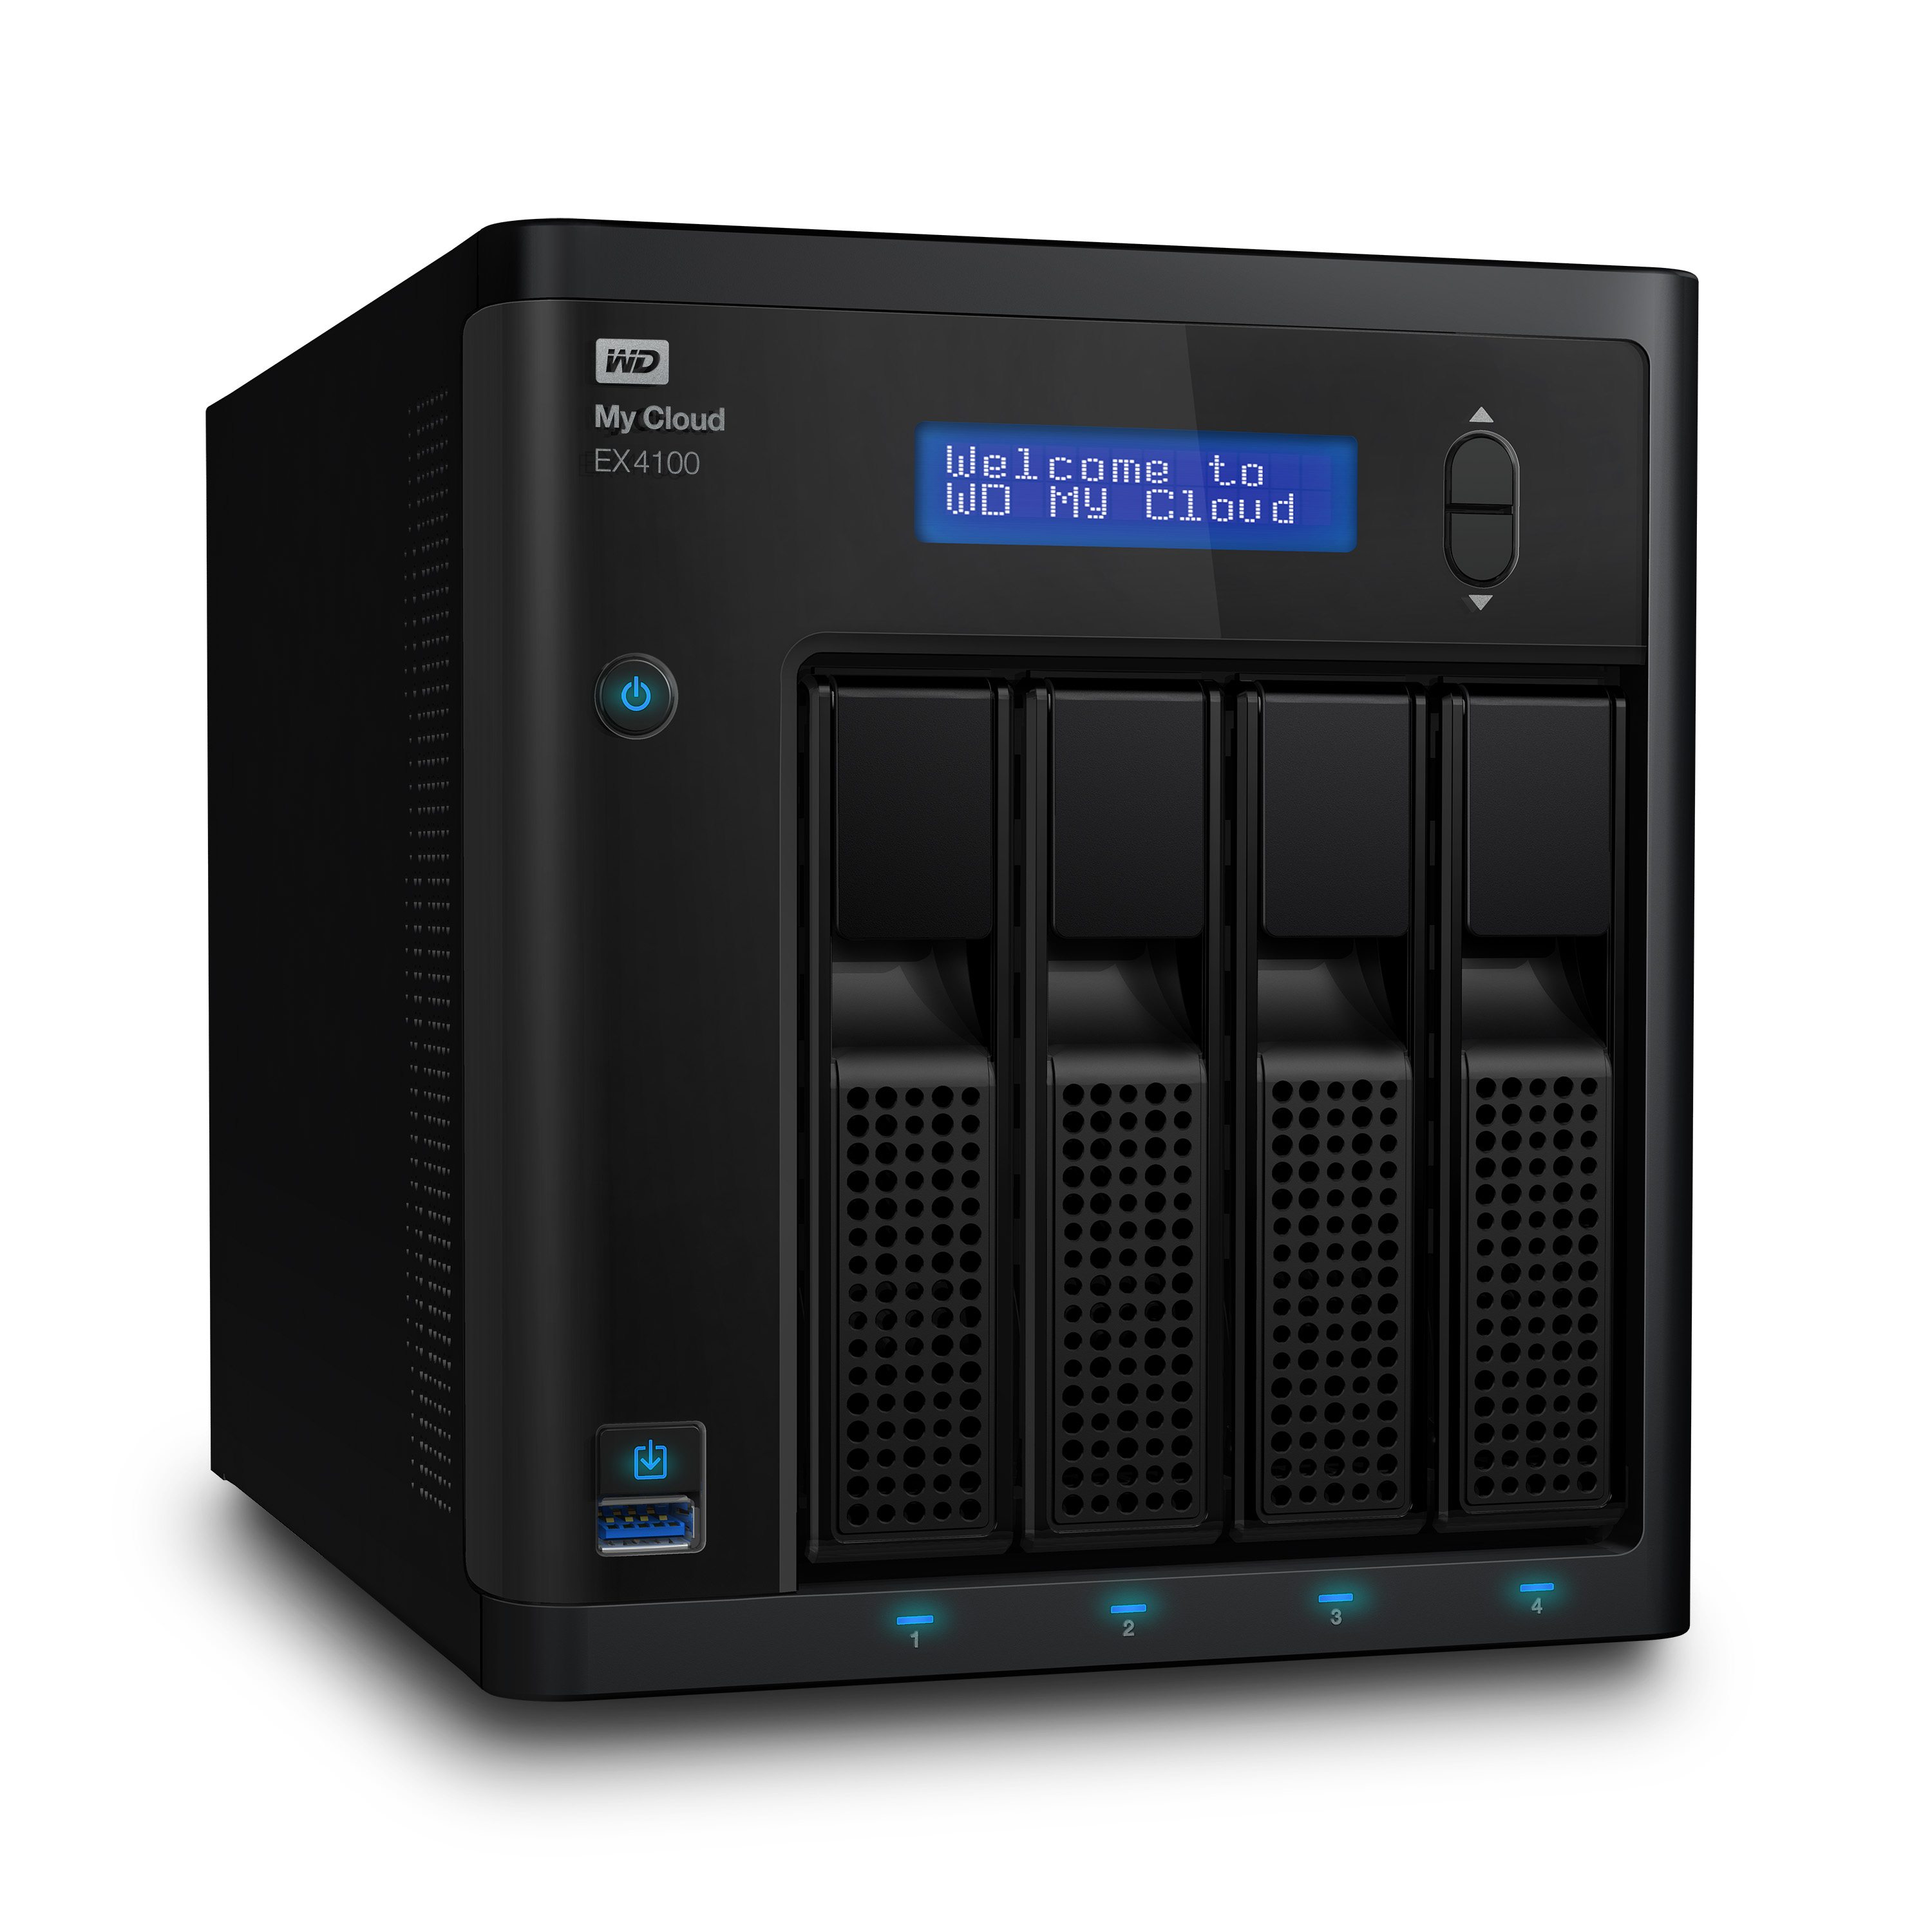
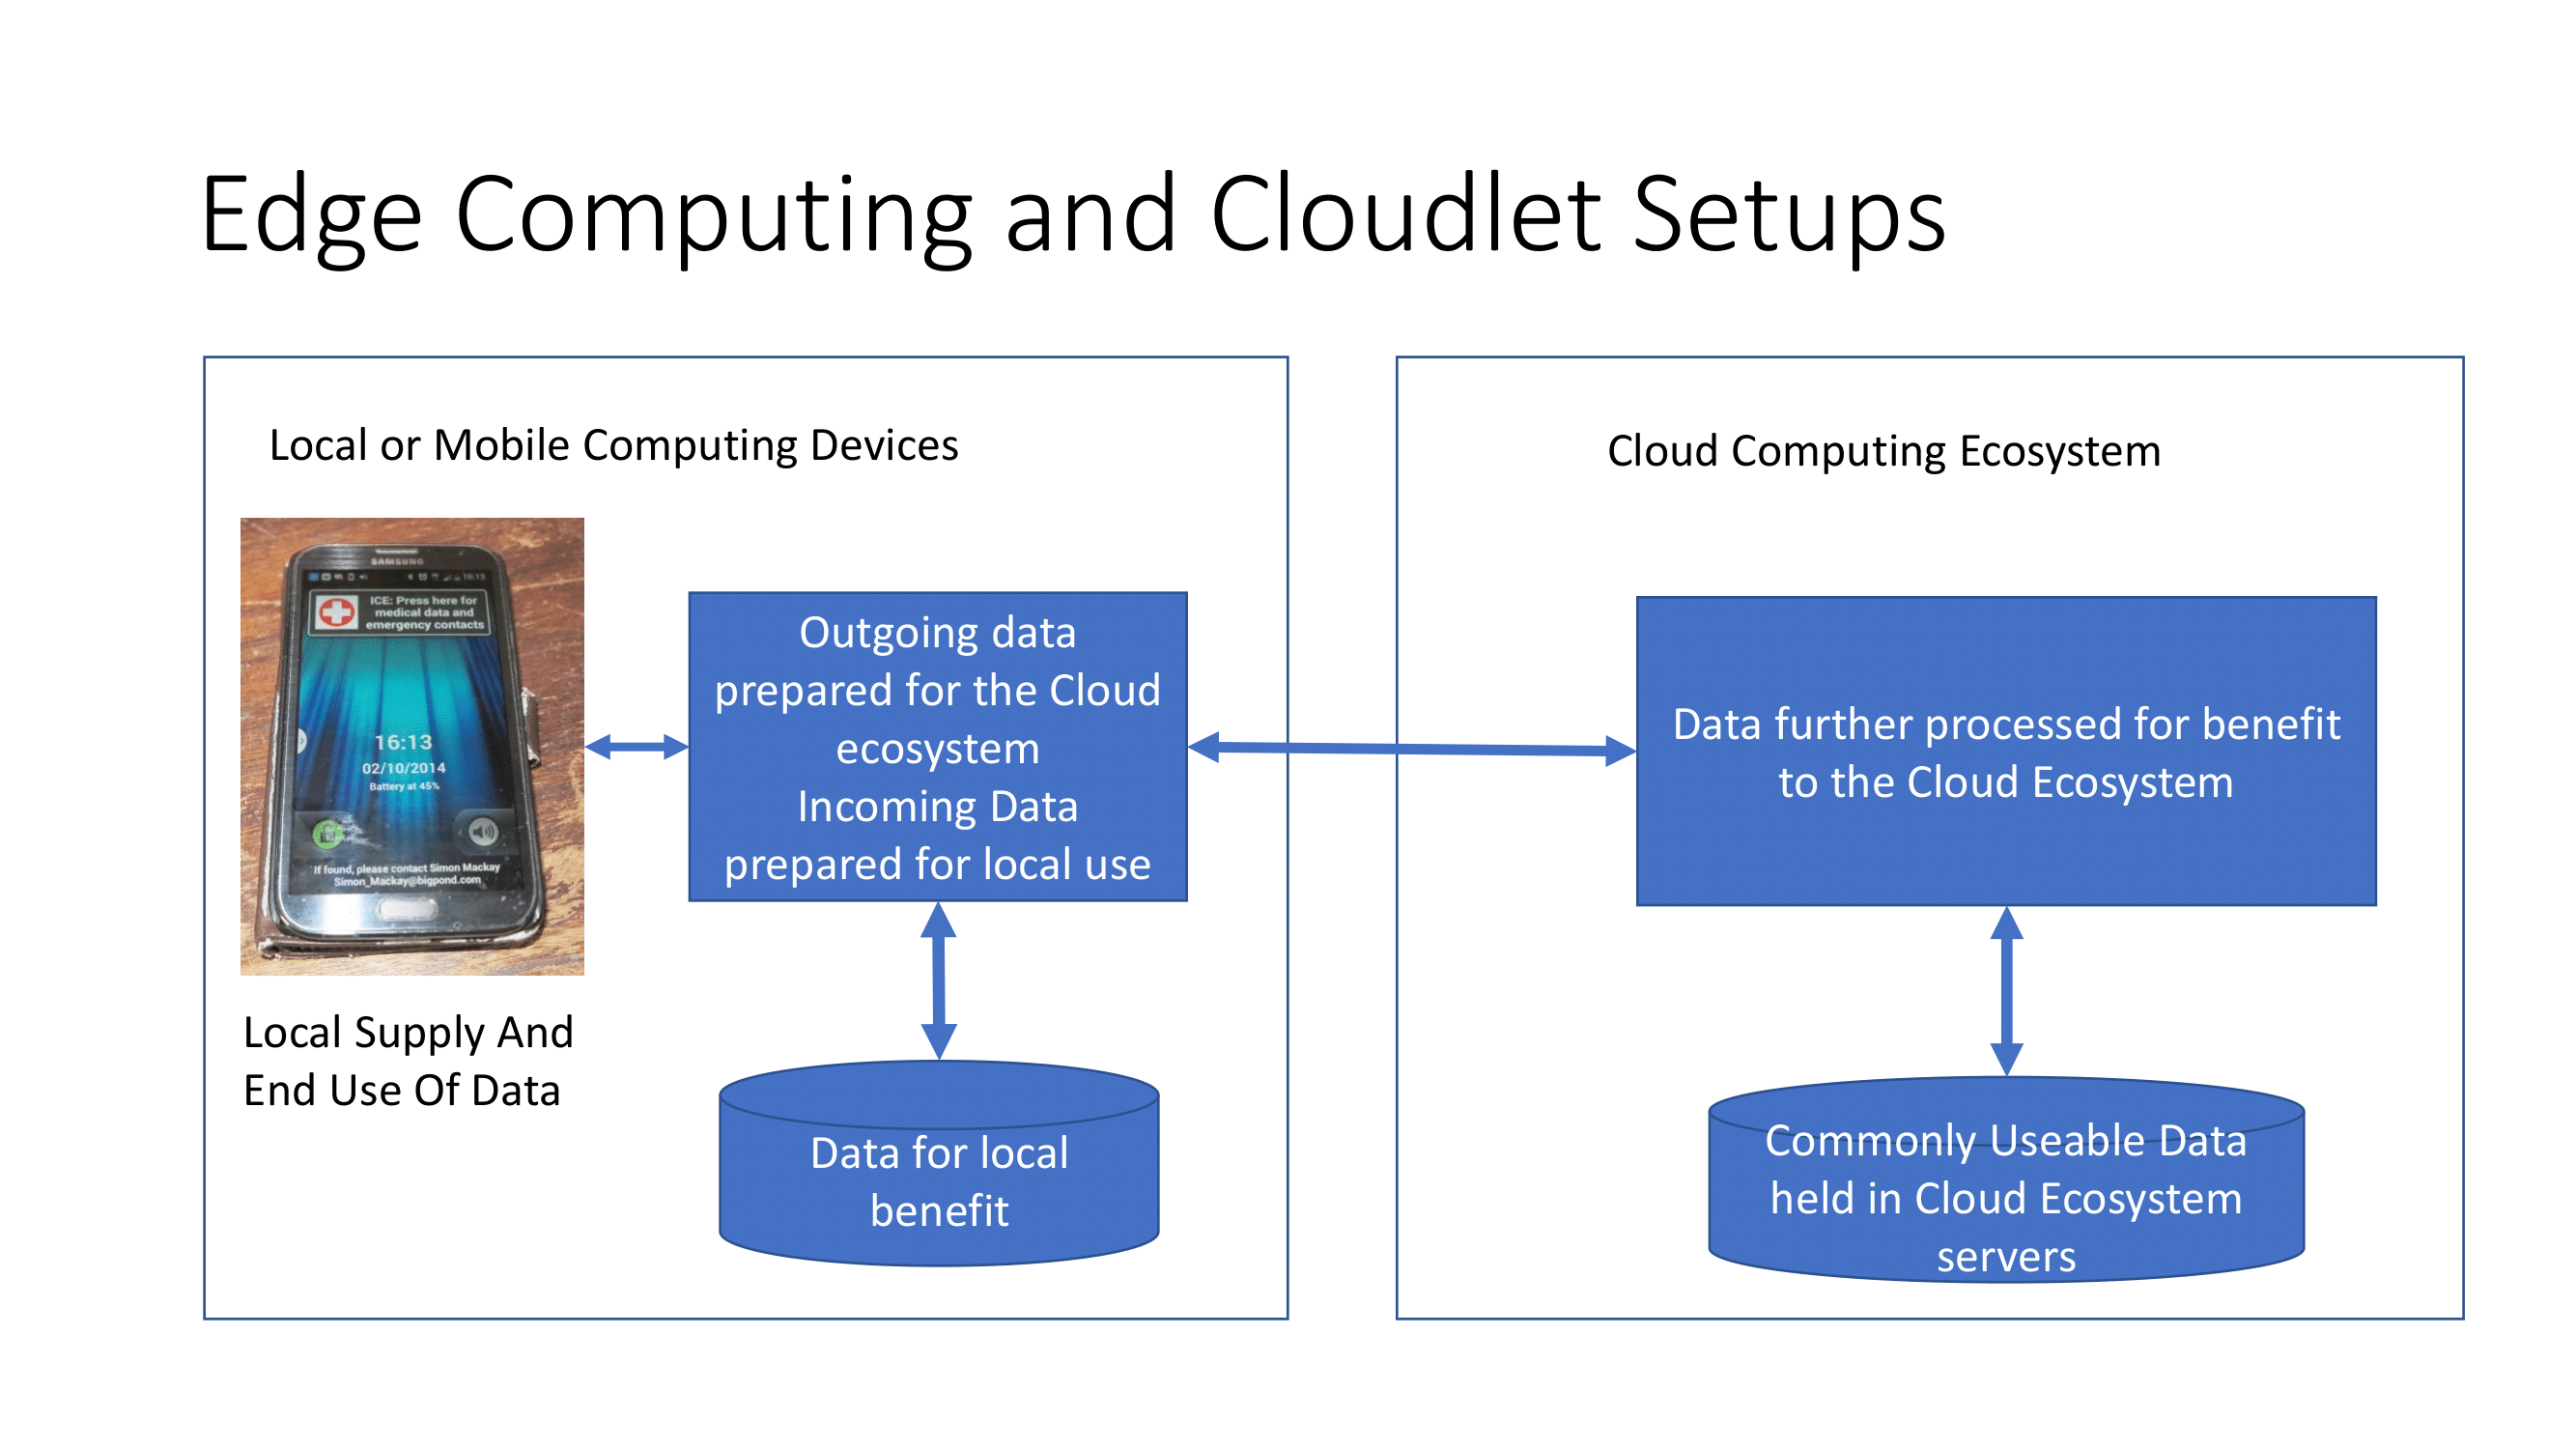
Wireless NAS as a bridge between mobile client devices and another Internet-providing network. This is a similar setup for travel routers that support “Wi-Fi to Wi-Fi” operation.

One approach is to use a travel router or Wi-Fi-capable portable NAS that supports “Wi-Fi to Wi-Fi routing”. This means that the device connects to the public access network while creating its own Wi-Fi network, acting as a router. With Wi-Fi-capable portable NAS devices, you have to enable this function through something like enabling “Share Wi-Fi Connection”. You have to set the NAS so that the data that it has is not shared to the Wi-Fi network it is connected to, something you do when you set up “secure” or “private” operation.

Newer multimedia-ready hotel-room networks

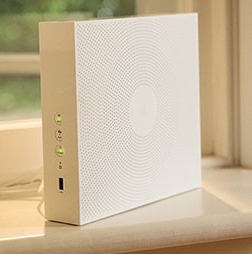
Be also aware that there is an increasing number of network solutions being pitched to hotels and similar lodging establishments that create small home-network-grade Wi-Fi networks unique to each room or apartment. Some companies are even pitching this as part of their public-access Wi-Fi solution or building-wide network / Internet solution for residential or accommodation places like hotels or build-to-rent apartment buildings.

This is achieved through a distinct room-specific network served by a router installed in the room or a VLAN specific to a room or account and operates for the user’s tenure that works like a small home network.

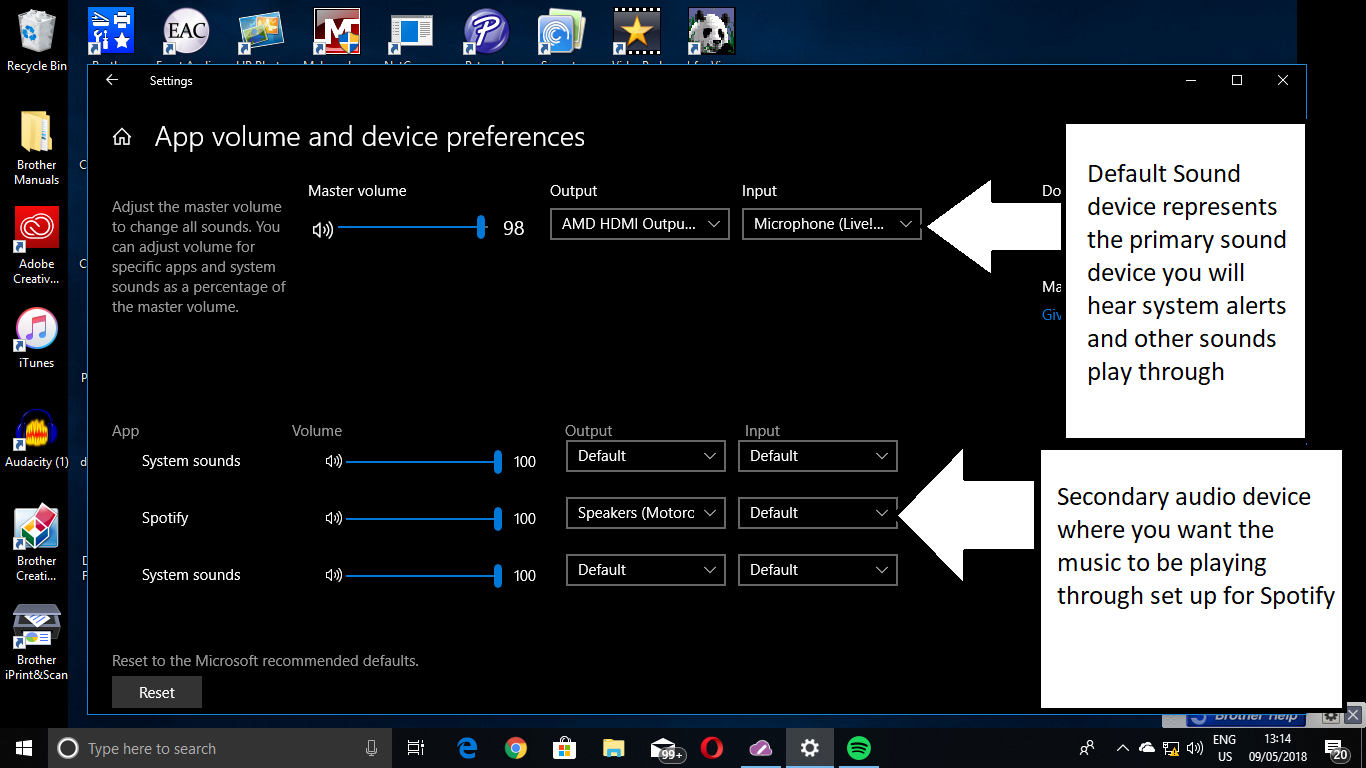
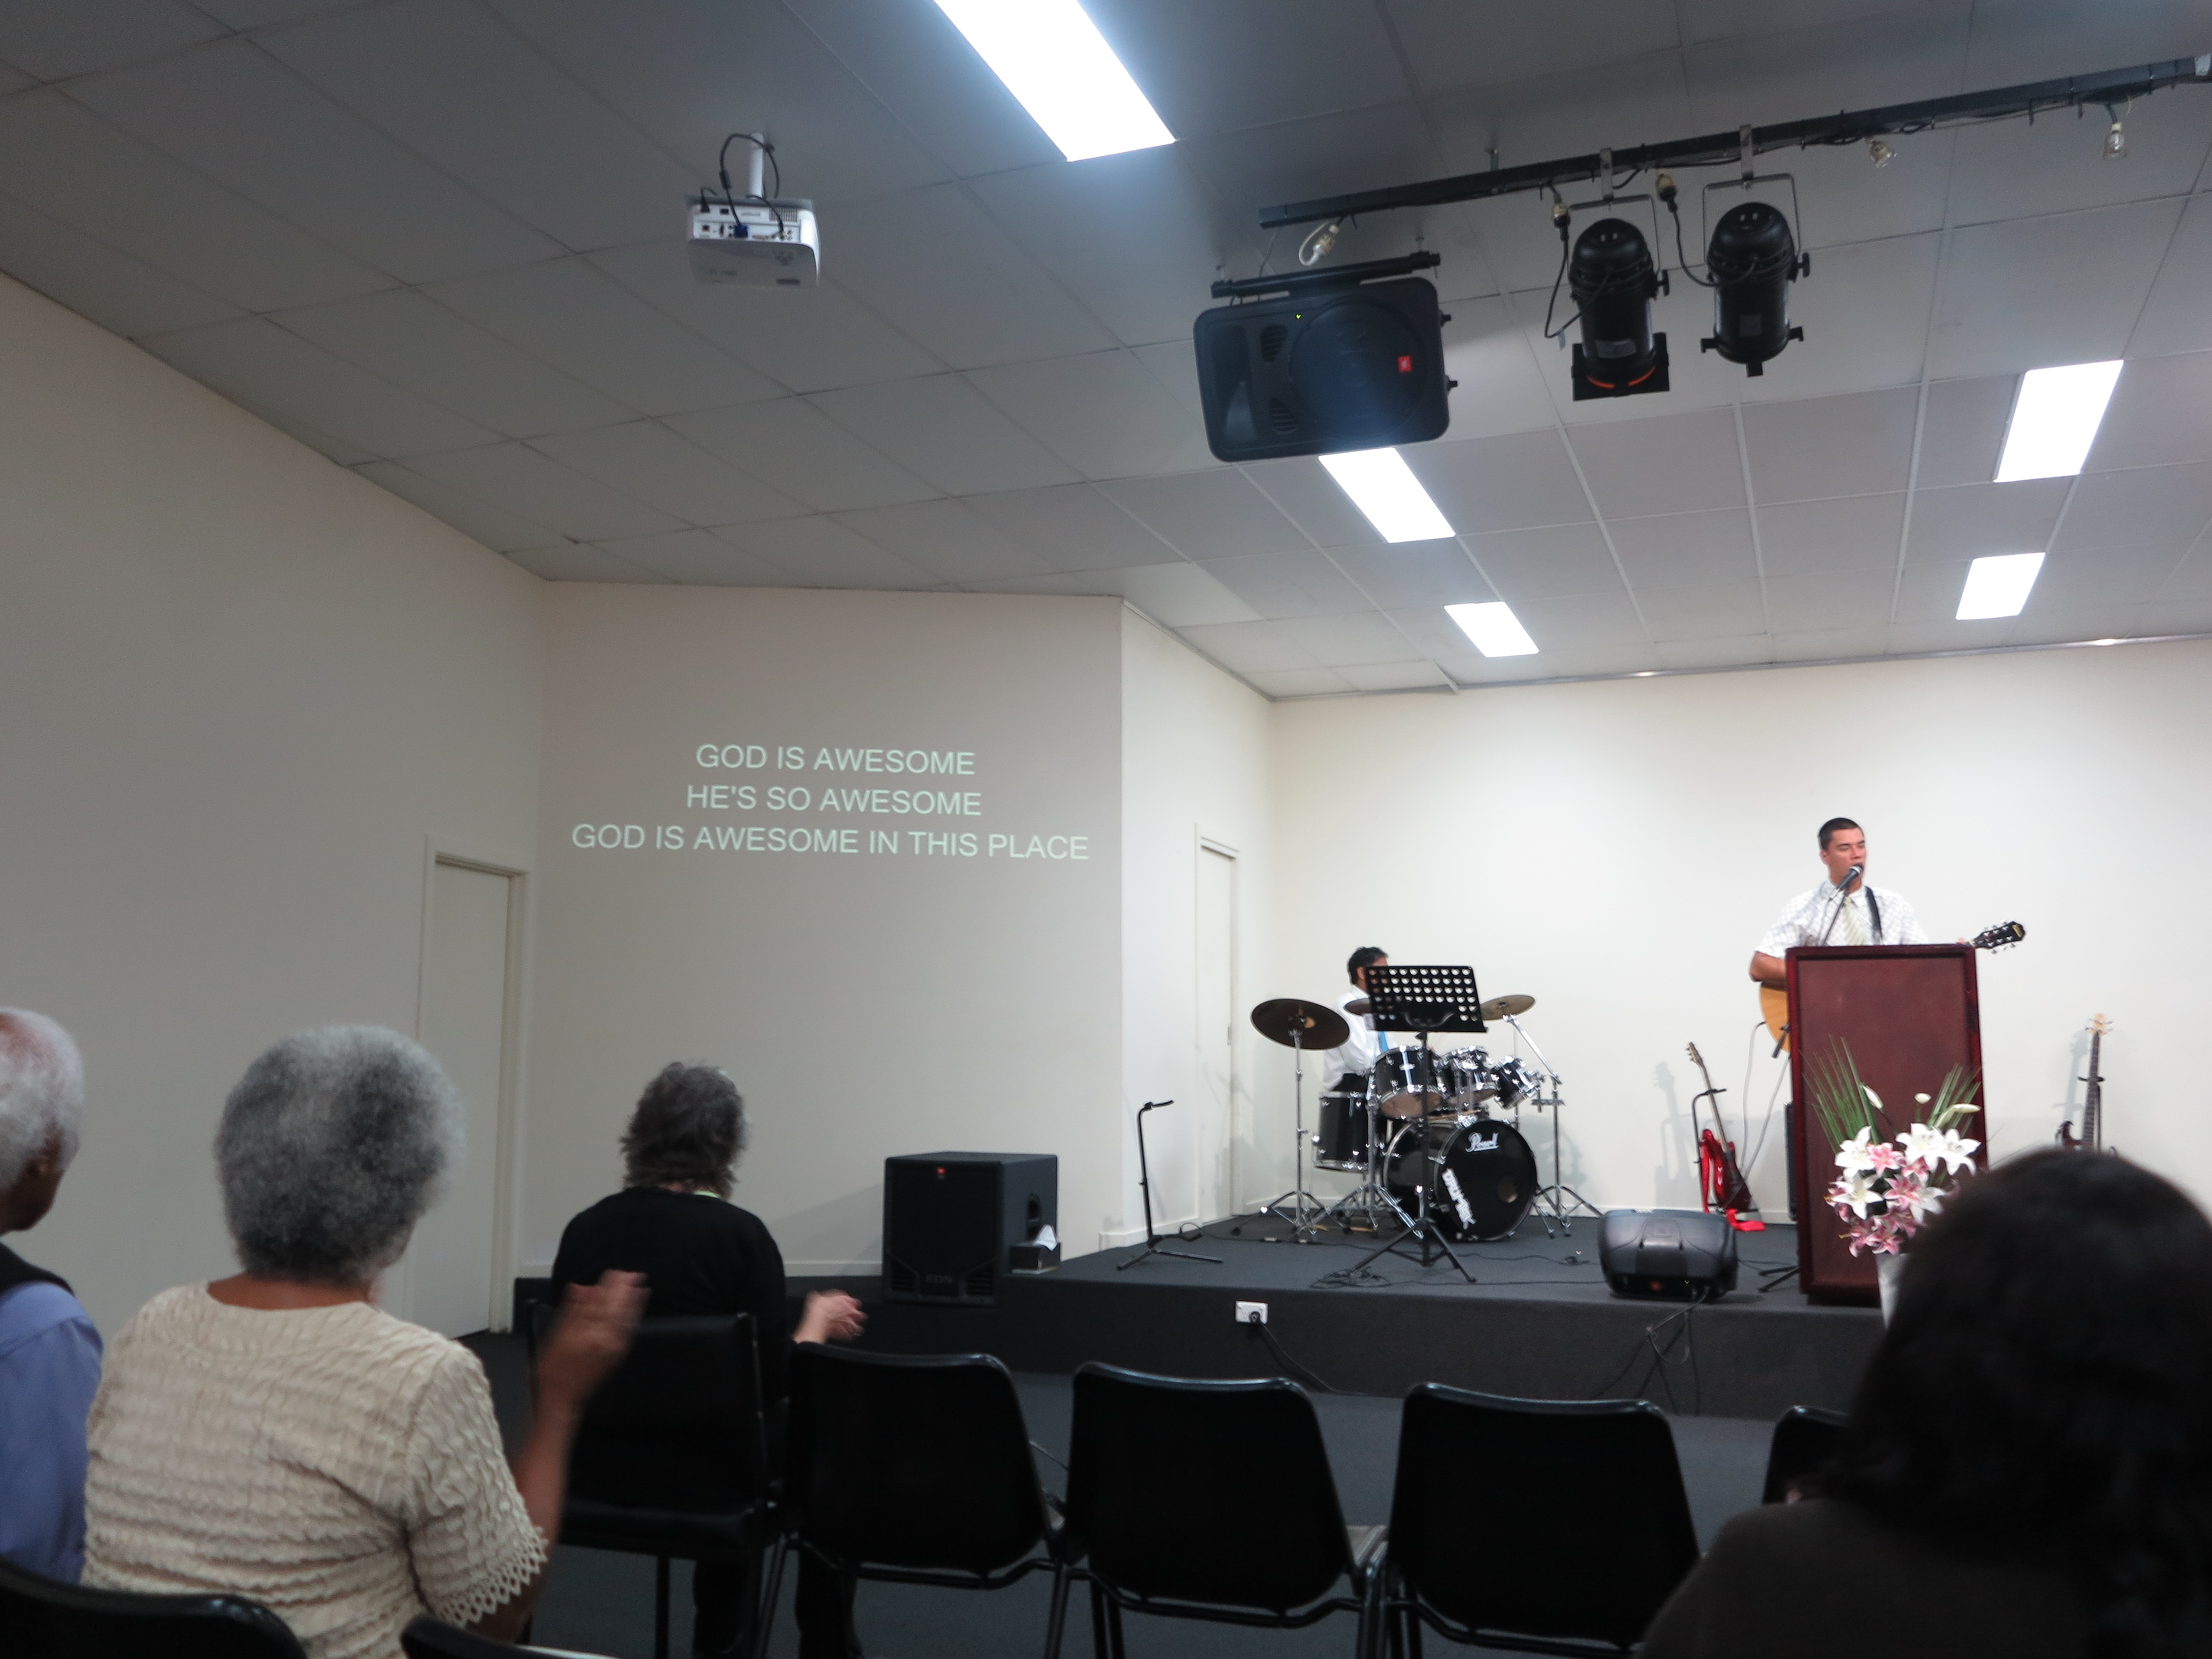
These setups may also be to support a TV or audio setup enabled for Google Chromecast, Apple AirPlay, DLNA, Spotify Connect or other common home-network media protocols. The TV or audio setup is something that a hotelier would like to provide as an amenity to their “switched-on” guests who make use of online services and smartphones for their multimedia consumption. Such networks will typically have a “small-network-standard” Wi-Fi network covering your room or suite and will have an SSID network name and password peculiar to that network.

Most likely, if you do bring along your equipment and have it work with the room-specific multimedia network, you will be able to discover it as long as your computer or mobile devices are linked to that particular network. This could mean that your Spotify-Connect-capable wireless speaker could work with Spotify on your smartphone like it does at home if all these devices are connected to the room-specific network.

You may find that the hotel you are staying in may be set up this way and there could be printed material in your room about this kind of network existing and how to “get on board”. Typically this requires you to connect your smartphone and your devices to the room-specific network once you have activated that network connection.

Your regular laptop computer as a travel router

Logitech MX Anywhere 3 mouse on glass table near laptop

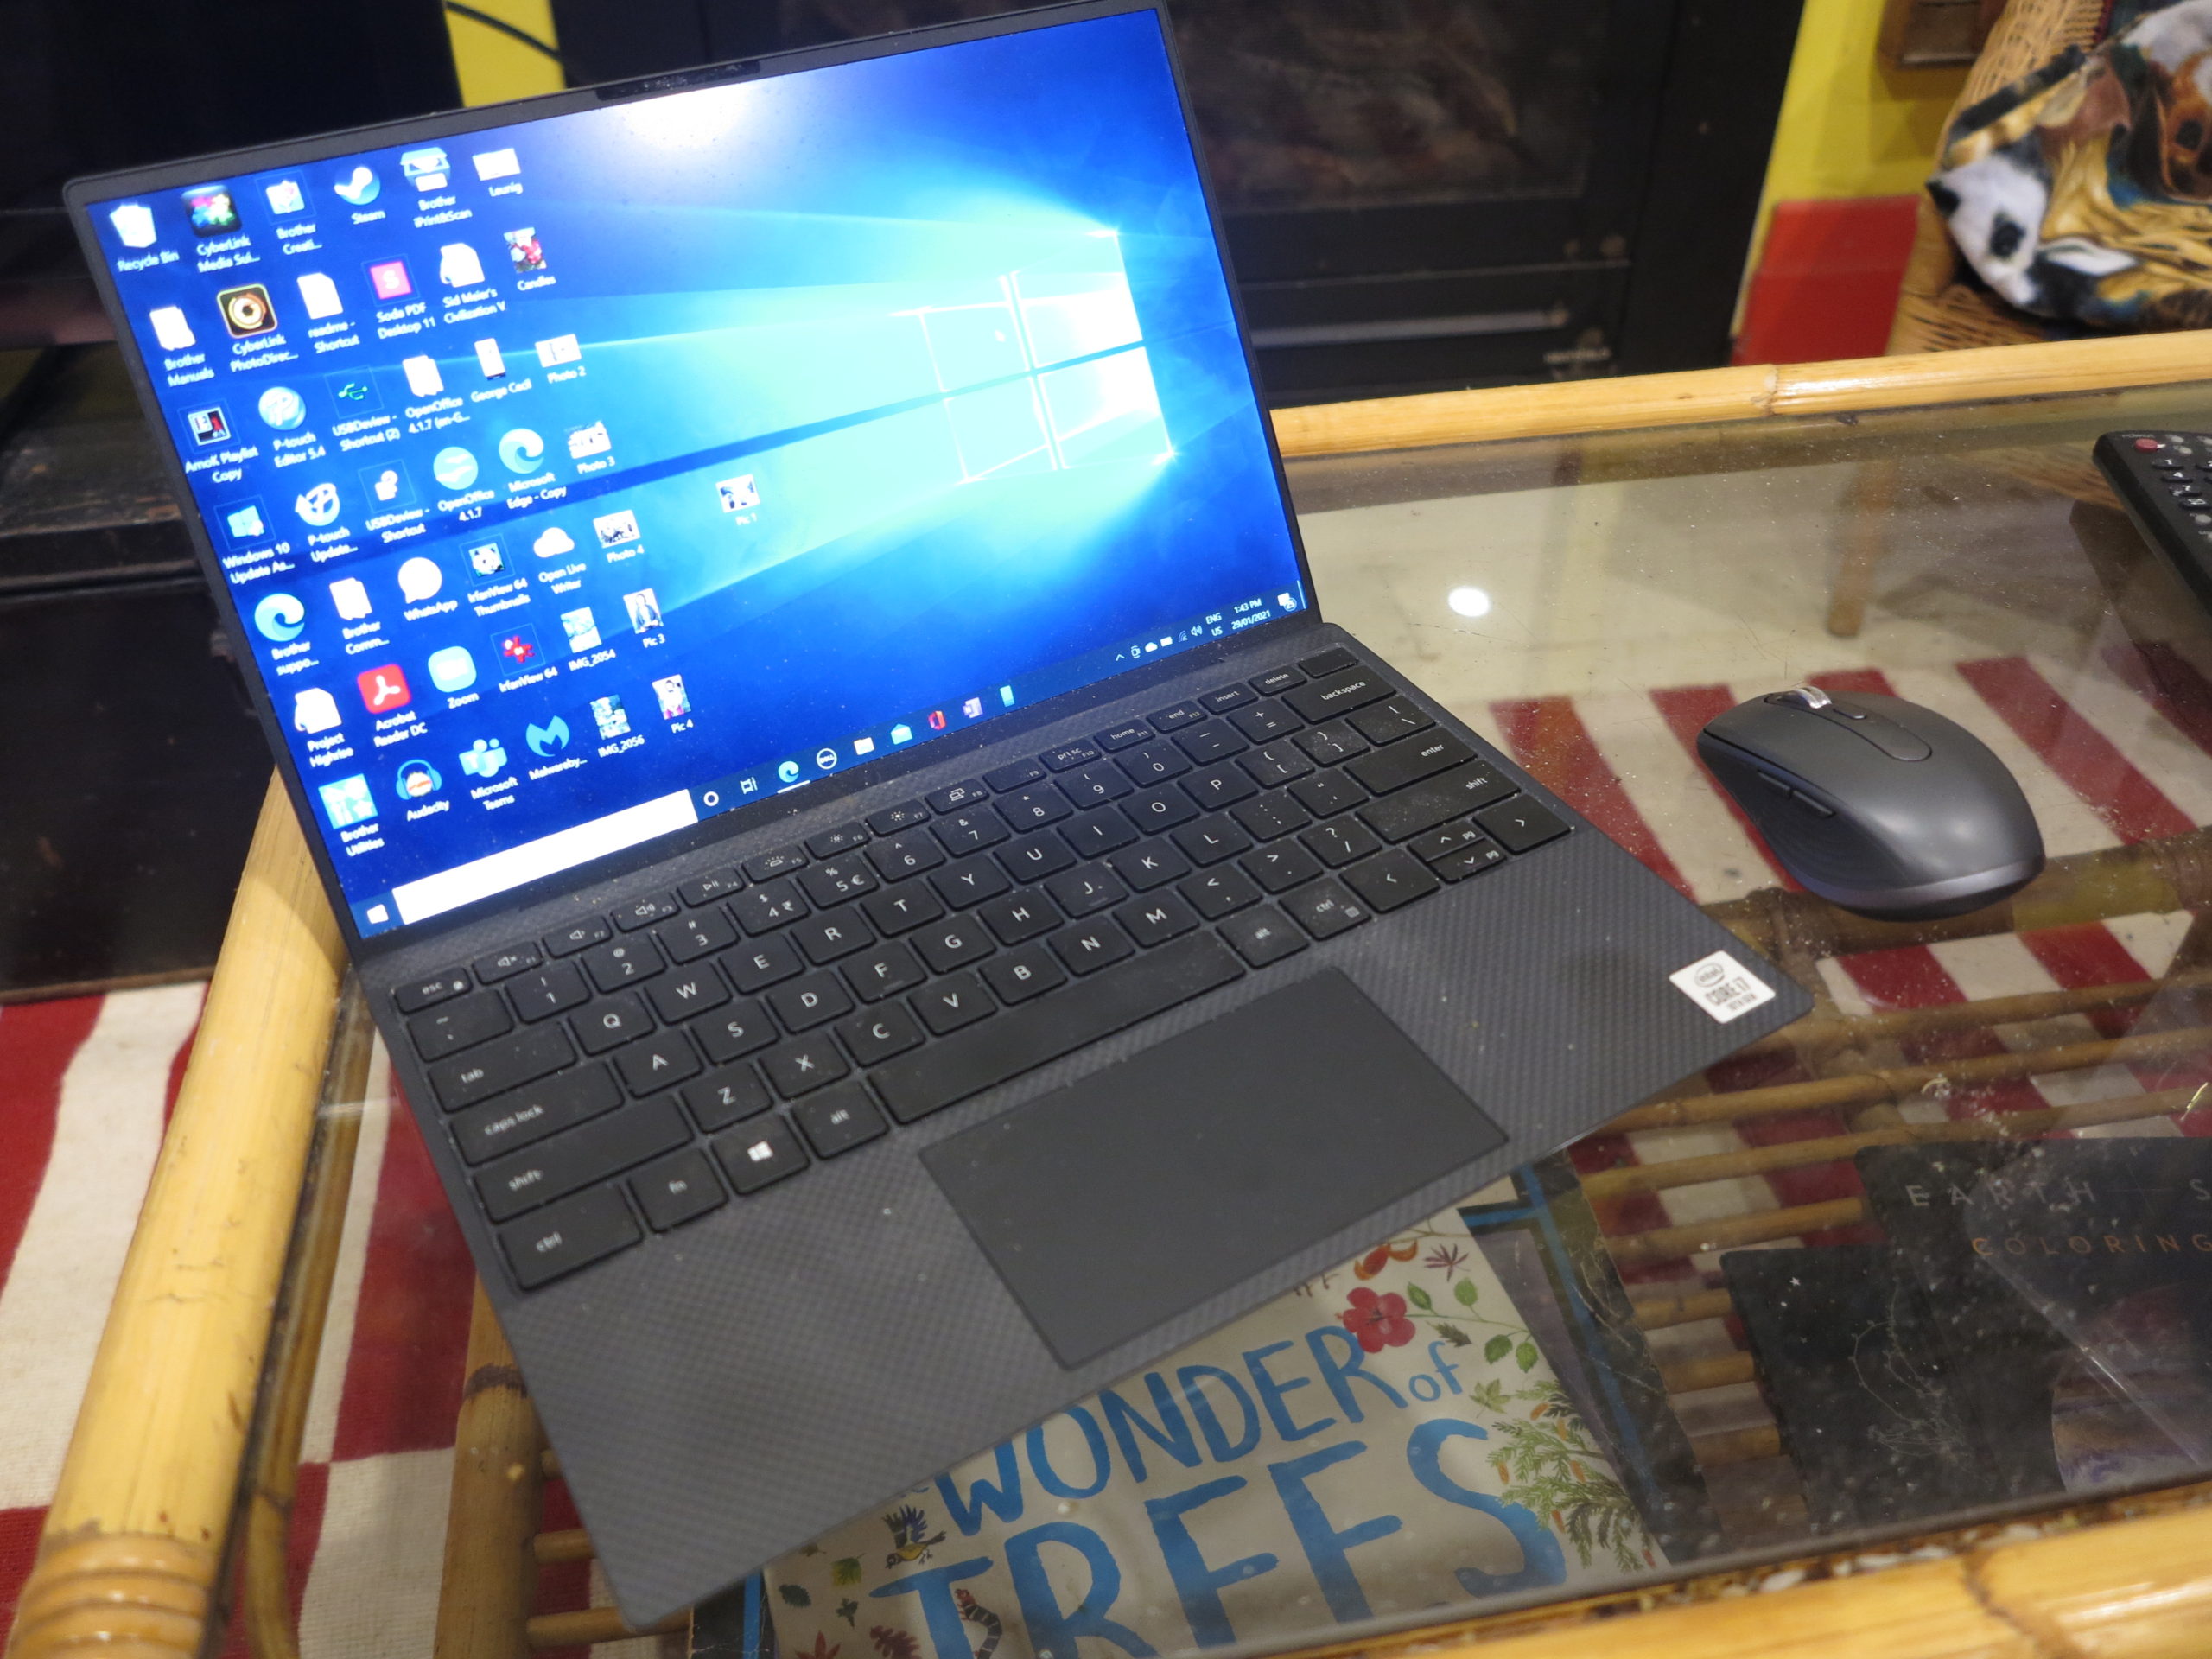
Your laptop that runs Windows 10 or MacOS 13 Ventura or newer operating systems also offers this same functionality

Laptops that run Windows 10 or MacOS 13 Ventura onwards can offer this same functionality natively. This is infact an approach that I used to run my Chromecast with Google Play as an audio-video output device for my Samsung Galaxy A52s smartphone at the Elsinor Motor Lodge in order to play my music through the motel room’s TV speakers.

Windows 10 onwards

Windows 11 Settings - Network And Internet - Mobile Hotspot option highlighted

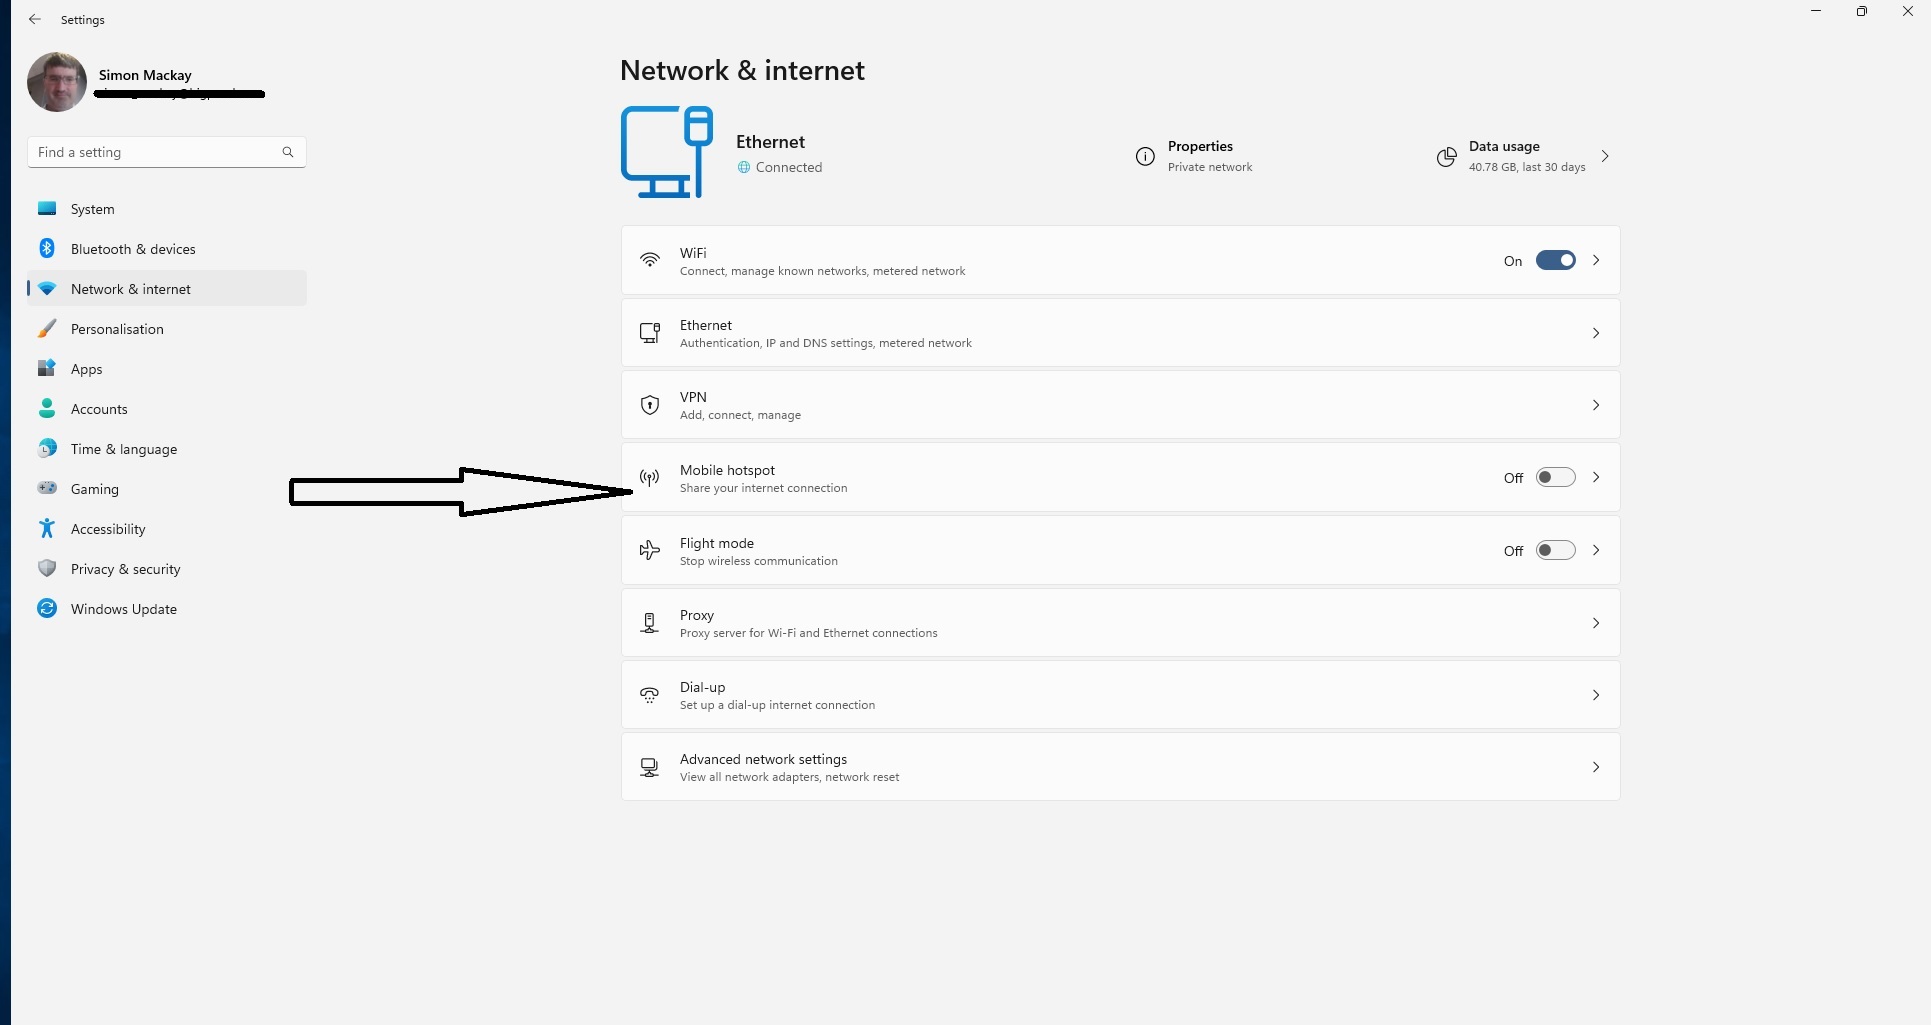
Enable the Mobile Hotspot option in Windows 10 or 11 so your laptop becomes a travel router or mobile hotspot

  1. Select “Settings” which is the gear-shaped icon to open the Settings menu
  2. Select “Network and Internet” on the left of the Settings screen to open the Network and Internet window.
  3. Enable Mobile Hotspot whereupon you will see the setup for sharing your computer’s Wi-Fi connection.
  4. To see your hotspot properties, click the “ > “ next to the “Enable Mobile Hotspot” toggle. Note down the Network Properties on this screen which correspond to the SSID (Network Name) and Password for the Wi-Fi hotspot created by your Windows computer.

    Windows 11 - Network And Internet - Mobile Hotspot Settings

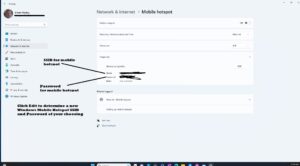
    These are the settings you need to go over to make sure your mobile hotspot works. The network details refer to what your devices need to be connected to.

MacOS 13 Ventura onwards

  1. Click the Apple icon at the top left of the screen and select “System Settings
  2. Select “General” then select “Sharing
  3. Look for “Internet Sharing” and click the i nearby that option
  4. Select the network connection that has the Internet service – this could be Wi-Fi or Thunderbolt Bridge.
  5. Select the network connection the other devices will connect to using the “To Computers Using”, which will be Wi-Fi
  6. You then have the option to create a Network Name (SSID) and Password for the hotspot network. Note down the SSID and Password you created for the hotspot,
  7. Once everything looks OK, click Done and toggle Internet Sharing on.
  8. Click Start in the pop-up message to confirm Internet Sharing.

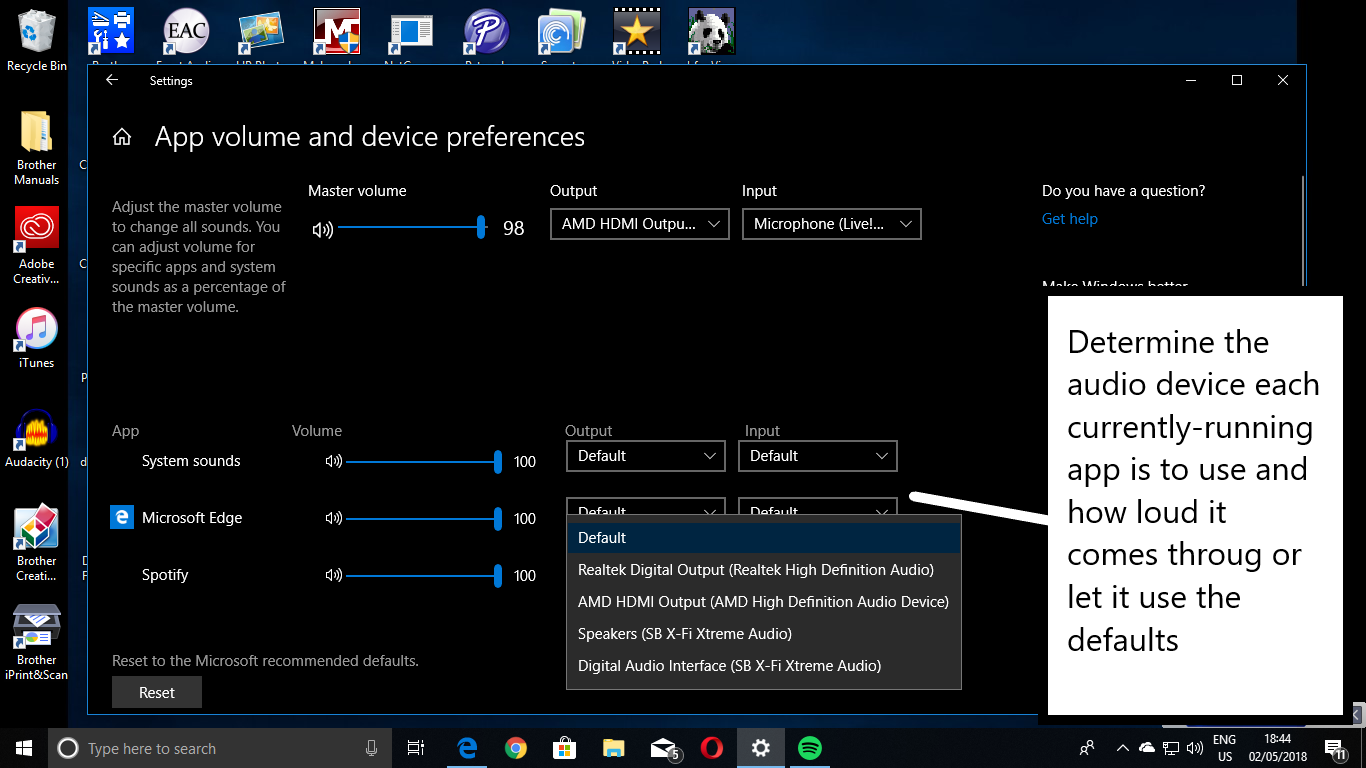
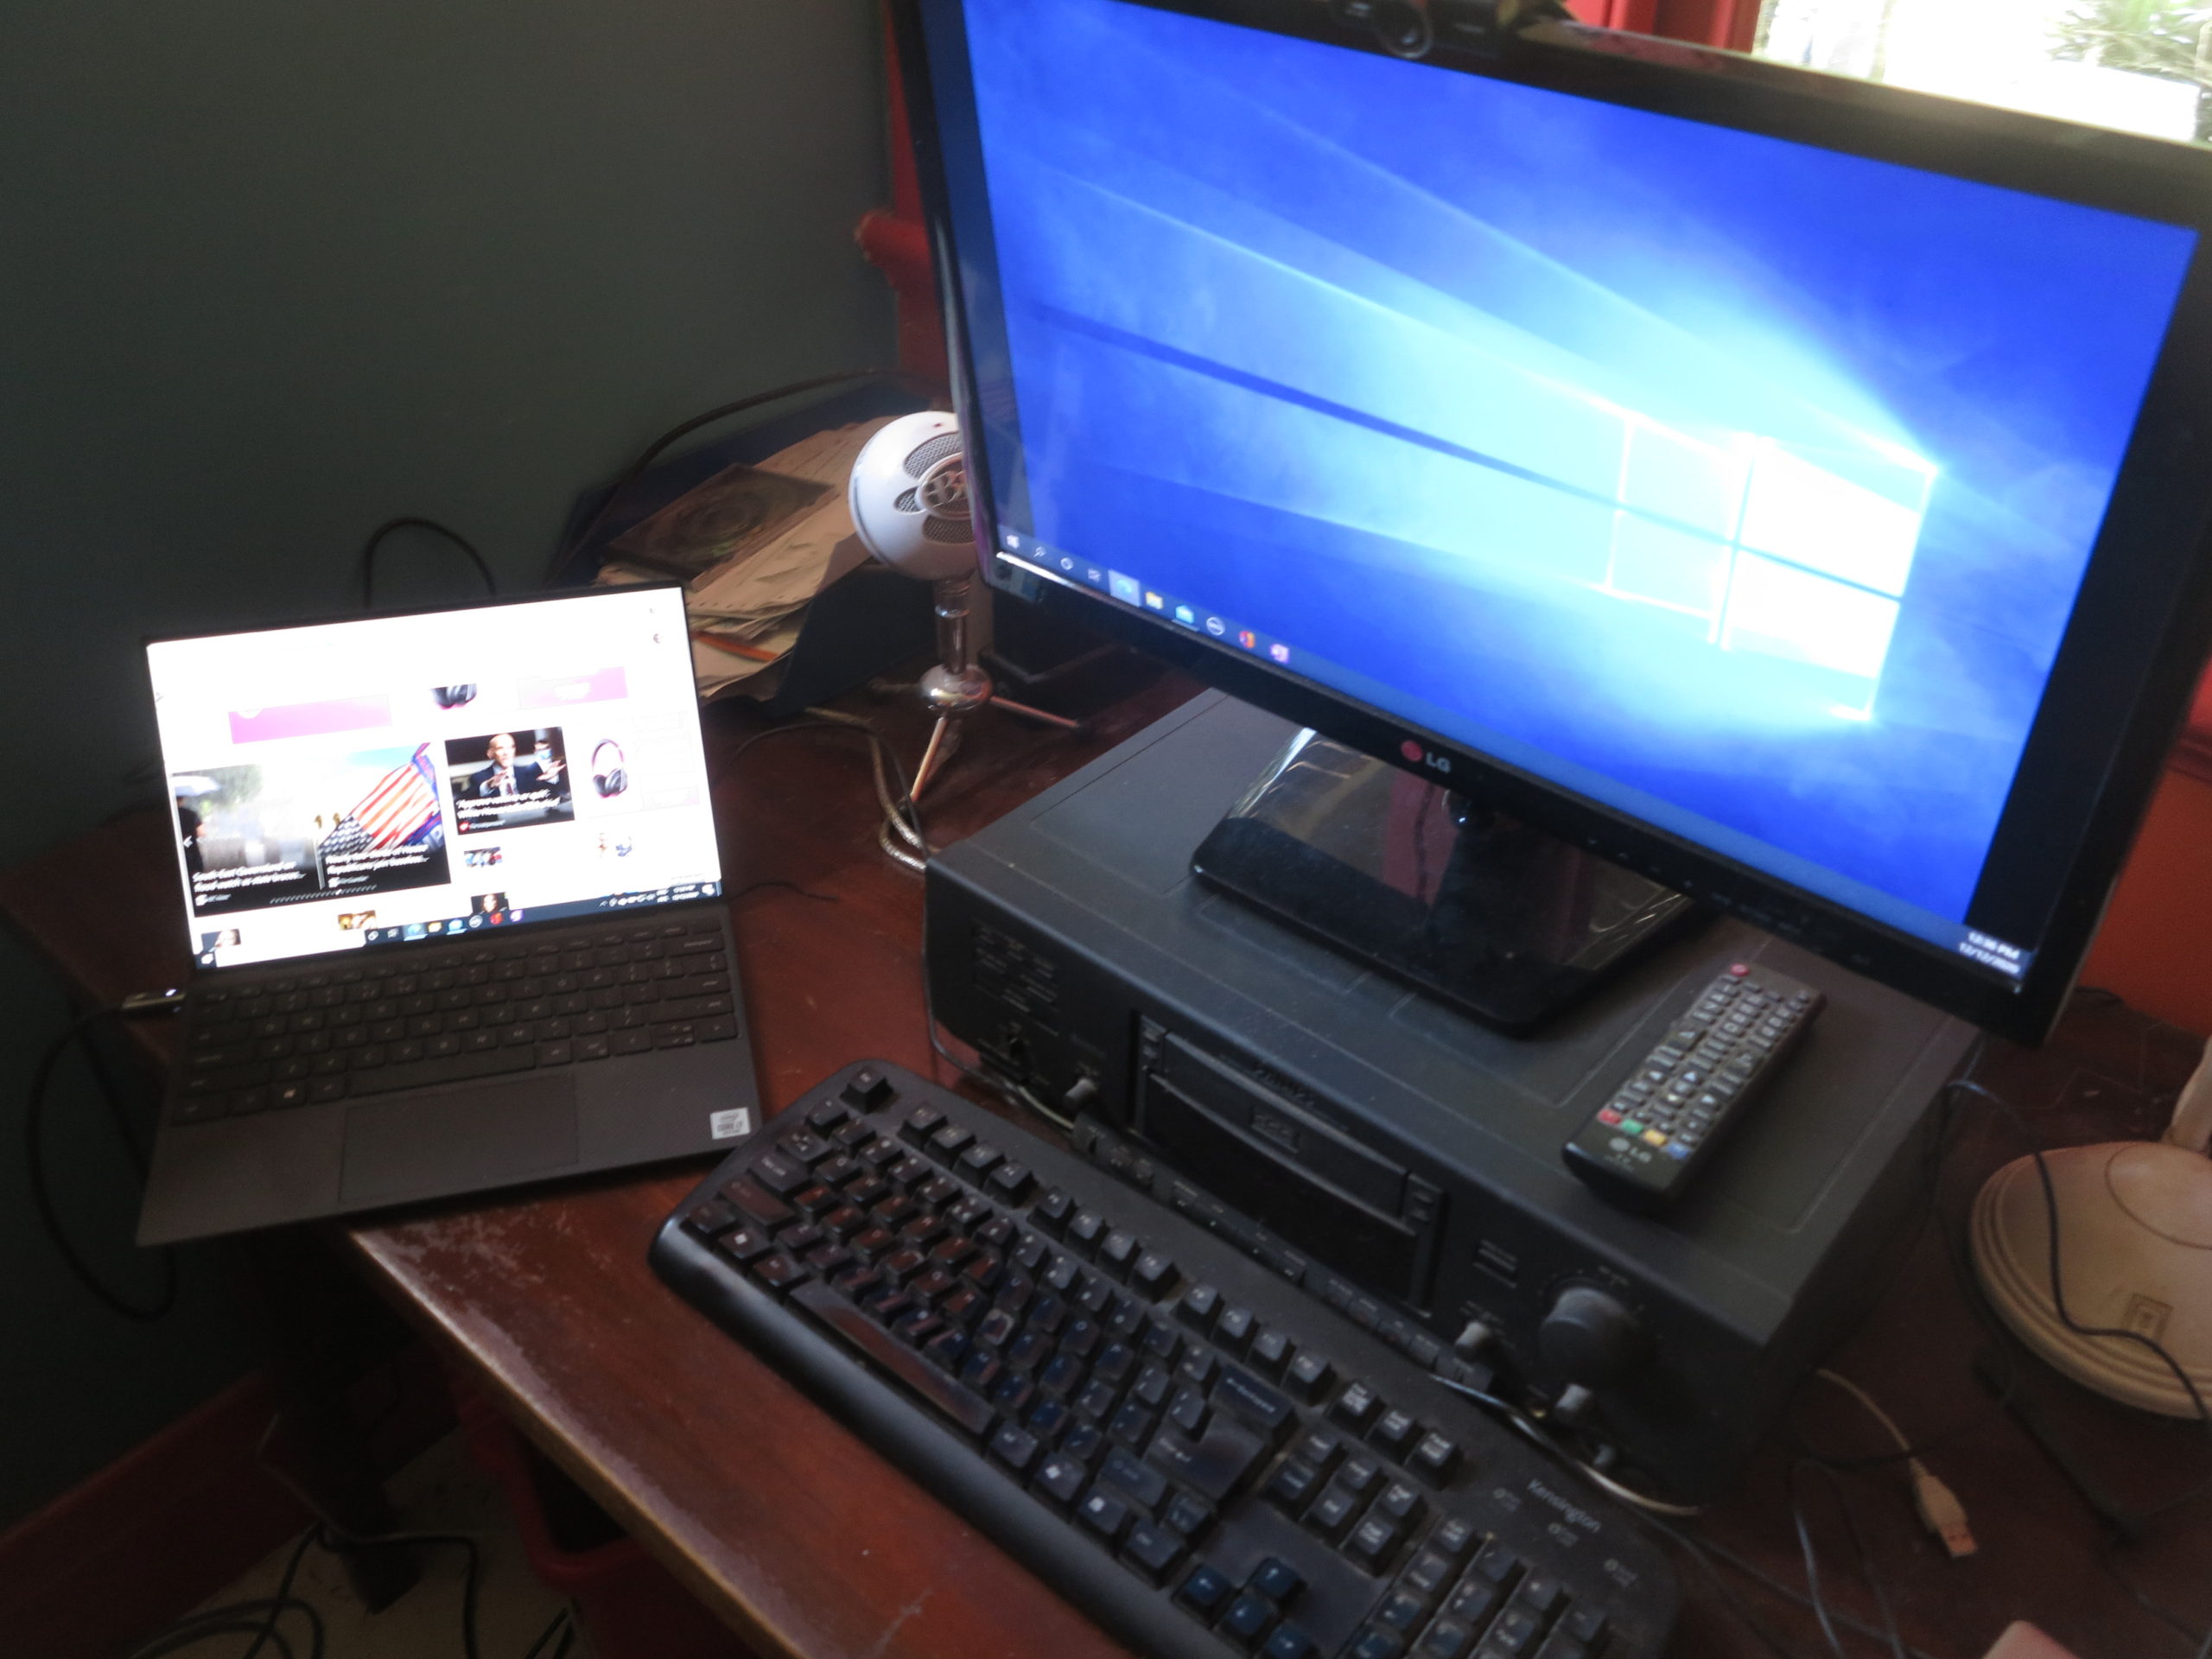
Setting up your devices

Then, set up your devices like your network media player or network printer to link to the hotspot network you created in the above steps. Most network media devices will require you to go through the “manual Wi-Fi setup” process with some devices, especially speakers, requiring you to link to a “setup” Wi-Fi access point integrated in the device and running a setup Website hosted by that device.

That also means that your smartphone or tablet has to connect to the hotspot network if it is to benefit from the devices that you connected to that network. This would be important for media-sharing protocols like Chromecast or DLNA, or network-printing protocols like AirPrint or Mopria.

When you are finished

If you are using Windows or MacOS as a travel router, turn off the “Mobile Hotspot” or “Internet Sharing” functionality before you pack up your equipment. This is to assure secure operation and also saves on battery power for your laptop computer. With a travel router or portable NAS, you just simply disable the network-sharing functionality when you pack the equipment up.

Remember that the settings will stay the same for your Mobile Hotspot or Internet Sharing functionality so you don’t need to connect to a new Wi-Fi network if you use the same method again. This also holds true for travel routers or portable NAS units that implement network sharing.

In the case of that multimedia-ready hotel room network, you will still have to connect your equipment including your computer or mobile devices to these networks when you set yourself up in your room. This is because the guest credentials are likely to change as a means of protecting guests’ own equipment and experience.

How to adapt to multiple-screen computing

Desktop workspace with Dell XPS 13 laptop computer

The computing setup with multiple screens – now very ubiquitous

Computing setups that are equipped with two or more screens are becoming more ubiquitous due to the affordability of these setups. As well, it is becoming more acceptable in general business and personal computing to operate with multiple displays at your main workspace thanks to a range of productivity benefits.

You may find that there is a steep learning curve as you set up your workspace for multiple-screen computing. This is something that I am facing as I move from a traditional desktop computer centred around a traditional PC tower to a laptop computer that is connected to a dock and I want to keep the existing monitor going.

An example of this is when you move away from your desktop computer with the traditional single-monitor approach to a laptop-centred computing setup and retain your desktop computer’s monitor because it has plenty of mileage left in it. It can also happen if you are using an all-in-one desktop computer like the iMac that has an integrated display and you use a similarly-sized monitor to create a multiple-screen computing setup.

Those of you who use a traditional desktop computer may head towards multiple-screen computing if you decide to buy a new monitor and keep the existing monitor going. You will find out if this is feasible for most of these computers if there are two or more display outputs on your computer, especially its graphics card.

Praise and worship at church

Using a computer in conjunction with a projector to show material to a large audience like this church setting will have you working a multiple-screen setup due to the use of a smaller screen for control or cueing purposes

This can also happen when you are using a projector or large-screen TV as the “big screen” in your display setup, something that is commonly done for multimedia or games applications or to show content to large audiences.

Occasionally I have had to deal with multiple screen computing setups. This was either as part of helping some people out with their computing setups. Or it was to help a small church with their AV and IT needs which has been the basis of some articles I have published and targeted to that same audience.

Now, thanks to a computer upgrade towards a laptop, I have headed towards regular use of a multiple-screen setup by maintaining my existing monitor as a second screen for that setup. In this case, I use the larger-screen second monitor for working on documents in my primary laptop-centric workspace.

Why go multiple-screen for your computing needs

Most computer users who make heavy use of their productivity software will want to benefit from multiple screens. This is due to the effectively-large working area that these setups offer.

.. as will using your laptop with your TV to watch Netflix

For example, a person who is building a document or presentation from online research will be having multiple programs running so they can add content from the online research in to their “magnum opus” easily. Some of these users will even have multiple Web-browser sessions running concurrently along with the program they are using to build their content. Or a user could engage in a videoconference and look up relevant material or take notes on another screen during the call.

People who work with large spreadsheets will also benefit especially if the spreadsheet becomes wide. It also applies to those of us who use desktop publishing, illustration or photo-editing programs to lay out publications or create our computer-graphics masterpieces. You may come across an increasing range of monitors that can be switched between landscape and portrait orientation, which may allow you to adapt them to support a wide or tall project.

Those of us who make use of online news services will benefit from multiple-screen computing> This can be about being able to monitor a current event that appears on an online news service while engaging in another activity like creating that document, spreadsheet or presentation.

Multiple-screen setups also are about a larger screen that is used to show material to other people. This is very common with projector-based setups or where the large-screen TV set is used. Increasingly a lot of software focused to this kind of effort is being designed to take advantage of multiple displays.

This same application is being extended to videoconferencing setups like with Zoom’s Multiple Monitor setup. Here, that allows a “gallery” view to exist on one screen and the current speaker to appear on the other screen, and to allow shared resources to appear on the secondary screen. It also extends to those of us who use text-based “chat” or social-media platforms and want to follow them while doing other computing activities including browsing the Web.

Some games are even exploiting multiple-screen operation in order to provide multiple concurrent views of the same action. Or they even use this to effectively create larger and wider views of the action.

Typical configuration

Here, you are typically implementing the multiple-screen display setup in the “extend” operating mode. This has the screens set up as one large display area or “canvas” but most operating systems make one screen become the primary screen where programs appear by default when they are launched. Typically it is the screen that will be used during the boot process and will show the startup images like the interactive login screen or operating-system splash screen. If you use a laptop or all-in-one computer, the integrated screen will always be deemed the primary screen.

Even with projectors or TVs, you may have to implement “extend” behaviour and work your computer’s regular display as your primary display to allow some presentation, multimedia or games software to work properly with multiple screens. In the same context, some users may have the computer’s primary display working as a “content preview” screen and shift the content to the large screen when it is ready to show.

For laptop users, they may use the “external monitor only”” display option but run multiple external monitors, This would come in to play if you are connecting multiple monitors to an outboard dock of some sort.

Laptop users will also need to be used to switching frequently between single-screen and multiple-screen setups. This is due to themselves using the laptop’s screen as the only screen when they use it in a portable context away from their desktop workspace but work with multiple screens while at the desktop workspace. They will also have to cope with being able to “go multiscreen” at a moment’s notice if they choose to connect the computer to a large-screen projector or TV.

Your mouse pointer

Mouse Options in Windows Control Panel - Pointer Trails called out

Using “pointer trails” a.k.a. “comet tails on your mouse pointer can make it easier to discover across the multiple screens

The first issue you will face is locating your mouse pointer. In this situation, you need to know which screen it exists on at the current time, or whether you are moving from one screen to another. This can be very difficult with screens of different sizes like a setup involving your laptop screen and your large-screen monitor. It can also be difficult where you have two screens that are separated from each other including dealing with monitors that have large screen bezels.

These kind of options are introduced in to the main regular computing platforms as a measure to increase accessibility and useability of these platforms for those of us with limited abilities. This is due to these platforms being used by an ageing user base for both work and play along with younger people that have limited abilities wanting to he productive with these platforms.

One way is to enable “comet tails” on your mouse pointer. This has a decaying trail of the pointer arrow which will appear as you move your mouse pointer with your input device. Windows has this as part of its Mouse control options in the Control Panel. MacOS X requires you to use a third-party app to have this same functionality for locating the mouse pointer.  You may also find that adjusting how your mouse pointer looks such as its size or colour may help you with making it more discoverable for you.

Another technique that you will have to perform frequently is to bring up the secondary or context menu simply as a way to locate your mouse pointer. Here, the large area occupied by the context menu stands out more visibly than a small mouse arrow or I-cursor. People who use a pointing device that has a secondary button can use this button on all desktop operating systems. But Apple Mac users who use a pointing device without a secondary button, as what was part of the original Macintosh setup, can achieve this same function by holding down the Ctrl key on the keyboard and clicking their pointing device.

The two main desktop operating systems also have their own tricks to make the mouse pointer discoverable at a moment’s notice through a special mouse-action or keypress. Here, it can be useful for identifying where your mouse pointer is across that large area.

Mouse options in Windows Control Panel - option to highlight mouse pointer when you press CTRL

Windows users can set things up to quickly highlight where the mouse pointer is when they press the CTRL key

Apple Mac users can set their computer to quickly enlarge the mouse cursor when you move the mouse (or your finger on the MacBook’s trackpad) vigorously. Here, you click on the Apple menu, then click on System Preferences, then click on Accessibility then click on Display, You subsequently select Cursor and tick the “Shake mouse cursor to locate” option. Windows users have to go the the Mouse control options in the Control Panel and select “Show location of cursor when I press the CTRL key“. Here, when you press and release the CTRL key, a large circle appears then reduces in size around where the mouse cursor is.

Laptop users who run a multi-screen setup comprising of their laptop’s screen and the large monitor in an “extended” arrangement may find that the small screen could be kept for “parking” application user interfaces that they aren’t giving all their attention to. They then keep the large screen for the applications they are focusing on at the moment. An example of this could be a Web browser with a page they are reading or an office application with the document they are working on existing on the large screen. That is while an email client, messaging application or media player that only needs occasional attention could be visible just on the laptop’s smaller screen.

Moving apps between screens with the keyboard

People who are new to multiple-screen computing or switch between single-screen computing and multiple-screen computing will come across situations where the app they are using doesn’t appear on the screen they want to use. This may be of concern where a user starts a program they previously ran on a multiple-screen setup doesn’t appear on a single-screen setup due to the absence of the screen they were using. Or they want to quickly move an app to another screen.

This situation will come in to play for those of us with laptops who work only with the laptop screen while away from the main workspace. Here, you may find that a program you use on your external monitor isn’t visible on the laptop’s screen but appears on the Windows Taskbar or MacOS Dock as an app that is in use. This may happen where an app doesn’t adapt to different multiple-screen setups properly.

Here, software that adapts properly between single-screen and multiple-screen computing setups will, for example, move to the single screen in a single-screen setup if it was last operated on other monitors in a multiple-screen setup.

It also applies to those of us who are using a computer as part of an AV playout setup and have to move a program’s screen between the cue / monitoring screen and the main screen. That also extends to people using the big TV screen to view videos or pictures or play games on a laptop. It is more so with Web browsers or other programs that don’t handle multiple screens properly.

Windows simplifies the process of moving apps between screens with the keyboard. Here, Windows users need to Alt-Tab to the program you are trying to bring back in to view in order to give it logical focus. Then you use the Windows + Shift + left or right arrow keys to bring the program to the integrated screen.

Apple Mac users would then have to invoke Mission Control by pressing the F3 key. Then they would have to use the trackpad or other pointing device to move the program between screens. As far as I know, there isn’t an approach to using the keyboard to move an app or window between screens on the MacOS.

Screenshots

You may find that the procedure for taking full-screen screenshots may be very different here. In most cases, the operating system will encompass what is seen on both screens in a full-screen screenshot.

In the case of Windows, you may find that PrtScr may yield you something to large for your screenshot. Here, moving the cursor in to the screen where you want to take the screengrab then pressing CTRL+ALT+PrtScr would “grab” what is on that screen and store that to the Clipboard. If you want both screens, you would press CTRL+PrtScr. Then, you simply past that in to Windows Paint or your favourite image editor, redact it then save it as a file. Other operating systems will use a similar means to take screenshots of a particular screen in a multiple-screen shot.

But mostly you will have to resort to window-specific screenshot commands like Alt+PrtScr for Windows or Cmd+Shift+4 then Spacebar for MacOS to grab screenshots of the relevant windows.

Conclusion

As you head towards multiple-screen computing, take your time to get used to it. Here, it is about moving an application window between the different screens or working out how to quickly locate that mouse pointer.

Building out a desktop workspace for your laptop computer

Desktop workspace with Dell XPS 13 laptop computer

The laptop-centric desktop workspace

Increasingly, a significant number of laptop-computer users set up a desktop-based workspace to use their computer at. With this arrangement, they equip the workspace with a full-sized keyboard and mouse alongside a large screen, with the computing power taking place inside the portable computer.

Why a desktop workspace for your laptop computer

The establishment of a desktop workspace for your portable computer is primarily about creating an ergonomic environment with full-sized input devices and larger screens that can stand long work sessions.

Some users may find this more important with ultraportable computers that use a smaller keyboard or omit things like numeric keypads. Similarly, you may find that a full-sized mouse may have work better for you than just relying on the computer’s trackpad.

Increasingly this arrangement appeals to the idea of running two screens thus creating a larger visual workspace. In most cases, this can be achieved through the use of a desktop monitor along with the laptop’s own display with them both set up to be a single display.

J Burrows lap desk used with a laptop computer on a couch - product image courtesy of Officeworks Australia

The laptop still is portable for use in the lounge during winter

Here you don’t lose the flexibility associated with using a laptop computer thanks to its portability. For example, your computing arrangements can suit the seasons at home if you have a good outdoor space that you use when it’s warm or you have a solid-fuel fire or a heater which conveys the look of a fire that you use when it’s cold. Or you can use a café or similar location as your “secondary office” when you want to work away from distraction. But you then are able to head back to your primary workspace where you want to benefit from what it offers.

Where is it relevant

A fully-equipped desktop workspace for your laptop computer is relevant to one or more areas you place a significant amount of your working time at. For a work-home laptop, this could be at your desk at the office you work at as well as your home office if you maintain this space. It will also have a strong appeal to those of us who run small businesses or community organisations with a physical shopfront but do a significant amount of the “homework” associated with running the organisation at home.

It also appeals to the “hot-desk” concept where different users end up using the same workspace but want to bring their computer, therefore their data, to that workspace. This is a significant trend that is being encouraged in new-style workplaces who are moving towards practices like telecommuting. But it also appeals to situations where, for example, members of your family want to use a fully-equipped workspace to do a significant project.

Secondary workspaces

Similarly you can create multiple desktop workspaces with this kind of setup at different locations. I mentioned this earlier in the context of a “work-home” laptop taken between your workplace / business premises and your home.

But this can also extend to a secondary residence like a holiday or seasonal home, whereupon you can establish a similar desktop workspace to use with your laptop computer at that location. Or this could be about a similar workspace set up in a study for your older children to use while completing their assignments and projects on their laptops.

Here, you may end up “pushing down” older equipment that has mileage left in it to this secondary workspace as you buy newer better equipment for your primary workspace. Examples of this would be to upgrade to a more capable USB-C or Thunderbolt 3 dock or a better monitor while your existing USB-C dock or monitor ends up at the secondary residence.

The equipment

Most of the equipment will be similar to what you would equip a standard desktop computer with but you may have to be particular about the connectivity issue concerning your laptop computer.

Input devices

Full size mice can earn their keep here at your primary workspace

You will need to equip your desktop workspace with a full-sized keyboard and a full-sized mouse or other input device. Here, make sure you choose the keyboard or input device you are comfortable with. Be aware that if you find that the travel-sized mouse can suit your needs equally for continual use as a full-size mouse, so be it.

These can be either wired or wireless with the former requiring a USB Type-A port on the computer for each wired device. Or the latter can be wireless, either using a transceiver dongle that plugs in to the computer’s USB Type-A port or Bluetooth which uses the laptop’s Bluetooth interface.

Some of the wireless “desktop sets” which consist of a keyboard and mouse in one package may allow one transceiver dongle to work with both the keyboard and mouse. But with Bluetooth you don’t need to deal with transceiver dongles because you are using the computer’s Bluetooth interface.

Screens

LG's 32" 4K monitor with HDR10 - press picture courtesy of LG USA

LG’s 32″ 4K monitor with HDR10 – larger monitors like these are relevant for the desktop workspace

If you have a 2-in-1, especially of the convertible type, you may find that having it set up in the “viewer” or “tent” mode will allow you to have a screen without its keyboard or trackpad being active. You may have to make sure Windows 10 is operating in “desktop” mode if you are using the external keyboard and input device.

As well, a good-quality display monitor with the screen size you are comfortable with and resolution that suits your needs can work well as your main or secondary display. The secondary display can come in to its own by providing an increased screen size and you may find that you have to use a laptop stand or bracket that suits your computer in order to prop your computer up to screen level.

If the monitor has its own speakers and connects to the setup via HDMI or DisplayPort including USB-C DisplayPort alt, you will need to have the default sound device being the laptop’s graphics-infrastructure display-audio device. Preferably in this case, the monitor should have an external audio output if you want to use headphones or a better sound setup with it.

Dell Inspiron 13 7000 2-in-1 Intel 8th Generation CPU - presentation mode

Having a 2-in-1 like this Dell Inspiron set up in viewer mode like this and using it with a keyboard and mouse may be a starting point for an enhanced workspace

Most operating systems will have the ability to have the screens work as either a copy of each other or as though they are one large display. It is in addition to setting up your computer to only use the external monitor as its display rather than its internal one. In this case, you may want to have the screens work as one large display if you value the increased desktop real estate or simply use your large monitor as your working display at your main workspace.

You can even go about having both screens as one large display but use the laptop’s built-in screen to “park aside” windows that you aren’t working with while  you have the larger screen for what you are currently focusing on. That would be effective for those of us who use a 12”-14″ ultraportable as part of this setup.

Sound

Creative Labs Stage Air desktop soundbar speaker

This Creative Labs Stage Air soundbar and similar desktop speakers could provide the sound for your desktop workspace

This can be satisfied through the use of desktop speakers, including a desktop soundbar like what Creative Labs offers. Or that old amplifier or receiver connected to a pair of bookshelf speakers can do the trick. In the same way, that 1980s-era “ghetto blaster” that has a selectable line input can answer the same need.

The speakers or amplifier can be connected to your laptop’s or monitor’s headphone or line-out jack or you may want to use an outboard sound module for this purpose. You may find that that the dock you use to provide one-cable connectivity to your laptop will have a built-in sound module that has very similar functionality to a USB sound module.

But the standalone sound modules are more likely to have better audio connectivity or audio reproduction electronics. Here, this may be of benefit for those of you who have a  home-office “den” that is equipped with high-quality audio equipment or you are using turntables or tape decks to salvage legacy media to digital form.

Such a setup may work well if you want better sound at your primary workspace and don’t want to rely on the laptop’s tinny built-in loudspeakers there. This would be important if you listen to music, watch videos or play games using that workspace.

Storage

USB portable hard disk

These portable USB hard disks are seen as a way to expand storage capacity for your workspace

You can also get by with using a USB hard disk or solid-state-storage device not just as a data-backup device but to offload data that you won’t be needing to keep on your laptop’s own storage subsystem. This will be of importance with those computers that use a small SSD as their onboard storage.  On the other hand, a network-attached storage could serve the same purpose as a data-backup or offload storage device. This is more important if you want to keep multimedia data available to your home network.

If you deal with optical disks like DVDs or Blu-Rays, you may find that a USB optical drive compatible with the disks you deal with may work well for this setup. This is more so if you are using the disks primarily at your desk, perhaps primarily to archive data; or simply want to play CDs, DVDs or Blu-Rays through your computer including ripping them to the computer’s storage subsystem. The same goes for other legacy removeable media like floppy disks or ZIP disks whereupon you use USB-connected drives for gaining access to data stored there.

Pioneer USB Blu-Ray optical drive

A USB optical drive can come in handy here if you use CDs, DVDs or similar discs at all.

Some of you may find that keeping a highly-portable USB hard-disk / SSD and/or optical drive may answer your needs if you are intending to use them on the road. This may be about moving photos you take with your camera off your laptop or watching a DVD or Blu-Ray during the long-haul flight. In the case of secondary residences or similar premises, you may prefer to take the highly-portable USB storage device with you when you leave so your backup or offload data stored there is safe with you.

Network connectivity

You may find that if you have an Ethernet connection near your workspace, you may want to connect your laptop to the network and Internet via Ethernet rather than Wi-Fi wireless. In most cases, this will allow high-throughput low-latency network and Internet connection and you may come across this if you have located your router in that workspace, wired your home for Ethernet or your business has wired Ethernet infrastructure.

This situation is answered through the use of a USB-based Ethernet network adaptor that plugs in to your computer’s Ethernet ports. But a lot of well-bred USB-C and Thunderbolt 3 docks have this function built in to them. Let’s not forget that you may find that your laptop has its own Ethernet port especially if it is a mainstream business or gaming unit.

Connecting many devices

The question that will come up frequently is how do I connect the many devices to my computer especially if it has fewer ports. Usually this would be about connecting and disconnecting many cables as you bring your computer to this workspace

Hubs and docks

To simplify this process, you may find that a USB hub or dock (expansion module) may come in to its own here.

Belkin USB hub

A typical USB hub

A hub will have a number of USB ports for use with USB peripherals while a dock will have a range of different connections and interface circuitry for different devices. You may find that your monitor may have some of this functionality built in to it and this can be a real boon because you don’t have to deal with a separate box. It will be more so if you are dealing with a USB-C monitor.

Here, you connect all of your peripherals that would be normally connected to your computer to this device. Then you have a cable that connects the hub or dock to your computer to expose all those peripherals to it and its operating system. Previously these used a USB 3 Type-A connector but most of them now use a USB Type-C or Thunderbolt 3 connector due to the high data throughput and, in some cases, power-supply functionality that they offer.

Dell WD19TB Thunderbolt dock

A USB-C or Thunderbolt 3 dock like this Dell WD19TB dock is relevant for this kind of workspace

If your computer supports USB Type C or Thunderbolt 3 connectivity, these devices come in to their own with a DisplayPort “pass-through” monitor connection. In a significant number of cases, you will find that the hub or dock comes with a power supply and works to USB Power Delivery specifications. This will mean that you will be able to keep your laptop’s power supply in your laptop bag rather than always bringing it out when you want to work at home. With the power capacity, I would look for something that is at least 45 watts in order to cover most computers’ needs.

On the other hand, if your computer doesn’t have a USB Type-C or Thunderbolt 3 connection, you will have to connect your external monitor directly to the computer’s display socket. Some of the USB 3.0 docks will have a display connection of some sort and this will be facilitated through the DisplayLink standard which “pipes” the video output from your computer’s graphics infrastructure via the USB 3.0 output to the display connection. This setup may appeal for a secondary-display application where display latency isn’t an issue.

The rule with these devices is to make sure you are purchasing one that suits your current needs. As well, if you do choose to upgrade an existing hub or dock  you can “push” your existing hub or dock in to service for another workspace that you use less regularly. Or if the hub or dock is small and light enough, it could be something you could stuff in your laptop bag to connect up other peripherals when on the road.

Accessories

Some of you may use a laptop stand or bracket as part of your desktop workspace. Here, your computer will either clip in to the bracket or rest on this stand, typically to have the laptop’s display at the same height as your main computer monitor.

Here, make sure that the laptop stand or bracket is sturdy and can continue to do its job for a long time. It is also worth making sure that the stand is adjustable so that the top of the computer’s screen is at the same height as the top of the monitor’s screen.

Moving from desktop to laptop?

Some of you may be building out that desktop workspace for your laptop computer as part of moving from desktop to laptop computing.

Here, you can retain most, if not all of your desktop computer’s peripherals and connect them to your new laptop computer, whether directly or via a hub or dock. As well, an independent computer store or electronics store may offer self-powered USB disk-drive enclosures that fit most standard-sized internal-mount hard disks or optical drives used in desktop computers. This will mean that you can move hard drives, SSDs or optical drives out of you desktop computer’s case to these enclosures so you can continue using them, something that can be done with a screwdriver.

Lenovo even had this idea in mind with their BoostStation external graphics module which connects to the host computer via Thunderbolt 3. Here, this unit didn’t just have room for a graphics card but also had the ability for you to install a hard disk or SSD like the one you have removed from your old desktop computer.

Similarly, you will have to remove the hard disks or solid-state storage device that are in your desktop computer from that computer before you send it off for e-waste recycling. This is to preserve your privacy and the confidentiality of your data. Again, if you needed to, that computer store may have a USB disk-drive enclosure or a USB hard-disk docking station so you can get at any of your data on the hard disk or SSD.

This approach is worth taking if you find that your desktop setup’s peripherals have a significant amount of mileage left in them or you use certain peripherals that fit your needs exactly.

Conclusion

Once you build out one or more desktop workspaces for your laptop computer, you are then able to have the best of both worlds – comfortable ergonomic computing at your desk and portable computing with your laptop.

Safe computing practices in the coronavirus age

Coronavirus Covid-19

The coronavirus plague is having us at home, inside and online more….
(iStock by Getty Images)

The Covid-19 coronavirus plague is changing our habits more and more as we stay at home to avoid the virus or avoid spreading it onwards. Now we are strongly relying on our home networks and the Internet to perform our work, continue studying and connect with others in our social circles.

But this state of affairs is drawing out its own cyber-security risks, with computing devices being vulnerable to malware and the existence of hastily-written software being preferred of tasks like videoconferencing. Not to mention the risk of an increasing flow of fake news and disinformation about this disease.

What can we do?

General IT security

But we need to be extra vigilant about our data security and personal privacy

The general IT security measures are very important even in this coronavirus age. Here, you need to make sure that all the software on your computing devices, including their operating systems are up-to-date and have the latest patches. It also applies to your network, TV set-top and Internet-of-Things hardware where you need to make sure the firmware is up-to-date. The best way to achieve this is to have the devices automatically download and install the revised software themselves.

As well, managing the passwords for our online services and our devices properly prevents the risk of data and identity theft. It may even be a good idea to use a password vault program to manage our passwords which may prevent us from reusing them across services.  Similarly using a word processor to keep a list of your passwords which is saved on removeable media and printed out, with both the hard and electronic copy kept in a secure location may also work wonders here.

Make sure that your computer is running a desktop / endpoint security program, even if it is the one that is part of the operating system. Similarly, using an on-demand scanning tool like Malwarebytes can work as a way to check for questionable software. As well, you may have to check the software that is installed on all of the computing devices is what you are using and even verify with multiple knowledgeable people if that program that is the “talk of the town” should be on your computer.

If you are signing up with new online services, it may even be a better idea to implement social sign-on with established credential pools like Google, Facebook or Microsoft. These setups implement a token between the credential pool and the online service as the authentication factor rather than a separate username and password that you create.

As well, you will be using the Webcam more frequently on your computing devices. The security issue with the Webcam and microphone is more important with computing setups that have the Webcam integrated in the computer or monitor, like with portable computing devices, “all-in-one” computers or monitors equipped with Webcams.

Here, you need to be careful of which programs are having access to the Webcam and microphone on your device. Here, if newly-installed software asks for use of your camera or microphone and it is out of touch with the way the software works, deny access to the camera or microphone when it asks for their use.

If you install a health-department-supplied tracking app as part of your government’s contact-tracing and disease-management efforts, remember to remove this app as soon as the coronavirus crisis is over. Doing this will protect your privacy once there is no real need to manage the disease.

Email and messaging security

Your email and messaging platforms will become an increased security risk at this time thanks to phishing including business email compromise. I have covered this issue in a previous article after helping someone reclaim their email service account after a successful phishing attempt.

An email or message would be a phishing attempt if the email isn’t commensurate with proper business writing standards for your country, has a sense of urgency about it and is too good to be true. Once you receive these emails, it is prudent to report them then delete them forthwith.

In the case of email addresses from official organisations, make sure that the domain name represents the organisation’s proper domain name. This is something that is exactly like the domain name they would use for their Web presence, although email addresses may have the domain name part of the address following the “ @ “ symbol prepended with a server identifier like “mail” or “email”. As well, there should be nothing appended to the domain name.

Also, be familiar with particular domain-name structures for official organisation clusters like the civil / public service, international organisations and academia when you open email or surf the Web. These will typically use protected high-level domain name suffixes like “.gov”, “.int” or “.edu” and won’t use common domain name suffixes like “ .com “. This will help with identifying whether a site or a sender is the proper authority or not.

Messaging and video-conferencing

Increasingly as we stay home due to the risk of catching or spreading the coronavirus plague, we are relying on messaging and video-conferencing software more frequently to communicate with each other. For example, families and communities are using video-conferencing software like Zoom or Skype to make a virtual “get-together” with each other thanks to these platforms’ support for many-to-many videocalls.

But as we rely on this software more, we need to make sure that our privacy, business confidentiality and data security is protected. This is becoming more important as we engage with our doctors, whether they be general practitioners or specialists, “over the wire” and reveal our medical issues to them that way.

If you value privacy, look towards using an online communications platform that implements end-to-end encryption. Infact, most of the respected “over-the-top” communications platforms like WhatsApp, Viber, Skype and iMessage offer this feature for 1:1 conversations between users on the same platform. Some, like WhatsApp and Viber offer this same feature for group conversations between users on that same platform.

Video-conferencing software like Zoom and Skype

When you are hosting a video-conference using Zoom, Skype or similar platforms, be familiar with any meeting-setup and meeting-management features that the platform offers. If the platform uses a Weblink to join a video-conference that you can share, use email or a messaging platform to share that link with potential participants. Avoid posting this on the Social Web so you keep gatecrashers from your meeting or class.

As well, if the platform supports password-protected meeting entry, use this feature to limit who can join the meeting. Here, it is also a good idea to send the password as a separate message from the meeting’s Weblink.

Some platforms like Zoom offer a waiting-room function which requires potential participants to wait and be vetted by the conference’s moderator before they can participate. As well these platforms may have a meeting-lockout so no more people can participate in the video-conference. Here, you use this function when all the participants that you expect are present in the meeting.

You need to regulate the screen sharing feature that your platform offers which allows meeting participants to share currently-running app or desktop user interfaces. Here, you may have the ability to limit this function to the moderator’s computer or a specified participant’s computer. Here this will prevent people from showing offensive imagery or videos to all the meeting’s participants. As well, you may also need to regulate access to any file-sharing functionality that the platform offers in order to prevent the video conference becoming a vector for spreading malware or offensive material.

Fake news and disinformation

Just like with the elections that count, the coronavirus issue has brought about its fair share of fake news and disinformation.

Here, I would recommend that you use trusted news sources like the respected public-service broadcasters for information about this plague. As well, I would recommend that you visit respected health-information sites including those offered “from the horse’s mouth” by local, regional or national government agencies for the latest information.

As well, trust your “gut reaction” when it comes to material that is posted online about the coronavirus plague, including the availability of necessary food or medical supplies. Here, he careful of content that is “out of reality” or plays on your emotions. The same attitude should also apply when it comes to buying essential supplies online and you are concerned about the availability and price of these supplies.

Conclusion

As we spend more time indoors and online thanks to the coronavirus, we need to keep our computing equipment including our tablets and smartphones running securely to protect our data and our privacy.

Keeping online video going with an older TV

Cable TV in the man-cave

Older TVs may end up in a secondary lounge area or bedroom

There is a very strong reality as far as the modern television set is concerned. It is that they last for more than 10 years thanks to electronic design that is about long-term reliability. This is bolstered by technical standards relating to broadcast TV or device interconnectivity that stay the same for the long haul.

Increasingly, as we buy a better or larger TV for the main lounge area where we watch most of our content, the older set that this new set will replace ends up in a secondary lounge area, a bedroom or even a secondary residence. In some cases, the older set will end up in the hands of a family member or friend who doesn’t have a TV or has one that is on the way out.

It is the same practice that happens with the refrigerator where an older fridge serves as an overflow-storage fridge whenever one buys a newer better fridge for their kitchen.

Online video via your home network

But it is underscored by a problem that will get worse with the rise of online video. Increasingly, manufacturers who don’t understand this reality are abandoning their older sets as they evolve their smart-TV platforms. This leads to smart TVs based on the older software not being supported by content providers when they launch front-end software for their new online video services. Or the set works with a limited, buggy operating system and applications which can impact your enjoyment of online video.

Let’s not forget that there are the TVs that don’t have any smart-TV functionality. Typically they will have, at best, network connectivity to work with a DLNA-based media player so you can see images or video you have on a NAS on these sets.

Here, you may have to rely on set-top devices to keep your older TV working in an optimum manner with the latest online video services. In this situation, it is easier to replace the set-top device if its manufacturer abandons the device’s software or the content providers abandon the set-top device’s platform.

Apple TV 4th Generation press picture courtesy of Apple

The Apple TV set-top box – an example of a popular online-media platform

At the moment, there are a few set-top platforms that are worth using for this purpose. The tvOS-based Apple TV; Android-based boxes running the Android TV operating system; Chromecast and Roku platforms still maintain support for older devices. The XBox One and PlayStation 4 games consoles also benefit from continual software upgrades as well as having apps for popular online-video services. Let’s not forget that you may find that some of the “décodeurs” offered as part of the multiple-play “n-box” setups by the French telcos like the Freebox Révolution may qualify in this regard.

Telstra TV media player (provisional design) press picture courtesy of Telstra

A Roku set-top box that is continually updated can also serve this need

You will also find that Apple TV and Chromecast are still alive with the AirPlay and Chromecast mobile-to-set-top streaming protocols. This will mean that most content services can be streamed from your iOS or Android mobile device to the set-top device. You may also find that Android TV will also support Chromecast streaming.

Other considerations

HDMI connection on video peripheral

HDMI connections – a preferred output on video peripherals

Your TV will have to, at least, support HDMI connectivity in order to work with these set-top devices. This is because most of these devices will have HDMI as their only AV connectivity option.

But you may find that the TV in question may provide only one HDMI input. This is more so with cheaper sets like house-brand specials offered by discount stores. In this case, you may end up having to use an HDMI switcher if you need to run multiple set-top boxes or other devices with these sets. Some audio devices like home-theatre-in-box units or AV receivers may answer this functionality need through the provision of extra HDMI inputs.

If your TV supports HDMI-CEC under its many names like Anynet+, Simplink, Bravia Sync or Viera Link, some of the set-top boxes like the tvOS-based Apple TV or the Chromecast will take advantage of this functionality. This will be in the form of the TV coming on and selecting the input the set-top device is connected to when you use its remote or, in the case of the Chromecast or Apple TV, you start streaming to that device from your smartphone. You may also find that you can control the set-top device with your TV’s remote so you don’t always have to rely on the set-top device’s remote.

HDMI-ARC is also relevant in relation to your older TV especially if you intend to use a soundbar, home-theatre-in-box system or AV receiver with it to improve its sound. This allows you to hear the sound from the set’s own broadcast tuner, network functionality or video devices connected directed to the set’s HDMI inputs via that audio device. If the older TV doesn’t have this connection but you want to use an external audio device, you may have to connect that device to the set’s digital audio output.

As far as traditional broadcast TV is concerned, you may find that your old TV will support the current digital-TV standard that is in place in your country. This is true if the digital-TV standard hadn’t changed since your country switched over to digital TV. But if your country is yet to switch to digital TV, you can plug in a set-top box when that day comes. Similarly, if your country has started to implement a newer digital-TV standard like DVB-T2 or ATSC 3.0, you would need to use a set-top box to gain access to broadcasts based on these standards. This extends to implementing interactive-TV platforms like HBBTV or the interactive provisions that ATSC 3.0 offers.

What manufacturers need to do

TV manufacturers need to understand the reality that the sets they make will be serving us for a very long time even if they try to force planned obsolescence on their products.

Here, if they offer a smart-TV product, they have to provide continual software support for at least 5 years, if not more. This may also have to be about at least providing software updates that answer data-security, software-quality and newer industry-standards needs.

As well, the manufacturers would need to maintain their products to commonly-accepted standards for broadcast reception and device / network interconnection. This is more so as a TV set ends up relying on external devices in order to stay up-to-date.

Conclusion

In order to keep your older TV set that you have pushed down to that secondary lounge area or bedroom, or have inherited from someone else going, you will need to consider the use of extra devices. This is more so if you want to keep it using the online services reliably.

Different kinds of cloud IT systems–what to be aware of

Apple iPad Pro 9.7 inch press picture courtesy of Apple

The iPad is seen as part of the cloud-based mobile computing idea that Silicon Valley promotes

Very often “cloud” is used as a Silicon-Valley-based buzzword when describing information-technology systems that have any sort of online data-handling abilities.

This is more so if the IT system is sold to the customer “as a service” where the customer pays a subscription to maintain use of the system. It also is used where the user’s data is stored at an online service with minimal data-processing and storage abilities at the user’s premises.

It is because small business users are being sold on these systems typically due to reduced capital expenditure or reduced involvement in maintaining the necessary software. It also allows the small business to be able to “think big” when it comes to their IT systems without paying a prince’s ransom.

What is strictly a cloud system

Single Server online system

Single Server online system

But, strictly speaking, a cloud-based system relies on multiple online locations to store and/or process data. Such a system would have multiple computers at multiple data centres processing or storing the data, whether in one geopolitical jurisdiction or many depending on the service contract.

This is compared to the single-server online IT system sold as a service that implements at least a Web-based “thin-client” where you work the data through a Web page and, perhaps, a mobile-platform native app to work your data on a smartphone or tablet. Typically, the data would be held on one system under the control of the service provider with this system existing at a data centre. It works in a similar vein to common Internet services like email or Web-hosting with the data held on a server provided by the Wehhost or ISP.

Hybrid cloud systems

Hybrid Cloud online system

Hybrid Cloud online system with primary data kept on premises

One type of cloud system is what could be best described as a “hybrid” system that works with data stored primarily on the user’s premises. This is typically to provide either a small private data cloud that replicates data across branches of a small business or to provide online and mobile functionality such as to allow you to manage the data on a Web page or native mobile-platform app anywhere around the world, or to provide messaging abilities through a mobile-messaging platform.

For example, a lot of NAS units are marketed as “cloud” NAS units but these devices keep the user’s data on their own storage media. Here, they use the “cloud” functionality to improve discovery of that device from the Internet when the user enables remote access functionality or data-syncing between two NAS devices via the Internet. It is due to the reality that most residential and some small-business Internet connections use outside IP addresses that change frequently.

WD MyCloud EX4100 NAS press image courtesy of Western Digital

WD MyCloud EX4100 NAS – one of the kind of NAS units that uses cloud functionality for online access

Or a small medical practice who keeps their data on-premises is sold a “cloud-based” messaging and self-service appointment-management add-on to their IT system. Here, the core data is based on what is held on-premises but the messaging functionality or Web-based user interface and necessary “hooks” enabling the mobile-platform native app for the self-service booking function are hosted on a cloud service built up by the add-on’s vendor. When a patient uses the mobile-platform app or Web-front to book or change an appointment, they alter the data on the on-premises system through the cloud-hosted service.

It may also be used with something like an on-premises accounting system to give business functionality like point-of-sale abilities to a mobile-platform device like an iPad through the use of a cloud-based framework. But the core data in the on-premises system is altered by the cloud-based mobile-platform setup as each transaction is completed.

Full-cloud systems

Full Cloud online system

Full Cloud online system with data processing and storage across multiple different computers

On the other hand, a full-cloud system has the user’s primary data held online across one or more server computers with minimum local hardware or software to work the user’s data. There may be some on-premises data-caching to support offline operation such as to provide transaction-capture if the link is down or simply to improve the system’s performance.

The on-premises data-caching can be extended to a system that has concurrent data storage both in the cloud and on the premises. This may help businesses who have invested in on-premises data-storage by providing them with the security and flexibility of a cloud setup with the fail-safe and responsive operation of the on-premises setup. In some cases, it may also be about facilitating secure payment-card transaction processing with that taking place in a separate compliant network hosted by the IT solution provider.

The IT infrastructure for a full-cloud system will have some measure of scalability to allow for an increasing customer base, typically with the service provider annexing more computer power as the customer base increases. Such a service will have tiered pricing where you pay more for increased capacity.

Client software types

The user-interface for an online or cloud IT system would primarily be Web-driven where you work the data with a Web browser. On the other hand, it could use native client software that works tightly with the client computer’s operating system whether as a “thick” client with a significant amount of local data-processing or storage on the endpoint computing device or a “thin” client which just has a window to the data such as simply using a Web browser.

Public vs private cloud

Another concept regarding cloud-based IT is the difference between a public cloud and a private cloud. The public cloud has the computing power managed by another firm like Microsoft Azure or Amazon Web Services while the private cloud has all its computing power managed by the service provider or client company and effectively isolated from public access through a separate private network.

This can be a regular server-grade computer installed at each of the business’s branches, described as an internal cloud, Or it can be multiple high-grade server computers installed at data centres managed by someone else but available exclusively for the business, known as a hosted private cloud.

Data Privacy, Security and Sovereignty

Another factor that comes in to question regarding cloud and online computing is the issue of data privacy, security and sovereignty.

This covers how the data is handled to assure privacy relating to end-users whom the data is about; and assurance of security over data confidential to the IT system’s customer and its end-users. It will call out issues like encryption of data “in transit” (while moved between systems) and “at rest” (while stored on the systems) along with policies and procedures regarding who has access to the data when and for what reason.

It is becoming a key issue with online services thanks to the European GDPR directive and similar laws being passed in other jurisdictions which are about protecting end-users’ privacy in a data-driven world.

The issue of data sovereignty includes who has effective legal control over the data created and managed by the end-user of the online service along with which geopolitical area’s rules the data is subject to. Some users pay attention to this thanks to countries like the continental-European countries who value end-user privacy and similar goals heavily.

There is also the issue of what happens to this data if the user wants to move to a service that suits their needs better or if the online service collapses or is taken over by another business.

Cloudlets, Fog Computing and Edge Computing

Edge Computing setup

Edge computing setup where local computing power is used for some of the data handling and storage

This leads me to the concept of “edge computing”, which uses terminology like “fog computing” or “cloudlets”. This involves computing devices relatively local to the data-creation or data-consumption endpoints that store or process data for the benefit of these endpoints.

An example can be about a small desktop NAS, especially a high-end unit, on a business premises that handles data coming in to or going out to a cloud-based online service from endpoint devices installed on that premises. Or it could be a server installed in the equipment rack at a telephone exchange that works as part of a content-delivery system for customers who live in the neighbourhood served by that exchange.

Qarnot Q.Rad press image courtesy of Qarnot

Qarnot Q.Rad room heater that is a server computer for edge-computing setups

Similarly, the Qarnot approach which uses servers that put their waste heat towards heating rooms or creating domestic hot water implements the principle of edge computing. Even the idea of a sensor drone or intelligent videosurveillance camera that processes the data it collects before it is uploaded to a cloud-based system is also about edge computing.

It is being touted due to the concept of decentralised data processing as a way to overcome throughput latency associated with the public Internet links. As well, this concept is being underscored with the Internet of Things as a way to quickly handle data created by sensors and turn it in to a form able to be used anywhere.

Conclusion

Here, the issue is for those of us who buy service-based IT whether for our own needs or for a workplace is to know what kind of system we are dealing with. This includes whether the data is to exist in multiple locations, at the premises or at one location.

Originally published in July 2019. Updated in January 2020 in order to encompass cloud-based IT solutions that keep business data both in the cloud and on the premises as well as using cloud-based technology to facilitate secure transaction processing.

Should we be managing multiple email accounts?

Windows Live Mail client-based email interface

Multiple email accounts may be beneficial to your privacy and work-life balance.

Some of us may find it convenient to handle all of our email through one account. The advantages that are often seen include dealing with one inbox and sending from one account.

But we are increasingly entering a world where we have to deal with multiple email accounts.

Why run multiple email accounts?

One reason this is becoming important is to keep business and private email separate. Here, it may be about preserving a separate business and social persona, or simply to delineate your time between home and work activity. Similarly, the separate email address for business / work email is an advantage in preserving a professional appearance.

As well, the correspondence associated with your personal email address that you maintain yourself isn’t subject to the same kind of legal scrutiny that the correspondence associated with your business email address would be subject to. This is important if your workplace or business is to change hands or is a party to legal action of any sort.

People who have a public-facing business life such as politicians or celebrities will maintain a public-facing email address to maintain an email correspondence consistent with that public-facing role. This is becoming more important where people in the public eye are becoming more vulnerable to “dirt-digging” – the practice of trawling for any information to discredit one’s reputation.

This practice is also becoming important with the emails we “tie” with various social-network presences. Here, we may want to operate a professional-looking persona on the public-facing social-media profiles while keeping a private persona that you have on your personal social-media profiles.

The situation extends to where we have our email address on material that the public have easy access to, whether it’s that notice on the church noticeboard or our entry on that petition.

Those of us who engage in online dating are having to find that maintaining a separate email address for use with dating apps and Websites gives us greater control over what potential suitors know about us. It may also offer a chance to control when they can contact us while keeping this life private from family or work.

Account types list in the Add Account option including option to add POP3 or IMAP4 accounts

It also applies to businesses and organisations who maintain a public-facing email address that is written on the public-facing material. This keeps a professional appearance and keeps your staff’s business and private email more private. Similarly, you can maintain multiple email address for particular job descriptions or workflow requirements.

Conversely, some of us maintain a separate email address that we give to marketers or online email newsletters as a crude method of spam control. Similarly, separate email addresses are being seen as important as a failover measure should one email server crash or as a security verification means for email services.

How is this achieved?

Who will provide the email inboxes

email settings in Samsung Android email app

Add Account option in email settings on Android (Samsung) email app

Your workplace will give you an email address that is tied to your tenure with that employer. The provision of a tied email address will also apply for most college students or staff who have access to college IT resources. If you run a small business or other organisation with a Web presence and own domain name, your Webhost or domain name provider will offer at least one email inbox under the main domain name you purchased.

Most ISPs or telcos will provide you with at least one email inbox as part of your Internet-service deal. It will be something that is very common with fixed-line Internet service especially from major providers.

Of course, there are the Webmail providers like Outlook.com and Gmail who will provide you at least one email address for free. It also includes the secure email hosts who provide a secure user experience at a premium price.

Now we are seeing the rise of dedicated service providers who provide email inboxes as their main business. Such providers will offer Web-based or standard client-based access to these mailboxes.

What to look for

Samsung Android email app account types

Account types offered by the Samsung Android email app

A feature I consider very important for email accounts is that they support multiple-device access and full “on-the-road” use. Typically it would mean use of a major Webmail host or a host that implements “hosted Exchange” or IMAP4 email protocols. This is important where we use a mobile device or secondary laptop computer to work our emails and want to work our email from anywhere.

You may find that a Webmail interface that allows the operation of multiple accounts from competing services may come in handy if you are using shared computers or public computing facilities.

How do you handle the multiple email inboxes

Different users may manage their email from multiple accounts using one of two paths. One is to use a single interface for all of the email accounts, with the other being to use different interfaces for different accounts.

It may include having all your personal email accounts operated with one interface like a Webmail interface while your work or business email accounts are operated with another interface like a business-optimised email client.

One email interface for all accounts

Most email interfaces, whether Web-based or client-based, will support the operation of multiple email accounts. In this case, using the one interface will underscore the idea of going to one email interface for all of your email activity.

Your email interface will have an option in its account-management settings to add or delete email accounts. Most of the current interfaces will have a “quick-setup” routine for the popular Webmail providers; and will have a setup option for accounts using Microsoft Exchange, POP3 or IMAP4 accounts.

Receiving email

The user experience for reading your email will have separate inboxes for each of the accounts you manage. You may also find that some of the email interfaces like the GMail Web interface may offer a combined-inbox view for all of your email accounts with better interfaces using visual clues to differentiate each account.

Sending email

Should you send an email, you will be asked to choose which account you use to send your email via.

On some email interfaces where you choose the account you are operating at the moment like Windows 10’s Mail app, the account you are operating would be the one you send your email via. Other interfaces may require you to determine which account you send the email from when you click the “Send” button. As well, most of these interfaces may offer a default-account setting for new email, with the option to override this when you compose your new message.

The default behaviour for replying and forwarding would be to use the email service you received the email via for sending the replies or forwarding the email.

Your contacts list

Of course the contact list kept in your email interface will, in most cases, be shared amongst all of the accounts you operate.

Different email interfaces for different accounts

On the other hand, some of us may choose to operate each inbox with its own interface setup. This may be due to an email client not handling multiple inboxes how we want it or simply to delineate the operation of each inbox as a separate task.

This is a simple task with operating each interface with its own account. You will have to copy across contact details you want to use across multiple accounts if you operate them with separate interfaces.

A combination of this situation and the former situation will apply if you choose to operate some accounts with one interface and others with another interface. This is a useful practice for those of us who want that “church and state” separation between business and personal or public and private email activity.

Conclusion

Operating multiple email accounts may come in to play as a measure to protect your privacy and manage our email inbox properly.

An ideal home network for an apartment

Apartment blockIncreasingly, as the cities become more dense, most of us will be either living in an apartment or looking towards doing so. In some cases, some of you may be living in a larger house in a rural or peri-urban area but maintain an apartment as a city-based “family house” if you or your family are making frequent trips downtown.

There will be issues that will impact how you set up your personal IT and home network in these apartments in order to make sure that it can coexist with your neighbours’ networks. Let’s not forget that those of you who are active in your building’s management committee may face discussions and questions about building-wide IT including the Internet Of Things. Here, I will be regularly publishing articles that may be of relevance to you and your situation.

When you are thinking of “downsizing” towards that small apartment, you may find that your needs change as far as your home network is concerned. As well, you may have to set things up so that your network coexists properly with your neighbours’ home networks especially as far as data privacy / security and network performance is concerned.

In most cases, setting up your home network and Internet connection at your apartment may be a simple task with you just installing a wireless router to use with your portable devices and, in most cases, a HomePlug AV500 powerline network segment for desktop computers and home-entertainment equipment.

But not all apartments may come across as a simple setup. For example, you may come across places with internal walls or plenums that are constructed of dense materials like double-brick, cinderblock or reinforced concrete or use metal as part of their construction, which can impede reliable Wi-Fi wireless signal reception.

As well, you need to be sure with HomePlug powerline or Wi-Fi wireless technologies that your operation of these technologies doesn’t impede on your neighbours’ use of them. This includes being sure that your data on your network stays private while theirs also stays private.

Equipment

Wireless Router

Telstra Gateway Frontier modem router press picture courtesy of Telstra

Most recent-spec Wi-Fi routers may serve you well for apartment-based networks

You can get by with most Internet routers, whether you buy them yourself or have them supplied as part of your Internet service. This may be true for a studio, one-bedroom or small two-bedroom location but you may have to consider something with improved Wi-Fi wireless performance for larger two-bedroom or three-bedroom spaces.

It is more so if your apartment follows the typical path of having the Internet connection like the telephone socket installed at one end of the dwelling which is opposite to another end where a lot of your living takes place.

Wireless connectivity

But you need to be sure that the Wi-Fi wireless functionality is of current specification. You may not need to worry about whether the router uses external high-gain antennas because of the smaller area that it is expected to cover. But I would make sure that this functionality works across two bands simultaneously especially as the 5GHz band is still seen as “new territory” for network coverage and can facilitate high throughput. Such a router will be described as 802.11a/b/g/n simultaneous dual-band or the routers that have 802.11ac functionality will be simultaneous dual-band devices.

Internet (WAN) connectivity for next-generation services

If your building is provisioned with next-generation broadband Internet service, find out whether the equipment supplied in your apartment includes router functionality or is simply a modem or optical-network terminator. In the latter situation, you would just need to use a broadband router with an Ethernet WAN (Internet) connection. It is also worth noting that a lot of FTTB (fibre-to-the-building / fibre-to-the-basement) setups will implement VDSL2 for the copper path to your apartment so you would need to use a modem router that supports this technology on the WAN side. This is a feature that is becoming available with newer mid-range and high-end DSL modem routers and is slowly trickling to economy equipment as this technology becomes more common.

In some cases, you may be lucky enough to have an FTTB setup which implements Cat5 Ethernet wiring to all of the apartments like with Spirit Telecom in Australia. The same would hold true for an FTTP (fibre-to-the-premises) setup which simply uses an optical-network terminator. Such setups would simply use a broadband router with an Ethernet WAN connection.

It is also worth noting that a lot of premium DSL modem routers including some equipment offered by carriers are offering a “dual-WAN” or “multiple-WAN” functionality where they have two different paths for connection to the Internet. This is typically an Ethernet and a DSL connection with the ability for you to select between these connection types using the configuration Web interface that they provide. Some of these modem routers have one of the Ethernet ports able to be switched between a LAN (home network) connection or a WAN (Internet) connection rather than a dedicated WAN Ethernet port and you would have to make sure you select the right type of connection for the purpose in mind.

When you move in to a new building as part of your downsizing efforts, you may need to find out from whoever is in charge of the building such as the owners corporation whether it has been provisioned for a fibre-based next-generation broadband service. Here, you would need to know what technology is being used along with whoever is providing the Internet service. This is so you can be sure you have the right equipment for the service.

That headline Wi-Fi Internet service offered by your building

Android main interactive lock screen

Those headline Wi-Fi Internet services offered by the apartment building will work well with smartphones, tablets and computers only and are best used for casual Internet use

Avoid the temptation to use for your main Internet service that free Wi-Fi service that your building offers as a headline amenity. The kind of developments that typically offer this kind of service are “resort” apartment developments, retirement villages or so-called “residence” apartments let out on a similar business model to a hotel. It also includes hotels that have rooms and apartments available to let for long-term residence but in the same “inn-style” business context with rent; light, heat and power; telecommunications, food and similar living expenses as one payment to that hotel.

This is because of the fact that most of these networks aren’t secure, typically being set up as open wireless networks with a Web-based login experience and intended for casual login. If these networks are properly set up as a public-access network, they will be set up with client isolation so that client devices cannot discover each other across the network.

Therefure, they don’t play well with anything other than a regular (desktop or laptop) or mobile (smartphone or tablet) computing device. I encountered this problem through an online conversation from someone who bought the Sony CMT-MX750Ni network-capable micro music system that I reviewed and couldn’t run its integrated Internet radio and online content functionality and further correspondence that I had with the commenter revealed that this stereo was installed in a “resort” apartment which had this kind of free Wi-Fi Internet access. They ended up having to use it with an iOS device connected to the Wi-Fi network and running a content app for online content.

There is still the security risk of having all the network traffic associated with everyone in the building using that network being “sniffed out” especially in an improperly-configured network, along with the risk of a commonly-known password that is rarely changed.

These Wi-Fi internet services are best used when you want to use Internet-based services from your laptop, tablet or smartphone while in a common space. But you won’t be able to use your home network’s resources from a device connected to one of these Wi-Fi Internet services.

Your home network

Wired-network segment

NETGEAR GS108PP ProSafe Gigabit Unmanaged 8-port Switch with Power-Over-Ethernet Plus press picture courtesy of NETGEAR

It may be worth having your apartment wired for Ethernet if you are buying “off the plan”

It is important to consider establishing a wired-network segment alongside your Wi-Fi wireless network segment. This is more important with the arrival of Smart TVs and network-connected video peripherals so you can be sure that they work properly and provide enjoyable viewing. In some cases, if you are locating a desktop computer or network-capable printer away from the router, you may find that a wired network segment may do the job.

If your apartment is being newly built such as when you buy one “off the plan”, it may be worth considering having an Ethernet connection installed if you can afford it. Here, you could have it set up to link to the main living area, the bedrooms and / or study / office space. Here, this is important for larger spaces like two-bedroom or larger apartments, dual-level maisonettes and the like. In this context, the areas you will need to cover are where the router will be and where you will be watching TV or using games consoles or similar equipment.

HomePlug AV adaptor

HomePlug networks can work well with apartment setups as a “wired no-new-wires” network

On the other hand, you can set up a HomePlug AV500 or better powerline network segment to cover your apartment. This is more important if you are on a tight budget or are dealing with a small apartment, and would earn its keep with existing developments.

Some of you may think that you could use a HomePlug powerline network segment to temporarily extend your home network from your apartment out to a common area or your neighbour’s apartment. You wouldn’t see reliable operation if you are doing this in a larger building due to the way the building is wired for many households or the fact that the building’s electrical subsystem is also serving various pieces of  “big-time” electrical equipment like lifts or building-wide heating / air-conditioning equipment which can yield electrical interference.

Wireless access point

You may find that your your home network’s Wi-Fi wireless segment can cover your apartment easily but there are some situations where these places can yield patchy coverage especially for smartphones and tablets.

For example, your apartment may have one or more interior walls made of a dense material like double-brick or concrete and these could impede the Wi-Fi coverage. This can also include where a building uses metal ducts or plenums running from floor to ceiling in the apartment for central heating and air-conditioning, garbage disposal or other purposes. It also includes where you are dealing with pre-1960s buildings where fireplaces used to exist or still exist but in a cosmetic manner. Similarly, you may be living in a “maisonette” or similar-styled apartment where your apartment is across two levels and your network’s coverage may not span both levels properly.

Devolo dLAN 550 WiFi HomePlug AV500 access point press picture courtesy of Devolo AG

The compact Devolo dLAN 550 WiFi HomePlug wireless access point – fills in the Wi-Fi gaps

Here, you may have to consider implementing an extension wireless access point to improve your network’s reception in those patchy areas. Typically the HomePlug wireless access points that use your apartment’s AC wiring as the backbone can answer this need very easily, providing just the right amount of coverage to fill in that dead-spot. Similarly, some wireless range extenders that can be set up to become access points for a wired backbone can provide that same level of coverage. At the most, you will typically end up with using two wireless access points in your setup – one that is part of the router as well as one extension access point.

How do I set this up?

The Wi-Fi wireless network

NETGEAR Orbi distributed WiFi system press image courtesy of NETGEAR

Distributed Wi-Fi setups like this NETGEAR Orbi can assure coverage across that large apartment, penthouse or two-level maisonette

In this area, you may have to identify a vacant operating frequency for the network using a Wi-Fi finder app, available for most regular-computer platforms and Android mobile platforms. Here, the channel you use would be the one where there is the lowest signal strength because no nearby networks are using that channel.

But you may find that some wireless routers, access points or distributed-Wi-Fi systems may offer this functionality as part of their setup procedure or may even automatically tune themselves as part of an “easy-setup” routine.

Then you determine a unique SSID (wireless network name) and passphrase for your network and configure your router and other wireless-network equipment to work to these specifications. Some of the routers, especially those offered by ISPs, may have a unique pre-defined SSID and passphrase, but it may be worth changing the SSID on these devices or. if you are comfortable with it, connecting your client devices to this new SSID configuration.

Shared-Internet-access setups

Some of you may use FON, Telstra Air or similar “shared Internet access” setups which require your home network router to be part of a wireless public-access network. Such services have it that you offer bandwidth to other users that aren’t part of your household, then are able to get bandwidth for free due to you offering that bandwidth to others.

This is achieved by it maintains the Wi-Fi access for your home network along with a separate Wi-Fi local network for this public-access network, typically by having two SSIDs on the same frequency – one for the public-access network and the other for your home network.

You may find that other people in the street can’t use the public-access network as expected because your router is located high up and away from street level. This can manifest with the remote device used by the person on the street acting as though it is in a fringe area and exhibiting patchy reception. It is something I have experienced in Docklands where it was a hit-and-miss affair to use the Telstra Air service offered by an apartment dweller living in one of the buildings that was facing a public walkway from my smartphone outside the building.

On the other hand, the only people who would benefit are others who are walking up and down the corridor outside your apartment.

The HomePlug powerline network

Western Digital LiveWire HomePlug AV Ethernet switch

You may have to use the SYNC or SimpleConnect buttons on your home network devices like this WD LiveWire HomePlug AV switch to assure reliable secure connectivity in your apartment-based HomePlug setup

Here, this network may be a simpler affair where you just use the SimpleConnect buttons on the HomePlug adaptors to create a new network segment with its own encryption. This is a procedure that I bad described in this IT assistance article where I was instructing my former pastor over the phone about how to set up a HomePlug segment for his desktop computer when he moved to a new location. But it is imperative to perform this process when you are setting up a HomePlug segment for the first time so as to avoid your data “creeping on” to your neighbour’s HomePlug segment or vice versa.

If you are adding other HomePlug devices, you need to follow the routine for using SimpleConnect buttons to add these devices – press the button on the new device then on the existing device while watching for the lights to flicker in a certain way.

When it comes to connecting a cluster of co-located network-capable equipment together like a home-entertainment system, you can either purchase a HomePlug-Ethernet switch that has multiple Ethernet connections. On the other hand, you can simply get by with a desktop Ethernet switch connected to a HomePlug adaptor to bring all the equipment in that cluster online – most of these desktop Ethernet switches do cost very little to purchase for a five-port Gigabit type.

Devolo dLAN 1200+ HomePlug AV2 MIMO adaptor press picture courtesy of Devolo

HomePlug AV2 like what is offered by this Devolo dLAN 1200+ adaptor may provide more stable operation when competing with large motors in the building (European setup)

Most apartment setups may be able to get by with the HomePlug AV500 powerline networks but you may find that HomePlug AV2 1200 MIMO-based technology may suit your needs better. This may be of relevance for those of you who may benefit from the extra bandwidth or who find that the highly-robust technology may cope with the high concentration of heavy-duty motors used in these buildings for things like air-conditioning or lifts better.

Other notes

If you are using a network-attached storage device or something similar, it may be preferable to connect it directly to the router rather than via a Wi-FI or HomePlug network because this assures a more reliable connection when it comes to making sure files arrive at the NAS complete.

Conclusion

An apartment can come across as a simple place to set up a home network within but there are some issues to work out so that you have a reliable secure home network that coexists with your neighbours’ home networks easily.

Windows 10 answers the problem of system sounds playing through that good sound sound system

This arrangement documented here will work with Windows 10 computers running the April Update (Build 1803) version of that operating system or newer versions.

I have just applied the latest feature update to my Windows 10 installation on my regular computer and it has come across with a feature that most of you will want to benefit from when you use your computer to play audio or video content.

This feature update called Windows 10 April Update or formerly Windows 10 Spring Update (Build number 1803 in the System dialog) implements the ability to determine which sound device a program uses. Some Win32 (traditionally-developed) programs, namely well-bred media editing and management programs or VoIP programs have the ability for a user to determine which sound device they want that program to use. But the Web browsers, along with Spotify or TuneIn Radio and most of the Microsoft Store apps don’t offer this ability.

HP Elitebook 2560p playing through Naim DAC-V1 USB DAC

Windows 10 April Update allows the speakers in this USB-based audio setup to play only the music while the audio alerts play through the laptop’s integrated speakers

This means that you could set things up so that the system sounds like that Windows error “ding” or the email alert sound don’t blast through the good sound system but play through the cheaper speaker setup like your laptop’s speakers. It is while Spotify or that other audio program plays through the good speakers or hi-fi system. Similarly, you may want that YouTube video or the game you are playing to have its sound come through your big TV’s speaker but don’t like the idea of the Windows audio prompts being a distraction by barging through those speakers.

Praise and worship at church

You can set things up so that the playout computer doesn’t play Windows audio alert sounds through PA systems like this church’s setup

This feature will be essential for those of you who use your computer with a PA system as an audio/video playout device and end up using baseline software that doesn’t offer the ability to manage the audio devices the software plays through. Here, you avoid having those PA speakers “magnifying” the audio prompts that Windows makes when a dialogue box pops up or new email comes in. Similarly, you could then have one audio-output device like headphones or low-powered speakers serve as a “cue” device that you use to verify or line-up the content you want to

Sound devices that you can send an app’s sound output through

play before you have it playing through the main speakers.

How do you go about this?

You would need to make sure that your computer is running with another sound device that is attached to the good sound system. This could be a separate sound card, USB sound module or DAC, or a Bluetooth audio adaptor. If you have the computer connected to a sound system equipped with Bluetooth, USB or similar audio functionality, you have effectively set up the secondary sound device. It also applies if you have connected it to the big TV or home-theatre setup using an HDMI cable.

Identifying the sound devices

Then you identify the two different sound devices – the one that you want as your “primary” device for monitoring audio prompts that Windows provides and the “secondary” one you want your multimedia content to play through.

The sound functionality that is built in to a laptop computer or a desktop computer’s motherboard will typically be represented by something like a Realtek, Intel HD Audio or similar chipset name. In most cases, this integrated-sound chipset serve the internal speakers in a laptop or a pair of cheap computer speakers connected to the audio sockets on a desktop computer’s motherboard.

Sony STR-DN1060 home theatre receiver press picture courtesy of Sony America

If you connect your computer to your monitor or TV through one of these home-theatre receivers using the HDMI connections on these sets, you will be using the separate HDMI audio subsystem facilitated by your computer’s graphics infrastructure for the sound that comes through the receiver

Display setups connected to your computer via HDMI or DisplayPort that have audio abilities will have those abilities seen as an audio function of the display infrastructure. Some of these cases like Intel integrated graphics chips will properly refer to the arrangement as “display audio” or “HDMI display audio” due to the function being separate from the computer’s main sound chipset. This arrangement also holds true if you are connecting HDMI audio devices like soundbars, HDMI audio adaptors and home-theatre receivers between your computer and your display using the HDMI cable.

Let’s not forget that USB or Bluetooth devices that use the Windows audio-device class drivers will still identify themselves by their device or chipset make and model. This is to avoid confusion that can exist if you connect multiple USB or Bluetooth audio devices to the same host computer.

Configuring your setup

Go to Settings (the gear icon in your Start menu) and click on the System option. Then click on the Sound menu on the left of the System menu page. Make sure the current sound device is the primary one that will drive your laptop, monitor or other cheaper speakers. Then click on “App volume and device preferences” to bring up the menu to determine which speakers Spotify or your other multimedia app will use.

If you added a new audio output device to your computer, Windows will automatically assume it is the default audio device. Here, if you want this device to be the secondary device, you would have to use the above-mentioned Settings – Sound panel to select the primary sound device to be the default device.

In my setup, I used my LG monitor which has an HDMI link and built-in speakers but yields laptop-quality sound as the primary sound device while a Motorola Bluetooth audio adaptor connected to an older boombox serves as the secondary sound device. Because I am using a traditional desktop PC, the Bluetooth link is facilitated through a USB Bluetooth modem.

Windows - System - Sound menu for app-based audio device selection

Spotify set up to play

Next to the app you wish to direct the sound output for, click on the drop-down box in the Output column. At the moment, this will say “Default”, but use this to select the output device you want to have the app come through such as the USB DAC or Bluetooth speaker.

Here, I tested the setup with a Win32 app in the form of the Windows Media Player and it does work properly even though that program provides the ability for users to determine the sound output device that they use. Then I tried it with a UWP (Microsoft Store) app in the form of Spotify’s Windows 10 port and this worked reliably. Subsequently, I also found that this setup worked with Google Chrome when playing a YouTube video. Through these tests, I made sure that the Windows sounds were playing through the primary speakers.

You may have to run totally different browsers if you want the sound from one Webpage to pass through one device while the sound from another Webpage passes through another. This can be of concern if, for example, you are running a YouTube playlist or something similar as background music while you are playing a Web-based social-media game.

Going back to normal operation

To get back to your normal settings, click the “Reset” button in the “App volume and device preferences” window to have all the sound sources work through your default devices.

You may find that some media content may stop if you switch audio devices while it is running. If you do use this ability to maintain a “cue” device and a “main” or “front-of-house” device for playout purposes, you will have to pause the media file before you switch audio devices or simply restart the media content after you switch.

Other abilities

There is the ability to determine which input device an app uses which can be good for Web-based, Microsoft Store or similar apps that don’t provide an option for you to choose which microphone device you are to use. This can come in handy if you want to use a more accurate microphone with Cortana, courseware apps or baseline notetaking apps rather than your 2-in-1’s built-in microphone.

In this case, you choose the Input device you want to use for each program or Web browser rather than choosing the Output device.

What improvements could be provided

This feature could be taken further through the use of a “Default Multimedia Audio Device” definition that is expressly used for media-player software and/or a “Default Game Audio Device” definition used for games.This could then allow a user to have an audio device work as the one to use for multimedia or gaming purposes while another is used for the system sounds. It can then lead to the ability to create an “audio device ladder” for each audio device class where connection of certain audio devices like headphones, HDMI-equipped TVs or USB DACs overrides other audio devices in a particular order.

Another issue that will crop up with this new ability that Windows 10 April Update provides is sending different audio content to different “jacks” served by the same audio infrastructure. It may come about through cheaper computer designs that only have one audio chipset for HDMI, internal-speaker and audio-jack output rather than allowing for a separate audio function that is part of a graphics infrastructure to support HDMI digital audio.

Conclusion

Now you are able to make sure that your Windows computer’s multimedia software can play through the speakers that would suit it best without having the various audio prompts that the Windows shell or office software creates blasting their way through those speakers.

Setting up a mobile NAS to work with your home network

WD MyPassport Wireless mobile NAS

The WD MyPassport Wireless mobile network-attached storage – can offer data to the host Wi-Fi network when set up in hotspot mode

Increasingly, data-storage device manufacturers are adding to their mobile network-attached storage devices the same kind of network-based data storage and access features typically offered with a standard desktop NAS device. This is rather than these devices just being a lightweight file server for smartphones and tablets connected to the device’s own Wi-Fi access point.

I had previously reviewed one of these devices in the form of the WD MyPassport Wireless mobile NAS which demonstrated this kind of functionality. In the review, I had called out the DLNA-compliant media server that was part of that mobile NAS’s feature set, where you had the ability to show your photos and videos on one of the latest Smart TVs via the home network the TV is connected to.

Mobile NAS with hotspot mode set for “secure” or “private” mode

As well, some of the increasingly-sophisticated devices like the WD MyPassport Wireless Pro also are offering the same kind of Samba-based (SMB / CIFS) file transfer method that you can do with other NAS devices so you can transfer resources to these devices using your regular computer’s operating-system’s file manager and its network file transfer protocols. Similarly, the devices may implement FTP, WebDAV or other common network-file-transfer protocols primarily to allow you to upload photos and footage from your Wi-Fi-capable digital camera or camcorder to the mobile NAS if the camera honours these standard protocols.

How to have this work properly?

Here your mobile NAS unit needs to be set up for connection to an existing small Wi-Fi network as a client device of that network. It also needs to be set up to share its resources to that client network in addition to the network it creates using its own wireless access point.  Most of this configuration that I would be talking about here would be something you would do using the vendor-provided native mobile-platform app or, perhaps, a Web page that the mobile NAS creates as its management page.

Mobile NAS with hotspot functionality set up for file sharing mode

Typically, you may set this up as part of enabling a “Share Wi-Fi Connection”, “Wi-Fi Hotspot” or similar function that effectively shares a logical network connection between multiple devices that connect to the portable NAS’s access point. This function is similar to what most travel routers offer as a way to share the one logical (and usually permitted) connection to a hotel’s guest-access Wi-Fi service amongst the personal computing devices you and your travelling companions own. Similarly, this same function creates a “trust circle” between multiple devices connected to the mobile NAS’s access point allowing them to be discovered by each other even if the public-access Wi-Fi network that the NAS is connected to is configured properly with client isolation enabled.

When you enable the “hotspot” function on a sophisticated mobile NAS like the WD MyPassport Wireless / Wireless Plus series or the Seagate Wireless Plus, you will have an option to set this function to work in a “private” or “secure” mode or a “sharing” mode.  In the “private” mode, the data held on the NAS becomes available only to devices on the Wi-Fi network created by the mobile NAS’s access point. Conversely, the “sharing” mode will make the data available to devices on the network which has the Wi-Fi segment you connected the mobile NAS to as part of the “hotspot” mode.

Availability of data held on mobile NAS Sharing mode Secure / Private mode
Host wireless network Yes No
Wireless network created by mobile NAS’s access point Yes Yes

To allow the mobile NAS to share its resources on your home network, you need to enable the “sharing” mode or disable the “secure” or “private” mode while setting up the “hotspot” functionality. It is a wise practice not to use the “sharing” mode on a Wi-Fi network used as a public-access network and this function wouldn’t work with these networks that are properly set up with client isolation enabled.

What can the manufacturers do to improve the Wi-Fi bridging functionality on these devices?

The “Wi-Fi hotspot” or “Shared Wi-Fi” functionality could be improved upon by allowing users to create preset operating modes for particular Wi-Fi networks. This would work in a similar way to the way Windows allows the user to classify each network they connect to as being a “home”, “work” or “public” network, causing it to adopt an exposed persona suitable for your home or office network or a private person for that public-access Wi-Fi network. Such parameters could be to determine whether to share resources with the host network or to always clone the client device’s MAC address when connecting along with remembered Wi-Fi network passwords.

Here, as a user connects the mobile NAS to a Wi-Fi network for “Shared Wi-Fi” operation, they are invited to save the configurations they have established for that network. Then, when they reconnect to that network, the mobile NAS assumes the operating modes that the user previously defined. These details can be referenced by the host network’s ESSID or a user-defined name for that network.

Conclusion

Once you know how to set up that highly-capable mobile NAS device and exploit the “private” or “shared” operating modes that these devices offer with setting up the “Shared Wi-Fi” or “hotspot” mode, you can then use them to make resources held therein available to other small networks you connect them to.