The computing setup with multiple screens – now very ubiquitous
Computing setups that are equipped with two or more screens are becoming more ubiquitous due to the affordability of these setups. As well, it is becoming more acceptable in general business and personal computing to operate with multiple displays at your main workspace thanks to a range of productivity benefits.
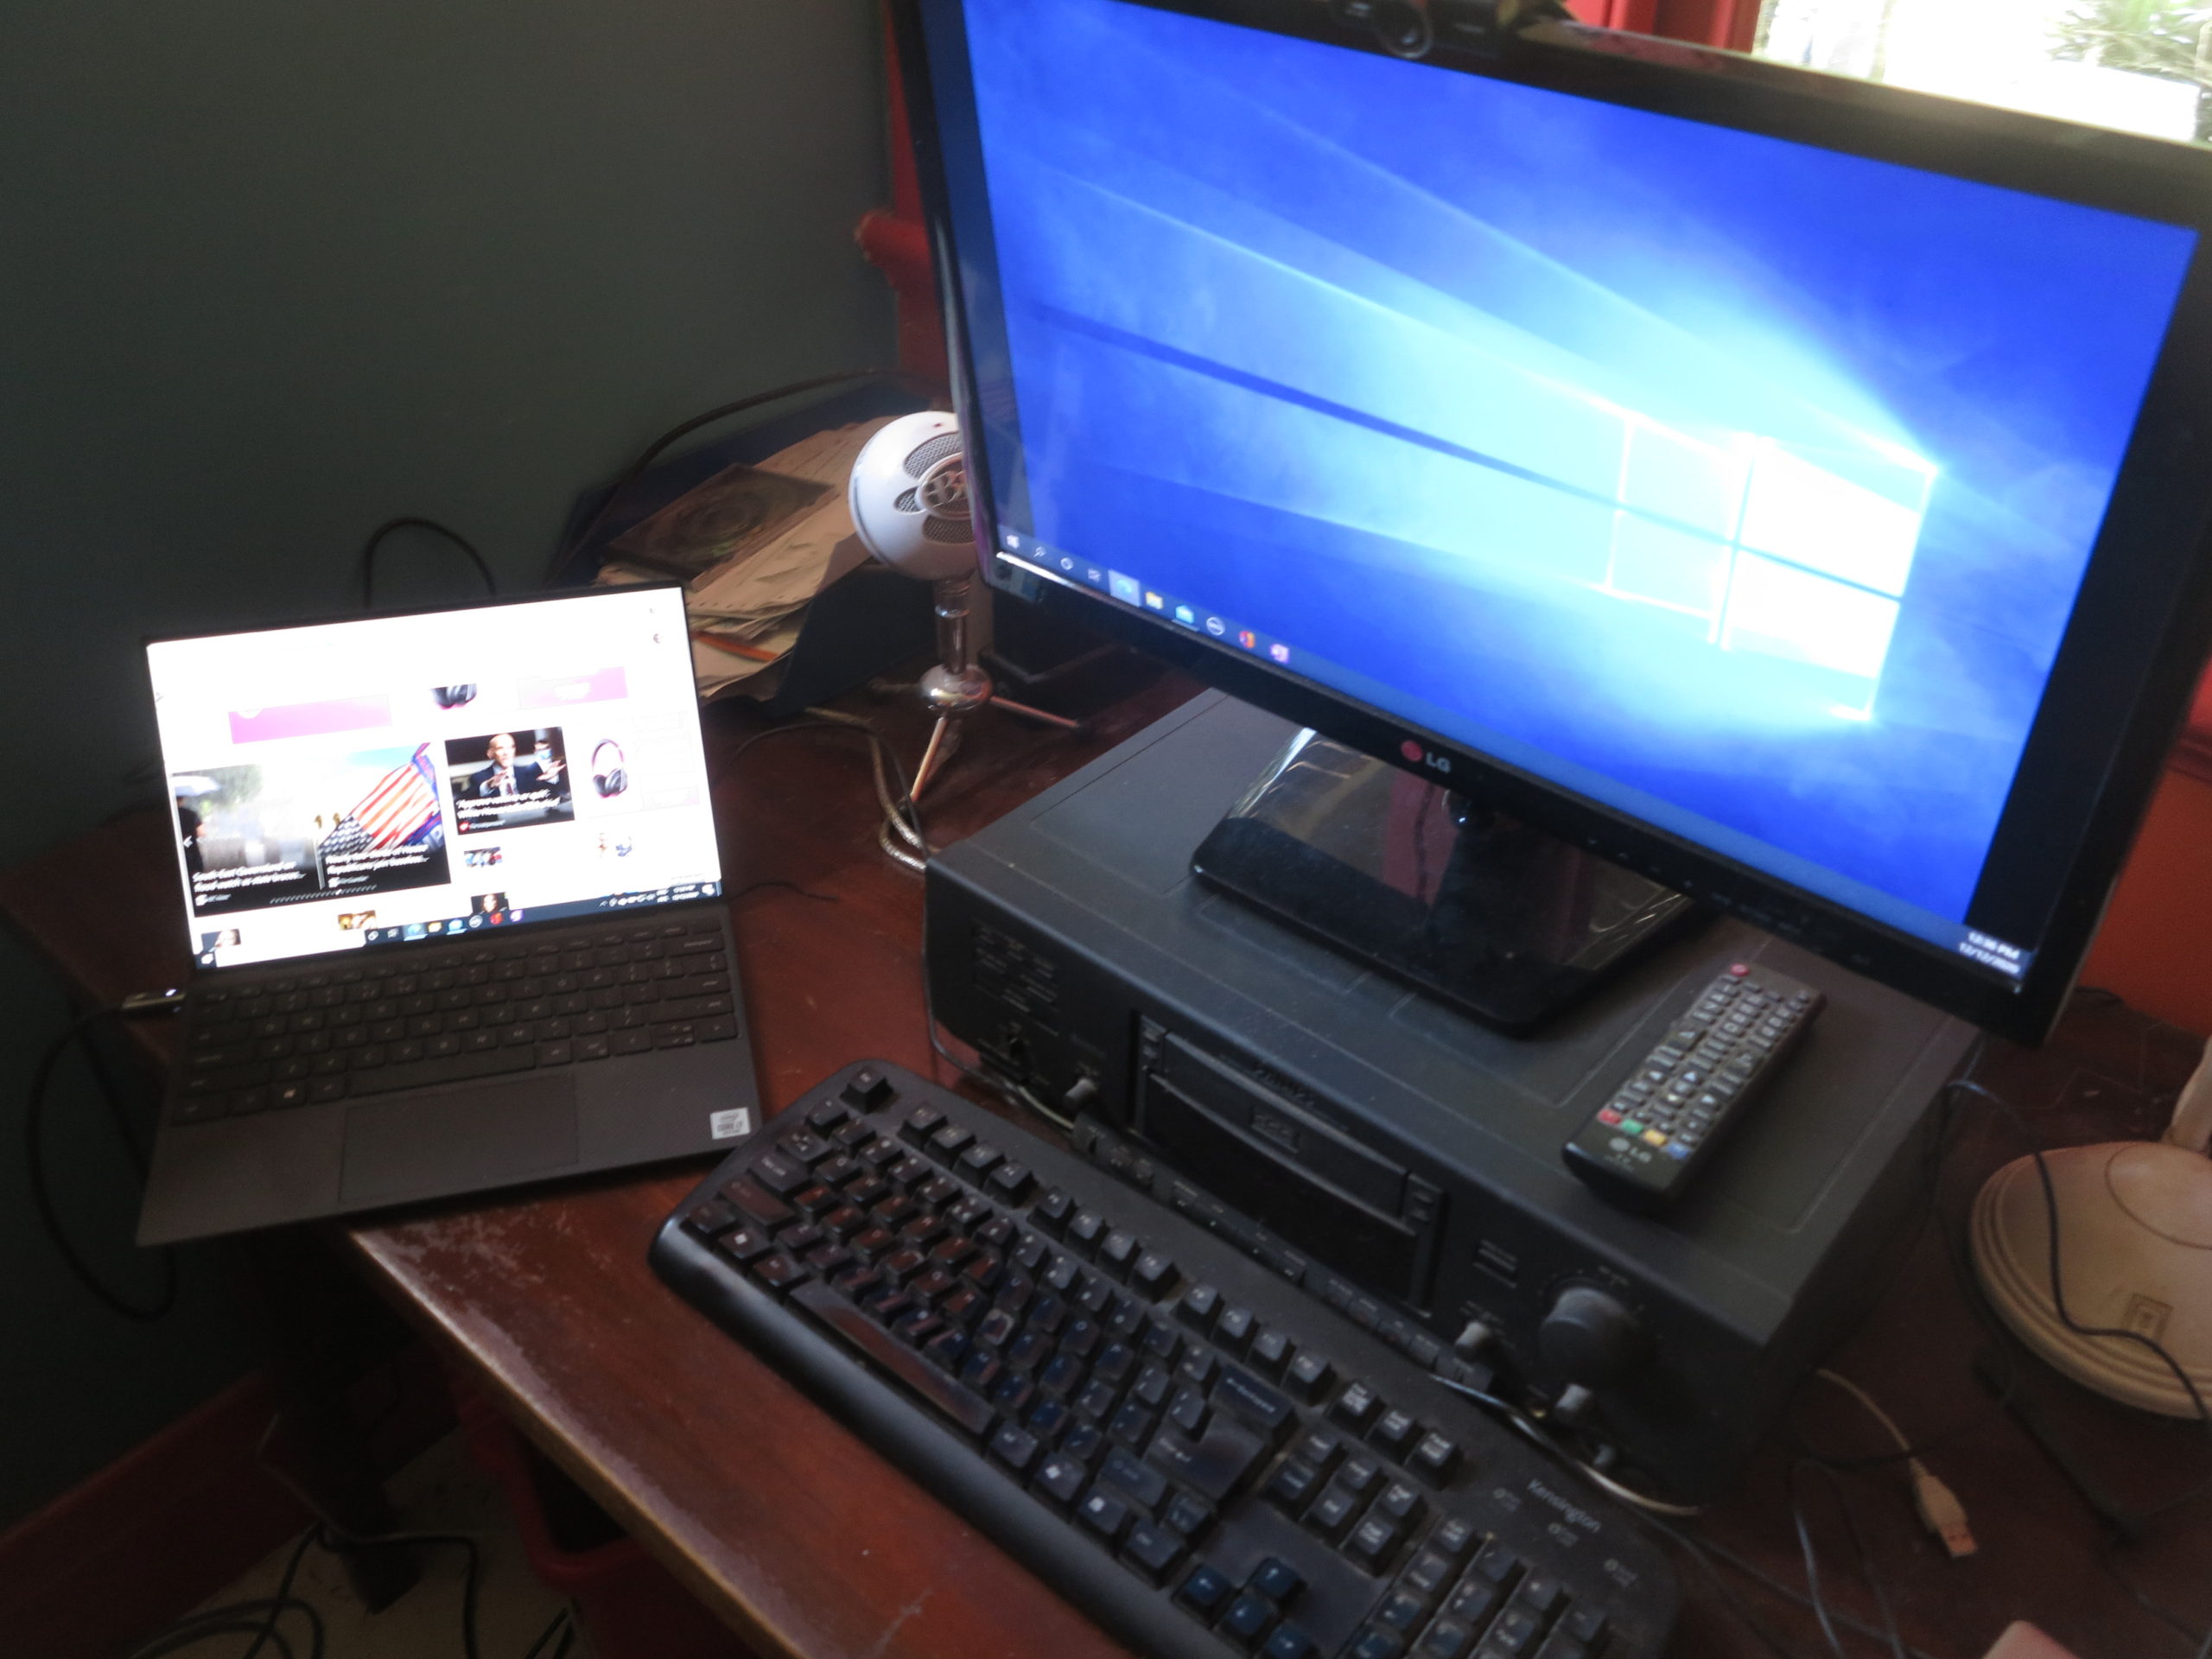
You may find that there is a steep learning curve as you set up your workspace for multiple-screen computing. This is something that I am facing as I move from a traditional desktop computer centred around a traditional PC tower to a laptop computer that is connected to a dock and I want to keep the existing monitor going.
An example of this is when you move away from your desktop computer with the traditional single-monitor approach to a laptop-centred computing setup and retain your desktop computer’s monitor because it has plenty of mileage left in it. It can also happen if you are using an all-in-one desktop computer like the iMac that has an integrated display and you use a similarly-sized monitor to create a multiple-screen computing setup.
Those of you who use a traditional desktop computer may head towards multiple-screen computing if you decide to buy a new monitor and keep the existing monitor going. You will find out if this is feasible for most of these computers if there are two or more display outputs on your computer, especially its graphics card.
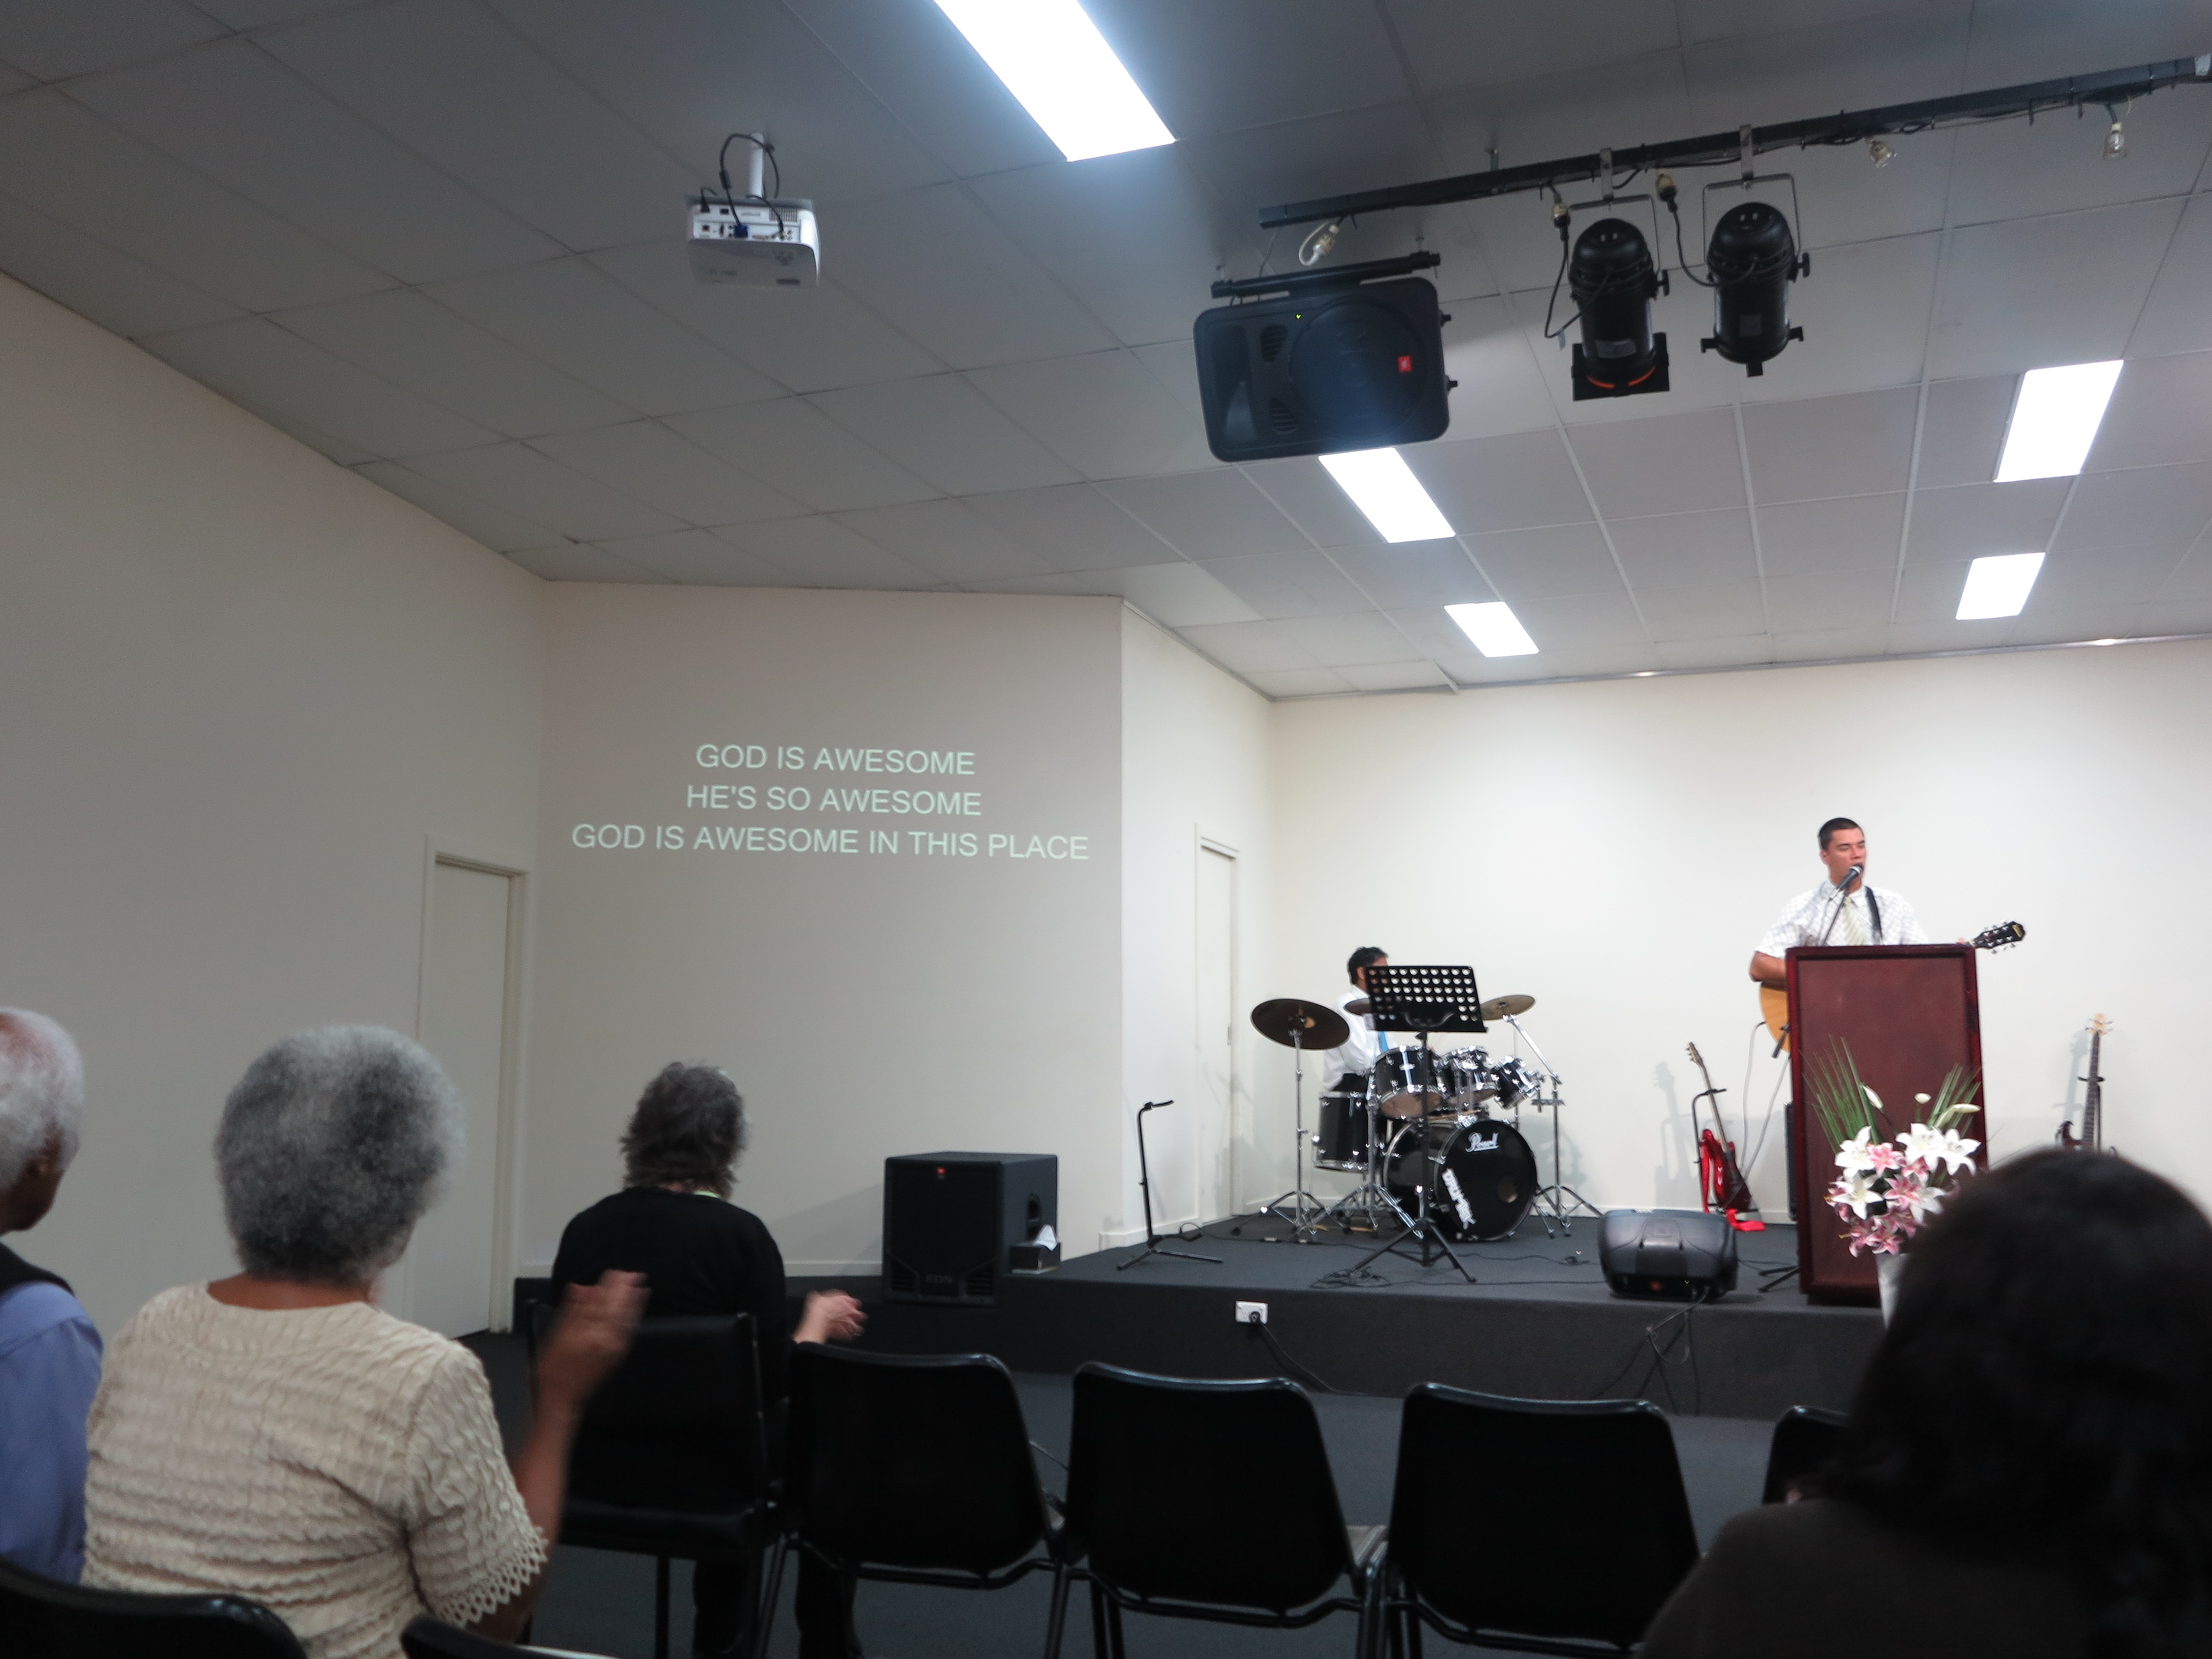
Using a computer in conjunction with a projector to show material to a large audience like this church setting will have you working a multiple-screen setup due to the use of a smaller screen for control or cueing purposes
This can also happen when you are using a projector or large-screen TV as the “big screen” in your display setup, something that is commonly done for multimedia or games applications or to show content to large audiences.
Occasionally I have had to deal with multiple screen computing setups. This was either as part of helping some people out with their computing setups. Or it was to help a small church with their AV and IT needs which has been the basis of some articles I have published and targeted to that same audience.
Now, thanks to a computer upgrade towards a laptop, I have headed towards regular use of a multiple-screen setup by maintaining my existing monitor as a second screen for that setup. In this case, I use the larger-screen second monitor for working on documents in my primary laptop-centric workspace.
Why go multiple-screen for your computing needs
Most computer users who make heavy use of their productivity software will want to benefit from multiple screens. This is due to the effectively-large working area that these setups offer.

.. as will using your laptop with your TV to watch Netflix
For example, a person who is building a document or presentation from online research will be having multiple programs running so they can add content from the online research in to their “magnum opus” easily. Some of these users will even have multiple Web-browser sessions running concurrently along with the program they are using to build their content. Or a user could engage in a videoconference and look up relevant material or take notes on another screen during the call.
People who work with large spreadsheets will also benefit especially if the spreadsheet becomes wide. It also applies to those of us who use desktop publishing, illustration or photo-editing programs to lay out publications or create our computer-graphics masterpieces. You may come across an increasing range of monitors that can be switched between landscape and portrait orientation, which may allow you to adapt them to support a wide or tall project.
Those of us who make use of online news services will benefit from multiple-screen computing> This can be about being able to monitor a current event that appears on an online news service while engaging in another activity like creating that document, spreadsheet or presentation.
Multiple-screen setups also are about a larger screen that is used to show material to other people. This is very common with projector-based setups or where the large-screen TV set is used. Increasingly a lot of software focused to this kind of effort is being designed to take advantage of multiple displays.
This same application is being extended to videoconferencing setups like with Zoom’s Multiple Monitor setup. Here, that allows a “gallery” view to exist on one screen and the current speaker to appear on the other screen, and to allow shared resources to appear on the secondary screen. It also extends to those of us who use text-based “chat” or social-media platforms and want to follow them while doing other computing activities including browsing the Web.
Some games are even exploiting multiple-screen operation in order to provide multiple concurrent views of the same action. Or they even use this to effectively create larger and wider views of the action.
Typical configuration
Here, you are typically implementing the multiple-screen display setup in the “extend” operating mode. This has the screens set up as one large display area or “canvas” but most operating systems make one screen become the primary screen where programs appear by default when they are launched. Typically it is the screen that will be used during the boot process and will show the startup images like the interactive login screen or operating-system splash screen. If you use a laptop or all-in-one computer, the integrated screen will always be deemed the primary screen.
Even with projectors or TVs, you may have to implement “extend” behaviour and work your computer’s regular display as your primary display to allow some presentation, multimedia or games software to work properly with multiple screens. In the same context, some users may have the computer’s primary display working as a “content preview” screen and shift the content to the large screen when it is ready to show.
For laptop users, they may use the “external monitor only”” display option but run multiple external monitors, This would come in to play if you are connecting multiple monitors to an outboard dock of some sort.
Laptop users will also need to be used to switching frequently between single-screen and multiple-screen setups. This is due to themselves using the laptop’s screen as the only screen when they use it in a portable context away from their desktop workspace but work with multiple screens while at the desktop workspace. They will also have to cope with being able to “go multiscreen” at a moment’s notice if they choose to connect the computer to a large-screen projector or TV.
Your mouse pointer

Using “pointer trails” a.k.a. “comet tails on your mouse pointer can make it easier to discover across the multiple screens
The first issue you will face is locating your mouse pointer. In this situation, you need to know which screen it exists on at the current time, or whether you are moving from one screen to another. This can be very difficult with screens of different sizes like a setup involving your laptop screen and your large-screen monitor. It can also be difficult where you have two screens that are separated from each other including dealing with monitors that have large screen bezels.
These kind of options are introduced in to the main regular computing platforms as a measure to increase accessibility and useability of these platforms for those of us with limited abilities. This is due to these platforms being used by an ageing user base for both work and play along with younger people that have limited abilities wanting to he productive with these platforms.
One way is to enable “comet tails” on your mouse pointer. This has a decaying trail of the pointer arrow which will appear as you move your mouse pointer with your input device. Windows has this as part of its Mouse control options in the Control Panel. MacOS X requires you to use a third-party app to have this same functionality for locating the mouse pointer. You may also find that adjusting how your mouse pointer looks such as its size or colour may help you with making it more discoverable for you.
Another technique that you will have to perform frequently is to bring up the secondary or context menu simply as a way to locate your mouse pointer. Here, the large area occupied by the context menu stands out more visibly than a small mouse arrow or I-cursor. People who use a pointing device that has a secondary button can use this button on all desktop operating systems. But Apple Mac users who use a pointing device without a secondary button, as what was part of the original Macintosh setup, can achieve this same function by holding down the Ctrl key on the keyboard and clicking their pointing device.
The two main desktop operating systems also have their own tricks to make the mouse pointer discoverable at a moment’s notice through a special mouse-action or keypress. Here, it can be useful for identifying where your mouse pointer is across that large area.

Windows users can set things up to quickly highlight where the mouse pointer is when they press the CTRL key
Apple Mac users can set their computer to quickly enlarge the mouse cursor when you move the mouse (or your finger on the MacBook’s trackpad) vigorously. Here, you click on the Apple menu, then click on System Preferences, then click on Accessibility then click on Display, You subsequently select Cursor and tick the “Shake mouse cursor to locate” option. Windows users have to go the the Mouse control options in the Control Panel and select “Show location of cursor when I press the CTRL key“. Here, when you press and release the CTRL key, a large circle appears then reduces in size around where the mouse cursor is.
Laptop users who run a multi-screen setup comprising of their laptop’s screen and the large monitor in an “extended” arrangement may find that the small screen could be kept for “parking” application user interfaces that they aren’t giving all their attention to. They then keep the large screen for the applications they are focusing on at the moment. An example of this could be a Web browser with a page they are reading or an office application with the document they are working on existing on the large screen. That is while an email client, messaging application or media player that only needs occasional attention could be visible just on the laptop’s smaller screen.
Moving apps between screens with the keyboard
People who are new to multiple-screen computing or switch between single-screen computing and multiple-screen computing will come across situations where the app they are using doesn’t appear on the screen they want to use. This may be of concern where a user starts a program they previously ran on a multiple-screen setup doesn’t appear on a single-screen setup due to the absence of the screen they were using. Or they want to quickly move an app to another screen.
This situation will come in to play for those of us with laptops who work only with the laptop screen while away from the main workspace. Here, you may find that a program you use on your external monitor isn’t visible on the laptop’s screen but appears on the Windows Taskbar or MacOS Dock as an app that is in use. This may happen where an app doesn’t adapt to different multiple-screen setups properly.
Here, software that adapts properly between single-screen and multiple-screen computing setups will, for example, move to the single screen in a single-screen setup if it was last operated on other monitors in a multiple-screen setup.
It also applies to those of us who are using a computer as part of an AV playout setup and have to move a program’s screen between the cue / monitoring screen and the main screen. That also extends to people using the big TV screen to view videos or pictures or play games on a laptop. It is more so with Web browsers or other programs that don’t handle multiple screens properly.
Windows simplifies the process of moving apps between screens with the keyboard. Here, Windows users need to Alt-Tab to the program you are trying to bring back in to view in order to give it logical focus. Then you use the Windows + Shift + left or right arrow keys to bring the program to the integrated screen.
Apple Mac users would then have to invoke Mission Control by pressing the F3 key. Then they would have to use the trackpad or other pointing device to move the program between screens. As far as I know, there isn’t an approach to using the keyboard to move an app or window between screens on the MacOS.
Screenshots
You may find that the procedure for taking full-screen screenshots may be very different here. In most cases, the operating system will encompass what is seen on both screens in a full-screen screenshot.
In the case of Windows, you may find that PrtScr may yield you something to large for your screenshot. Here, moving the cursor in to the screen where you want to take the screengrab then pressing CTRL+ALT+PrtScr would “grab” what is on that screen and store that to the Clipboard. If you want both screens, you would press CTRL+PrtScr. Then, you simply past that in to Windows Paint or your favourite image editor, redact it then save it as a file. Other operating systems will use a similar means to take screenshots of a particular screen in a multiple-screen shot.
But mostly you will have to resort to window-specific screenshot commands like Alt+PrtScr for Windows or Cmd+Shift+4 then Spacebar for MacOS to grab screenshots of the relevant windows.
Conclusion
As you head towards multiple-screen computing, take your time to get used to it. Here, it is about moving an application window between the different screens or working out how to quickly locate that mouse pointer.

