Category: Computing Tips

Return to portable computing

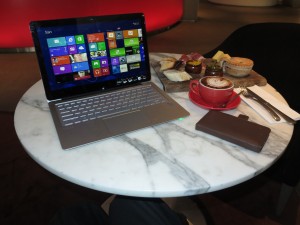
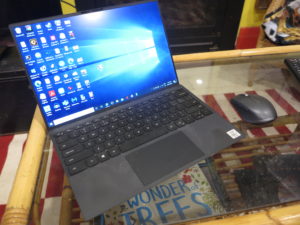
Dell Inspiron 14 5000 2-in-1 at Rydges Melbourne (Locanda)

Portable computing with a laptop like this Dell Inspiron 14 5000 2-in-1 after those COVID lockdowns is something to think of

There is a slow return to laptop-based portable computing at offices or “third places” in jurisdictions who have successfully tamed the COVID-19 coronavirus plague and have allowed increased freedom of movement. It is becoming more so as the vaccines are being rolled out to more people in more neighbourhoods; and more of us take the opportunity to get these shots in our arms as they become available in order to limit COVID’s effective spread.

This includes an increase in returning to offices for meetings or part-time work there or heading to cafés, bars and libraries to work there. Some workplaces are even examining the idea of mixed on-site / off-site working arrangements such as working some days of a workweek on-site and others remotely. This kind of work, known as hybrid working, is being encouraged by local governments as a way to keep the CBD or major business areas active during the workweek even though workplaces are seeing more of the benefits of remote work.

Even if your work ends up being “home-based” including those of us who run our own businesses from home, you will end up engaging in more portable computing. This could be to use that café or library as an “away from it all” workspace or even to make use of co-working facilities for that same purpose. Those of us whose effort has a public-facing storefront of some sort may want or will have to use our laptops at that location for some IT needs. This is more so as we make use of these storefronts more as they can be opened up to the public more frequently.

Making sure your laptop computer is ready for increased portable computing

What you may be thinking of is how to make sure your laptop is ready for this kind of computing. This is more so if you were using your laptop at home due to the requirement to work or learn form home.

One issue that will come about is how the battery will perform for all-day computing activities. Here, if your computer has power management software built in like most Dell and Lenovo Windows laptops have, you may have to run it on an adaptive setting rather than “primarily AC” or similar settings that you may have used as a measure to conserve battery life due to you staying at home. The “adaptive” setting adapts the battery charging and discharging limits to suit your current needs whereas the “primarily-AC” setting was often about managing charging and discharging so that the laptop can run from external power without compromising the battery life.

You may even consider the idea of undergoing a “dry run” with your computer before you start heading out regularly. That is to run it in a portable or “on-road” usage scenario for a significant part of your day, including to do some productive computing activity during that time so you can know if it will last the distance at your favourite “third places” without the need to look for power outlets to plug it in to.

An example of this would be to use your laptop at seasonally-comfortable locations like the backyard, balcony or garden during warm weather or at the fireside during colder weather.

Logitech MX Anywhere 3 mouse on glass table near laptop

A travel mouse like the Logitech MX Anywhere 3 as used with my Dell XPS 13 9300 can work well for on-road use

Such a practice would be about running your laptop only on battery power for a significant amount of time during the day in order to effectively “drain out” the battery. That then has the laptop able to charge for a longer time and get used to increased amounts of portable use.

It will also be a chance to adapt between use at your primary desktop workspace which you have kitted out with better (and multiple) screens and input devices; and portable use where you are just using the laptop’s keyboard and trackpad / thumbstick.  Here you may think of whether to take a travel mouse like the Logitech MX Anywhere 3 with you if you are still comfortable with “mousing around” while on the go.

You may also need to think of accessories that you can stuff in your bag or briefcase with the laptop computer. Here, you need to focus on portability and work towards small lightweight durable accessories to suit your needs. If you are likely to be absent-minded, you may want to buy a spare charger for your laptop. Here, you could keep it in a drawer in your home office even if you have a device like a USB-C dock powering your laptop at the primary workspace. This is in addition to the charger you would be keeping in your bag.

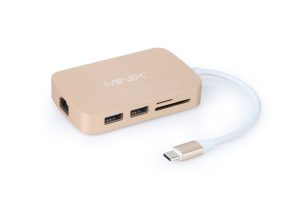
Minix Neo-C USB-C Multiport Adaptor press image courtesy of Minix

A small-sized USB-C dock or hub could be worth keeping in your laptop bag

For example, if you are dealing with an ultraportable computer that uses nothing but USB-C-based sockets, you may want to keep a compact USB-C travel hub so you can connect USB, display or other peripherals to that computer. Most of these will support “charge-through” operation, commonly known as “pass-through” charging. This is so you plug your laptop’s USB-C charger in to the travel adaptor that is connected to the laptop in order to run the computer from external power without forfeiting the ability to use the peripherals connected to that dock.

It may also be a good time to check that your laptop bag or similar hand luggage that you use to transport your computer with when on the road is still “fit for purpose” even though you may not have used it for a long time. Here, you may have to check that it is still intact and in good condition, including to check that zippers, press-studs (snap-fasteners) and other fasteners still work properly. You may even have to lubricate the zipper by rubbing a candle, dry bar of soap or a “lead”(graphite) pencil along its teeth if it is stuck. It may also be a good time to get rid of any dust, vermin or other stuff that has accumulated on or in that laptop bag which you haven’t used.

As always, make sure that your computer’s operating system and other software is up-to-date with all the latest patches before you head out. This is to make sure that your computer runs smoothly and securely as it should be. Business users who use company-provided hardware may need to check with their IT-support professionals associated with their employer regarding keeping their computer up-to-date with the latest software updates and patches.

Then you are able to confidently return to work or to your favourite “third places” and use your laptop there.

Identifying the end-of-support date for your Chromebook

Article

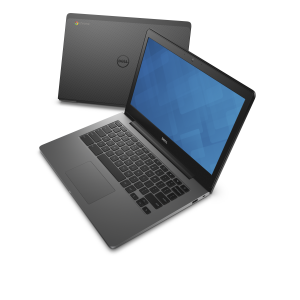
Dell Chromebook 13 press image courtesy of Dell Inc.

You can find out the end-of-support date for that Chromebook or other Chrome OS computer

How to check a Chromebook auto-update expiration date before you buy – CNET

Resource

Auto Update Expiration date for most Chrome OS computer models (Google)

My Comments

Google has defined for your Chromebook or other Chrome OS based computer an end-of-support date where they will stop providing software updates to that computer. This date, known as the Auto Update Expiration date, is agreed by Google and the device manufacturer due to Google not being able to guarantee Chrome OS support for particular hardware setups after that date.

This is important if you are passing on a Chromebook to someone else or buying one on the secondhand market. As well, there is a common issue especially with Chrome OS devices where manufacturers, distributors and retailers get rid of excess inventory representing last-year’s models during the peak shopping seasons.

You may find that some systems, especially those that are part of a “managed” Enterprise or Education setup may have longer support lives as far as software-quality updates are concerned. But this kind of extended support may only apply while the machine is part of that setup which can be of concerned when a school or workplace sells its Chromebook fleet as part of a tech upgrade.

Google maintains an ongoing list of Chromebook, Chromebase and Chromebox models that are in circulation and are approved by them on this page. If you are dealing with a Dynabook-branded device, you will have to look for the Sharp brand because Toshiba had sold their personal computing business to Sharp under the Dynabook brand.

But if you have access to the Chromebook in question, you can check the AUE date for that particular machine.

  1. Open the Settings menu by clicking on the time then click on the gear-shaped Settings icon.
  2. On the left navigation panel which you may have to bring up by clicking the three-bar icon, you should see the “About Chrome OS” information. Click that option to see more details about the current version and other details of your Chrome OS setup on your Chromebook.
  3. The Additional Details area in that screen, which you may have to click on, will show the AUE date for your particular Chromebook.

In November 2020, Google has realised that the Chrome OS platform is a viable third force when it comes to the regular computer. Here, one of the changes they are offering is that Google will assure longer support lives for newer Chromebooks typically in the order of 7 or 8 years. But they should also look at ways to extend this date for earlier Chromebooks that are in current usage.

A USB-C hub may take your Chromecast with Google Play further

Article

You can do more with your Chromecast with Google TV if you use a USB-C hub or dock that offers Power Delivery pass-through

Use a USB-C Hub to Upgrade Your Chromecast With Google TV (gizmodo.com)

My Comments

The Google Chromecast with Google TV device is actually an Android TV set-top box which has a lot of what Android can offer.

This includes being able to work with external peripherals thanks to device class support for some peripheral types that are connected via USB. It is thanks to Android TV having class drivers built in to the operating system in order to support these peripheral types.

What do I need?

USB-C hub must have Power Delivery pass-through connection

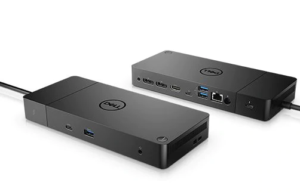
Dell WD19TB Thunderbolt dock product image courtesy of Dell

USB-C hubs and docks can be used to expand your Google Chromecast with Google TV set-top device

The USB-C hub or dock must have at least one USB-C port set up for Power-Delivery pass-through connectivity. This connection arrangement, which may be known as “Charge-through”, passes power from a USB-C PD charger to the host computing device that is connected to the upstream connection. This is in addition to providing power to the hub itself and any USB bus-powered peripherals connected to that hub.

USB PD-compliant charger with at least 45 watts power output

The USB charger that came with your Chromecast with Google Play device would not be able to power anything beyond the Chromecast device itself. This is because it is rated just for that device.

Rather you use a USB-PD compliant charger that offers at least 45 watts output and is something you would get with most of today’s ultraportable laptops that just use this connection. Using a USB-PD charger offering 65W or more may give you more flexibility especially if you are dealing with USB mass-storage devices or Webcams.

You may find that some if not most business-grade USB-C hubs and docks have their own power-supply arrangement and can provide power to the host computer in a USB Power-Delivery compliant manner. That is typically to provide power to an ultraportable laptop that is connected to these docks. These can be used without the need of a separate charger to connect to these hubs or docks – you just use the hub’s actual power supply and associated transformer to power your Chromecast setup.

What can I do?

Play multimedia files held on USB mass-storage devices

If the USB hard drive, memory key or other mass-storage device (including memory cards in a memory-card reader) is formatted to FAT32, you may be able to view or play image, audio or video files held on that storage.

You may have to use a higher-powered USB PD charger if you are dealing with something like a portable hard disk or SSD. As for apps, software like VLC media player that can navigate the Android directory tree can work for finding content. There are also file managers available to the Android TV platform so you can see what is there on the storage devices.

A question that can be easily raised is whether this Android-TV-based Chromecast can support USB mass-storage devices that represent themselves as multiple volumes in one physical device. It is a situation that will come true with multi-slot memory-card readers, USB devices that have internal and external storage or USB storage devices partitioned in to multiple logical volumes.

Similarly, Android TV would need to support exFAT and the other open-source ext-based file systems in order to handle the high-capacity mass-storage devices as they should be handled.

Use of keyboards and mice as input devices

Connecting a USB keyboard or mouse, including a wireless one that uses a USB receiver dongle, provides an alternative input method for your Chromecast with Google TV.

For example, a keyboard can avoid the need to “hunt and peck” with your remote control when logging in to something like Netflix. This can also apply if you make heavy use of the search functionality within your favourite video-on-demand platforms. It can even apply if you are using an Android-TV-optimised Web browser to work the Web on the big screen.

This may even encourage Google to see Android TV as a viable TV-based gaming platform especially if they provide device-level support for wired or wireless games controllers be it USB Human Interface Device class controllers or device-specific support for XBox or PlayStation controllers. It also can lead to the creation of Android-TV-based hardware that has real gaming performance along with games that can take advantage of this performance.

To the same extent, Android TV support for USB-MIDI music devices could open up support for music-based applications and games on that platform. This could be ranging from music-based games through computer-based music training apps to music performance software.

Chromecast with Google TV as a group videophone

You can connect a Webcam to the USB-C hub so you can run this device as a group videophone. But you may find that some Webcams do need a bit more power and will need a stronger USB-PD charger on your setup.

As for software, Google’s Duo is the only videocall platform capable of supporting Android TV with the proper 10-foot “lean-back” user experience. You do need the app to be open and in the foreground when you are expecting a videocall on the Duo platform.

Google needs to encourage software developers who have videoconferencing software for the Android platform to write in Android TV support with the “lean-back” user experience. This could then have any TV or set-top device based on the Android TV / Google TV platform work well as a group videophone.

Infact Skype should reinstigate support for TV-based videocalling after they had many group videophone clients written for various smart-TV platforms.

More reliable Internet connectivity for your Chromecast

An increasing number of USB-C hubs are being equipped with Ethernet ports, primarily so that you can connect that ultraportable laptop to an Ethernet or HomePlug powerline network segment.

Let’s not forget that Google offered an Ethernet adaptor for their previous Chromecasts so these devices can be run from a more stable wired network segment. But they omitted an official Ethernet adaptor for the Chromecast with Google TV as part of its official aftermarket accessories lineup.

But the Ethernet connection on a USB-C hub is also available to the Google Chromecast with Google TV. It would be useful as a means to bring a reliable wired network connection to this device, especially if your home is wired for Ethernet, you have a HomePlug powerline network setup or your TV is next to your home network’s router.

Conclusion

Once you have USB-C hubs and docks that support common standard device classes for their internal connections or allow connection of peripherals honouring standard device classes, this could make Internet-of-Things and similar devices become very capable.

But these setups show a few glaring weaknesses within the Android TV ecosystem like lack of support for high-capacity file systems. It can be a chance for Google to take the Android TV platform further and turn it in to a highly-flexible large-screen set-top platform.

When should you spontaneously make that videocall

Article

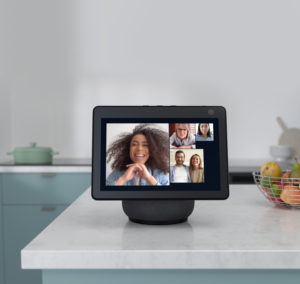
Amazon Echo Show 10 in videocall - press image courtesy of Amazon

You may need to be careful about spontaneously making or taking that videocall if you want to use this communications medium effectively

Don’t spontaneously FaceTime people and expect them to pick up | Mashable

My Comments

Most of us have a preference for seeing people face-to-face but people who are from the Generation Z or younger generations increasing are interested in making and taking videocalls.

The COVID-19 coronavirus pandemic and its associated stay-at-home requirements enacted by many a jurisdiction has had us wanting to make more of the videocalls. This includes participating in multiple-party videoconferences for work, learning or social life using platforms like Zoom, Skype or Microsoft Teams.

How presentable do you look?

As a kid who has shown interest in science-fiction and futurist-technology material, I had seen plenty of reference to videocalls as part of what communications would be about in the future. A lot of this material talked of videocall technology as a “Picturephone” or videophone and illustrated regular use of this mode of calling.

At times I had engaged in conversation about this technology and how it would fit in to our lives. An issue that was raised by some girls and women I talked to was having to “look beautiful or handsome enough” for the videocall. We raised issues like having the need to dress up or to get your hair or face right for that call.

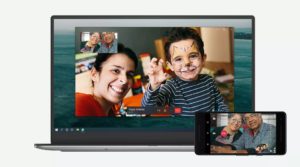
WhatsApp desktop with videoconference support press image courtesy of WhatsApp

Not all times may be right for those videocalls

The Mashable article referenced the situation of the author being in nightwear when the Facetime call came in. This could extend to being dressed in everyday clothing you wear around the house versus the more impressionable clothing you wear when away from home or receiving visitors.

Here you can take a voice call in a flexible manner. For example, you could be out and about, you could be doing other activities at home or not worrying about being fully dressed up to take the call. The person on the other side of the line doesn’t know what you are doing or how you look.

How emotionally prepared are you?

Another factor raised is how emotionally prepared you should be. Here you would make sure you are emotionally prepared to meet someone face-to-face, similarly you should be emotionally prepared for that videocall. This is the analogy of when someone drops in at your home unexpected with this sudden arrival being very stressful for them.

This is because a videocall can be like a long face-to-face conversation rather than something that can take place quickly. Some callers can use these videocalls to pick up on any facial expressions that you exhibit during the call. As well, if you use a handheld device like a smartphone or a tablet to make or take the videocall, any shakiness that happens with your hands due to nervousness can be magnified as far as the caller is concerned.

Some people even see those Zoom multi-party videoconferences that they take part in for work as something that is very tiring. It can become aggravated where there are frequent videoconferences taking place during the workday for example. This can be about having to concentrate on how each other comes across and the messages they are conveying

How comfortable are you and what impression do you want to convey?

You may also be thinking of making sure you are comfortable before the videocall. It may be whether to sit at a desk or table or relax in lounge furniture like an armchair during the videocall.

Then you think of what the caller sees around you during the videocall as in whether the space conveys the right impression that you want to convey. This may be about having a particular bookcase or picture window behind you during the videocall or whether to go in to the garden or on to the balcony for that videocall.

Some parents of young children may want to leave the toys that their children are playing with lying around. This would be to “set the scene” about their children happily engaging in play. Or someone who loves cooking may leave food they are preparing out but in a neat manner in order to convey their love of food and cookery.

An example often seen on TV news and information programming during the COVID-19 lockdowns was how different presenters set up their “home studios” for their TV appearances when they broadcast from home. A financial presenter on ABC Australia’s nightly news bulletins had a picture window behind him and a set of different books in front of him. Then, on the same channel, an infectious-diseases expert who regularly appeared with commentary about how COVID-19 was to be managed had a large bookcase behind her.

It will also include the privacy of other members of your household especially where the background would show a thoroughfare or area of activity within your home. That is very common with the idea of open-plan interior layouts or having the front door opening directly in to the lounge area.

Even the device you use for a videocall may be important to you. This could be about using a laptop versus a tablet or smartphone for the purpose or even to use that Webcam for the videocall.

What can you do?

A good practice with making videocalls is to make a voice call or send a text message asking whether the caller wants to engage in a videocall with you before making that videocall. Here, it may be about having some warning time to get ourselves ready to make or take the call.

You may want to create an exception to this rule for those times where you and a certain caller may want to engage in impromptu videocalls and do not mind doing that. For example some parents may want to make a point of having their child take part in a videocall with that doting relative or friend perhaps as part of a family ritual.

Conclusion

It is important to consider the videocalls and multi-party videoconferences as a different kettle of fish compared to audio calls or text messaging. Then it simplifies the process of adapting your communications strategies to these different modalities.

Using USB or Wi-Fi to tether your laptop to your smartphone–which is better

Article

Sony VAIO Fit 13a convertible Ultrabook at Rydges Hotel Melbourne

You can use USB or Wi-Fi to tether your laptop like this Sony VAIO to your smartphone for Internet access with Android making it easier

USB vs WiFi – Tethering 4G Broadband to a Laptop via Android Phones – ISPreview UK

My Comments

You may be having to “tether” your laptop to your smartphone in order to gain access to the Internet. This can be done using a USB cable or wirelessly mostly using your phone as a Wi-Fi mobile-broadband router.

Android users can do this without the need to load additional software on their computer while iOS users may need to run iTunes if they wish to use a USB cable. As well, US-based users may have to have their mobile telco enable tethering and Wi-Fi hotspot use on their smartphone, with these companies likely to charge an extra fee for this service.

An ISPReview article did a comparison test on the performance of a USB-based tether setup compared with a Wi-Fi-based setup using the same late-model Android smartphone (running Android 10) and Windows laptop. The phone was set up with a 4G mobile broadband connection offered by Three UK that is typical of a UK mobile broadband service. Here, the setup was in the same urban area and using the same cell (mobile base station) for the tests.

As well, for each setup, there were two separate tests performed on different days with the results recorded in the article. This catered for different load factors that the Three UK network or the particular cell may be experiencing during the tests.

It was found that both the USB and Wi-Fi connection setups were on a par with each other. This was catering to the situation that the bandwidth offered by the mobile broadband service may not be great especially if you are dealing with 4G broadband.

But the article alluded to users having situation-specific needs for using particular connection types such as preferring to use USB for security, simple setup or where a lot of Wi-Fi connections could compromise performance. On the other hand, it may be about providing Internet to a device that doesn’t support USB-modem / USB-tethering connectivity but has Wi-Fi like a tablet; or creating a mobile local network using your phone.

Here, I would support these kind of setups if you are intending to purpose your smartphone for use as a modem and are not likely to be making or taking many calls with it. This is because you may find that a call may encumber your phone’s use as a modem especially if you like to walk about during that call.

As well, I wouldn’t expect good performance out of a tethered-smartphone setup if you are on a busy commuter train or bus. This is due to the increased competition for bandwidth from the various base stations serving the train’s or bus’s route as many people use their mobile devices while riding this route. This statement would also apply to use of mobile broadband in a rural area where the mobile base stations would be equipped with older technology.

How can you use Amazon Alexa to measure room temparature

Article

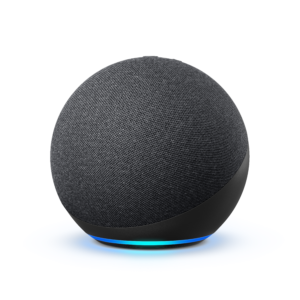
Amazon Echo press image courtesy of Amazon

These new Echo speakers can work as temperature sensors for a room

How to Get an Amazon Echo to Tell You a Room’s Temperature (lifehacker.com)

My Comments

Newer Amazon Echo smart speakers are being equipped with room-temperature sensors that contribute this data to the Alexa smart-home subsystem.

Here, the devices you need to use in the rooms you want to measure the temperature of are:

  • Amazon Echo 4th Generation (spherical) or newer generation
  • Amazon Echo Plus 2nd Generation (cylindrical) or newer generation

To confirm your Amazon Echo device’s room-temperature measuring ability, you need to open the Alexa app or http://alexa.amazon.com and log in to your Amazon account. Then you go to “Devices”, then “Echo & Alexa” and select the name of your Echo smart speaker that you want to verify. Here, you need to look for the “Temperature Sensor” field which will come up with the current room temperature if your Echo speaker is suitably equipped.

Each Echo device that you want to use as a temperature sensor has to be given a unique room name. Then to ask Alexa for the current room temperature of a particular room, you say “Alexa, what is the temperature for <desired room name>?”

There are limitations with this setup at the moment. You can’t ask for a house-wide indoor temperature or the indoor temperature of a room cluster like upstairs. This is because Amazon hasn’t worked out what way whether to assess the room temperature of an area covered by multiple devices as an average or what other way. Nor have they added the necessary logic to do so.

But you can create a temperature-based routine that works with this temperature for the Alexa smart home. For example, you may have a fan or heater come on if the room reaches or falls below a minimum temperature. This may be a situation where you don’t have an occasionally-used room that isn’t part of your central HVAC setup and you use portable heating or cooling equipment for this purpose.

Or you want to be alerted if a room of yours falls below a critical temperature level so you can undertake procedures to mitigate frost or pipes freezing up.

What Amazon will need to do for Alexa in relation to this is to make this more useful is to allow averaging of multiple temperature sensors so you can measure areas larger than a room. As well, it could cater to environments where you have multiple suitably-equipped Echo speakers in one room like in a large kitchen / dining area for example.

How to use RSS Webfeeds effectively nowadays

RSS Webfeed iconThe recent saga involving Facebook denying Australian users access to news content has shown up a requirement to have multiple paths for following your daily news online from respected sources. This is more so where we want to use a single-view approach to aggregating content from multiple news services.

Often the solution is to subscribe to multiple email newsletters or load your mobile devices with news apps provided by multiple news outlets. This becomes an issue if you follow multiple news outlets and you want that “aggregated news view” from the different outlets. It means to have in the one screen view a list of headlines or articles from multiple sources in the one screen view.

The technology that I see regaining currency for this goal is RSS or “Really Simple Syndication” Webfeeds. This is where a Website provides a special always-updated XML file representing new and updated content.

This technology had a lot of currency in the early 2010s with popular Web browsers having RSS Webfeed management with that particular orange Webfeed icon. At the same time, Google ran an online RSS Webfeed reader but its death had sidelined the popular takeup of this technology.

RSS Webfeeds are still being used as a way to syndicate and synchronise content across the Web. Here, most Websites like this HomeNetworking01.info Website you are reading use this approach to facilitate “master” synchronisation for applications like email newsletters or content discovery such as “sitemaps”. It is also used very heavily in the podcast ecosystem to alert users when they have new episodes available of a podcast they subscribe to.

There are still some RSS feed readers out there that are worth using so you can craft your own personal newsfeeds.

Two methods of operation

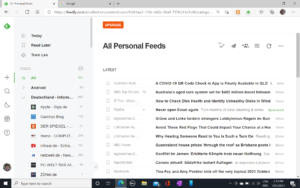
Feedly screenshot

Feedly – an example of an online Webfeed reader that shows a custom newsfeed

But I see these Webfeed readers and podcast managers as falling in to two different categories based on where the subscription and synchronisation data is held. Such data represents the Webfeeds you are following and what articles you have read or podcasts you have listened to.

The first type is the “device-based” reader that keeps this data on the device that the user uses to read these Webfeeds or listen to podcasts. Examples can include email clients with RSS Webfeed reader functionality, Web browsers wtih built-in RSS Webfeed reader functionality or Webfeed reader and podcast manager apps that don’t work with an online-based user account.

In this case, anything you have read on that device is deemed read as far as that device is concerned. As well, if you add or delete Webfeeds on that device, these changes only apply to that device.

The second type is the online reader that is associated with a remote online backend of some sort. This can be a purpose-built online news aggregator or podcast manager that has an online infrastructure built up by its vendor. Or it could be part of an email or similar service that integrates RSS Webfeed management and is tied to the user’s service account. That also encompasses business cloud-computing backends offering this function or a NAS or file server that runs RSS feed-manager or podcast-manager software.

This type of RSS feed reader will be increasingly seen as the way to go for managing and viewing RSS Webfeed and podcast collections. This is due to most of us having multiple computing devices of some form or another, with a desire to view our Webfeeds across the different devices.

A popular example of this is Feedly which works on a freemium approach with a generous free-use allowance. This uses a Web view but has native clients for mobile platforms. It also has social sign-on for Google and Facebook accounts as well as the ability to create a unique acclount.

Here, it would work with user accounts that hold Webfeed subscription and synchronisation details. The end-users gain access to these feeds through a Webpage or a first-party or third-party native software client written for that end-user’s platform.  This approach supports multi-device use in such a way that what is read on one device is deemed read on other devices. As well, if you add or delete Webfeeds on your account, these changes are reflected on all devices associated with your account.

What to look for in an RSS feed reader

A well-designed RSS feed reader should allow you to group feeds in a hierarchical order. This may come in handy to make it easier to organise your Webfeeds based on common factors like country source, interest or whatever.

For online feed readers, you need to make sure there is a client app that suits your device properly. This includes a user interface commensurate to your device type be it a smartphone, tablet or regular computer.

How to discover a Webfeed

You may find that your Web browser has support for detecting RSS Webfeeds. This may be in the form of a button that glows orange when the browser detects a Webfeed. This then opens up the Webfeed in your browser or you may find that your Webfeed reader app launches so you can add the Webfeed to that site.

Desktop Web browsers based on Google Chrome and have access to the Google’s app store for Chrome extensions can run a Chrome extension that detects RSS Webfeeds.

The popular news Websites will have a page which shows what Webfeeds are available from their Website. Here, you can then click on these Weblinks to open these feeds or right-click on each feed to copy them in to your feed reader.

Let’s not forget that most RSS feed readers will have a Webfeed-discovery option where you enter your site’s URL in to a “search” dialog box. This will cause the feed reader to show you what feeds are available so you can add them to your feed list

What needs to happen

There needs to be a number of polished capable online RSS feed reader services that are made aware to business and consumers in order to allow people to make their own news views effectively. As well, there has to be a return to simplified Webfeed discovery for news Websites.

The cohort of smart TVs, set-top boxes and the Internet of Things needs to come on board the RSS Webfeed bandwagon as much as regular and mobile computing devices. This could be in the form of a Webfeed-driven “teletext” experience for smart TVs or simply smart displays of the Amazon Echo Show or Google Smart Hub ilk being able to show your custom RSS-driven news feeds at your command.

Conclusion

It is still worth remembering that the RSS Webfeed is still to be valued as an information service in its own roght. It is more so as a way to create your own custom news views without relying on the big names of the Social Web to provide that feed.

How to adapt to multiple-screen computing

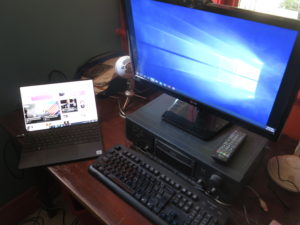
Desktop workspace with Dell XPS 13 laptop computer

The computing setup with multiple screens – now very ubiquitous

Computing setups that are equipped with two or more screens are becoming more ubiquitous due to the affordability of these setups. As well, it is becoming more acceptable in general business and personal computing to operate with multiple displays at your main workspace thanks to a range of productivity benefits.

You may find that there is a steep learning curve as you set up your workspace for multiple-screen computing. This is something that I am facing as I move from a traditional desktop computer centred around a traditional PC tower to a laptop computer that is connected to a dock and I want to keep the existing monitor going.

An example of this is when you move away from your desktop computer with the traditional single-monitor approach to a laptop-centred computing setup and retain your desktop computer’s monitor because it has plenty of mileage left in it. It can also happen if you are using an all-in-one desktop computer like the iMac that has an integrated display and you use a similarly-sized monitor to create a multiple-screen computing setup.

Those of you who use a traditional desktop computer may head towards multiple-screen computing if you decide to buy a new monitor and keep the existing monitor going. You will find out if this is feasible for most of these computers if there are two or more display outputs on your computer, especially its graphics card.

Praise and worship at church

Using a computer in conjunction with a projector to show material to a large audience like this church setting will have you working a multiple-screen setup due to the use of a smaller screen for control or cueing purposes

This can also happen when you are using a projector or large-screen TV as the “big screen” in your display setup, something that is commonly done for multimedia or games applications or to show content to large audiences.

Occasionally I have had to deal with multiple screen computing setups. This was either as part of helping some people out with their computing setups. Or it was to help a small church with their AV and IT needs which has been the basis of some articles I have published and targeted to that same audience.

Now, thanks to a computer upgrade towards a laptop, I have headed towards regular use of a multiple-screen setup by maintaining my existing monitor as a second screen for that setup. In this case, I use the larger-screen second monitor for working on documents in my primary laptop-centric workspace.

Why go multiple-screen for your computing needs

Most computer users who make heavy use of their productivity software will want to benefit from multiple screens. This is due to the effectively-large working area that these setups offer.
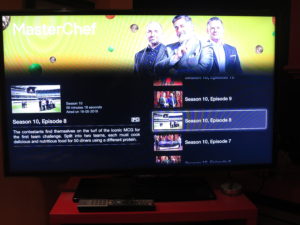
.. as will using your laptop with your TV to watch Netflix

For example, a person who is building a document or presentation from online research will be having multiple programs running so they can add content from the online research in to their “magnum opus” easily. Some of these users will even have multiple Web-browser sessions running concurrently along with the program they are using to build their content. Or a user could engage in a videoconference and look up relevant material or take notes on another screen during the call.

People who work with large spreadsheets will also benefit especially if the spreadsheet becomes wide. It also applies to those of us who use desktop publishing, illustration or photo-editing programs to lay out publications or create our computer-graphics masterpieces. You may come across an increasing range of monitors that can be switched between landscape and portrait orientation, which may allow you to adapt them to support a wide or tall project.

Those of us who make use of online news services will benefit from multiple-screen computing> This can be about being able to monitor a current event that appears on an online news service while engaging in another activity like creating that document, spreadsheet or presentation.

Multiple-screen setups also are about a larger screen that is used to show material to other people. This is very common with projector-based setups or where the large-screen TV set is used. Increasingly a lot of software focused to this kind of effort is being designed to take advantage of multiple displays.

This same application is being extended to videoconferencing setups like with Zoom’s Multiple Monitor setup. Here, that allows a “gallery” view to exist on one screen and the current speaker to appear on the other screen, and to allow shared resources to appear on the secondary screen. It also extends to those of us who use text-based “chat” or social-media platforms and want to follow them while doing other computing activities including browsing the Web.

Some games are even exploiting multiple-screen operation in order to provide multiple concurrent views of the same action. Or they even use this to effectively create larger and wider views of the action.

Typical configuration

Here, you are typically implementing the multiple-screen display setup in the “extend” operating mode. This has the screens set up as one large display area or “canvas” but most operating systems make one screen become the primary screen where programs appear by default when they are launched. Typically it is the screen that will be used during the boot process and will show the startup images like the interactive login screen or operating-system splash screen. If you use a laptop or all-in-one computer, the integrated screen will always be deemed the primary screen.

Even with projectors or TVs, you may have to implement “extend” behaviour and work your computer’s regular display as your primary display to allow some presentation, multimedia or games software to work properly with multiple screens. In the same context, some users may have the computer’s primary display working as a “content preview” screen and shift the content to the large screen when it is ready to show.

For laptop users, they may use the “external monitor only”” display option but run multiple external monitors, This would come in to play if you are connecting multiple monitors to an outboard dock of some sort.

Laptop users will also need to be used to switching frequently between single-screen and multiple-screen setups. This is due to themselves using the laptop’s screen as the only screen when they use it in a portable context away from their desktop workspace but work with multiple screens while at the desktop workspace. They will also have to cope with being able to “go multiscreen” at a moment’s notice if they choose to connect the computer to a large-screen projector or TV.

Your mouse pointer
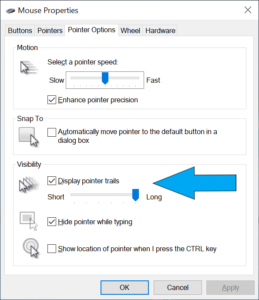
Mouse Options in Windows Control Panel - Pointer Trails called out

Using “pointer trails” a.k.a. “comet tails on your mouse pointer can make it easier to discover across the multiple screens

The first issue you will face is locating your mouse pointer. In this situation, you need to know which screen it exists on at the current time, or whether you are moving from one screen to another. This can be very difficult with screens of different sizes like a setup involving your laptop screen and your large-screen monitor. It can also be difficult where you have two screens that are separated from each other including dealing with monitors that have large screen bezels.

These kind of options are introduced in to the main regular computing platforms as a measure to increase accessibility and useability of these platforms for those of us with limited abilities. This is due to these platforms being used by an ageing user base for both work and play along with younger people that have limited abilities wanting to he productive with these platforms.

One way is to enable “comet tails” on your mouse pointer. This has a decaying trail of the pointer arrow which will appear as you move your mouse pointer with your input device. Windows has this as part of its Mouse control options in the Control Panel. MacOS X requires you to use a third-party app to have this same functionality for locating the mouse pointer.  You may also find that adjusting how your mouse pointer looks such as its size or colour may help you with making it more discoverable for you.

Another technique that you will have to perform frequently is to bring up the secondary or context menu simply as a way to locate your mouse pointer. Here, the large area occupied by the context menu stands out more visibly than a small mouse arrow or I-cursor. People who use a pointing device that has a secondary button can use this button on all desktop operating systems. But Apple Mac users who use a pointing device without a secondary button, as what was part of the original Macintosh setup, can achieve this same function by holding down the Ctrl key on the keyboard and clicking their pointing device.

The two main desktop operating systems also have their own tricks to make the mouse pointer discoverable at a moment’s notice through a special mouse-action or keypress. Here, it can be useful for identifying where your mouse pointer is across that large area.
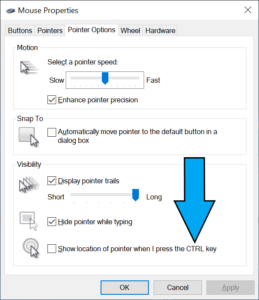
Mouse options in Windows Control Panel - option to highlight mouse pointer when you press CTRL

Windows users can set things up to quickly highlight where the mouse pointer is when they press the CTRL key

Apple Mac users can set their computer to quickly enlarge the mouse cursor when you move the mouse (or your finger on the MacBook’s trackpad) vigorously. Here, you click on the Apple menu, then click on System Preferences, then click on Accessibility then click on Display, You subsequently select Cursor and tick the “Shake mouse cursor to locate” option. Windows users have to go the the Mouse control options in the Control Panel and select “Show location of cursor when I press the CTRL key“. Here, when you press and release the CTRL key, a large circle appears then reduces in size around where the mouse cursor is.

Laptop users who run a multi-screen setup comprising of their laptop’s screen and the large monitor in an “extended” arrangement may find that the small screen could be kept for “parking” application user interfaces that they aren’t giving all their attention to. They then keep the large screen for the applications they are focusing on at the moment. An example of this could be a Web browser with a page they are reading or an office application with the document they are working on existing on the large screen. That is while an email client, messaging application or media player that only needs occasional attention could be visible just on the laptop’s smaller screen.

Moving apps between screens with the keyboard

People who are new to multiple-screen computing or switch between single-screen computing and multiple-screen computing will come across situations where the app they are using doesn’t appear on the screen they want to use. This may be of concern where a user starts a program they previously ran on a multiple-screen setup doesn’t appear on a single-screen setup due to the absence of the screen they were using. Or they want to quickly move an app to another screen.

This situation will come in to play for those of us with laptops who work only with the laptop screen while away from the main workspace. Here, you may find that a program you use on your external monitor isn’t visible on the laptop’s screen but appears on the Windows Taskbar or MacOS Dock as an app that is in use. This may happen where an app doesn’t adapt to different multiple-screen setups properly.

Here, software that adapts properly between single-screen and multiple-screen computing setups will, for example, move to the single screen in a single-screen setup if it was last operated on other monitors in a multiple-screen setup.

It also applies to those of us who are using a computer as part of an AV playout setup and have to move a program’s screen between the cue / monitoring screen and the main screen. That also extends to people using the big TV screen to view videos or pictures or play games on a laptop. It is more so with Web browsers or other programs that don’t handle multiple screens properly.

Windows simplifies the process of moving apps between screens with the keyboard. Here, Windows users need to Alt-Tab to the program you are trying to bring back in to view in order to give it logical focus. Then you use the Windows + Shift + left or right arrow keys to bring the program to the integrated screen.

Apple Mac users would then have to invoke Mission Control by pressing the F3 key. Then they would have to use the trackpad or other pointing device to move the program between screens. As far as I know, there isn’t an approach to using the keyboard to move an app or window between screens on the MacOS.

Screenshots

You may find that the procedure for taking full-screen screenshots may be very different here. In most cases, the operating system will encompass what is seen on both screens in a full-screen screenshot.

In the case of Windows, you may find that PrtScr may yield you something to large for your screenshot. Here, moving the cursor in to the screen where you want to take the screengrab then pressing CTRL+ALT+PrtScr would “grab” what is on that screen and store that to the Clipboard. If you want both screens, you would press CTRL+PrtScr. Then, you simply past that in to Windows Paint or your favourite image editor, redact it then save it as a file. Other operating systems will use a similar means to take screenshots of a particular screen in a multiple-screen shot.

But mostly you will have to resort to window-specific screenshot commands like Alt+PrtScr for Windows or Cmd+Shift+4 then Spacebar for MacOS to grab screenshots of the relevant windows.

Conclusion

As you head towards multiple-screen computing, take your time to get used to it. Here, it is about moving an application window between the different screens or working out how to quickly locate that mouse pointer.
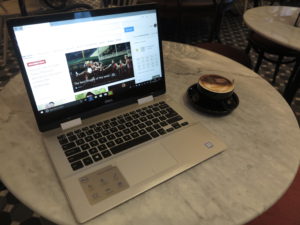
Trying to reduce the number of USB chargers around the house. What can you do?

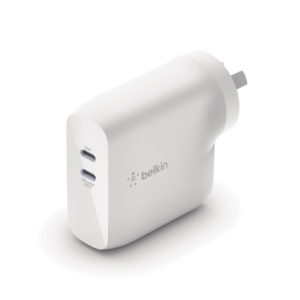
Belkin BOOST Charge 68W GaN Dual USB-C Wall Charger (Australasia) product picture courtesy of Belkin

You may need to end up rationalising the number of USB chargers you have in your home

You can easily end up with too many USB wall chargers in your home. This can happen as you purchase more devices that come with these chargers or you find and use better chargers like multi-outlet “charging bars”.

Then you think of rationalising the number of chargers you have on hand in your home as you find you have too many of them. But how can you go about this effectively without sacrificing convenience?

Here, the idea is to keep enough chargers on hand and in appropriate locations that assures you of convenience. No-one wants to find that they can’t power or charge their devices because there aren’t enough of these chargers available near to them for their needs.

Which chargers do you keep.

Firstly, you need to retain chargers that have at least one USB Type-A socket and/or USB Type-C socket on the charger unit itself. That means you don’t really need chargers that have a USB micro-B or Apple MFi Lightning plug on the end of a cable wired to the charger itself.

This will mean that you can use them to charge any device as long as you have a connection cable with the appropriate connectors on each end. You can even consider the use of longer cables for more flexible connectivity setups.

As well, prefer to keep powerful chargers or those that implement USB Power Delivery for USB Type-C units or Qualcomm fast-charge standards (for USB Type-A units. This will mean that you can quickly charge up your phone or tablet or allow them to work in a high-performance setting while connected to AC power.

Keeping one or more USB-C chargers that use USB Power Delivery and can put up at least 60 watts to at least one USB-C port is a good direction to go. This is important when you are using or intend to purchase an ultraportable laptop or 2-in-1 that has this kind of power needs, something that will be very common in the near future. Sometimes the more power output the charger can make available the better.

Chargers that have two or more outlets, including the many-outlet “charging bars” should be kept for the long haul. It is preferable to have them in the kitchen or the home office especially where you are likely to be charging multiple devices in the same location.

You will be finding that there will be more of the powerful multiple-outlet chargers on the market thanks to power-supply designers, manufacturers and vendors investing in Gallium Nitride technology that allows for compact powerful power-supply devices.

Here, you are factoring in many realities when you use mobile technology. Here, as your portable devices get older, the batteries don’t run for the same long time that they used to when they were new. As well, most of us like to run our portable devices on external power as much as possible to conserve battery runtime.

It is something we used to do with portable audio equipment and some pocket calculators since these devices came around in the 1960s.  We even did things like minimise any battery-draining activities like fast-winding of tapes with our portable tape players unless the equipment was connected to AC power. Or most portable devices that had dial or display lighting had this lighting come on when they were powered from external power but have a button to activate it as needed when on batteries. This was driven by the fact that batteries for these devices that ran for a long time were at a price premium then.

There are also the accessories that support our mobile devices like Bluetooth headsets or powerbanks and these use a USB-based cable for charging their integrated batteries. It is also underscoring that the USB Type-A plug or USB Type-C plug is being seen as the “universal DC power plug” for many devices thus simplifying what we use to power these devices with. For example, some LED-based decorative lighting is appearing that is powered by a USB charger rather than a specially-designed power supply.

As you find that you acquire more powerful USB chargers, you may find that it is high time to send the least-powerful ones away for e-waste recycling. That is unless you are using a device that uses the USB charger purely as a power supply and can work with a low-power USB charger.

You may also find yourself migrating to the newer USB Type-C connection for your devices and then find that it may be a better time to move towards chargers that use at least one of these connection according to the Power Delivery specification.

If you find that your charger uses an IEC-standard “figure-8” or “cloverleaf” AC input socket, this opens up a pathway of flexibility which may give you more reason to keep it. Here, you could use a longer AC cord that has the appropriate connection if you want it further away from the power outlet.

For travel purposes, you may find it simpler to purchase an AC cord with the destination country’s national AC plug to use it in countries using that kind of AC power outlet. Typically you would buy these cables from a local electrical retailer or office-supplies store as an AC cord for a radio or laptop. You then end up with some form of flexibility about where you locate it in your travel accommodation. This situation is more advantageous where you end up frequently visiting countries using that same AC power outlet.

Where should we keep USB chargers?

At least one of these chargers should be kept in each of the main living areas in the house.

If you find that you don’t like the idea of these chargers strewn around the house, it may be a good idea to keep them in a drawer in the appropriate room while they aren’t actually in use. But make sure everyone is aware of the chargers existing in those storage locations when you store them. This is where the ultra-compact chargers really earn their keep because they don’t take up much storage space.

In the lounge areas like the living room or rumpus room, it may be a good idea to keep a powerful USB charger of some form near one or more of the armchairs or couches. This is because most of us would be using a smartphone or, more likely, a tablet there in order to interact with online resources like Wikipedia, search engines or social media when we watch TV for example.

You may find that plugging a charger in to a standard extension cord may work if you are wanting one to serve someone sitting in a chair or sofa that is located away from a wall. Similarly using a powerboard to plug your table or floor lamp and a charger in to may work wonders here. The use of longer AC-current cords may benefit these applications better due to keeping the power conversion process closer to the device using the power and reducing voltage drop where it matters.

The kitchen area may be a good location for a multiple-outlet “charging bar” due to people charging their devices in that area. On the other hand a small two-outlet powerful wall charger may earn its keep here if you are trying to avoid excess clutter.

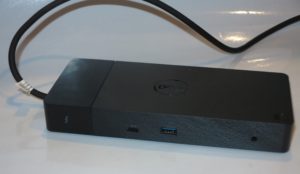
Dell WD19TB Thunderbolt dock

It is best to focus USB-C and Thunderbolt 3 docks like the Dell WD19TB Thunderbolt 3 dock towards peripherals that are being used with the dock’s host computer

The same goes too for the home office at least. Here, you may be using this as the “go to” place to charge powerbanks and mobile accessories in a location where they can be found. You may think of using that USB-C or Thunderbolt dock that you are using to connect your laptop to the big screen and keyboard for this purpose. But you may find that having a charger, like a “charging bar” may earn its keep here when you are simply charging devices that aren’t necessarily peripherals for your computer so that all USB sockets on that dock serve those peripherals.

You may want to keep a charger or two in the bedrooms if you do charge your smartphone or tablet there. It is also important to make sure the guestroom has one or two of these chargers so that guests who stay overnight have somewhere to charge their devices.

If you do keep accessories on hand for travel, one or more small USB chargers can come in handy here. You could even consider a multi-outlet “charging bar” again for packing when you travel.

At least, making sure you are keeping the powerful capable chargers that work to current standards and keeping them in areas where they are useful can work out as a convenient and effective way to rationalise these devices.

The XBox One offers dual controls for the benefit of novice game players

Article

CO-PILOT, XBOX ONE’S NEW ACCESSIBILITY FEATURE | Cerebral Palsy Foundation

How to use Xbox One copilot to link two controllers | Windows Central

Copilot video update: sharing or splitting a controller | Special Effect

Video Walkthrough from Special Effect – Click or Tap to play in YouTube

From the horse’s mouth

Microsoft

First Wave of New Xbox Update Features Ship to Select Xbox Insiders Today (Blog Post)

Copilot on XBox One (XBox Support Article)

My Comments

An issue I raised in a previous posting regarding computer and video games, especially console games, is that it can be difficult for some people to learn how to play a video game.

One of the situations I was thinking of was where a younger game player was showing an older person who is interested in cricket how to play a cricket video game on his console. He then offered the older person a try at the game but the older person found it difficult to work out what effect the different buttons on the control had on the gameplay.

Here it may be about dealing with which buttons to use on a particular controller to achieve a particular result, especially has today’s game-console controllers have many different controls on them and it may be difficult to work out which button, joystick or trigger does what if you are now to these devices.

As part of Microsoft releasing the XBox Adaptive Controller, they also added to the XBox One and to Windows a “co-pilot” mode. This isn’t just part of running two controllers with two different operation methods together. But it could be to allow an advanced game player to give a helping hand to a novice game player. It is similar to the practice followed by most driving schools where the driving school’s fleet of cars are equipped with dual-controls. This allows the driving instructor to control the clutch and brake in order to override what the learner driver is doing in case of an emergency, thus being a safety net for novice drivers.

Here, you have to have at least two controllers connected to the XBox or Windows computer to have Copilot Mode active. The rule with the Copilot Mode is that the first controller you turn on ends up as the primary controller for setting up this mode. As well, it is a good idea to do the initial setup routine with your typical XBox controller, now seen as the primary controller if you are using something like the XBox Adaptive Controller as your complementary controller.

XBox One games console

Method One
  1. Connect the secondary controller to your XBox for copilot use. The copilot doesn’t need to sign in with their XBox account for this to happen. As well, the primary player is able to record their achievements on the XBox leaderboard.
  2. Using the primary controller, press the large X button to open the Guide, then select the Profile & System menu. Select Settings, then Ease Of Access, then Controller in that menu.
  3. Choose Copilot Settings and select the “Turn on Copilot” option to enable this mode.
  4. You will see the secondary controller listed. Here, select that controller to work in Copilot mode.
  5. At this point, your XBox controllers are linked as if they are dual controls.

When you are done with Copilot mode, go back to the Copilot settings menu and select “Turn off Copilot”. Both controllers then work as if they are for separate players.

Method Two

You need to follow this method if you want to maintain access to and control of any advanced features that your secondary controller may have. This may be to support custom button mappings or enable vibration to provide haptic feedback during gameplay.

  1. Connect the secondary controller to your XBox for copilot use
  2. Go to the My Games And Apps menu then select XBox Accessories. You may have pinned the XBox Accessories app to your home screen perhaps to have more control over game-controller customisations.
  3. Using the XBox Accessories app, assign the secondary controller to your current login
  4. Go to the top menu on your XBox Accessories app, then select the three-dot option on your primary controller.
  5. In this menu, you select the Turn on Copilot option to enable this function on your controller.
  6. At this point, your XBox controllers are linked as if they are dual controls. You also maintain customisations for each of the controllers like vibration feedback or custom button mappings.
  7. When you are done with Copilot mode, go back to the Copilot settings menu in the three-dot option for your primary controller. Then click “Turn off Copilot” to return the controllers to normal dual-player operation.

Windows 10 computers

  1. Here, you need to download and install the XBox Accessories App from the Microsoft Store. This will provide increased control over any XBox controllers you have connected to your computer.
  2. Connect both controllers to your Windows 10 computer as mentioned in the prior article. This can be done via USB or wirelessly and you may find that the latest controllers will support Bluetooth connectivity.
  3. Run the XBox Accessories App whereupon you will see both controllers represented on the screen.
  4. Click the three-dot option under your primary controller. Then click the Turn on Copilot option in that menu to enable this function. This will only apply to the two controllers.
  5. When you are done with Copilot mode, run the XBox Accessories App and select the three-dot option under your primary controller. Then select the Turn off Copilot option in that menu to return to normal two-player operation.

Further notes

If you are helping someone handle that game, it may be better to take a similar approach to how driving instructors help and teach novice drivers even when using dual-control vehicles. That is to allow the novice to do the controlling themselves but take the reins when things become difficult.

As well, it may be about allowing the novice to familiarise themselves with the button layout on the controller and allow them to work the game at their own speed.

If the game does have any online play abilities, you may find that playing the game in a manner where the computer is the only effective opponent may be what you need to do when you are helping a novice game player. This means that you aren’t playing against real people at remote locations who may not be understanding about novice or occasional game players.