Article

You can set up an Amazon Echo with just this kind of computer
How to set up a smart home using Windows 10 and Amazon Echo | Windows Central
My Comments
If you are dabbling with the idea of a voice-controlled smart-home assistant, you may find that some of these setups are dependent on you running an app on an iOS or Android mobile device to set them up or manage them. There are some users out there who may not be able to or want to use a mobile device that works on those two platforms.
For example, there are people like a lot of the older generation who prefer to work with a baseline mobile phone or a landline phone service as well as a regular computer for the communications and personal IT needs. There are also some of us who run a smartphone that is based on Windows 10 Mobile or a similar platform.
This is not so with the Amazon Echo and most other devices that work on the Amazon Alexa platform. When they are in action, they are not dependent on you running a mobile-platform app to have them work properly, rather you just talk to Alexa, the voice-driven home assistant. It is also underscored by the fact that you could purchase the Amazon Echo Dot module which works with a set of powered speakers or a stereo system equipped with an AUX or similar line-level input for US$49.
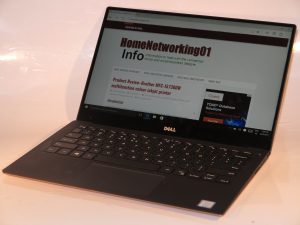
Most of this interaction in managing your Amazon Echo devices is through the Alexa website (http://alexa.amazon.com), which you can visit using any Web browser.
Adding Amazon Echo devices

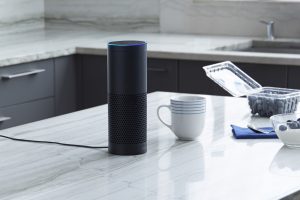
This Echo doesn’t need to be managed by an iPhone or Android smartphone
Other Alexa-based devices may work through a different setup procedure, perhaps through an on-device Website, Android / iOS mobile app or the device’s control surface.
- If you are adding an Echo device, you just need to log in with your Amazon account credentials. Then plug in and turn on your Amazon Echo device.
- The ring light on your Amazon Echo device will glow orange while it is listed on the abovementioned Web site. This is also because the Echo device is pre-registered to your Amazon account when you bought it through Amazon.
- You may then have to click the “Set up a new device” option to start enrolling it with your home network. On the other hand, you may just need to proceed to the next step.
- Then you hold down the Action button on the Echo device for five seconds. This is whereupon you will see a list of Wi-Fi networks that the Echo can connect to.
- Here, you select your home network’s SSID (Wi-Fi network name) and click Connect. You may be asked for your network’s Wi-Fi password which you subsequently enter to come on board. There is an option for this to be saved securely to your Amazon account, which can come in handy if you are dealing with multiple Echo devices.
- Once the ring light is blue, feel free to talk to Alexa.
Managing Skills and Smart Home devices
The Amazon Alexa Website is also where you can manage what your Amazon Echo or Alexa-compliant device does.
The Skills option allows you to add “skills” which provide an audio-based link to various smart-home hardware and online services. This can also include the ability to book a Uber or other taxi/hire-car service that has a suitable Alexa Skill for example.
As well, some smart-home devices that you add to your home network whether directly or via a hub cam be detected by the Amazon Echo through the “Smart Home” option in the Alexa Webpage.
To get the best out of this resource, create a Favourite / Bookmark in your Web browser or a desktop or similar shortcut in your operating system to the Amazon Alexa Website so you know where to go if you want to manage that Echo or add that Alexa Skill.
But you are not needing to use a mobile-platform app to have your Alexa-based devices how you want, rather simply using your favourite Web browser on your favourite computer device.


