Tag: Multi-access-point wireless networks

Wi-Fi to become strong as a location and range-finding technology

Article – From the horse’s mouth

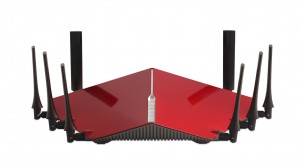
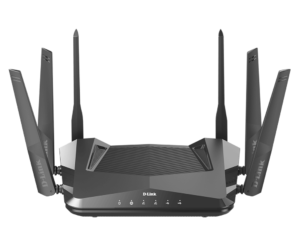
D-Link DIR-X5460 Wi-Fi 6 router press picture courtesy of D-Link USA

Multi-antenna Wi-Fi 6 and similar routers like this D-Link router could be part of allowing Wi-Fi to work as a location-tracking, range-finding and way-finding technology

Wi-Fi Alliance

Wi-Fi Location™: Performance drivers for Wi-Fi® ranging technologies and its achievable accuracies

My Comments

Qualcomm is driving Wi-Fi further as a location and ranging tool through the use of its own silicon. This is in addition to the Ekahau effort to use Wi-Fi as a real-time location system for business.

But it’s more about making sure that the Wi-Fi network is capable to answer Bluetooth and UWB wireless technologies in this space. This is being facilitated by Wi-Fi devices having multiple antennas and operating on multiple bands, That can exploit different bands’ radio-frequency characteristics like transmission / reception range.

In the business world, this may be about staff or asset tracking, indoor navigation amongst other uses. It may even be about “pointing” a laptop, tablet or smartphone to the closest printer or similar peripheral so you cut down on the amount of time it takes to select that peripheral. Airports, shopping centres and similar places will benefit in the form of enhanced indoor navigation for staff and end-users.

But as far as the Wi-Fi home network is concerned, this could come in to its own in a strong way.

This would be facilitated by the use of most recent-issue value-priced and premium Wi-Fi routers having multiple antennas thanks to newer Wi-Fi iterations like Wi-Fi 5, Wi-Fi 6 and Wi-Fi 7 that implement various MIMO techniques; along with the ability to work on multiple wavebands.

Then there is an increased interest in multiple-access-point Wi-Fi networks thanks to Wi-Fi repeaters, distributed Wi-Fi (mesh) networks and access points that use Ethernet or wired “no-new-wires” networking technology like powerline networks as a backhaul. This is often implemented to fill in Wi-Fi dark spots within your home caused by things like highly-dense building materials or metal used as part of building materials or insulation.

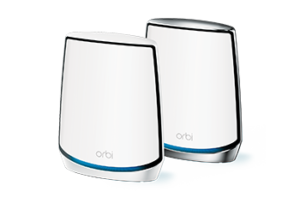
NETGEAR Orbi with Wi-Fi 6 press picture courtesy of NETGEAR

Even distributed Wi-Fi setups like this NETGEAR Orbi with WI-Fi 6 system will serve the same purpose

One key use case for the home is the smart-home technology based on “Internet of Things” devices. The classic use cases would be the robot vacuum cleaners that move around your house, keeping the floors clean or the robot lawnmowers that keep your lawn mown down.

In the context of home and automotive security, it could be about geofencing and similar algorithms that limit the operation of smart locks or vehicle locking systems. It could even extend to preemptive control of heating / air-conditioning and lighting so when you are near home, the heating or lights come on.

To some extent, this could extent to healthcare at home including ageing at home. For example, this may be about fall detection or wandering detection for dementia sufferers. Or it could be about proof-of-presence and time/attendance records for paid carers.

The “nearest peripheral” location will come in to its own with the home network if you have multiple network-capable TVs or printers on your premises. Here, it could be about having the default printer being the one that is closest to you even if you take your laptop to the kitchen for example. It could also extend to use of Wi-Fi Aware for “across-the-room” use cases like transferring data between devices or user discovery with social media and online games.

Therefore in a lot of use cases, Wi-Fi will be valued as a location and ranging technology even if the network of concern is a small network that covers a house or small business.

Wi-Fi Agile Multiband–What will it be about

Article – From the horse’s mouth

Wi-Fi Alliance

D-Link DIR-895L AC5300 6 stream wireless router press picture courtesy of D-Link America

Wi-Fi Agile Multiband will make better use of those dual-band Wi-Fi wireless networks

Wi-Fi Agile Multiband (Resource Page)

My Comments

A reality that is affecting how the Wi-Fi wireless local network operates is the increasing number of network-infrastructure hardware that can work simultaneously on both the 2.4GHz and 5GHz bands. Add to this the fact that most Wi-Fi clients released in the last few years are able to work on both these bands.

But there is the issue of making sure these devices can provide the optimum throughput for whatever data you are sending to them. This can affect the setup process for network-infrastructure hardware where you have to be sure you are on the right channel for optimum throughput everywhere over your premises.

There is also the fact that you may want to make sure that your laptop, smartphone or other client device chooses the right band for the right application when you deal with a network that works across both bands. This would be more important where you have to use the least-cluttered band to assure reliable audio or video streaming or IP-based voice or video telephony sessions.

The Wi-Fi Alliance have launched a certified trademarked specification known as Agile Multiband to answer these situations.

What does it offer

A network access point or client that implements Wi-Fi Agile Multiband has the ability to monitor the service quality to determine the best connection opportunities available for that network.

Client and infrastructure devices in a Wi-Fi Agile Multiband network can steer away from congested channels and bands. This is a form of “self-tuning” which can take place even as the network’s environment changes.

In a multiple-access-point network, a Wi-Fi Agile Multiband setup can steer client devices away from

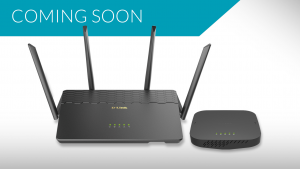
D-Link Covr router and wireless extender package press image courtesy of D-Link

Even multiple-access-point networks will benefit from this technology

oversubscribed access points to those that aren’t loaded with traffic to access points that don’t have much traffic on them. This is also to answer the reality that home networks are heading towards the multiple-access-point path thanks to HomePlug-based access points and mesh-based wireless network kits.

All these options can answer the needs of both static and mobile client setups. This means that a Wi-Fi-capable printer or Smart TV can benefit as much from these features as a laptop or smartphone that is always moved around. It can also appeal to “transportable” clients like Smart TVs installed on easily-movable furniture or “all-in-one” desktop computers which are normally static but are moved on an ad-hoc basis.

Moving around a Wi-Fi Agile Multiband network will see minimal interruption for the network device’s user. This is because client devices can cache network encryption keys to facilitate a quick handover between different access points, something that will be important for IP telephony or AV streaming.

A question that needs to be asked thanks to the ubiquity of Wi-Fi wireless networks operating on the 2.4GHz band is how a Wi-Fi Agile Multiband network can address non-Wi-Fi interference on that band. This is a situation driven by microwave ovens, cordless telephone systems, Bluetooth devices and the like that work on this band and the use of these devices could cause temporary interference.

What Wi-Fi Agile Multiband is about is a step to assure increased reliability out of Wi-Fi wireless network segments and make better use of the radiofrequency spectrum available to them.

Feature Article–Extending your wireless network’s coverage

This is an update of the article originally published on 11 August 2008 and has been refreshed to encompass newer technologies and equipment features that wireless-network equipment have.

Many of you who have viewed this blog have been looking for information about extending the wireless segment of your home network. Typically it may be to cover a large house or to gain wireless coverage past a radio obstacle like thick brick or stone walls, foil-lined insulation or double-glazing which uses metal-based heat reflection techniques. Previously, I have mentioned about using this technique to mitigate microwave-oven interference on the 2.4GHz band which 802.11g works on.

Most wireless-network equipment manufacturers have released repeater devices that catch the existing wireless-network signal and expose it in to the new area. Some of these setups work on a vendor-specific manner or may work according to standard WDS bridging techniques. But they all require the use of equipment compatible with each other, usually equipment supplied by the same vendor.

Other companies have released “wireless range extenders” which create a new wireless-network segment using a new SSID but bridge it to the existing wireless segment. This can be a point of confusion as you have to determine the best SSID to connect to at your client equipment and you don’t necessarily get the full bandwidth from your home network in this newly-created segment.

The “extended service set”

The method that I am going to talk about here is the establishment of an “extended service set” comprising of multiple access points serving the same network and using the same SSID and security parameters. All the access points have to be connected to a common wired-network backbone which is part of the same logical network; and the access points must be working on the same technology – the same 802.11 variation and operating mode (G-only, N-only, mixed mode, etc).

This method can be performed with access points or wireless routers supplied by different vendors, thus permitting the use of equipment which is suited for the job at hand. It can allow for use of surplus routers simply as access points as long as they are configured correctly.

This setup won’t work properly across networks that are set up as multiple subnets or logical networks. An example of this may include extending a wireless network between two business premises across the street or corridor where they are served by separate Internet services. If you do want to link the two different premises across the street or corridor, you may have to make sure there is a wired or dedicated wireless backbone connecting both these locations before you set up this kind of network.

The diagram below shows what a small network should be like when running an extended service set.
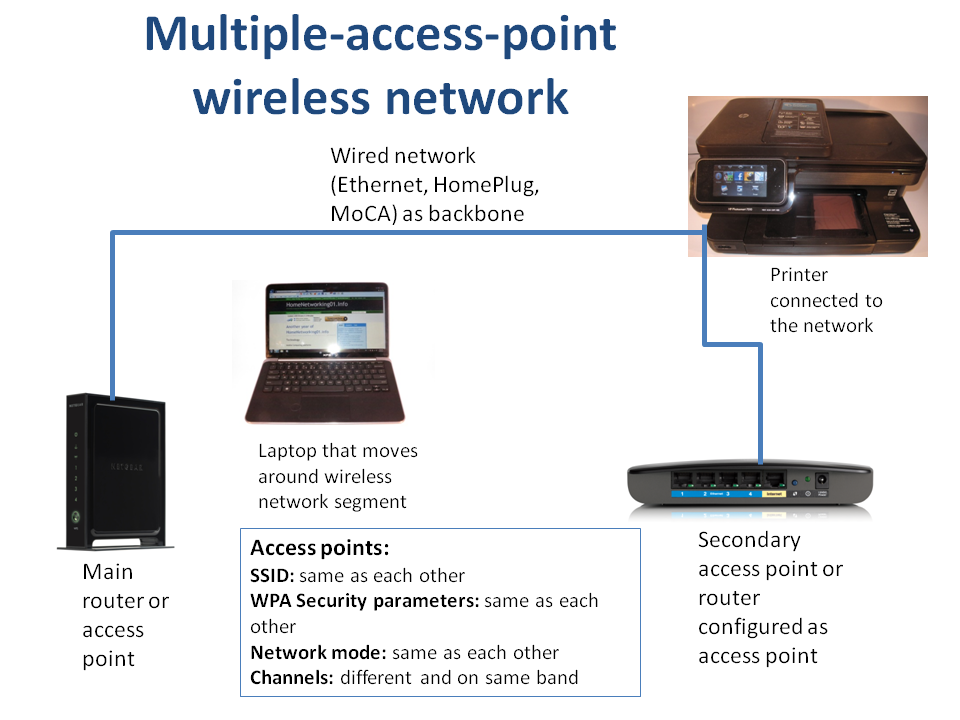
 

Extended wireless-network connection diagram

Connection diagram for the multiple-access-point wireless netwrok

Key Components

The network backbone

The wired-network backbone can work on any wired-network media such as a Cat5 Ethernet, HomePlug power-line, fibre-optic LAN, MoCA TV-aerial coax, HomePNA phone-line or a mix of these technologies bridged to each other. It can even work with a dedicated inter-building wireless backbone that may be used for larger properties or to join shops or offices that are separated by a street.

The network backbone can handle other network traffic from wired-network devices like servers, desktop computers and games consoles; and become the network’s local data path to the Internet. This is while it works as the backbone for the wireless “extended service set”.

You may have be lucky to have an Ethernet cable in your house if you had it “wired for data”. But most houses typically wouldn’t have this facility everywhere. The other technology that I have found to do this job equally well is HomePlug AV powerline networking which works over the cable infrastructure used to provide AC power to your lights and appliances. It can reach further than the existing building, which is a boon if you need to extend coverage to garages, sheds, cabins or other outbuildings or have Internet access in a caravan or campervan used as a “sleepout” or mobile office.

Access Points

These devices are the transmitters that bring the data from the wired network backbone to the wireless client devices and make up the extended service set.

You typically will have one such device in the form of your wireless router which is at your network’s Internet-network “edge”. The wired-network backbone used as part of this “extended service set” would be connected to one of the LAN ports on this device. If you use a wireless router with one Ethernet port for the LAN and that port is used for a desktop computer or similar wired-network device, you will need to expand the number of sockets by using an Ethernet switch. These will typically be a “dime a dozen” for a five-port or eight-port unit. There are also some HomePlug-Ethernet bridges that have a built-in four-port switch that are worth considering if you are setting up a HomePlug backbone.

Repurposing the old wireless router

If you upgraded your wireless router to a newer model, you will still have your existing router gathering dust. Similarly, you may have changed broadband technologies like moving from cable to DSL or from DSL to a next-generation broadband technology and your router’s Internet connection may have been served by a technology-specific internal modem or connection.

This router that became surplus to your needs can work as an access point but will need to be configured appropriately.

Here, you will need to disable the following functions:

  • DHCP server
  • UPnP Internet Gateway Device functionality (typically referred to as UPnP)
  • Dynamic DNS functionality (if used)

As well, you will need to set the LAN IP address to something that is within your network’s IP address range but preferably out of the address pool used by the current router. The reason you have to take care of this setup is because there needs to be only one device performing “network-Internet edge” functions such as DHCP in a network and this device should be the one at the logical network-Internet border.

Some of the newer routers that are sold through retail have an “access point mode” option in their setup Web page. This make the effort of setting them up to run purely as an access point a simpler task because it disables the DHCP, Dynamic DNS and other functions associated with an “edge” router at the click of an option.

When you connect this router to the wired backbone, you use any of the LAN ports to connect the backbone. Never use the WAN port on this router for the wired backbone. This may not be an issue if the router you are setting up is a modem-router where the modem is performing WAN functions or you are using a router that has the above-mentioned “access-point mode” and this mode makes the WAN port become a LAN port.

“3-in-1″ HomePlug wireless access points

There is an increasing number of wireless access points that work with a HomePlug or Ethernet backbone. These devices, such as the Netcomm NP290W / Solwise PL-85PEW and the Devolo dLAN Wireless Extender, are as big as a compact “wall-wart” power adaptor used to power most electronic devices from the mains and plug directly in to the power outlet. They bridge between a Wi-Fi wireless segment (as an access point or wireless client bridge in some cases), a HomePlug powerline segment and a Cat5 Ethernet segment.

These units come in handy if you need to extend a wireless network on a temporary basis or simply if a compact device can do the job better than a large access point. They would come in to their own when you are using the extension access point to mitigate microwave-oven interference in the kitchen or if you want to extend the home network to a static caravan where the teenage kids can use that iPhone or iPad.

But with these devices, you have to make sure that you use one of the wired technologies as the backbone. This means that you have to use them with your HomePlug setgment as the backbone and the Ethernet connection to link a device like a desktop computer, PlayStation 3 or a network printer to the home network; or connect to an existing Ethernet backbone and have the device create a new HomePlug segment as well as working as an access point.

Setting Up The Network

Configuring the access points

You will need to know the SSID and the WEP or WPA wireless security parameters that are operational for your network. These are the only factors that need to be common amongst all of the access points of the network. The reason that the SSID and security parameters are set to the same details is so that wireless client devices can roam between the different access points without any user intervention.

The radio channels for each of the access points have to be set differently to each other. It is a good idea to set the access point closest to the kitchen to Channel 1 if you have a microwave oven in that kitchen. This is because, from my research, most of the domestic-market microwave ovens work at 2450 MHz which is between Channels 8 and 9 on the 802.11g channel list. I had tried an experiment to see whether a microwave can upset a wireless-network “cell” that is tuned away from its operating frequency.

If the access points or wireless routers is a consumer model that was made in the last few years, they would be equipped with WPS push-button setup. Here, you would have to make sure that they don’t reconfigure the wireless access-point parameters when you invoke the WPS push-button setup function. There is usually a “Keep settings” option associated with the WPS setup menu/

This option will then allow you to use the push-button setup on the nearest access point to enroll your wireless client device to your home network.

Dual-band wireless networks

If you are operating a dual-band wireless network which works on 2.4GHz and 5GHz, you may have to create separate extended-service-sets for each band. These would have a different SSID for each band like “Network-Name” for the 2.4G band and “Network-Name-5G: for the 5G band. The security parameters are the same for each band; and you may want to run the 2.4GHz band as “mixed mode” and the 5G band as “N-only”. The advantage of this setup is so you can identify any weak spots that affect a particular band in your dual-band wireless network and is more applicable with the 5GHz band that uses a shorter wavelength than the 2.4GHz band.

Here, you could have the main router that serves most of the house being a dual-band dual-radio type, also known as a simultaneous dual-band unit. This can also apply to an access point expected to cover a large area. Then you could use single-band or dual-band single-radio equipment for providing any infill coverage on either of the bands.

The wireless client devices

There is no need to reconfigure any of the wireless client devices such as laptop computers once you have set up the network according to the above instructions.

You will see an improvement in network performance when you operate your wireless client devices in areas where you barely could operate them. The signal-strength bar-graph that is part of your wireless client device’s network management software will register a stronger signal as the client device comes in to vicinity of the access points.

Some devices may not support this automatic roaming behaviour properly and may require you to reselect the network when you move in to the scope of the better access point.

Conclusion

Once you have followed the steps in this article, you will be able to extend the effective coverage of your wireless home network or make your wireless network cover everywhere in your house even if it uses metal-based energy-efficiency measures or has thick brick or stone walls.
WPS-capable access points and multi-access-point networks

Just about every wireless router or access point targeted at the consumer or, in some cases, SOHO/small-business market is equipped with Wi-Fi Protected Setup, commonly known as WPS. The obvious part of this feature is a button on the router that instigates a quick and easy enrolment routine for suitably-equipped wireless network client devices.

Here, you would instigate the WPS setup routine on the client device, which may be as simple as starting Wi-Fi network setup. In all versions of Microsoft Windows since Windows 7, you would have your computer searching for wireless networks through the “Add Wireless Networks” routine.  But you may find that you have to select the target network you want to connect to in newer versions of Windows and click or tap “Connect” where Windows will prompt for the passphrase but will tell you that you can use the WPS button on your router if the network supports this. Then you would press the WPS button which begins to securely transfer the network credentials to the client device. In some cases, if you unpack a new router and plug it in to the wall, you may be determining a new WPA-PSK passkey for that router.

But you may be wondering how this will affect those wireless networks that have two or more access points that have this feature yet are set up to extend a wireless network’s coverage.

Last Saturday, I had an opportunity to set up such a network by repurposing a broadband router with this feature as an access point to extend a wireless network past a corrugated-iron wall to the back of a newly-extended house. Luckily the house was wired for Ethernet as part of the renovation, so the wired backbone of this “extended-service-set” was the Cat5 Ethernet cabling. But most of you may simply use a HomePlug AV powerline network as your backbone for a similar network.

Both the network’s main ADSL modem-router and the broadband router, which was floating around as a spare, were recent-issue units equipped with WPS. They were configured with different channels but the same ESSID, wireless-technology and security parameters and the broadband router was set up as an access point with its DHCP server turned off and itself existing on a fixed IP address that was part of the network.

I had discovered a problem with this broadband router where it reset the wireless-network parameters after a WPS wireless-network-setup cycle. But you need to check that the settings stay by going to “Advanced”, “Wireless Setup” or “WPS” options in your router’s / access point’s management Web page and making sure that options to keep wireless-network settings are selected after you configure the device with your network’s SSID and security parameters.

This means that WPS-equipped access points and routers are capable of working in the “extended-service-set” arrangement. It then means that you can enrol new Wi-Fi client devices like Windows 7 laptops, Android smartphones or Internet radios to your wireless-network segment using that idiot-proof WPS “push-push” method at the nearest access point to where you are setting them up at. Yet the multiple-access-point network still does the job of extending wireless coverage in to the dark spot while allowing you to move the laptop, tablet or smartphone between the access-points’ coverage areas without reconfiguring anything.

Note: I have updated the article originally published on May 2012 to added some extra notes about the WPS setup experience for versions of the Microsoft Windows regular-computer operating system released since this article was originally published.

Quick “extended service set” setup routines for WiFi access points

Why a quick setup routine for WiFi access points (or client devices capable of operating as access points)?

It makes it simple for one to extend or improve wireless coverage by adding access points to an existing “extended service set” with a wired backbone. This includes mitigating microwave-oven interference to computer equipment being used in the kitchen by using an access point tuned to Channel 1 installed there. Increasingly this functionality will become more relevant with WiFi-based VoIP cordless phones and come in to its own with location-based WiFi security and home-automation applications. It will also allow a device with built-in Ethernet or HomePlug network connectivity as well as a WiFi client functionality (which typically covers most WiFi-enabled devices) to become a low-power WiFi access point thus making it easy to expand the wireless network by providing infill coverage.

This is achieved by enrolling the device as a client device of the wireless network, then if the device is connected to the same Internet gateway that is visited by the wireless network via the wired network, it sets itself up as an access point with the same SSID and security data as the master access point. It then avoids users having to re-enter network data and make mistakes in setting up multiple-access-point wireless networks.

Methods

Semi-automatic operation – without WPS on master AP

  1. User: Connect to new AP via Ethernet or HomePlug
  2. User: At Web UI for new access point:
    1. Select AP – quick setup
  3. New Access Point: AP becomes wireless client bridge, direct link to host
  4. New Access Point: AP presents list of SSIDs that it can receive and their security status (open or secure)
  5. User: Clicks on SSID matching their home network’s SSID or enters home network’s SSID (for hidden SSID networks), then enters WEP/WPA-PSK key as applicable when the new AP locks on to the desired AP
  6. New Access Point: Perform DHCP test to see if it can find the gateway
    1. If successful, offer to set up as AP, gain MAC of gateway & BSSID of master (& other) APs on SSID,set WEP/WPA-PSK parameter
  7. New Access Point: If user OKs with setting up as AP for network, then switch to AP mode, self-tune to vacant frequency, remain dormant
  8. New Access Point: Once gateway is discovered through Ethernet / HomePlug interface (backbone detect), activate AP mode.

Automatic operation – with WPS on master AP

  1. User: Select Access Point mode, then invoke WPS on new and master AP (PBC “push-push” method)
  2. New Access Point: new AP gains WiFi details through WPS as if it is a client
  3. New Access Point: become wireless client bridge on these details until connected to wired backbone
  4. New Access Point: detect wired backbone (via Ethernet, HomePlug), self-tune, become AP with WPS “peer” status

Limitations

Some details may not be able to be conveyed to the new access point, especially if the access point is of lesser capability than the master access point. This may be of concern when extending the coverage of a wireless hotspot and want to enforce client-computer isolation at the access point. The client-computer isolation functionality should be achieved at the link-layer level by the hotspot gateway router thus allowing for media-independent client isolation. It can then cater for hotspots that use wired media (Ethernet, HomePlug, MoCA TV-aerial cabling) to extend WiFi coverage or connect computers supplied by themselves or their guests to their Internet service.

Similarly there may be issues with setting up a multi-LAN wireless network where there is a VLAN set up on the wired network and multiple SSIDs that are radiated by the same access point. This kind of setup describes a “private” LAN segment and a “public” or “guest” LAN segment

Conclusion

Once the WiFi equipment vendors look at using “quick-setup” methods for WiFi access points, this can allow home and small-business users, especially those with limited computer skills, to set up their wireless networks to suit their needs more easily.

802.11r – the new wireless-networking standard

In August-September 2008, there has been a fair bit of talk in the IT press about the new IEEE 802.11r standard for wireless networks. It isn’t a new waveband or transmission standard for these networks.

Instead it is an improved method of handling the “handover” procedure when a wireless-network client moves between two access points in a multi-access-point network. The idea behind this is to make the handover process hard to notice if you are using a multimedia service which works with streamed audio or video like VoIP or audio / video streaming. The same feature will also benefit multi-machine multi-player gaming such as Internet-hosted online gaming because everything that is part of the game is kept in sync, thus making sure that you can “frag” the opponent there and then. With current technology, if you move between different access points while using a multimedia service, you will notice an obvious “glitch” because of the requirement to re-associate with the network when in the new access point’s area.

The improvement is based on a “work-ahead” procedure where the client will log in with access points of the same “extended service set” while utilising the current access point. Then it will “switch over” to whichever access point has the best signal, thus avoiding unnecessary glitches.

The main issue with this technology, like any new standard being introduced, is how it can work with existing networks and equipment. As well, there is the issue of an upgrade path for existing equipment. In the first situation, would 802.11r-based clients be able to achieve the fast handover with wireless networks that work with current technology and would 802.11r-based access points work with existing WiFi clients. This also includes wireless networks where some access points may be 802.11r-enabled and some may be on existing technology. This would typify operating environments where a gradual roll-out is implemented because there will be an initial price premium for newer equipment being equipped with 802.11r and it would still wouldn’t be cost-effective to replace all access points at the same time. This brings me to what will be discussed in the next paragraph regarding existing equipment.

The second situation would determine what is needed to be done to an existing network to roll out the new technology. Could this be achieved through a firmware or software upgrade on existing equipment or would it require totally-new equipment to be deployed? This issue would be very pertinent when it comes to small wireless networks where one of the access points is built in to a wireless router that is on the network-Internet edge. It also would encompass most outdoor access points and, of course, those HomePlug-based wireless access points like the Netcomm NP-290W / Solwise PL-85PEW which I have mentioned about in this blog.

This issue may not be exposed in the small-network space because the typical small wireless network is based around only one access point — the one built in to the router at the network’s “edge”. But as I have mentioned in this blog about setting up multi-access-point wireless networks which have an Ethernet or HomePlug wired backbone as a way of extending the wireless network or conquering wireless-network reception difficulties, the issue of the 802.11r “fast-handover” technology will have to be exposed to this class of network. This is important if the network is being used for VoIP, streamed IP-based multimedia or online-gaming “frag-fests”.

Feature Article: Extending your wireless network's coverage

 Many of you who have viewed this blog have been looking for information about extending the wireless segment of your home network. Typically it may be to cover a large house or to gain wireless coverage past a radio obstacle like thick brick / stone walls, foil-lined insulation or double-glazing which uses metal-based heat reflection techniques. Previously, I have mentioned about using this technique to mitigate microwave-oven interference on the 2.4GHz band which 802.11g works on.


Most wireless-network equipment manufacturers have released repeater devices that catch the existing wireless-network signal and expose it in to the new area. Some of these setups work on a vendor-specific manner or may work according to standard WDS bridging techniques. But they all require the use of equipment compatible with each other, usually equipment supplied by the same vendor.

The “extended service set”

The method that I am going to talk about here is the establishment of an “extended service set” comprising of multiple access points serving the same network and using the same SSID and security parameters. All the access points have to be connected to a common wired-network backbone which is part of the same logical network; and the access points must be working on the same technology – the same 802.11 variation and operating mode (G-only, N-only, mixed mode, etc)

This method can be performed with access points or wireless routers supplied by different vendors, thus permitting the use of equipment which is suited for the job at hand. It can allow for use of surplus routers simply as access points as long as they are configured correctly.

The diagram below shows what a small network should be like when running an extended service set.

Home Network with extended wireless segment

The network backbone

The wired-network backbone can work on any wired-network media such as a Cat5 Ethernet, HomePlug power-line, fibre-optic LAN, MoCA TV-aerial coax, HomePNA phone-line or a mix of these technologies bridged to each other. It can even work with a dedicated inter-building wireless backbone that may be used for larger properties or to join shops separated by a street.

The network backbone can handle other network traffic from wired-network devices like servers, desktop computers and games consoles; and become the network’s local data path to the Internet. This is while it works as the backbone for the wireless “extended service set”.

You may have be lucky to have an Ethernet cable in your house if you had it “wired for data”. But most houses typically wouldn’t have this facility everywhere.  The other technology that I have found to do this job equally well is HomePlug powerline networking which works over the cable infrastructure used to provide AC power to your lights and appliances. It can reach further than the existing building, which is a boon if you need to extend coverage to garages, sheds, cabins or other outbuildings or have Internet access in a caravan or campervan used as a “sleepout” or mobile office.

Access Points

These devices are the transmitters that bring the data from the wired network backbone to the wireless client devices and make up the extended service set.

You typically will have one such device in the form of your wireless router which is at your network’s Internet-network “edge”. The wired-network backbone used as part of this “extended service set” would be connected to one of the LAN ports on this device. If you use a wireless router with one Ethernet port for the LAN and that port is used for a desktop computer or similar wired-network device, you will need to expand the number of sockets by using an Ethernet switch. These will typically be a “dime a dozen” for a five-port or eight-port unit. There are also some HomePlug-Ethernet bridges that have a built-in four-port switch that are worth considering if you are setting up a HomePlug backbone.

Repurposing the old wireless router

If you upgraded your wireless router to a newer model, you will still have your existing router gathering dust. This can work as an access point but will need to be configured appropriately. You will need to disable the following functions:

* DHCP server

* UPnP Internet Gateway Device functionality (typically referred to as UPnP)

* Dynamic DNS functionality (if used)

As well, you will need to set the LAN IP address to something that is within your network’s IP address range but preferably out of the address pool used by the current router. The reason you have to take care of this setup is because there needs to be only one device performing “network-Internet edge” functions such as DHCP in a network and this device should be the one at the logical network-Internet border.

When you connect this router to the wired backbone, you use any of the LAN ports to connect the backbone. Never use the WAN port on this router for the wired backbone.

“3-in-1” HomePlug wireless access points

There is an increasing number of wireless access points that work with a HomePlug or Ethernet backbone. These devices, such as the Netcomm NP290W / Solwise PL-85PEW and the Devolo dLAN Wireless Extender, are as big as a compact “wall-wart” power adaptor used to power most electronic devices from the mains and plug directly in to the power outlet. They bridge between an 802.11g wireless segment (as an access point or wireless client bridge), a HomePlug powerline segment and a Cat5 Ethernet segment.

These units come in handy if you need to extend a wireless network on a temporary basis or simply if a compact device can do the job better than a large access point. They would come in to their own when you are using the extension access point to mitigate microwave-oven interference in the kitchen or if you want to extend the home network to a static caravan.

Configuring the access points

You will need to know the SSID and the WEP or WPA wireless security parameters that are operational for your network. These are the only factors that need to be common amongst all of the access points of the network. The reason that the SSID and security parameters are set to the same details is so that wireless client devices can roam between the different access points without any user intervention.

The radio channels for each of the access points have to be set differently to each other. It is a good idea to set the access point closest to the kitchen to Channel 1 if you have a microwave oven in that kitchen. This is because, from my research, most of the domestic-market microwave ovens work at 2450 MHz which is between Channels 8 and 9 on the 802.11g channel list. I had tried an experiment to see whether a microwave can upset a wireless-network “cell” that is tuned away from its operating frequency.

The wireless client devices

There is no need to reconfigure any of the wireless client devices such as laptop computers once you have set up the network according to the above instructions.

You will see an improvement in network performance when you operate your wireless client devices in areas where you barely could operate them. The signal-strength bar-graph that is part of your wireless client device’s network management software will register a stronger signal as the client device comes in to vicinity of the access points.

Conclusion

Once you have followed the steps in this article, you will be able to extend the effective coverage of your wireless home network or make your wireless network cover everywhere in your house even if it uses metal-based energy-efficiency measures or has thick brick or stone walls.


Feature Article: Multi-Building Home Networks

What is a multi-building home network

A multi-building home network is a home or other small network where network devices are used in at least two buildings on the one property. The idea is for the whole logical network to be pervasive in all or some of the buildings that are on that same property.

The network will end up comprising of multiple segments (physical network connections) that cover each building where network presence is desired. Then there are segments that exist to create a bridge for data to move between buildings.

What properties and situations is this kind of network relevant to

The situation where this network comes in to its own is where it is desirable to have the home office in another building such as a detached garage or barn, but also the same Internet bandwidth needs to be available in the home and the detached building. This is more prevalent with farms where the “office” is the barn and none of the farm business is transacted in the homestead.

The same situation can exist with properties where there is at least one cabin, bungalow or static caravan that is used for extra guests or older children. Here, it may be desirable to provide the same Internet access as what exists in the main house to these locations. This is important with older children who use these buildings as their private space for activities including playing online games. In a similar vein, the same situation may extend to the use of a cabana that is located by the pool or in the garden as a place to benefit from Internet access through the use of a portable computer.

Now that various manufacturers are making network appliances like Internet CCTV cameras or Internet-enabled games consoles that benefit from being part of a network, this concept of multi-building home networks is becoming a lot more relevant. Imagine being able to keep an eye on the valuables in the garage or livestock in the barn from a PC in the house; or the older son playing an on-line game on the Xbox 360 using XboxLive in the bungalow.

How does this kind of network operate

This kind of network consists of many different segments that exist to cover the areas being served as well as segments that exist to transfer data out to the area-specific segments. All the segments are joined using media-specific bridge devices like wireless access points, Ethernet switches, HomePlug-Ethernet bridges or simply the local-network connections of the typical wireless router.

This means that all network devices that are part of this network setup are on the same logical network or subnet. This means that if they ask for IP addresses,  they will get their IP addresses from the same DHCP server that is in the network-Internet “edge” router. They will also benefit from that router’s Internet gateway functionality and from resources made available to them by other network devices.

Techniques And Methods

Dedicated wire run 

The buildings may be linked by a direct wire, usually Category 5 / 6 twisted-pair copper Ethernet cable or fibre-optic cable. The fibre-optic cable is more expensive than copper-wire cabling, especially for smaller runs, but would suit installations where the buildings are a very long distance (3 kilometres) apart or there could be excessive electrical noise. On the other hand, copper-cable twisted-pair Ethernet can suit inter-building runs of up to 100 metres.

Both cables will need a dedicated run, which will typically require a trench to be dug between the buildings and the cable to be run in a conduit for best results. This work can be affordably done if you are running low-voltage communications cable like a telephone line between the buildings.

Each end of the cable run would need to have an Ethernet switch in the case of a copper-cable run or media converters in the case of a fibre-optic run. The Ethernet switches are just about a “dime a dozen” for a five-port or eight-port unmanaged 10/100Mbps unit suitable for small networks and a bit extra for Gigabit units. An existing switch that is part of your home network, such as the one built in to your router or used as a “hub” in your Ethernet-based home network can do the job equally as well as a dedicated switch. 

Wireless

This method uses a radio link as the means for data-transfer between the buildings. It is based on the use of 802.11a/g/n equipment, commonly known as WiFi equipment, which works at a theoretical raw data speed of 54Mbps for 802.11a/g and 248Mbps for 802.11n. The range where the speed will be maintained will depend on the wireless equipment used and the antennas (aerials) used with the equipment. Typically the bandwidth will taper off as the distance between the equipment increases.

Inter-building applications have typically used equipment that is capable of working with higher-gain directional antennas than what is typically supplied with the equipment and such equipment is typically installed outdoors with an Ethernet cable used for bringing data in to the buildings.

It can involve the use of “shared WiFi” where remote buildings are equipped with wireless client bridges that are pointed towards the wireless access point installed in the main building. This same method permits WiFi use by portable devices used in or near the main access point, but requires different SSIDs for access points used in remote buildings.

Another method is to use a dedicated wireless link for building-building data flow. This can be achieved through the use of multi-function access points that are set up as “wireless bridges”. This wireless link wouldn’t be able to be used by portable devices for wireless network access.

Yet another method that works with some wireless access points and wireless routers is to use Wireless Distribution System. It allows the member devices to become wireless-segment repeaters, thus expanding wireless segment coverage and becoming an Ethernet bridge for the data. Portable devices can roam amongst the stations as if they are moving around an “extended service set” collection of access points with a wired backbone.  At the moment, the setup doesn’t permit true fault-tolerant signal meshing without bandwidth starvation, but can do a fair “hands-off” job of extending the “extended service set”.  

Non-dedicated wire run 

This method uses wires that are used to provide an existing service to the building rather than a dedicated wire run. It avoids the need to spend money on costs associated with running that dedicated wire, such as trenching and conduit runs, while avoiding the need to dig up established landscape.

There used to be two methods based around this concept but the most common one would be the HomePlug system which uses the infrastructure that is used to provide AC power to appliances that are used on the property. It is often marketed as a “no-new-wires” backbone for establishing new networks but can be used as a supplementary segment for existing networks. This is typically promoted through the small “infill” access points like the Netcomm NP290W which plug in to the wall and provide extra coverage for an existing wireless network.

It can work effectively in most residential, small-office and rural properties because they are often wired to the one general-purpose electricity service from the head transformer. This is typically exemplified with the property having one “common-tariff” electricity meter accounting for all the “common-tariff” electricity used on the property. It may not work if any building, like a bungalow, has been metered separately because, in most situations, the different services may have been derived from different phases.

Some sites may, because of inter-building wiring distance, require the HomePlug segment to be pushed out further. This situation is typical of buildings that are used as a “go-between” wire point for other buildings or static caravabs. This involves the creation of extra HomePlug segments for the remote buildings.

This is achieved by the use of 2 HomePlug-Ethernet bridges connected to each other by an Ethernet patch cord or Ethernet switch and installed close to the building’s AC switch board or fuse box.

One of the bridges is configured to use the Network Password (segment identification name for a HomePlug network, equivalent to an SSID for a WiFi wireless network segment) of main segment, while the other uses a new Network Password representative of the new segment. Remote HomePlug devices use new Network Password.

The appropriate method

Working From Scratch

You may be building the outbuilding from scratch or doing extensive renovations to an existing building, which involves work with the electrical circuits in the building. This includes running AC wiring to and establishing AC circuits in an existing building that has no AC power. In this case, you may want to “cover all your bases”, especially if you are dealing with a garage, barn, bungalow or cabin where the building is going to be a point of activity. This means running a dedicated wire run between the main building and the outbuilding. The materials that you use may depend on your budget that you allocate for the project.

This option can work very well in making maximum value from your tradesmen who are doing any cabling work on the project. If cost is an issue, you may have to use HomePlug as your inter-building link.

Existing Buildings

For existing buildings, especially on properties where there is established landscape, you will need to use either a wireless or HomePlug link.

If you prefer to run a wireless link, it may be preferable to use wireless infrastructure hardware which works with third-party antennas and is capable of working outdoors.

HomePlug can also and has been known to do a more reliable job as a building-building link in this context than wireless. This is more true of buildings that are made out of metal such as the “quick-assemble” garages and sheds because the metal frame and / or walls do block or limit the transmission of radio waves.

Static Caravans

Typically these vehicles are capable of being moved around the property at a moment’s notice. Most of the time, these vehicles are hooked up to the nearest power outlet on the property using a long high-current low-resistance extension cord. This is often to enable use of interior lights and appliances that are plugged into power outlets that are installed in the vehicle. Also, this practice allows one to use the gas-electric fridge that is built in to the vehicle with it running off AC power rather than gas or the vehicle’s 12 volt battery.

A highly-reliable method of bringing the home network to these vehicles would be the HomePlug power-line link. This technology would be suited to the job because of the metal-based construction of the typical post-1950s caravan or campervan which can interfere with wireless inter-building links. The HomePlug access points like the Netcomm NP290W can work effectively in this situation by providing a strong wireless signal within the metal walls of these vans while using the power link as the data run.

Conclusion

As governments and Internet service providers make an effort to provide less-dense communities like the country and outer-urban areas with broadband Internet access, the idea of extending the home network beyond the main house on a large property will be very real. This article has explained how this idea can be achieved with the existing technology.