Tag: Apple MacOS X Lion

Apple AirDrop has a compatibility mode to cater to older Macs

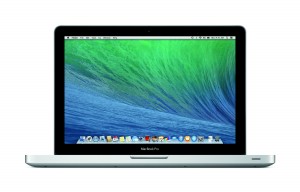
Article Apple MacBook Pro running MacOS X Mavericks - press picture courtesy of Apple
AirDrop Not Working? Use Compatibility Mode for New Mac to Old Mac AirDrop Support | OS X Daily

My Comments

You have two Macintosh computers with one running an older version of MacOS X. Then you want to try that AirDrop file-transfer lark that Apple encourages for its platforms.

Here you may find that your Macs can’t “see” each other on AirDrop. What can you do?

You may have to run AirDrop on the newer Mac in a “compatibility mode” that allows it to behave properly for older interations of Apple’s file-transfer utility.

  1. To do this, you have to open a Finder window on the Macintosh running the latest OS X version.
  2. Then you choose AirDrop on that same Mac and make an attempt to discover older Macs that are enabled and “exposed” for AirDrop. A quicker way in would be to press Shift+Command+R together to start your AirDrop session.
  3. The result will be that AirDrop will show up Macs and iOS devices running suitable versions of their operating systems and open for discovery. If you don’t see the Mac you are looking for – the one which is running an older operating system, click the “Don’t see what you are looking for” text. This will pop up a dialog box with an option to “Search for an older Mac”.
  4. Clicking this will place your Mac in to “compatibility mode” which allows it to discover older iterations of AirDrop. Here, you wait a moment and your newer Mac will show up the Macs running the older operating system as an AirDrop target (destination). Then you begin your file transfer.

If you intend to transfer files between newer Macs or iOS devices, you need to disable compatibility mode. Here, if you are performing a subsequent AirDrop file-transfer and your Mac says that it is looking for older Macs, you just click “Cancel” then look for targets that are based on the new OS X or iOS operating systems.

I would recommend using the Compatibility mode if you are in doubt about the version of OS X the Mac you want to transfer files to or from to is running and you are not sending or receiving files from an iPhone or iPad.

What to do if the App Store gives your Mac the Dreaded Beach Ball

Article

Tackle a hung App Store update in OS X | MacFixIt – CNET Reviews

My Comments

You have that Macintosh computer running with Apple’s App Store as your preferred download spot for programs. But you notice that the Mac is not being its usual self while you are running an App Store update or download. It starts to show that dreaded “beach ball” for ever during the update process while nothing is happening. This means that the App Store client application is hanging and effectively slowing down the rest of your system.

The main problem that can lead to this typically are about the App Store working with corrupted files in its folders as what happens with any computer programs. This encompasses where the installation packages are held after they are downloaded as well as any temporary files that the App Store creates. The folders will exist on the “Macintosh HD” secondary storage location which is the main storage location for all of your Mac’s programs and data.

Here, when you notice this behaviour, you would have to “force-quit” the App Store application. Either this is done by selecting “Force Quit” from the Apple menu or pressing CommandOptionEsc on the keyboard. You could also “force quit” from the Dock by using Option-Right-Click on the unresponsive application’s icon. After you have done this, the Mac should be more stable by now.

Dealing with the corrupted data

Installation package folder

Then you would have to use Finder to clear out the App Store Updates folder which is at Macintosh HD/Library/Updates. This is where the software update or download packages are held by the App Store before being installed. Once you clear this folder out, it means that the App Store application can draw down fresh “known-to-be-good” install packages from the iTunes App Store.

Temporary and “work” files created by the App Store

Another location that you may have to clear out are the App Store Caches. These represent the temporary files that the App Store application creates as it goes about its work.

Here, you run Terminal and type in: “open $TMPDIR../C” to expose the “cache” folders where data that the App Store needs for speedy operation exists. In this window, look for folders that begin with “com.apple.appstore” and remove these folders.

You also go back to Terminal and type in “open $TMPDIR../T” to expose the temporary-file folders. Here, you look for the folders that begin with “com.apple.appstore” and remove them.

The App Store will take longer to start as it re-builds the cache and temporary files with the fresh “known-to-be-good” data.

Permissions fix for the system resources

This is another area that could house corrupt data and could generally affect your Mac’s stability. It is because the information about the permissions required by the applications to use system resources is kept as data on the Macintosh HD.

Here, you use the Disk Utility to do this task. You select the Macintosh HD in this program’s sidebar and click “Repair Permissions” in the “First Aid” tab to start it repairing any corrupt system-permissions data.

Tips to avoid this problem

If you are using a Wi-Fi wireless LAN connection or a mobile-broadband connection, and you intend to do a lengthy App Store update, make sure that you are getting a consistently strong signal from the wireless network. This is because a poor or inconsistent wireless signal could lead to an increased risk of failed downloads.

As well, it may be a good idea to have your MacBook connected to external power while you are doing a lengthy update. This avoids the risk of a failed download occurring because the battery is on the way out.

Here, you could confine the App Store software updates to your home or workplace so you can be sure of a smooth update scenario.

Setting up Apple iChat for Facebook Chat and Messaging

Windows users have been able to use the Facebook Messenger as a desktop option for gaining access to Facebook’s chat and messaging features. Similarly, users of the iOS and Android mobile platforms have benefited from having access to the Facebook Messenger app as a dedicated path to this same service.

But how can you gain full-time access to the Facebook chat and messaging functionality on your Apple Macintosh without the need to open your Web browser? You can when you use the iChat software that is integrated with the Mac OS X operating system.

Here, the Mac has to be equipped with iChat AV 3 or later which is part of the operating system from 10.4 Tiger to 10.7 Lion. It will provide an “always-live” messaging and “green-dot” presence feature that you would expect with the Web-driven Facebook messaging interface.

  1. To set this up, you click on the “Preferences” item in the iChat menu.
  2. Click on the “Accounts” option in this window, then click the + icon at the bottom of this window as if you are adding a new iChat account.
  3. Select “Jabber” as the account type.
  4. Supply the credentials as:
    Screen Name: <Your_Facebook_User_Name>@chat.facebook.com
    Password:<Your_Facebook_Password>
  5. For the Server Options, make sure that “Automatically find server name and port” option is checked. If this doesn’t work, you may have to fill in “chat.facebook.com” in the Name and 5222 in the Port for the Server details
  6. Then click Done to add the account.

For this acoount to work automatically, you have to select the “Enable this account” and “Log in Automatically” options for it to log in and show you as online when you use your Mac. Here, you will see the list of all the Facebook Friends who are currently online with that green dot.

MacOS X users can now consolidate multiple cloud-based notes storage services in one app

Article

Notesdeck Consolidates Evernote, Dropbox And iCloud Notes Into One App | Lifehacker Australia

My Comments

Some of us may start using the cloud-driven notes storage services like Evernote or Dropbox. This is due to the ability for us to gain access to the material we create on these services from any regular or mobile computing device.

But we can be encouraged to create accounts with more than one of these services, such as through a service provider having a presence on our new computers; or our colleagues, relatives or friends recommending a particular service to us. In some cases, we may exploit a particular service as a data pool for a particular project.

Subsequently we end up with multiple “front-end” links to different cloud-based storage services on our computers and end up not knowing where a particular piece of data is held – is it on Dropbox, is it on Evernote, is it on iCloud or whatever.

Now someone has written a MacOS X app that provides the same kind of interface and useability to these cloud-based services that an email client provides to most email services. In the Apple Macintosh context, Apple Mail would be able to allow you to set up multiple email accounts such as your SMTP/POP3 mailbox your ISP gave you, your Exchange account that work gave you as well as your GMail account that you set up as a personal account.

At the moment, the software called NotesDeck, sells for $11.49 but according to the review, there needs to be a few improvements. One that was raised was that entries are listed for services that you aren’t set up with. This is compared to the typical email client that doesn’t list service types that you don’t have presence with. It could be rectified properly if the software could use a provisioning user experience similar to the typical email client where you click on “Add Account” to create details about the mailbox you are integrating to your client. 

Of course, I would like to be sure that this program does allow you to transfer notes between accounts and also between local resources such as your word-processing documents. This may be important if you intend to consolidate your cloud-based notes services towards fewer services or copy the notes out to the magnum opus that you are working on.

Similarly, the program could be ported to the Windows platform or to the mobile platforms (iOS, Android, Windows Phone 8) so that users who use these platforms can have the ability to work the multiple accounts on their devices using one program.

Your new MacBook Air or MacBook Pro being thirsty on the battery? Check for software updates

Article

Apple releases fix for increased power consumption in new MBP and MBA | ZDNet

From the horse’s mouth

Apple – Software Download (direct)

My Comments

You may have just bought the Retina-based MacBook Pro or a Macintosh laptop over the past year but have noticed that you always have to run it on AC power rather than on battery. In some cases, you may have noticed that the fan in the computer is running more than it should.

This has been discovered by Apple as a firmware bug and they have prepared a software update to rectify this problem. This bug is allowing the CPU in the MacBook to run harder than it really needs to, thus allowing it to draw on more power and yield more heat. The software update also improves operating-system compatibility with certain USB devices which may also help with the stability of the system.

This software update is available at Apple’s Website or through the Software Updates panel in MacOS X Lion. Infact, if you have just bought a Mac laptop, I would recommend that you visit the Software Updates option and deploy this and other important updates to your Mac.

Apple has now released a software fix for the Flashback trojan

Articles

A look at Apple’s Flashback removal tool | MacFixIt – CNET Reviews

Apple releases fix for Flashback malware | Engadget

Downloads – Apple’s support Website

Java Update for MacOS 10.6

Java for MacOS Lion

My Comments

Apple has reacted to the groundswell of concern about the recent Flashback malware and have issued updates to its Java runtime environment for both MacOS Snow Leopard and Lion.

Here, they have implemented a check-and-remove routine for this Trojan as part of the installation routine for the new Java runtime environment. For most Macintosh users, this will simplify the process of removing any existence of this malware as well as keeping this runtime environment up-to-date.

The CNET article also gave a detailed review of what goes on as well as how to fix situations if the installation takes too long and the procedure hangs. As I have posted previously, Apple could improve on the issue of providing system maintenance and desktop security software so that Mac users can keep these systems in good order.

You can create a removable recovery disk for MacOS X Lion

Article

Apple releases Lion Recovery Disk Assistant, asserts its dominance over Snow Leopard | Engadget

Resource Links – Apple Support

Apple Lion Recovery Disk Assistant

Further Details

My Comments

Now that Apple are distributing the “Lion” version of the MacOS X operating system in an online manner, you may think of how you may be able to do a bare-metal recovery of your Macintosh computer. This is where the computer has a hard disk on board but it doesn’t have the operating system to work from. This is because there is no physical disk that came with the upgrade which you can install from when you need to reinstall the operating system.

Now Apple have provided a recovery disk program that allows you to create the recovery image on to an external disk like a USB memory key or a USB external hard disk. It avoids the need to reuse Snow Leopard (which may be on an install DVD) in order to download Lion again as part of the recovery process.

Normally, an upgrade to MacOS X Lion would create a recovery partition on the Mac’s system disk. This wouldn’t be good enough if that hard disk crashed. When you run this utility, you create a copy of the same recovery partition on an external disk which you can then boot from during a bare-metal install or system rebuild.

Like the internal copy, this would allow you to do a “ground-zero” OS install, reinstall from a Time Machine backup, use MacOS Disk Utility to check and repair the hard disk as well as use Safari to visit Web-based resources.

When you prepare the Recovery Disk, you would have to create a separate partition (logical disk) on the same USB physical disk which should be greater than 1Gb. As well, the Mac should have a Recovery HD partition created on it during the Lion OS install or upgrade. This is because the Recovery Disk Assistant formats the drive to create the partition. As well, the partition will be hidden from view when you use the file-system utilities like Finder or Disk Utility.

It will come in to play when you have the external disk connected to the Mac and you reboot it while holding down the Option key. Here, the new Recovery partition will be listed as an option in the Mac’s “Startup Manager” boot menu.

Apple’s update to the MacOS X platform–a more visible update

When Apple launched the “Snow Leopard” version of the MacOS X platform, there were initial doubts expressed in the computing press about Apple Macintosh users upgrading their existing equipment to this newer platform. The doubts that were expressed were primarily directed at the operating system not exposing new functionality at the user interface. This was because a lot of the work was done “under the hood” through a code rebuild for the Intel processors.

Over the past two years that I have seen MacOS X “Snow Leopard” in the field; I have talked with various Macintosh users about how their computer has fared under it. There have been some users who have bought it pre-installed on a new Macintosh-platform computer or have upgraded their existing Mac to this platform. Remarks I have heard included relative performance improvement as well as a reduction in the disk space required for the operating system compared to prior versions of the MacOS X platform.

This year sees the imminent release of the “Lion” version of this same platform, where there has been a lot of key changes and improvements made to the operating system. Examples of these functionality improvements included: enabling the Macintosh platform for touchscreen use, the implementation of “full-screen” operation for Macintosh applications without the need to have the Apple Menu Bar in view all the time; a multi-window view of all the currently-running programs; an iOS-style icon screen for all the programs installed on the Mac as well as the previously-mentioned iTunes App Store for the Macintosh.

What it seems like for me is that Apple have decided to take the job of improving the Macintosh platform in to two stages; the first one being primarily an “under-the-hood” effort which culminated with “Snow Leopard” and the second one with all the user-visible improvements culminating with “Lion”.

If you intend to upgrade your Macintosh to the “Lion” version, you will need to make sure it is based on an Intel Core-based or Xeon-based processor which means most relatively-recent Macs; and runs the latest version of “Snow Leopard”. The upgrade will be available as an electronic download available at the App Store for US$29.99 and downloads straight to your Mac.