Tag: Apple iPhone

Apple to implement RCS messaging in iPhones

Articles

The Apple messaging app on your iPhone will support RCS messaging as a fallback platform in 2024

Apple announces RCS support for iOS. What does this mean for green vs. blue bubbles? | Mashable

Messaging Between iPhones and Android to Get So Much Better Next Year (droid-life.com)

Apple iPhones will support RCS starting 2024 but green bubbles will remain – SamMobile

My Comments

RCS Universal Profile messaging is a rich open-frame messaging standard defined by GSM Association that follows on from SMS and MMS messaging. This allows for IP-based text messaging and offers features typically associated with over-the-top messaging platforms like WhatsApp, Facebook Messenger, Signal or Apple’s iMessage. But it allows mobile-phone service providers to offer these kind of features.

Android has provided inherent support for this messaging system as part of Google’s and Samsung’s messaging clients. But Apple was determined to use their own iMessage platform as the preferred messaging platform for iPhones or iPads. If you as an Android user communicated with someone who uses an iPhone, your messages would go through as an MMS message.

This wouldn’t have the rich messaging abilities of either RCS or iMessage and your messages come through as green bubbles in the conversation flow. Photos and videos would also appear at lower resolutions which may not do them justice. In some cases, people who want to engage in rich messaging with Apple users would end up resorting to WhatsApp, Signal or a similar platform.

Sometimes Apple fanbois see the green bubble as an indication that their correspondent is “not in the program” because they aren’t using an iPhone, with some tech and general press describing the green bubble as a “scarlet letter”. Recently Google and Samsung have been putting pressure on Apple to implement RCS messaging in iMessage including shaming Apple in front of industry peers. This is similar to how Apple products, especially iPhones, have been seen as status symbols.

As well, the European Union enacted their Digital Markets Act which is seen as a way to significantly regulate Big Tech and their market power. There was further interest amongst the tech press about having the European Commission use this law to enforce Apple to implement RCS messaging on iPhones and iPads. This is after the success that the European bureaucrats had with forcing Apple to install USB-C power-data connectors on the iPhone 15 in lieu of Apple’s preferred MFi Lightning connectors, with this connection appearing on the iPhone 15 family and newer iPhones offered around the world.

The RCS messaging feature will work as a fallback cross-platform messaging platform for sending messages to non-Apple devices. This is while the Apple iMessage platform continues to exist as the preferred messaging platform amongst Apple’s own platforms. That will still mean that Apple users appear in a conversation stream as blue bubbles while other platforms appear as green bubbles.

This feature will be expected to start sometime in 2024 and most likely be issued as part of a new major version or “point” update for iOS where functionality is introduced to the operating system, rather than a software-quality / security update.

iTunes downgrade to permit tethered iOS app deployment–Apple could do better here

Article

iTunes Store

iTunes losing its ability to install software to iOS devices from version 12.7 onwards

Apple Releases New iTunes 12.7, What You Should Know | AppleToolbox.com

My Comments

An issue that will face iOS device users who make use of the iTunes desktop media-management applications is that starting from iTunes 12.7 onwards, they won’t be able to upload iOS apps from their regular computer to their iOS mobile device in a tethered manner using this software. This is in addition to omitting the iOS App Store from the iTunes Store shopfront integrated in iTunes. It is also part of a direction that Apple is enforcing with iOS where you manage your iPhone or iPad from its screen and update its software “over the air”.

Apple iPad Pro 9.7 inch press picture courtesy of Apple

Apple could still provide desktop management of their iOS devices through separately downloadable software

Tethering is where you connect a computing device that can normally function alone to another computing device, typically a regular computer, by a wired connection. This is typically to allow a smartphone to be a modem for a regular computer or to transfer data stored on one device to the other device. In this case, it is to transfer iOS apps stored on your regular computer running macOS or Windows to your iPhone, iPad or iPod Touch that you have connected to the computer.

But there are people who use a Mac or Windows regular computer to deploy iOS software to iPhones and iPads. For example, in your business or household, you may want to deploy the same app to multiple iOS devices and want to save bandwidth by caching the app to your regular computer’s hard disk then deploying the same app by tethering each iOS device to your regular computer. As well, some of us may use this as a way to get around a dodgy Internet connection by downloading to a laptop used at a location with known-to-be-good Internet service then deploying where it’s more convenient.

Apple offered a make-do update for iTunes by offering the iTunes 12.6.3 software. This has the feature set associated with iTunes 12.6 including access to the iOS App Store and tethered app deployment for iOS devices. But it has under-hood improvements which allow it to work with iOS devices that are running iOS 11 or newer versions. This is alongside iTunes 12.7 which is focused as a media-management tool and iTunes media storefront.

Personally, I would like to see Apple approach this situation in a better manner for both the Mac OS and Windows operating systems. This would be in the form of a separately-installable “iOS-desktop-manager” program that provides add-on functionality to either the Mac OS operating system for Macintosh computers or to the iTunes Windows port. It would at least provide desktop access to the iOS App Store along with tethered app deployment for iOS devices.

As well, the “iOS-desktop-manager” program could provide device backup and management abilities so you could do things like backup an iPhone or reset a faltering iPod Touch. This is more so where the Wi-Fi or wireless-broadband modem in an iOS device or its network connection can be a point of failure and it isn’t realistic to restore from an iCloud backup if the iOS device’s Wi-Fi is so slow or intermittent.  Similarly, using something like your local backup infrastructure such as your NAS or a USB external hard disk of your own means that you aren’t necessarily ceding control of your mobile-created data to others, something that can be of importance when it comes to privacy.

Controlling Wi-Fi and Bluetooth on your iOS 11 device

Articles

If you can’t manage your iOS 11 device’s WiFi or Bluetooth from the Control Center, you may have to go to the Settings App.

iOS Control Centre’s Wireless Toggles Don’t Turn Off Wireless Radios | Lifehacker Australia

My Comments

Apple has just rolled out iOS 11 as an update for your iPhone’s or iPad’s operating system and, as expected with “.0” versions of operating systems’ major functionality updates, there will be a few bugs and issues here and there. This is typically due to Apple, like other software vendors, rushing the major-functionality version of the software out the door to satisfy the vendor’s marketing team’s needs. In this case, the goal here is to get the new iPhone X and new iPhone 8 range, which will be loaded with this operating-system version, ready to sell to the crowds queueing outside the Apple stores and mobile phone retailers on the day they are released i.e. 22 September for the iPhone 8 and 8 Plus, and 3 November for the iPhone X.

One of these is the inability to manage Wi-Fi and Bluetooth from the Control Center on your iOS device even though the buttons do exist there to enable and disable this function. Here, you may want to disable one or both of these functions for your privacy when in the vicinity of Wi-Fi networks you don’t trust, to save battery runtime when you are not connected to a Bluetooth peripheral or a Wi-Fi network or simply as part of troubleshooting a Wi-Fi network or Bluetooth peripheral connection.

The symptom shows up in the form where pressing the Wi-Fi or Bluetooth icons in the Control Center has no effect on the Wi-Fi or Bluetooth functionality. But you can work around this by going to the Settings app on your iOS device. Then you tap on WiFi or Bluetooth to select the appropriate function you want to control.

Disable the appropriate function by sliding the switch to the Off position whereupon you will see no references to Bluetooth or Wi-Fi activity and the green marker will disappear. Or enable the appropriate function by sliding the switch to the On position where you will see the green marker appear and references to the Bluetooth or Wi-Fi activity appear.

Of course, keep an eye on the Settings app for newer “point-release” versions of the iOS operating system and update your iOS device with these newer versions as they arrive. Here, these versions will typically rectify bugs, security exploits or weaknesses that become knowledge to Apple.

Facetime on the big screen with Apple TV

Old lady making a video call at the dinner table press picture courtesy of NBNCo

You can have a FaceTime videocall on the big TV screen with your Apple TV

Those of you who use an iPhone or iPad and have contacts that use these Apple iOS devices will no doubt have engaged in a Facetime videocall at some point. Facetime is Apple’s own over-the-top VoIP / videocall platform that works alongside the their iMessage messaging / presence platform.

But you may want to use the big screen for a Facetime videocall. This may be to have a large group like your family participate in the videocall with a distant relative or friend or you may find that the large screen offers you a way to see your correspondent easily and comfortably. How do you do this?

Apple iPad Pro 9.7 inch press picture courtesy of Apple

The AirPlay network-based video-streaming method brings more utility to the Apple iPad

The same instructions will also apply with people who use any other mobile-messaging platform that uses an iOS client like Skype or Facebook Messenger, especially where the platform offers videocalling or video messaging functionality.

Most likely, you will have purchased an Apple TV set-top box perhaps to use the iTunes video-on-demand services or use its Netflix or other video-service front-ends. This device can also earn its keep in bringing Facetime to the big screen.

This Apple TV device exploits Apple’s Airplay network-based streaming protocol especially for video applications and will work alongside any iPhone or iPad running a version of iOS newer than iOS 5. Both these devices need to be on the same logical network as each other, which is simple for most home and other small networks looked after by one router.

How to have Facetime on the big screen

  1. Start a Facetime session on your iPhone or iPad as you normally would and advise the caller you will be linking to the big screen
  2. Double-click the Home button to bring up the “Fast Application Switcher” and select the iOS Home screen then expose the control panel by “pulling up” from the bottom of the screen
  3. Tap Airplay button and select Apple TV as your AirPlay target device and enable AirPlay mirroring

    Apple TV - Mirroring on - iPad

    Set up iPad for mirroring to Apple TV

  4. Switch back to Facetime by double-clicking on the Home button and selecting the Facetime window which should be the last or second-last window.
  5. Continue your call but see your caller on the big screen and hear them through the TV’s speakers. You may find it easier to place your iPhone or iPad atop or in front of the TV screen for natural conversation.

When I was doing research on this topic, I noticed that commentators were raising the idea that Apple could integrate Facetime in to the Apple TV platform in a similar way to how some smart-TV manufacturers integrated Skype in to their smart-TVs and video peripherals. This would be in the form of supplying a camera kit as an optional accessory or describing one of these kits as part of the MFi peripherals program that Apple runs along with developing a Facetime app for the Apple TV.

You can have Night Shift and Low Power modes together on your iOS device

Article

Use Night Shift Mode And Low Power Mode On iOS At The Same Time With Siri’s Help | Lifehacker

Video – Click to view

My Comments

Apple introduced in to iOS 9.3 the “Night Shift” mode which tints the iPhone’s or iPad’s display to a yellow colour to allow you to sleep better at night. But you can’t invoke this function on your iOS device if you are running it in Low Power mode to “spin out” your battery runtime or facilitate quick charging.

But the video accompanying the article has shown that there is a way to have both these functions working together. This is through telling Siri, Apple’s voice-driven personal assistant for the iOS platform, to “turn on Night Shift”. Once you tell Siri to do this even though your iOS device is in Low Power mode, it will switch the display to Night Shift mode. You can regret this change by telling Siri to “turn off Night Shift”.

Personally, I would improve on this through a point upgrade by allowing both functions to work together and, perhaps, using Night Shift as a “master command” to optimise your iOS device for evening and night-time use such as reducing sound output or invoking Low Power as a way to run your iOS device on reduced power overnight.

I would see it lead to Apple offering a selection of situation-specific operating modes that affect display, sound and other operational parameters with the ability for users to vary the parameters themselves. Users could at least invoke these modes through an app or the Settings function. But this could be taken further by them asking Siri to invoke these modes or the modes coming in to play under certain conditions like time periods.

The Nickname field is now of use for mobile assistant platforms

Article

Samsung Galaxy Note 2 smartphone

Android and iOS can support contacts’ nicknames with Google Now and Siri

Use Nicknames With Siri And Google Now To Reach Contacts Faster | Gizmodo

My Comments

Most smartphone operating systems have in their contact list a field called “Nickname”. This is typically of use when you have a personal nickname, relative-shortcut name like “Mum” or similar name for a contact. But in most cases, this field isn’t shown up on call logs or contact lists.

Now Siri and Google Now make use of the Nickname field to interpret instructions to call particular people. Google Now does provide inherent support for relationship-shortcut names but you can use the Nickname field for manually determining a contact’s nickname. Both voice assistants can query which person a nickname pertains to which can come in handy if you are calling one of many siblings or someone with an obscure nickname or a nickname that is spelt a certain way but pronounced another way.

How could this be improved upon?

Nicknames appearing in the contact-display context

At the moment, the nickname functionality only works in the contact-search context but I would like to see it also work in the contact-display context especailly when a call or text comes in from the contact or you browse through your contact list or recent / missed call logs. This could be facilitated through the use of a “Display As” field which shows a user-chosen field or combination of concatenated fields for a particular contact.

Support for a phonetic representation of a nickname

These systems could support the ability to store a phonetic representation of a nickname which can come in handy when you say that nickname one way but have it written another way. The phonetic representation would be used for voice-based search and voice-based call announcements.

Security issues with nicknames

Nicknames may expose security issues when they fall in to the wrong hands. It is because people use these nicknames as a “password” or “word of trust” within their community.  But confidence tricksters using familiar nicknames as a way to “get in to someone’s mind” and have them acquiesce to their inappropriate scheme. In some cases, a nickname that is a symbol of endearment may be used as a weapon against one or both of the participants.

Having nicknames as a “secure” field which is only shown to trusted users is important to preserve this kind of security. For example, if a phone shows a list of missed calls or text messages on the notification screen, it could show a standard “first-name last-name” or “company-name” while locked but show the nickname while unlocked. Similarly, voice-level biometrics can be used to authenticate a user who is “searching by nickname” using a voice-based personal assistant.

Further improvements needed for phone contact lists

Handling of common phone numbers

Another area where a lot of contact list programs miss out on is handling phone calls or other communication that comes in from pbone numbers, emails or other contact addresses common to two or more contacts.

The most common example is a landline phone number that serves as a “catch-all” number for a household, workgroup or business. In this case, you may instruct the voice assistant to call a person on that landline by saying “person-name Home” or “person-name Work” or something similar. This will place the call to that landline. The same thing will happen if you contact someone else who lives or works behind that common phone number.

The problem rears its ugly head when a call comes in from that phone number or you review your call logs and you see the first alphabetically-listed contact related to that “catch-all” number even though other contacts in your contact list are behind that number. Here you don’t know whom it was who called you or whom you placed that call to.

This could be facilitated using a dynamically-concatenated display field for phone numbers with something like [<company-name>(caller-name-1. caller-name-2, or caller-name-n] for callers with a populated company-name field; or [caller-name-1, caller-name-2 or caller-name-n] for callers missing a company-name field i.e. households. Or you may create a dedicated contact entry for the “catch-all” phone number such as a distinct “name-address-number” entry for a company or household. Then you add “common fields” like work number, home number or company name to the entries associated with the people with that same “roof” in common. The name associated with the dedicated contact entry shows up in the call log when you call that number or on your phone’s screen when they ring you from that “catch-all” telephone.

Conclusion

At least something is being done to make sure that the contact management software and voice-activated personal assistant software  is tied in to how we view our contacts so we see our contacts our way.

You can set your iPhone or iPad to update iOS overnight

Article

Automatically Install iOS Software Update in the Middle of the Night | OS X Daily

My Comments

Those of you who run an Apple mobile device i.e. the iPhone, iPad or iPod Touch will end up keeping iOS which is the device’s operating software updated. But you may find that the software update will have your device out of action while it is downloading or installing.

Why can’t this be possible for that iPhone to be updated to the latest iOS version while I am asleep? You can achieve this goal.

What does your iOS device need?

Backing up device data

You need to back up your iOS device’s data, preferably to the iCloud incase something goes awry during an update such as a bad download. Here, you cam manually backup the device to iCloud over-the-air or to iTunes on your regular computer. Or you can set up iCloud to automatically backup your iOS device every night.

The backup will save your device’s app list, local data held by your apps, user credentials associated with online services where you use a native-client app, your email setup details and, most importantly, your Camera Roll.

Setting up your device

Power

Your iOS device needs to be connected to an AC power source as if for charging. You may think that you may get away with an external battery pack but you are never sure if they are in a position to last the distance, so it is a better idea to stick with an AC charger.

Wi-Fi

As well, your would have to connect your iOS device to your Wi-Fi network. If you are dealing with a public-access network that implements Web-based login like the one in your university’s residence hall / dorm or your favourite hotel or B&B, make sure your iOS device is logged in to that network with the “login-confirmed” page kept open in Safari. With these networks, you could enable both the “Auto-Join” and “Auto-Login” functions so that you stay logged in on the networks.

Similarly, if you make a habit of shutting the Wi-Fi or Internet off overnight, either to save money or protect yourself from perceived radiation dangers, you would need to keep the Wi-FI and Internet on to facilitate this update.

Start overnight updating

When you see the “Software Update” reminder screen pop up, select the “Later” option.

This will offer you an option to remind you later or install the update tonight. Select the latter option for overnight installation to commence.

Your iOS device will commence downloading the latest version of the iOS operating software at a time between 2am and 5am and then deploy that software. This will involve the iOS device power-cycling so as to fully “cement” the new operating software.

Web page on a big screen–How?

Facebook and Dropbox desktop

You may want to use the large screen to show people how to use social media to promote their business

Do you want to show that Web-based resource to a large group of people?

You may want to do this as part of training for concepts like social media, Web analytics and the like. Perhaps, you may want to show a particular blog post to a group or even show pictures and video from a Website or video platform but the device doesn’t have native support for that.

There are two different methods of going about this:

  • Mirroring – you see the same display on both the device’s screen and the large screen
  • Extended or Dedicated View – you can see what you want to show on the large screen but have a minimal control view on your

I will be listing the options available to you by the different equipment combinations.

Using your home or other small network

This involves using devices that connect to your computer via your home or other small network.

The common requirement for these setups is that the set-top device connected to your display and your host computer must be on the same logical network. It doesn’t matter what medium (Wi-Fi wireless, Ethernet or HomePlug powerline) is used to connect the host computer or the set-top device to your network.

This setup may not work properly if you are attempting to use a public-access network to connect your set-top device or host computer and this network implements Web-based authentication.

iOS + Apple TV

Equipment Requirements:

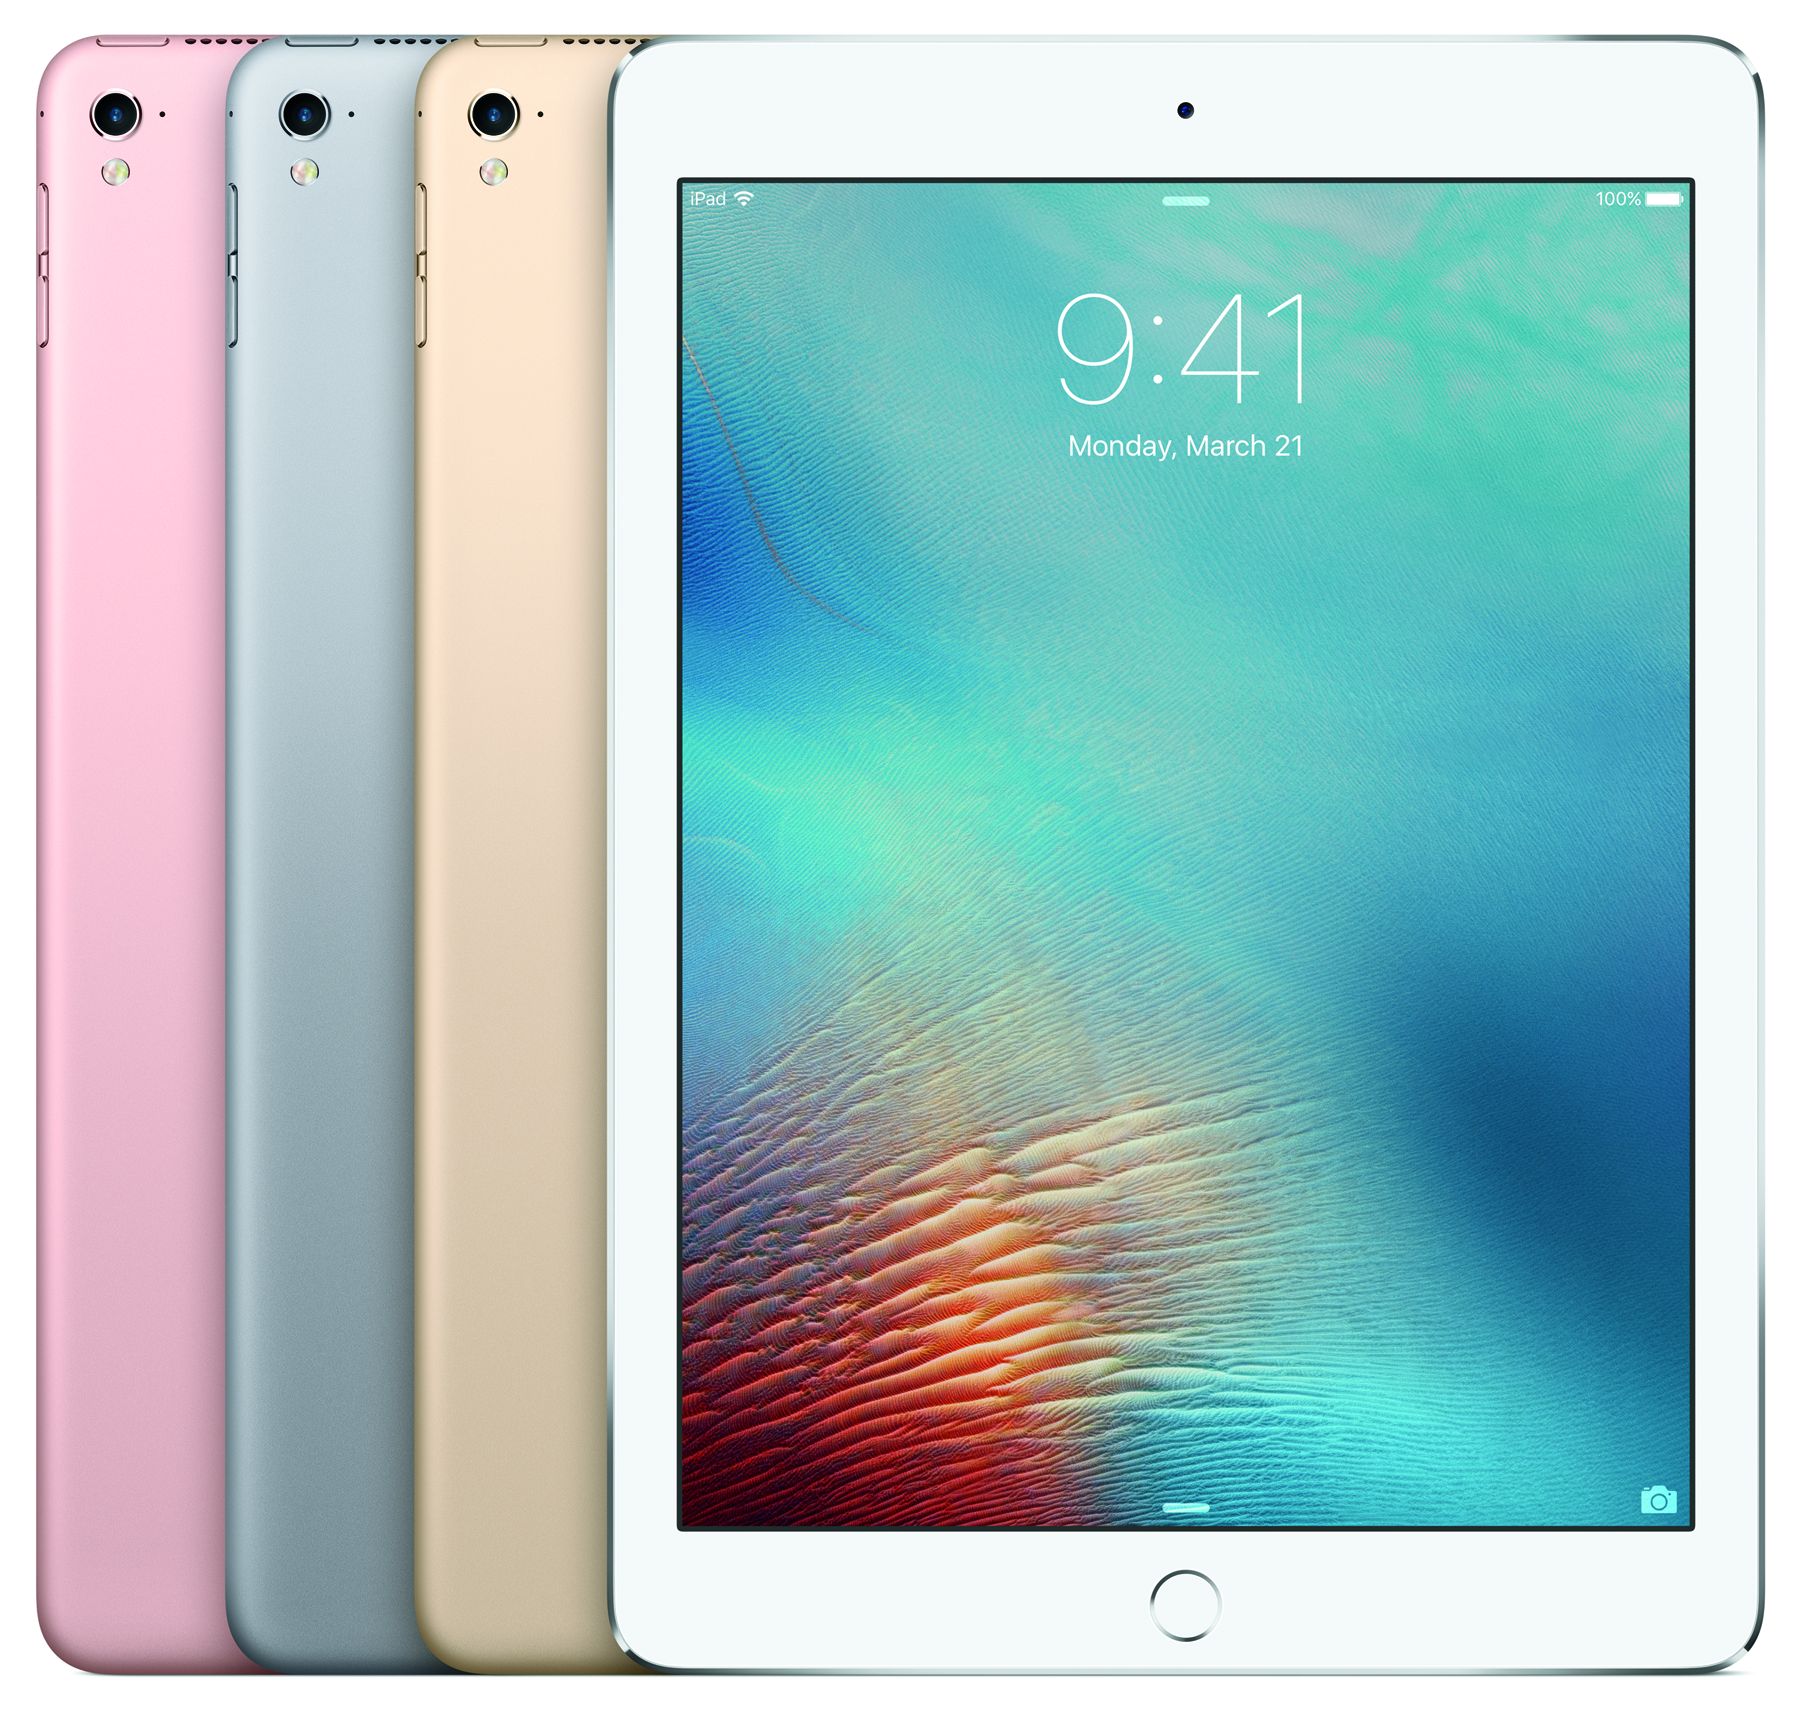
  • Relatively recent iOS devices (iPad 2 onwards, iPhone 4 onwards, iPod Touch 5th generation onwards) running iOS 6 or newer
  • Apple TV (3rd generation onwards)

    AirPlay devices discovered by iPad

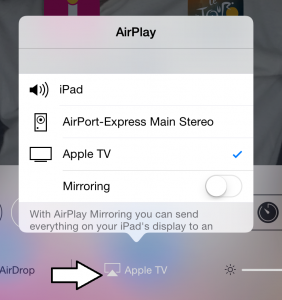
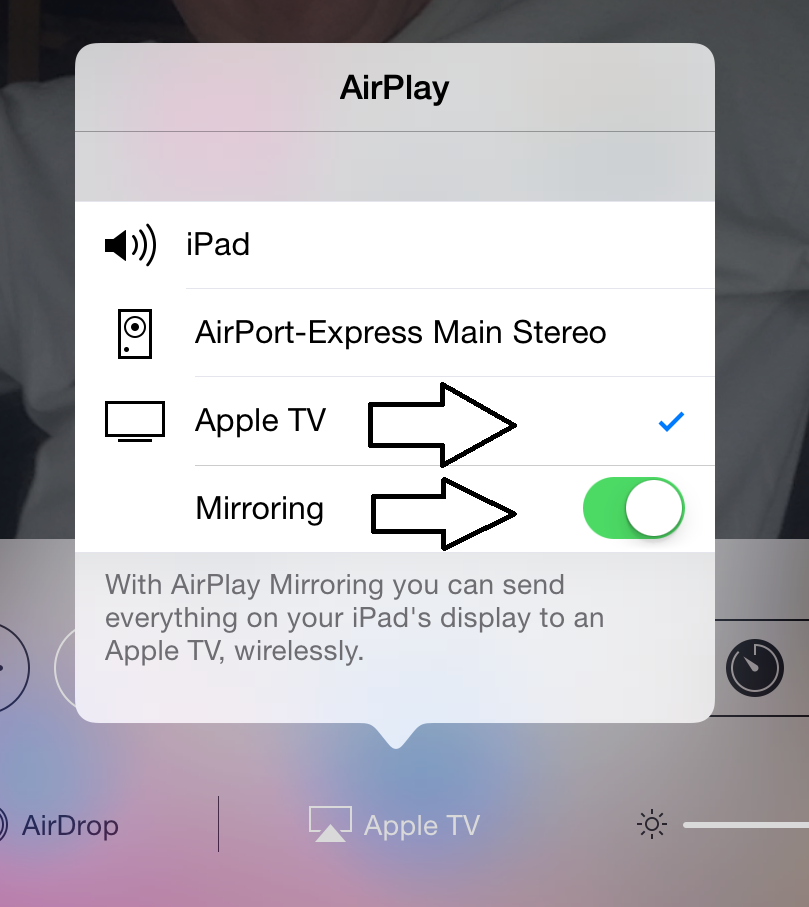
    AirPlay devices discovered by iPad – when you tap AirPlay icon

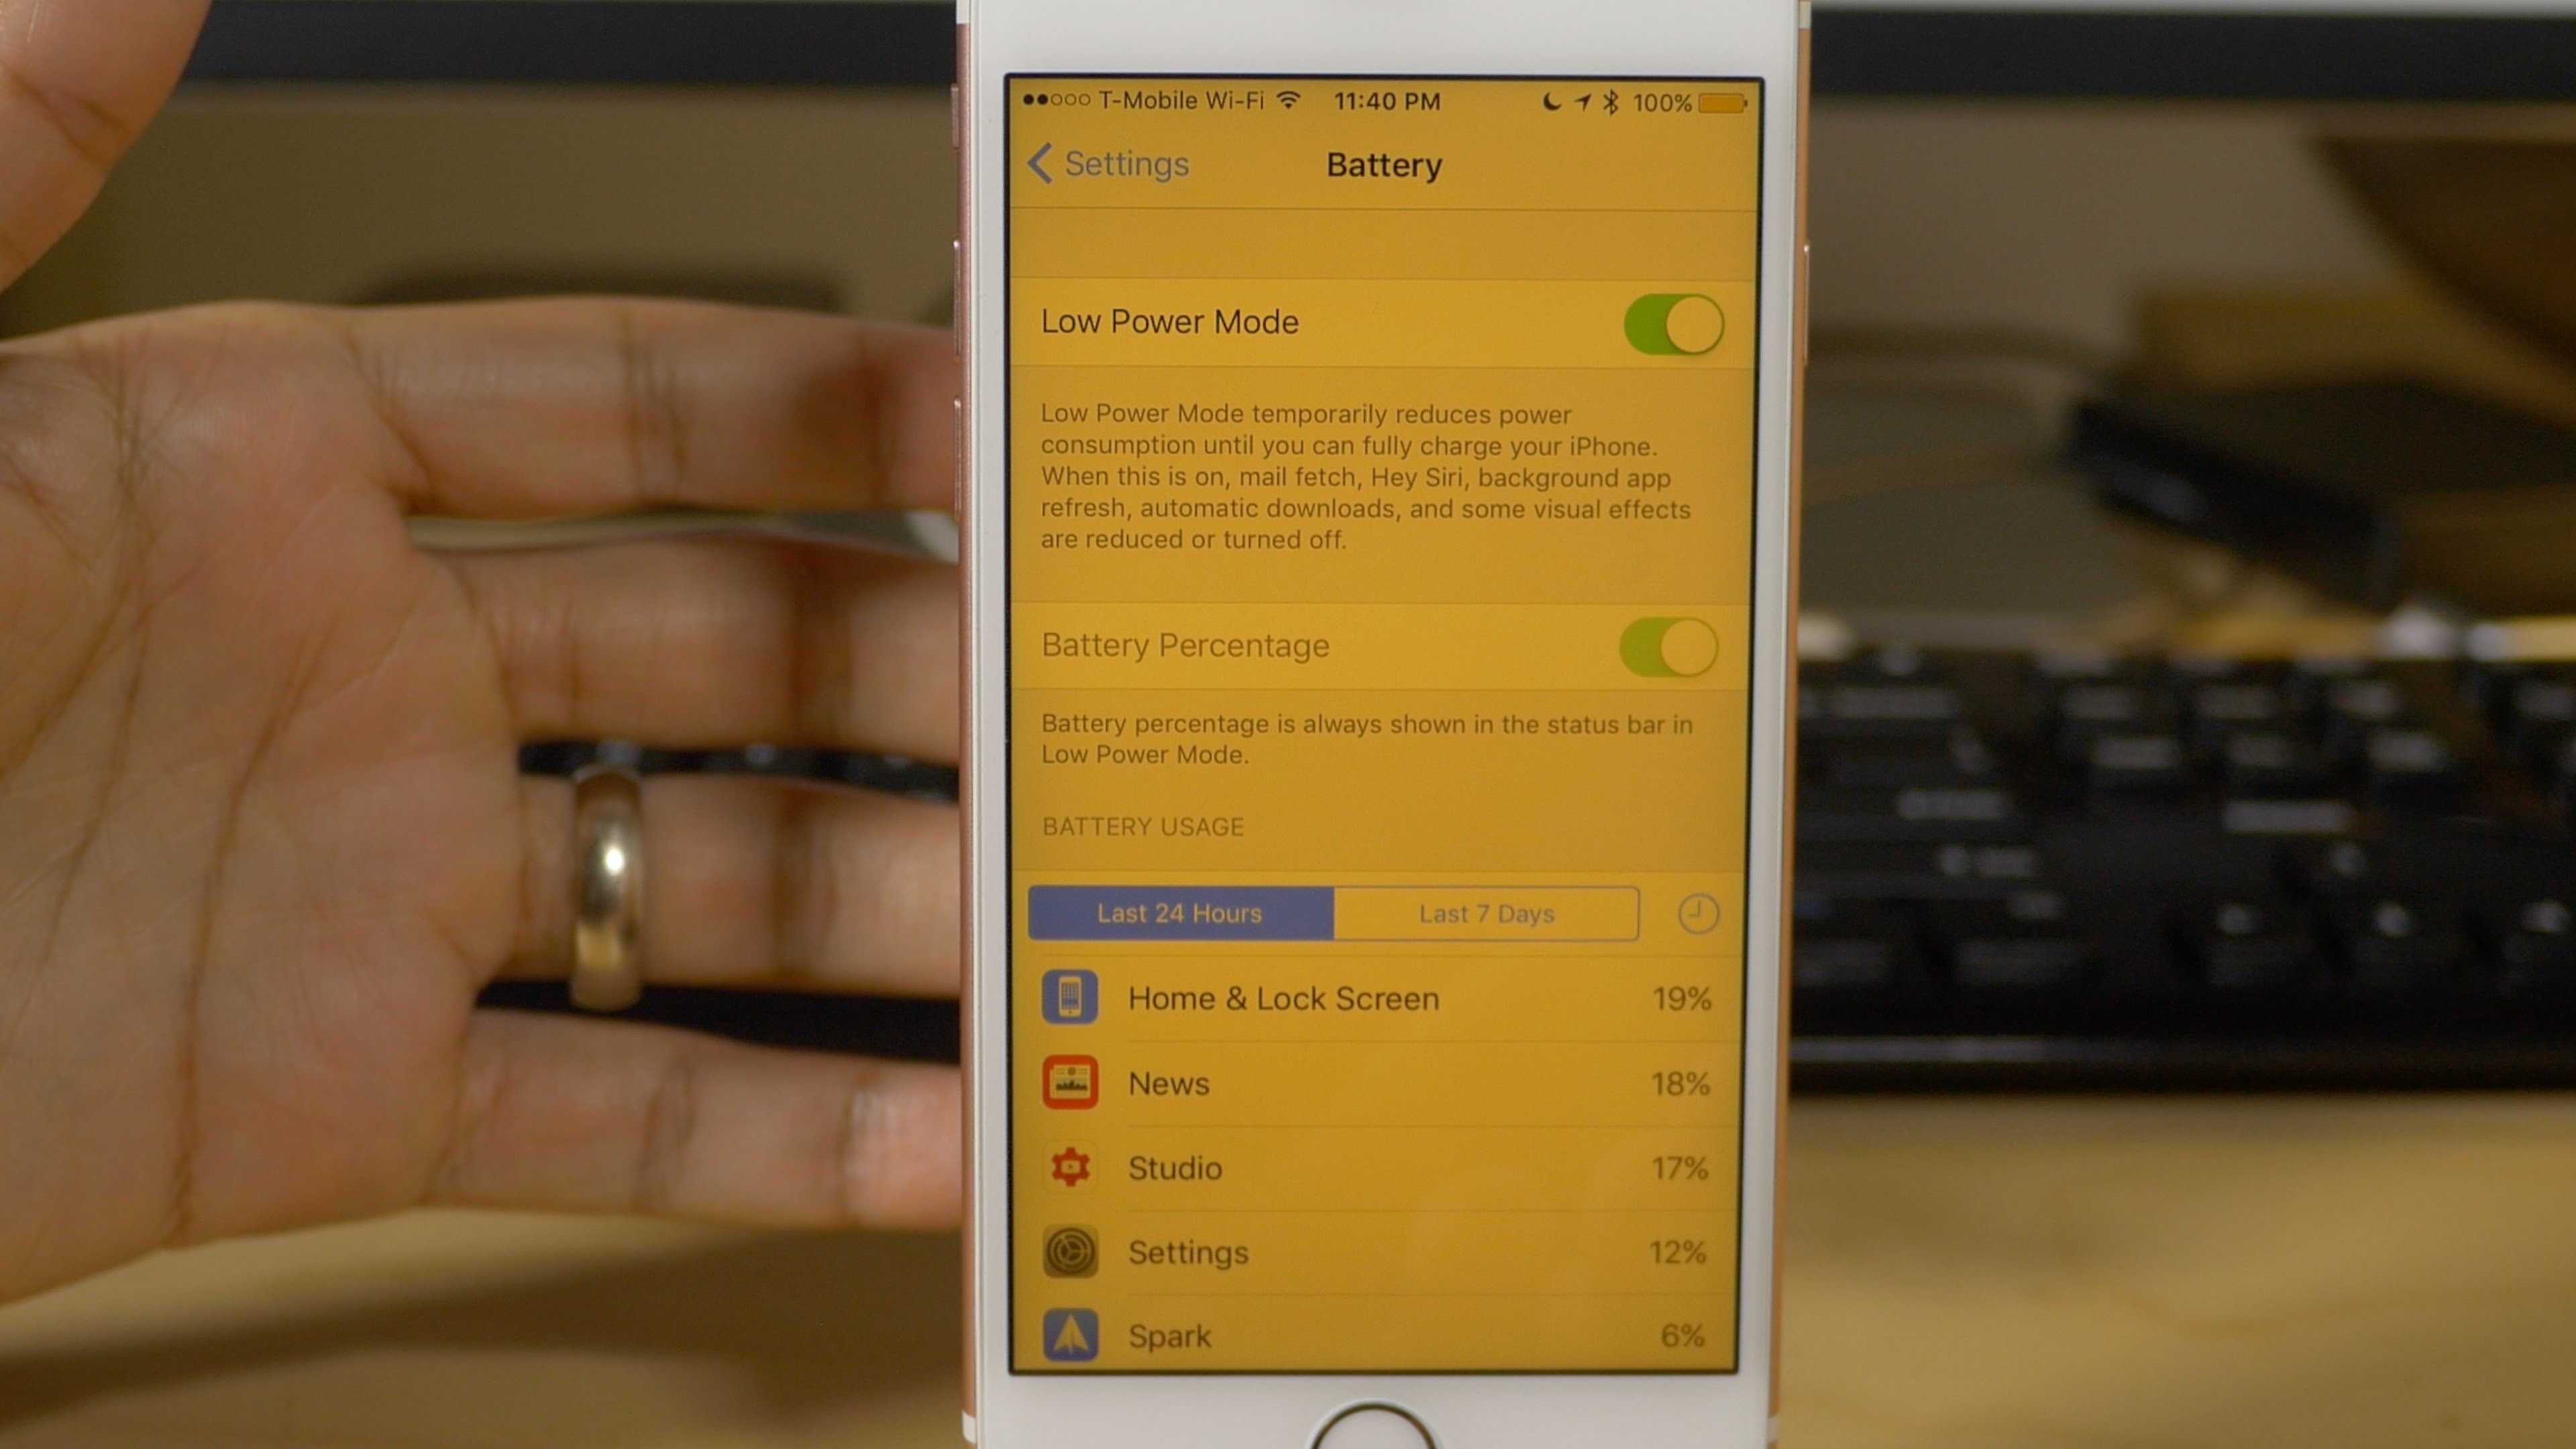
Mirror your iPad’s display

  1. Go to Shortcut menu (tap Home button twice, slide to right)
  2. Click AirPlay button and select Apple TV
  3. Select Mirroring
  4. Bring up Web page using Safari

Dedicated Display

This requires you to use one of two apps that you buy from the iTunes App Store: AirWeb ($1.99) or AirBrowser ($6.49). These are Web browsers which present the page on to the display that is connected to the Apple TV device and use your device as a tool to navigate the Web page.

Apple TV - Mirroring on - iPad

Set up iPad for mirroring to Apple TV

AirWeb simply has your iOS device work as a mouse with the external display serving as a screen while the more expensive AirBrowser offers a more polished response and has more capabilities.

Apple Macintosh + Apple TV

Equipment Requirements

  • Apple Macintosh to run MacOS X Mountain Lion (10.8) or newer
  • Apple TV 3rd generation onwards

To connect your Apple Macintosh to your Apple TV

  1. Click AirPlay icon on the Menu Bar at the top of your screen
  2. Click the “Connect To AirPlay Display” option and select the Apple TV device you want to use
    This procedure makes the AirPlay-connected Apple TV device work as an extra monitor similar to if you had connected another monitor or projector to your Mac.

Mirrored Display

  1. Select the Mirroring option to show your system’s Desktop display on the big screen
  2. Open the Web page using your preferred browser

Extended or Dedicated Display

  1. Select the Extended Desktop option
  2. Open the Web page using your preferred browser and drag it to the new screen

Google Chromecast + Google Chrome on Windows or MacOS

Equipment Requirements:

The computer you are using to bring up the Web pages with has to run the latest version of Google Chrome browser and have the Google Cast extension installed.

Mirrored Display

  1. Click the Cast square at top right corner on Chrome in Windows
  2. Using the drop-down menu, select the “Cast this screen / window” option

Dedicated Display

  1. Start Chrome and browse to the Webpage you want to show on your large display
  2. Click the Cast icon on the tab and choose the Chromecast you want to show it to

Google Chromecast + Chromecast App on Android

Equipment Requirements

Your Android smartphone or tablet has to run the latest version of the Chromecast app, which you can download from the Google Play store.

Mirrored Display

  1. Run Chromecast app on Android device
  2. Click on the Navigation drawer (hamburger icon) on the Chromecast app’s user interface
  3. Select the Cast Screen option
  4. Select the Chromecast that you want to use, The Android device’s screen will appear on your larger screen
  5. Use Google Chrome or your favourite Android Web browser to load your site

Dedicated Display

Like the iOS platform, you will have to install a browser that shows its output on the external screen. Here, your Android device will be the control surface while you see the Webpage on your large screen.

For Android users, you will need to purchase and install the Web2Cast app which costs $1.99.

Directly-connected screen

These setups require you to connect your host computer directly to the display device, preferably via HDMI. It is a task you can perform easily with the regular-computer platforms i.e. Windows, Macintosh or Linux because this practice is performed more commonly in offices for multi-screen displays or to show presentations using a projector.

Therefore the procedure to use a directly-connected external display to show that Web page comes across as being simple.

The setup procedures are very consistent across the different major versions of these operating systems.

If you are using some “all-in-one” desktop computers, you may find that an HDMI port may be used as an input port or output port. This functionality is typically to allow one to use the computer’s display and speakers with another video peripheral like a games console or set-top box. Here, make sure that this port is set up to become an “output” port for use with external displays when you are showing a Web page on a larger screen that is connected to this HDMI port.

Windows computer

Equipment preparation

Display setup for a secondary display as a dedicated screen - Windows 7

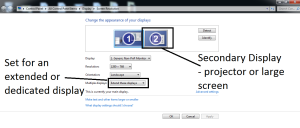
Display setup for a secondary display as a dedicated screen – Windows 7

Connect the external display to Windows computer and make sure that Windows detects the presence of the display. Here, you may have to use Display Settings to verify that this display is properly detected. You may also have to make sure the external display is switched on and the correct input is selected.

Mirroring

  1. Right click on the Desktop and select “Display Settings
  2. Select Duplicate These Displays to see same screen
    Most laptops may allow you to invoke this setup by pressing Windows+P together
  3. Load the Webpage on your preferred Web browser and browse it as normal

Extended Display

  1. Right click on the Desktop and select Display Settings
  2. Select Extend These Displays
  3. Drag the screen which represents the external display, which should be marked as 2, to the top or right of your main screen. This is a way to help you remember that you are setting up a “big screen”.
  4. Load page on your preferred Web browser, and drag to “big screen” before you browse it.
    Windows 10 makes this process easier by allowing you to click the square “All tasks” button where there will be icons representing both the screens. Then you just drag the Web browser to the “other” screen

MacOS X

Equipment Preparation

Like with Windows, connect the external display to your Mac and make sure that MacOS X detects the presence of this display. As well, make sure that the correct source is selected on your display.

Mirrored Display

  1. Click the System Preferences menu in the Apple menu
  2. Select the Displays menu in the View menu
  3. Check Mirror Displays to show the Desktop on big screen
  4. Open the Web page in your preferred browser

Dedicated Display

  1. Click the System Preferences menu in the Apple menu
  2. Select the Displays menu in the View menu
  3. Uncheck Mirror Displays for extended desktops
  4. Drag the newly-created screen to the top of your existing screen and make sure that your existing screen is kept as the primary screen. This is a way to help you remember you are setting up and using a “big screen”.
  5. Open the Web page in your preferred browser and drag it to the external display.

What is this about “cyberflashing” and how to prevent it?

Samsung Galaxy Note 2 smartphone

Taking control of local data-transfer functionality like AirDrop can help you avoid unwanted surprises

Article

Cyberflasher Airdrops rude images to victim’s iPhone | Naked Security (Sophos)

My Comments

A problem that has started to surface for Apple iOS users is the ability for someone to send gross images to strangers courtesy of the AirDrop feature that newer iterations of this platform have. Situations where this typically happened were when the offender and victim were on public transport or in public areas.

This feature makes it easy to share photos between iOS and MacOS X devices in a local area using Bluetooth and Wi-FI technologies and provides a thumbnail image of incoming photos rather than a dialog box asking if you want to receive the image.

This was feasible with Android and other open-frame mobile operating systems courtesy of Bluetooth Object Push Profile but these platforms. especially Android, hardened themselves against this by making your phone undiscoverable by default and providing a narrow time limit for having your phone discoverable by Bluetooth devices. As well, these platforms required your permission to start receiving the file and you didn’t see one bit of that file until you gave the go-ahead.

Android and Windows improved on this using a passcode that you and your correspondent exchange before a file is transferred and the NFC functionality that is part of recent Android versions requires you to physically touch the backs of the phones as part of instigating the data transfer.

The same situation may also crop up with Wi-Fi Aware as it implements Bluetooth local discovery for ad-hoc Wi-Fi networks created by mobile devices and will require users to be able to take control of what notifications and files they receive on their devices if this technology is for transferring files.

Protecting yourself

A good practice to observe is to turn off the AirDrop feature unless you make regular use of it. Or, at least, set AirDrop’s discoverability settings to “Off” or “Contacts Only” rather than “Everyone” so that every man and his dog can’t discover your phone. You would turn this function on if you are expecting a photo from someone not yet in your Contacts List.

In some situations, you may have to disable Wi-Fi and Bluetooth unless you are actually using these features such as linking to a hotspot or using a Bluetooth headset.

You may find that changing your device’s identity to your initials or something innocuous rather than your first name may work wonders in these situations.

I would also prefer that any local data transfer or similar activity between users takes place in a manner where each participant can see each other. This may be at the same table in a café, restaurant or library, the same seating cluster in a lounge area, the same row of seats in a public-transport vehicle or a similar area of close proximity. As well, such activity should be preceded by relevant conversation.

What must be preserved

If a setup allows for local data transfer between computer devices using a wireless medium, there must be a way of allowing the users to confirm their intent to transfer the data between each other. This means that the sender and receiver know whom the data is coming from and to and must occur before a single bit of the actual data changes hands.

This may be through the sender exchanging a simple passcode to the receiver or requiring the devices to physically be near each other at the start of the data transmission. The latter solution may be in the form of NFC where the users touch the backs of their devices together, or a QR code shown on the sending device’s screen that the receiving device has to scan before transmission takes place.

If a user wants to simplify this process, they could create a “trusted recipients” list which can be their Contacts list or a separately-created list. Personally, I would use all of the “friends” in a social network as this list because that tends to encompass too many people and an account can too easily be compromised.

The same thing must also apply to social networks, online gaming and similar services where one user may want to enrol another user in to their personal lists. This is more important if any of these services facilitate the transfer of files between users or support any form of instant messaging.

Apple have fixed the iPhone message bug once and for all

Article

Apple releases iOS 8.4 with new Music app, fix for crashing bug | ARSTechnica

My Comments

Apple have just rolled out version 8.4 of the iOS mobile operating system and the main headline feature that this came with is the Apple Music streaming-music service which came about due to their takeover of Beats by Dr. Dre.

But this version of iOS also fixes a bug that placed iPhones, iPads and iPod Touches at risk of crashing if a specially-formed message came in via iMessage or other message services. This was due to problems associated with handling standard ASCII and Unicode character combinations. To get their iOS devices back to life after a crash, they had to do things like ask correspondents to send pictures.

Any iOS user can update their devices either over the air by visiting the Settings screen then selecting “General” before clicking on “Software Update”. Or they could use the USB charge/data cable to plug the iDevice in to a regular computer equipped with iTunes and use that software to deliver the update to the device.