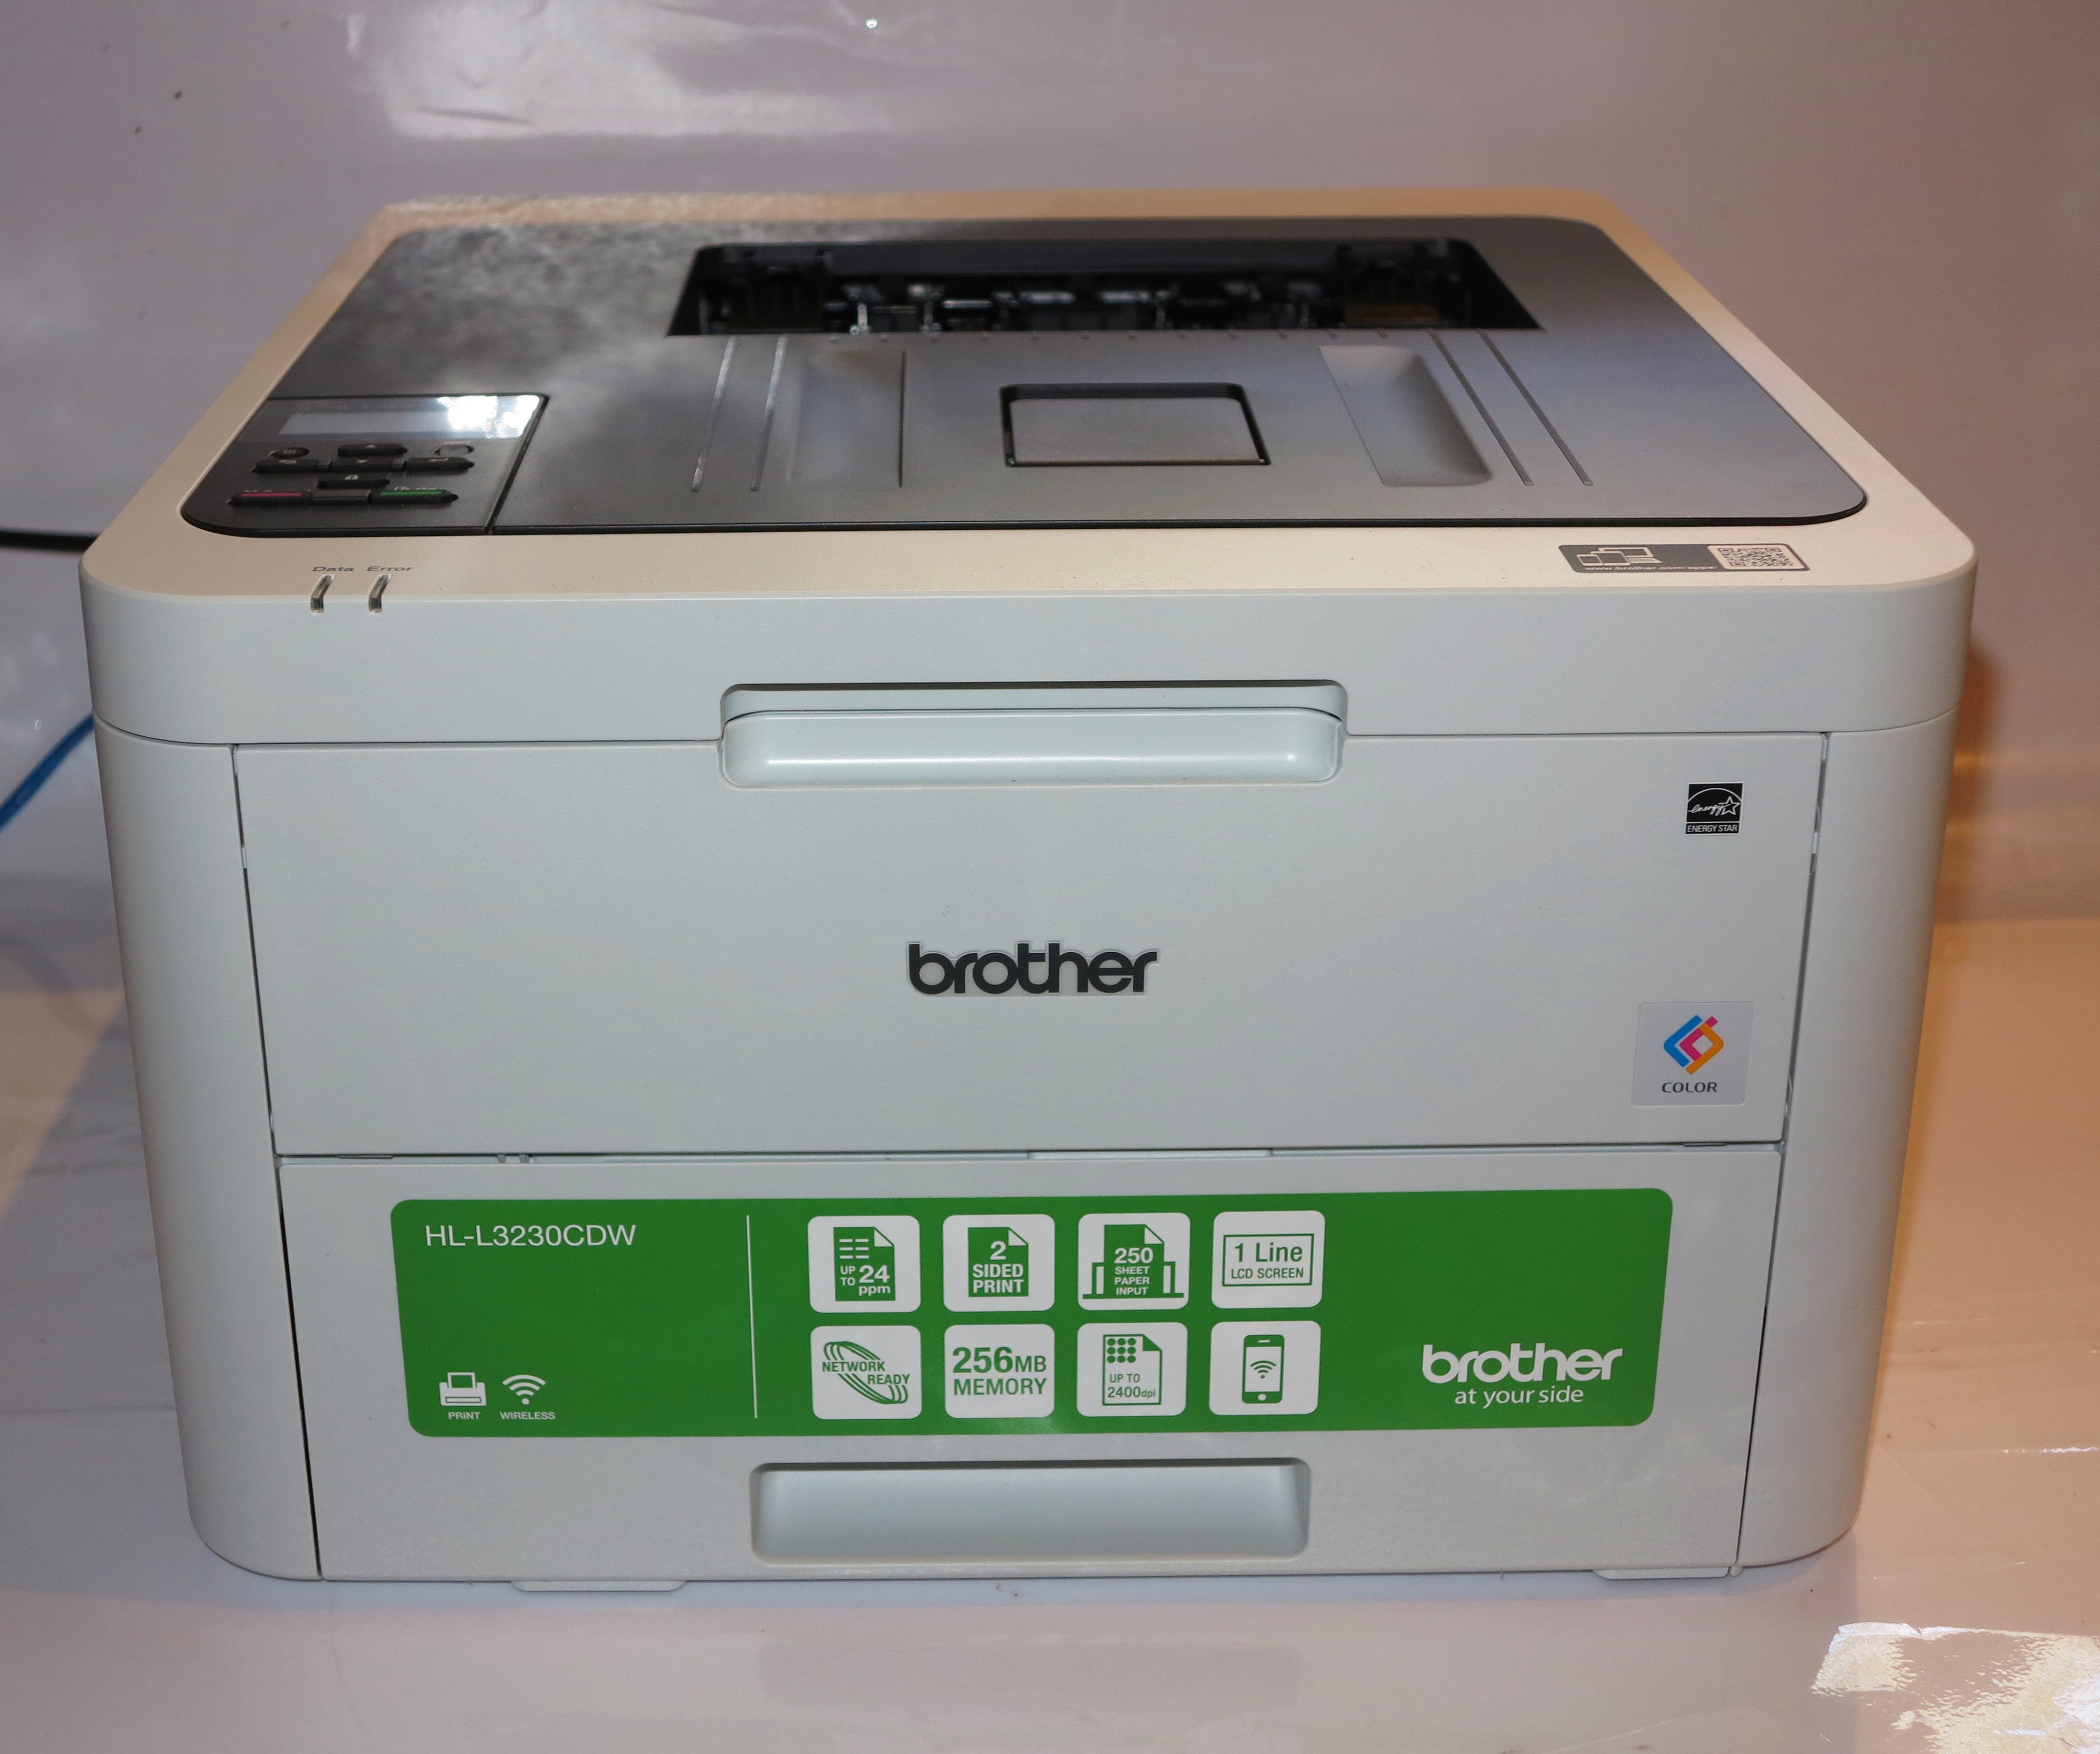
Category: Product Review

Product Review–Logitech MX Anywhere 3 wireless mouse

Logitech MX Anywhere 3 Bluetooth mouseAs part of a gradual upgrade to a new workspace centred around my new Dell XPS 13 laptop, I have decided to buy a Logitech MX Anywhere 3 Bluetooth mouse. This is a very small portable mouse that is pitched for laptop use while on the road.

This mouse connects to the host computer via a USB-A “Unifying” receiver dongle. But it can connect to a Bluetooth-capable host, presenting itself as a Bluetooth human-interface device, which is the method I have preferred. This means that if your computer is equipped for Bluetooth like most laptops, all-in-ones and some low-profile desktops are, you don’t need to worry about using or losing a USB receiver dongle. That is infact a feature I look for with wireless mice and keyboards for that reason.

Logitech MX Anywhere 3 Bluetooth mouse - low profile

Low profile mouse

The setup routine for the Logitech MX Anywhere 3 mouse was very quick especially when I was wanting to use it via Bluetooth. Here, this was about pressing a button underneath the mouse to make it discoverable then having your Bluetooth host device “find” a new device in the form of this mouse, whereupon you select that device using the host device’s user interface.

Logitech MX Anywhere 3 Bluetooth mouse - underneath view

Button underneath to select which host device the mouse works with or instigate Bluetooth pairing

Windows 10 even led me to download the Logitech companion software that provides extra functionality for the mouse. This software even showed me the features of this mouse and what I can set it up for including working across two different computers.

It also supports three-host operation so you can use it with three different host devices, no matter the platform. This will please those of us who run two or more computers or similar devices and want to use a mouse with them. A button underneath the mouse exists to select between the three different host devices you have set it up to work with.

Logitech MX Anywhere 3 mouse on glass table near laptop

Able to work on a glass table thanks to Logitech’s Darkfield tracking technology

This MX Anywhere mouse uses Logitech’s Darkfield optical technology which allows the mouse to work with glass surfaces like . That is compared to most optical-mouse technologies where they don’t work reliably with glass surfaces, be they having a glass top across an opaque material under that surface or them having a glass pane as the table or desk top. I have tested it with a glass coffee table which just has a glass top and have found that it works when I move it on the glass surface.

It is a very shallow compact mouse which fits under an adult’s palm easily. This also means that it can be stowed in your laptop bag or briefcase without taking up much room, making it more travel-friendly.

Logitech MX Anywhere 3 Bluetooth mouse

Scroll wheel and switch to select detented or smooth operation

The mouse’s scroll wheel has the feel of a Swiss watch’s crown and can provide a smooth feel or a detented “click-click-click” feel. This can be determined you you pressing a “mode shift” button on top of the mouse near the scroll wheel. There are also two buttons for horizontal scrolling or other functions you determine using the Logitech companion app.

Logitech MX Anywhere 3 Bluetooth mouse - front view with USB-C socket

USB-C socket to charge your Logitech MX Anywhere 3 mouse

The Logitech MX Anywhere mouse is powered by internal rechargeable batteries which means you don’t have to worry about buying many AA or AAA Duracells to keep it going. Here, you connect the mouse to a USB charger via its USB-C socket and it comes with a USB-A to  USB-C cable for this purpose if you use existing USB chargers.

Here, I have found that I could get a few days of significant use out of the mouse before I needed to charge it up again. Then it takes just a few hours to charge it up. You may find that charging your mouse for the duration of, say, a lunch break may be good enough to get it back in order for the rest of your workday.

Limitations and points of improvement

I would like to see Logitech and others who offer input devices like the MX Anywhere mouse that are charged via USB to take this connection further. If the peripheral uses a USB-C socket, it could support full Power-Delivery compliance to allow for quick charging.

As well, the USB connection could permit wired operation so, in the case of this mouse, it can work as an ordinary wired mouse. That arrangement may be seen as being relevant where wireless operation of input devices is not really desired such as in aircraft or with secure workstations where use of wireless devices isn’t desired.  It can also simply be a way to keep the mouse useful to you if the battery dies out while you are working.

Tips

If you are travelling with the Logitech MX Anywhere mouse, it is a good idea to make sure it is properly turned off using the slide switch when you have it packed in your laptop luggage. You then turn the Bluetooth mouse on when you intend to use it.

This avoids the risk of the battery depleting suddenly while you are travelling and you having to end up charging it before you intend to use it.

Conclusion

The small size and the use of Darkfield glass-compatible tracking technology makes the Logitech MX Anywhere 3 mouse a highly-capable laptop mouse. Here, you are not worried about what kind of surface you will end up resting that laptop on and using this mouse with when you head out and about.

Product Review–Brother PT-P910BT Bluetooth label printer

Introduction

I am reviewing the Brother PT-P910BT Bluetooth label printer that uses USB-C or Bluetooth host-device connectivity to print out labels using Brother’s TZe family of label tapes. This means it doesn’t use your home network for this purpose, rather it uses local peripheral connectivity approaches.

Brother PT-P910BT Cube Bluetooth label printer

The Brother PT-P910BT Bluetooth label printer

Brother PT-P910BT Cube P-Touch Bluetooth label printerThe Brother PT-P910BT Bluetooth label printer is similar to the PT-P710BT label printer that I have previously reviewed. Here, these devices work on an USB power or a user-replaceable battery pack installed within the unit. They talk to the host computing device via a USB or Bluetooth connection working in a similar vein to a direct-connected printer.

They are dependent on Brother’s P-Touch software for regular Windows or Mac computers or the iPrint&Label for iOS and Android mobile-platform devices. As well, the use Brother’s TZe cartridge-based direct-thermal tape platform.

Brother PT-P910BT Bluetooth label printer with 36mm tape cartridge inside

This can use the 36mm TZe label tapes that are wider

But the similarities stop here. The PT-P910BT which is finished in white is capable of working with TZe label cartridges that use 36mm-wide tape in addition to the narrower label tapes. That is compared to the PT-P710BT using label tapes with a maximum width of 24mm. Even if it appears to be thicker to accommodate wider tape, the Brother PT-P910BT label printer can be laid flat or be stood upright.

Brother PT-P910BT P-Touch Bluetooth label printer USB-C socket

Uses a USB-C socket for data connectivity or power charging

The PT-P710BT label printer used a USB micro-B port as the equipment-side connection. But the PT-P910BT label printer implements the USB-C port as the equipment-side connector and is furnished with a USB-C to USB-A cable so you can connect it to regular computers or USB chargers using the traditional USB-A fitting.

Here, it has become the first Brother label printer that I have had for review that uses a USB-C connection for charging or wired connection to host computing devices.

Setup

Setting the Brother PT-P910BT label printer up with a mobile-platform device was simple. Here, you held down the power switch until the light flashed to make the printer discoverable by the mobile device, then you had to use iOS or Android to pair the printer to your smartphone or tablet.

Brother PT-P910BT connected to Samsung Galaxy S8+ Android phone

This can connect directly to your USB-C-equipped Android smartphone using a USB-C cable. You have to select USB as the connection type on iPrint&Scan in this case.

After that, I had to make sure that Brother’s iPrint&Label Android software was downloaded from Google’s Play Store and installed on my Android smartphone. I also tried connecting the Brother PT-P910BT Bluetooth label printer to my Samsung Galaxy S8 Plus Android smartphone using a USB-C to USB-C cable and used the same iPrint&Label app to make a label using this connection. This was feasible once I tapped on the device name and then selected USB as the connection type to use within the same app.

For your Windows computer, you had to download then install the Brother P-Touch software, with an installation step having you connect the printer to your computer via USB. The Bluetooth setup process became awkward at some point because the Brother software invoked Windows and failed to discover even when the printer was in Bluetooth-discovery mode and the computer could “hunt” for Bluetooth devices.

Use

Once set up, the Brother PT-P910BT Bluetooth label printer was able to turn out labels very quickly and clearly. It

Brother PT-P910BT P-Touch label printer and Samsung Galaxy S8+ Android smartphone

But it still works as a Bluetooth labeller

didn’t matter whether were working with the P-Touch Editor on Windows or iPrint&Label on Android.

The printer can work with two Bluetooth-connected host devices concurrently but you will need to wait until it has finished printing before you can submit your label job from the other device.

The single light can be very confusing when it comes to knowing whether the unit is on an active Bluetooth connection or not, or if there is enough power in the battery. There is a second light near the USB socket to indicate whether it is charging or not. Personally, I would like to see a steady blue light glow during a Bluetooth connection and flash while it is in discoverable (pairing) mode as a way to make Bluetooth setup easier.

Limitations and Points of improvement

The Windows driver software needs to adopt a simplified setup approach that is agnostic of whether the device is connected to the host computer via USB or Bluetooth. It could allow you to install all the software then begin the Bluetooth pair-up process using the Find New Device option in Windows 10’s Settings menu.

As well, it will also be of concern for those of us who switch between USB wired and Bluetooth wireless connectivity on a whim. This may be to allow a user who forgot to charge the Brother P-Touch Bluetooth label printer up before doing a labelling run to connect to the host computer via USB for that job with that computer powering the labeller. This is even though the user uses Bluetooth as a preferred connection for their setup.

Brother could also set a good example for USB-C peripheral devices like labellers by fully implementing USB Power Delivery for charging or powering these devices. This could allow for fast-charging using ordinary USB PD hardware, like what is being expected for Android phones.

Conclusion – Is it a tool or toy?

This is an example of Brother offering an incremental update for a P-Touch labelling product and offering it as an updated variant that works with the largest of the TZe tape sizes. Again, this Brother PT-P910BT labeller comes across as a tool especially when you are wanting to do any labelling “on the go” while you are using

It is more about taking an incremental approach to improving and updating products rather than taking a radical new design approach. But the Brother PT-P910BT underscores the idea of using your smartphone or tablet and its Bluetooth connectivity or USB connectivity in the case of recent Android USB-C-equipped smartphones to turn out labels.

Dell designs their business USB-C docks for the long haul

Article – From the horse’s mouth

Dell WD19TB Thunderbolt dock product image courtesy of Dell

The Dell WD19TB Thunderbolt 3 dock – an example of the modular USB-C docks that Dell offers

Dell

WD-19TB Thunderbolt 3 dock (Product Page)

My Comments

Dell has defined a series of business USB-C docks that can have their host connectivity technology upgraded or replaced by the user.

What are these docks about?

This series of expansion modules, known as the Dell WD19 family have in common video connections in the form of a single HDMI, two DisplayPorts and a USB-C with DisplayPort alt mode connectivity. The above-mentioned USB-C DisplayPort-enabled port, along with another USB-C port located up front offer data transfer and Power Delivery power-source functionality. There are three USB 3.1 Type-A sockets with one up-front along with a Gigabit Ethernet network-adaptor function. As well, there is a basic USB sound module that has a headphone/microphone socket up front and a line-out socket behind, which may suit the use of a wired headset, powered speakers or that old stereo amplifier connected to those old speakers you use for computer sound.

The devices are pitched for business use, especially with large businesses who practice hot-desking a lot, using shared workspace setups where you connect a laptop computer to at least one large screen as well as a full-size keyboard, full-size  mouse and Ethernet network connection.  This leads to separate modules being available for USB-C connectivity, Thunderbolt 3 connectivity and dual-USB-C connectivity depending on the performance needs of the workspace’s user group.

The power available on these units is up to 90 watts for equipment adhering to the current USB Power Delivery specification. But Dell takes this further to 130W for their own products because this specification currently doesn’t address the likes of the XPS 17 which demand more power output. This may be something that will be investigated by the USB Implementers Forum for supporting USB Power Delivery on higher-powered devices namely powerful large-screen laptops or “next-unit-of-computing” desktops.

For that matter, the Thunderbolt 3 variant has another USB-C port that supports Power Delivery, USB-C and Thunderbolt 3 data transfer and DisplayPort alt mode.

If you are buying the docks, you can choose between the different units offering the different host connectivity types and pay appropriately for the connection type. But Dell sells these modules as a separate accessory so you can upgrade your dock to a better host-connectivity type like Thunderbolt 3.

What I like about this family of docks and the user-replaceable host-connectivity modules that Dell offers is if a host-connectivity module fails and the dock becomes useless, you can just replace that module. There is also the ability to upgrade your dock to newer expectations at a later time.

Although this is optimised to work primarily with Dell computers, the WD19 series of docks can work with any computer that has a USB-C or Thunderbolt 3 connection. This is in a totally “plug-and-play” manner without the need to install device drivers.

Room to innovate

But it could allow Dell to have a range of business-class docks ready for full-on USB4,  Thunderbolt 4 or any future host-peripheral connection technology. This is with the ability for users to upgrade them to that technology when the time comes.

Also having user-replaceable host-connectivity modules could open up to Dell the idea of external graphics modules with soldered-in graphics chipsets that can be added on to these docks. Most likely this idea would be limited to high-end mobile graphics chipsets that give a bit of “pep” to your Ultrabook’s graphics rather than desktop graphics chipsets that provide the full performance.

As well, having the dock part as a separate module can allow Dell to build on this system further. For example, it could also be about creation of a multimedia variant of this dock with a better sound module having line inputs or SPDIF connectivity along with more USB connections. Similarly, there could be a dock with multiple-Gigabit Ethernet connectivity that could appeal to “workstation-class” network computing.

Limitations that are identified

From all of the material I have seen on the Internet about these devices. there are some limitations that show up here.

For example, for the single-USB-C or Thunderbolt-3 connection modules, Dell could fit each module with a USB-C socket for the upstream (host-side) connection rather than using a captive USB-C cable. This could allow the user to use longer USB-C cables thus allowing for installation flexibility. It can also allow the user to replace a broken cable themselves, something that will become real if they frequently plug and unplug their laptop from the dock.

From a video review that I had seen, there could be the ability to support Thunderbolt-level multiple-screen display for three outputs for the Thunderbolt 3 variant. This could work better with the Apple Macintosh platform, but “open-platform” implementations like Windows don’t need to worry about this issue much. But it may not work properly with the modular approach behind this dock’s design.

Conclusion

But the Dell WD19 business USB-C dock family underscores the reality that you have to pay dearly for something that is robust and will last you in to the long term. It can also show that a design platform can be achieved for premium, business and multimedia docks where there is a goal to see them last longer and be future-proof.

Product Review–Brother DSMobile DS-940DW mobile scanner

Introduction

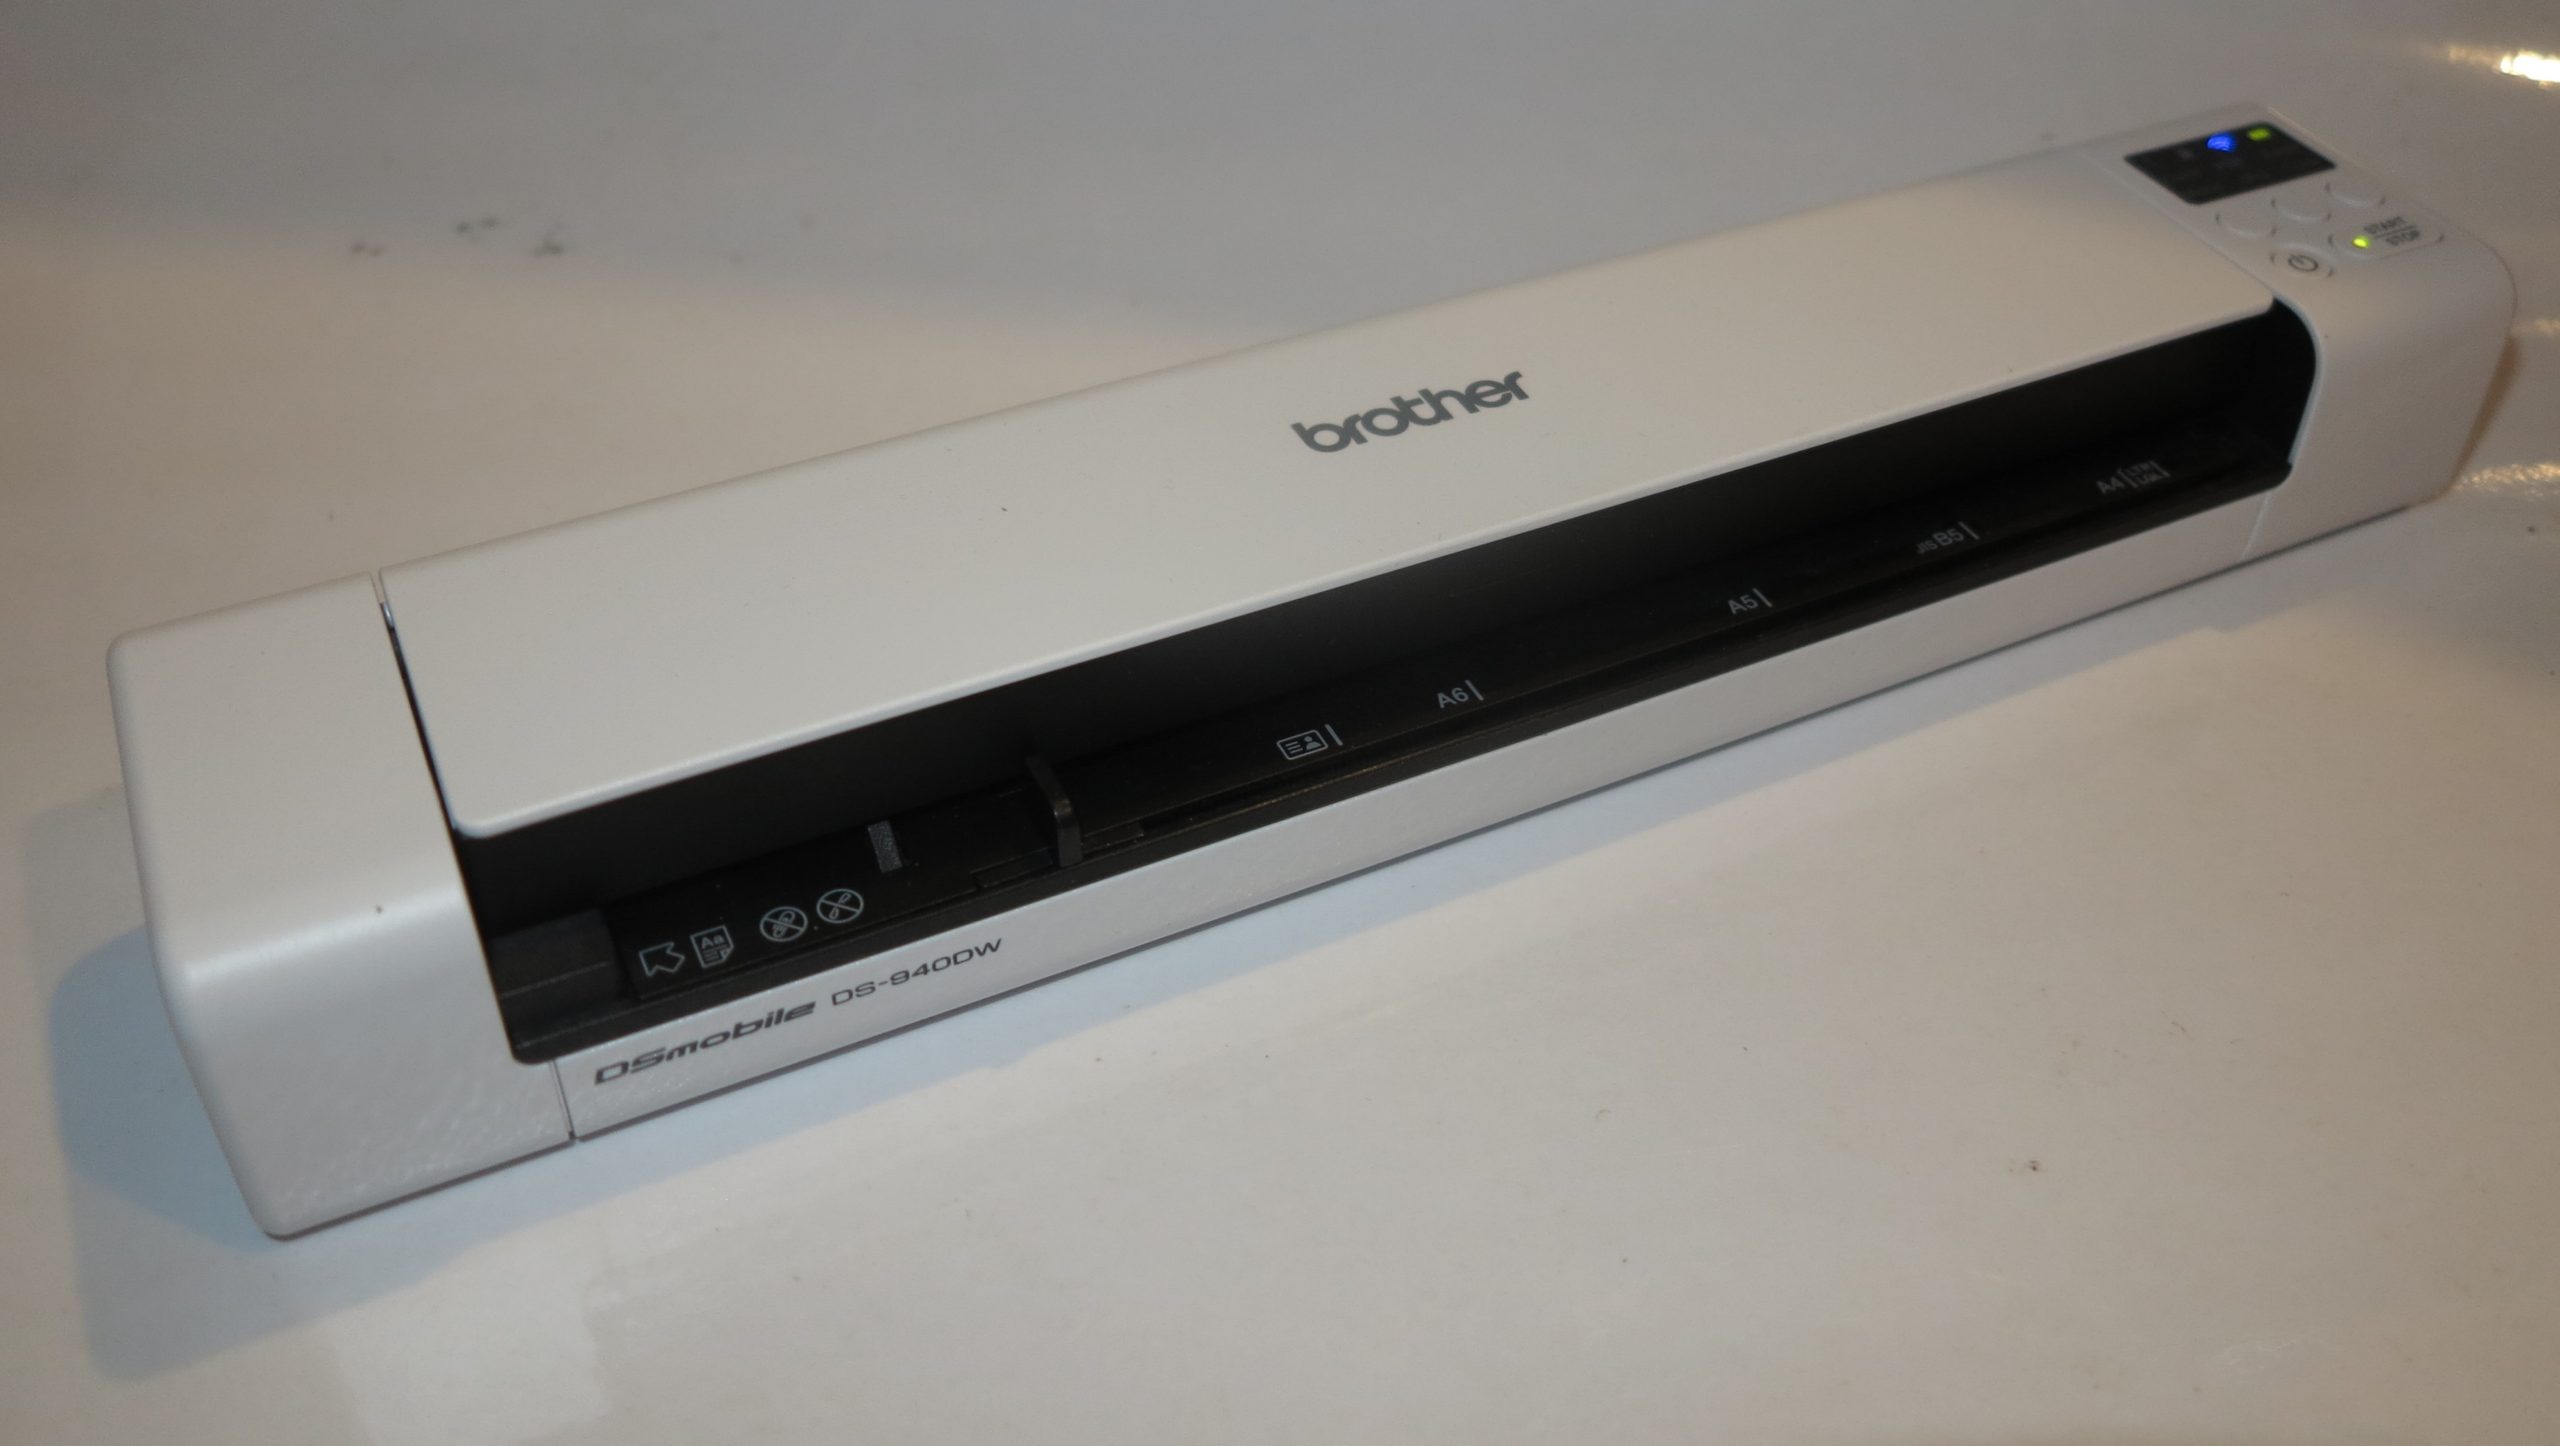
I am reviewing the Brother DSMobile DS-940DW Wi-Fi mobile scanner which is a highly-portable pure-play document scanner pitched towards the mobile office.

This battery-powered mobile scanner can scan to a regular computer via a USB connection or via a Wi-Fi link , whether you are using the one it creates or an existing small or home Wi-Fi network. As well, you can use it to scan documents to your iOS or Android mobile device using a Wi-Fi link, either one it creates or an extant small network.

As well, you can use it offline to scan documents to a removable microSD card so you can then download them as files to your computer at a later stage. In this case, you can remove the card and install it in your computer’s SD card reader to get at your documents or while you have the scanner connected to your regular computer you see that SD card as a removable storage device with all your scanned documents.

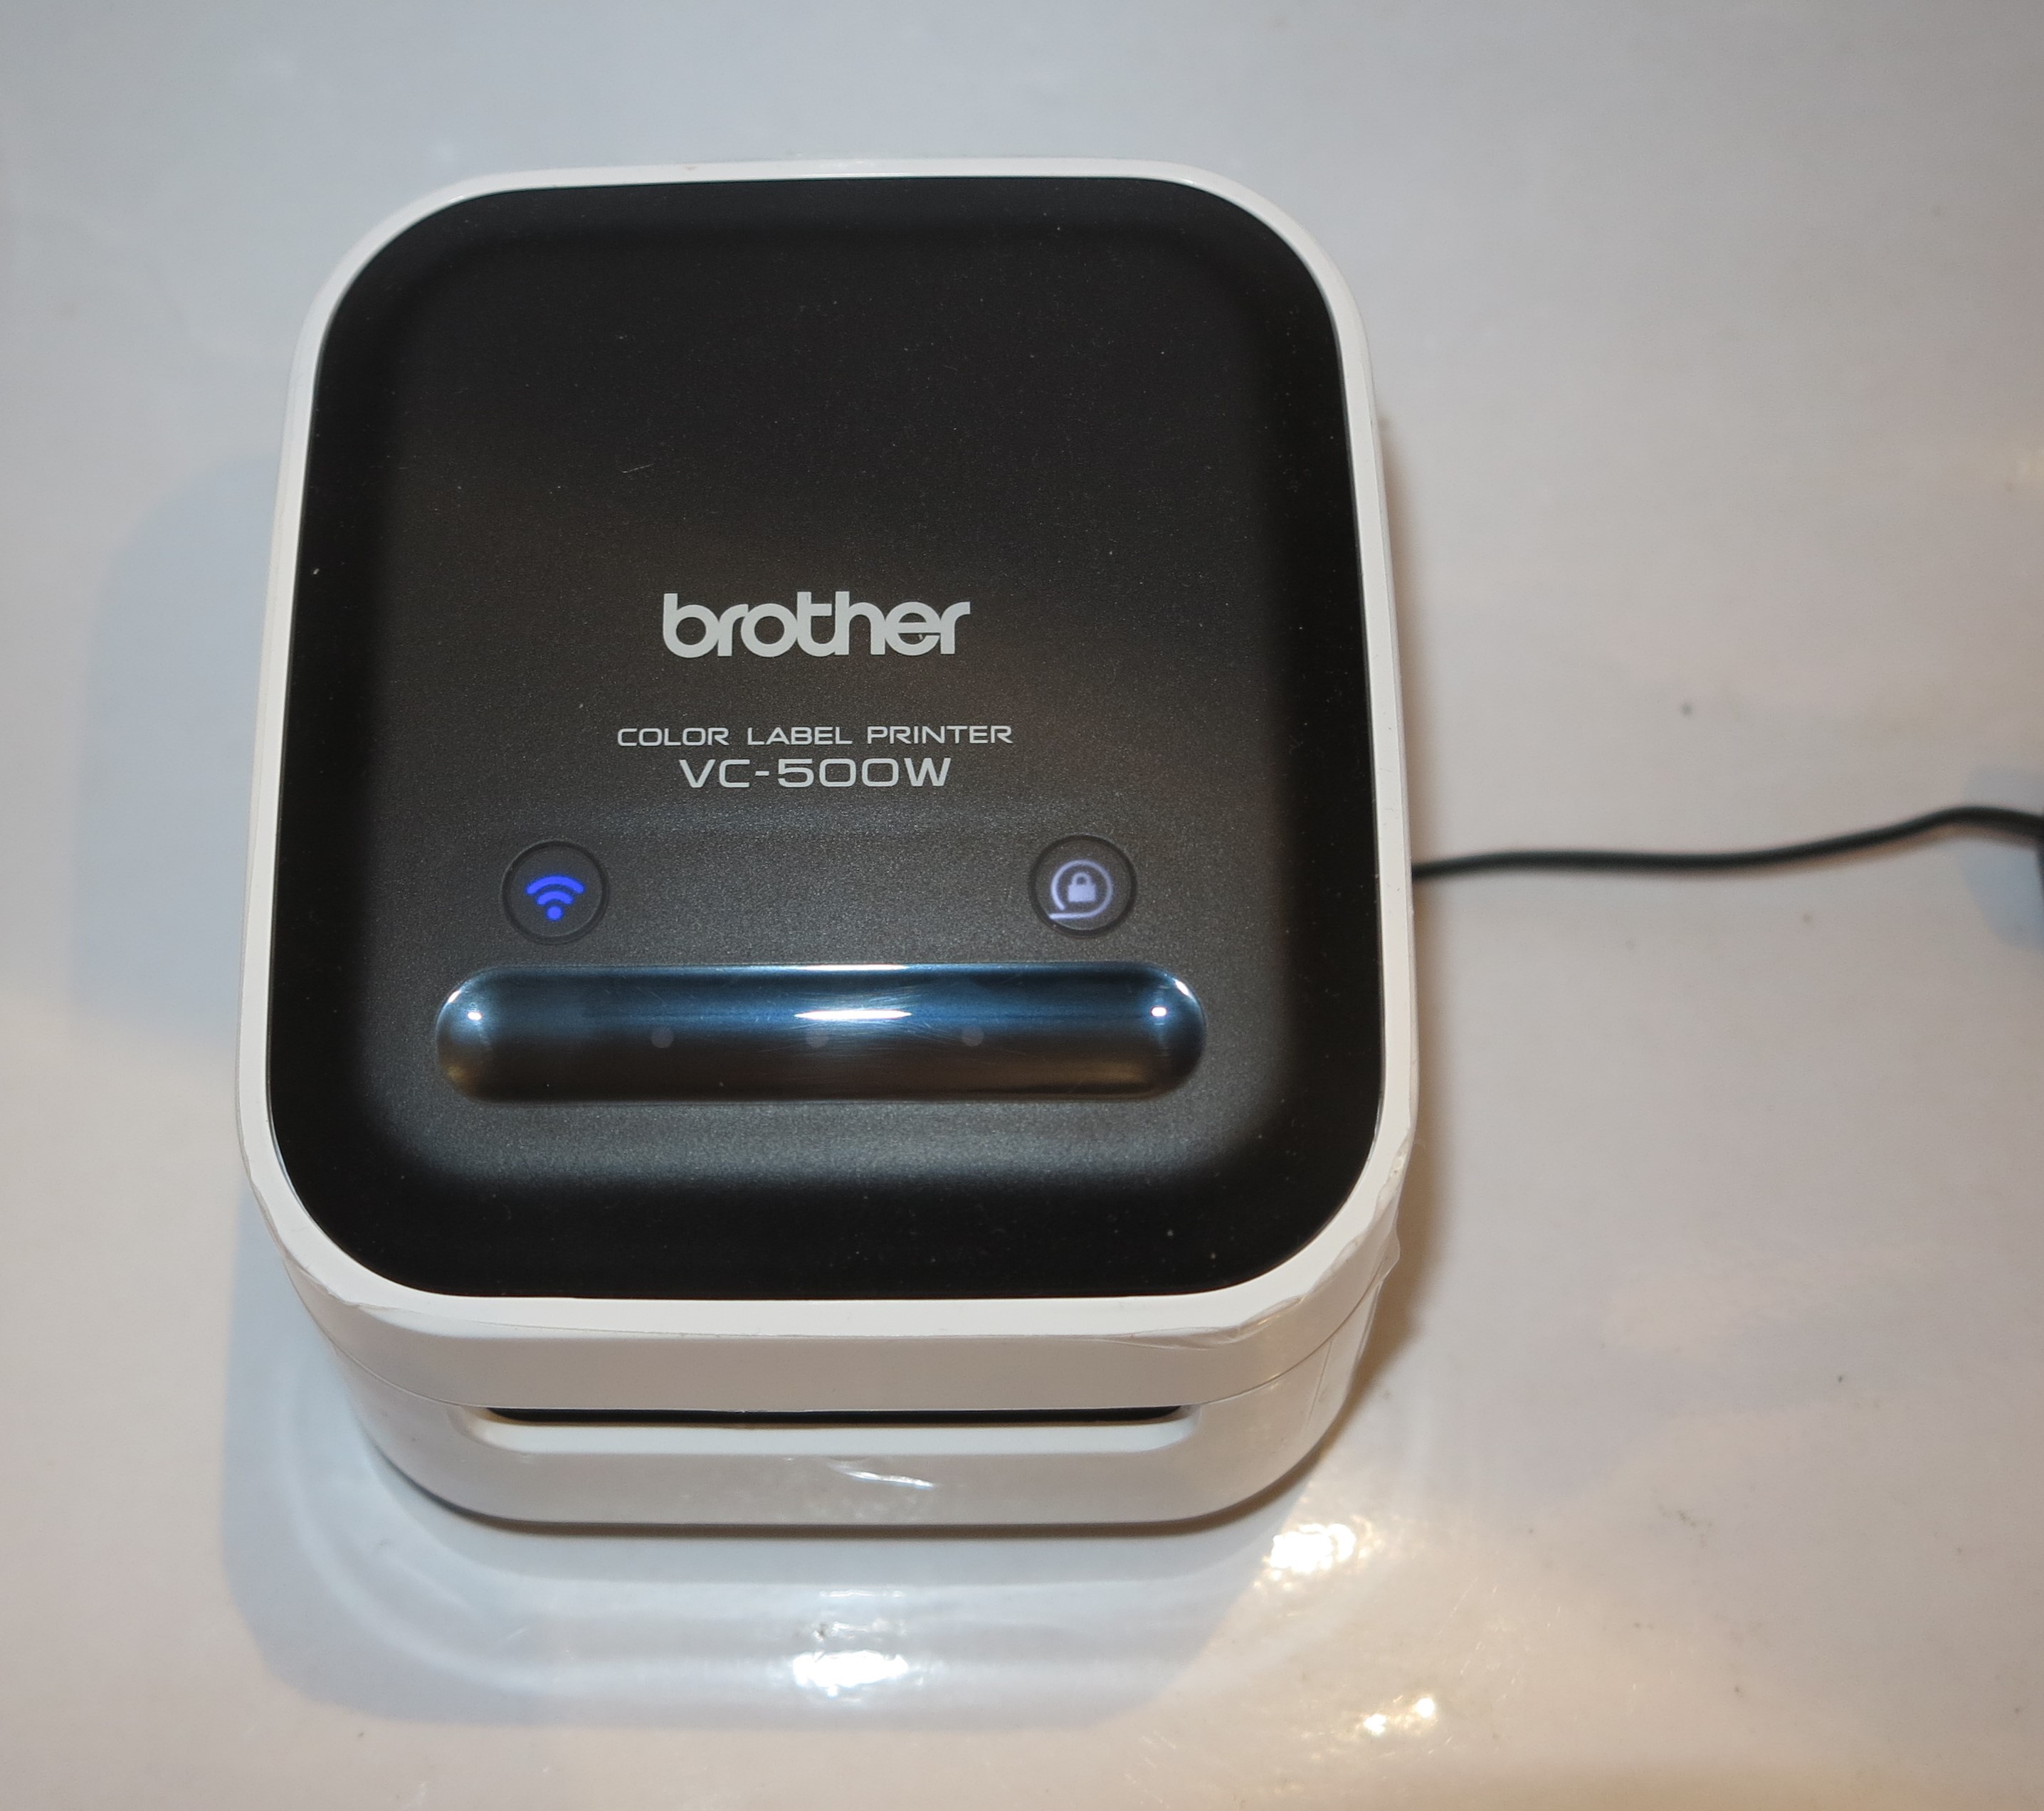
Photo – Insert high-resolution photo of product INLINE

Brother DSMobile DS-940DW Wi-Fi mobile scanner

Scan Connections
Colour USB 3.0
600dpi x 600dpi

Single-pass auto-duplex

Wi-Fi
Own-access-point Wi-FiIPv6

Price

Scanner

Recommended Retail Price: AUD$299
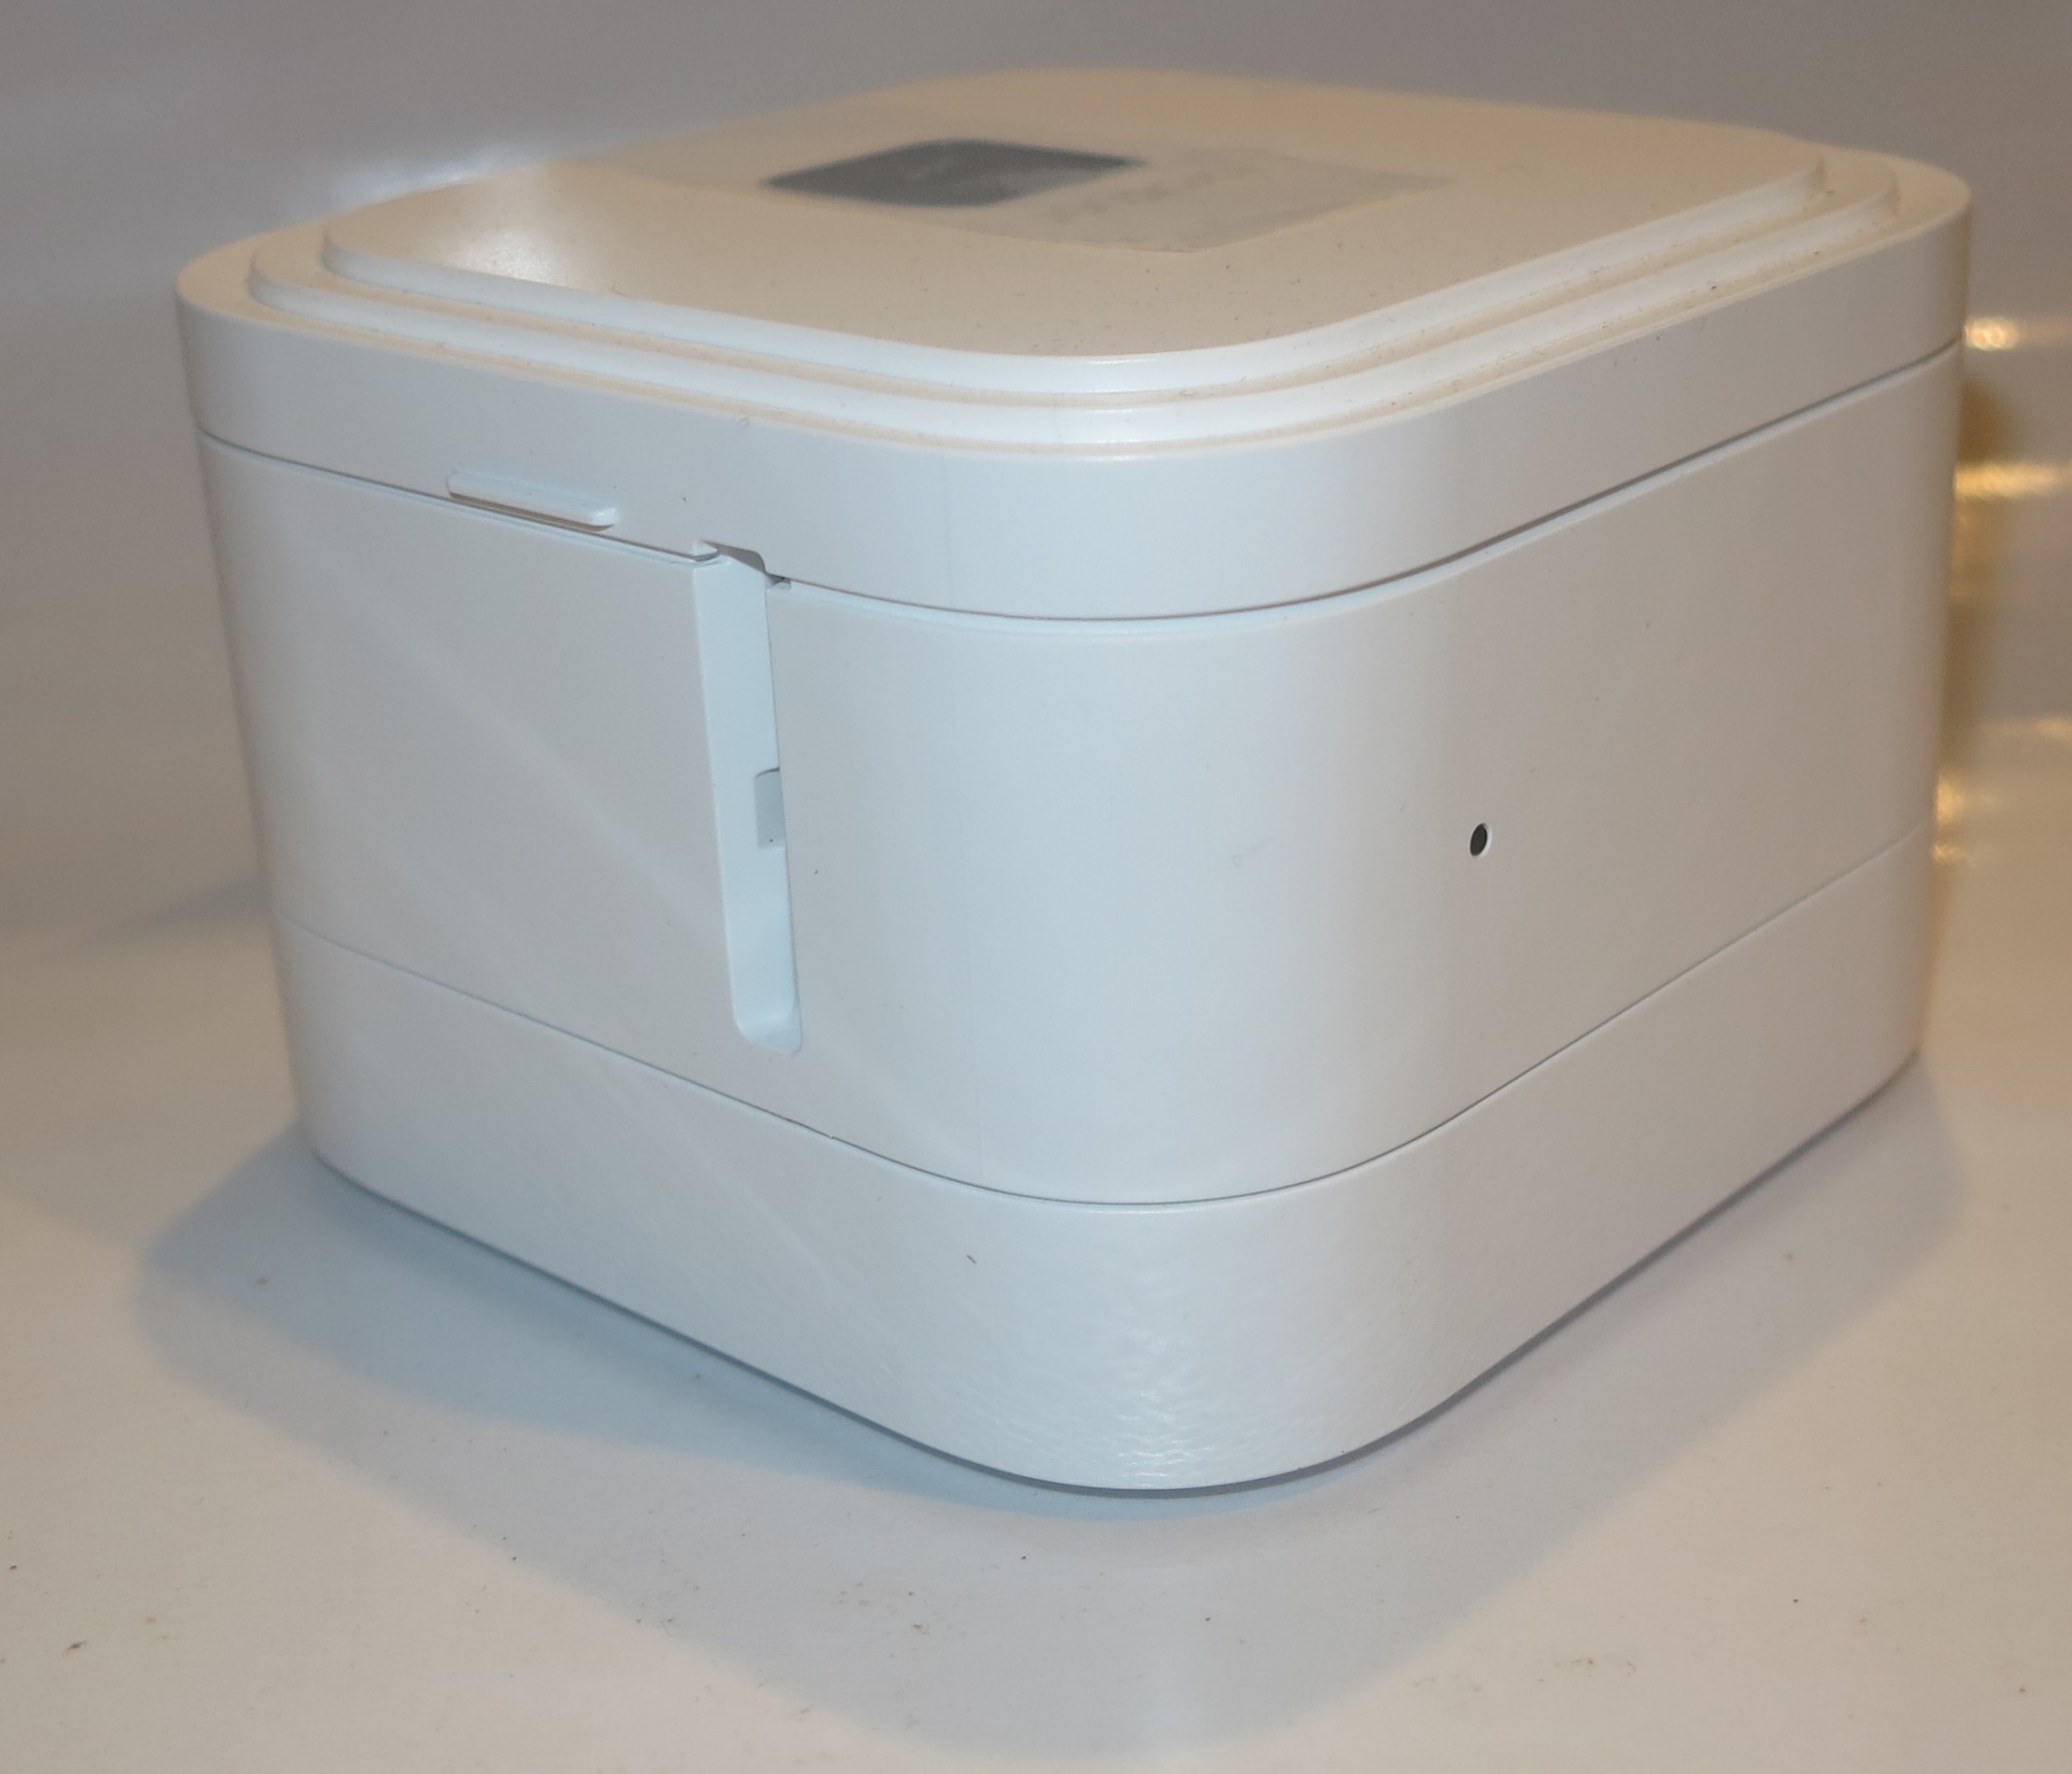
The scanner itself

Brother DS-940DW Wi-Fi mobile scanner scan heads detail

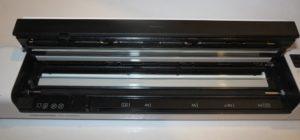
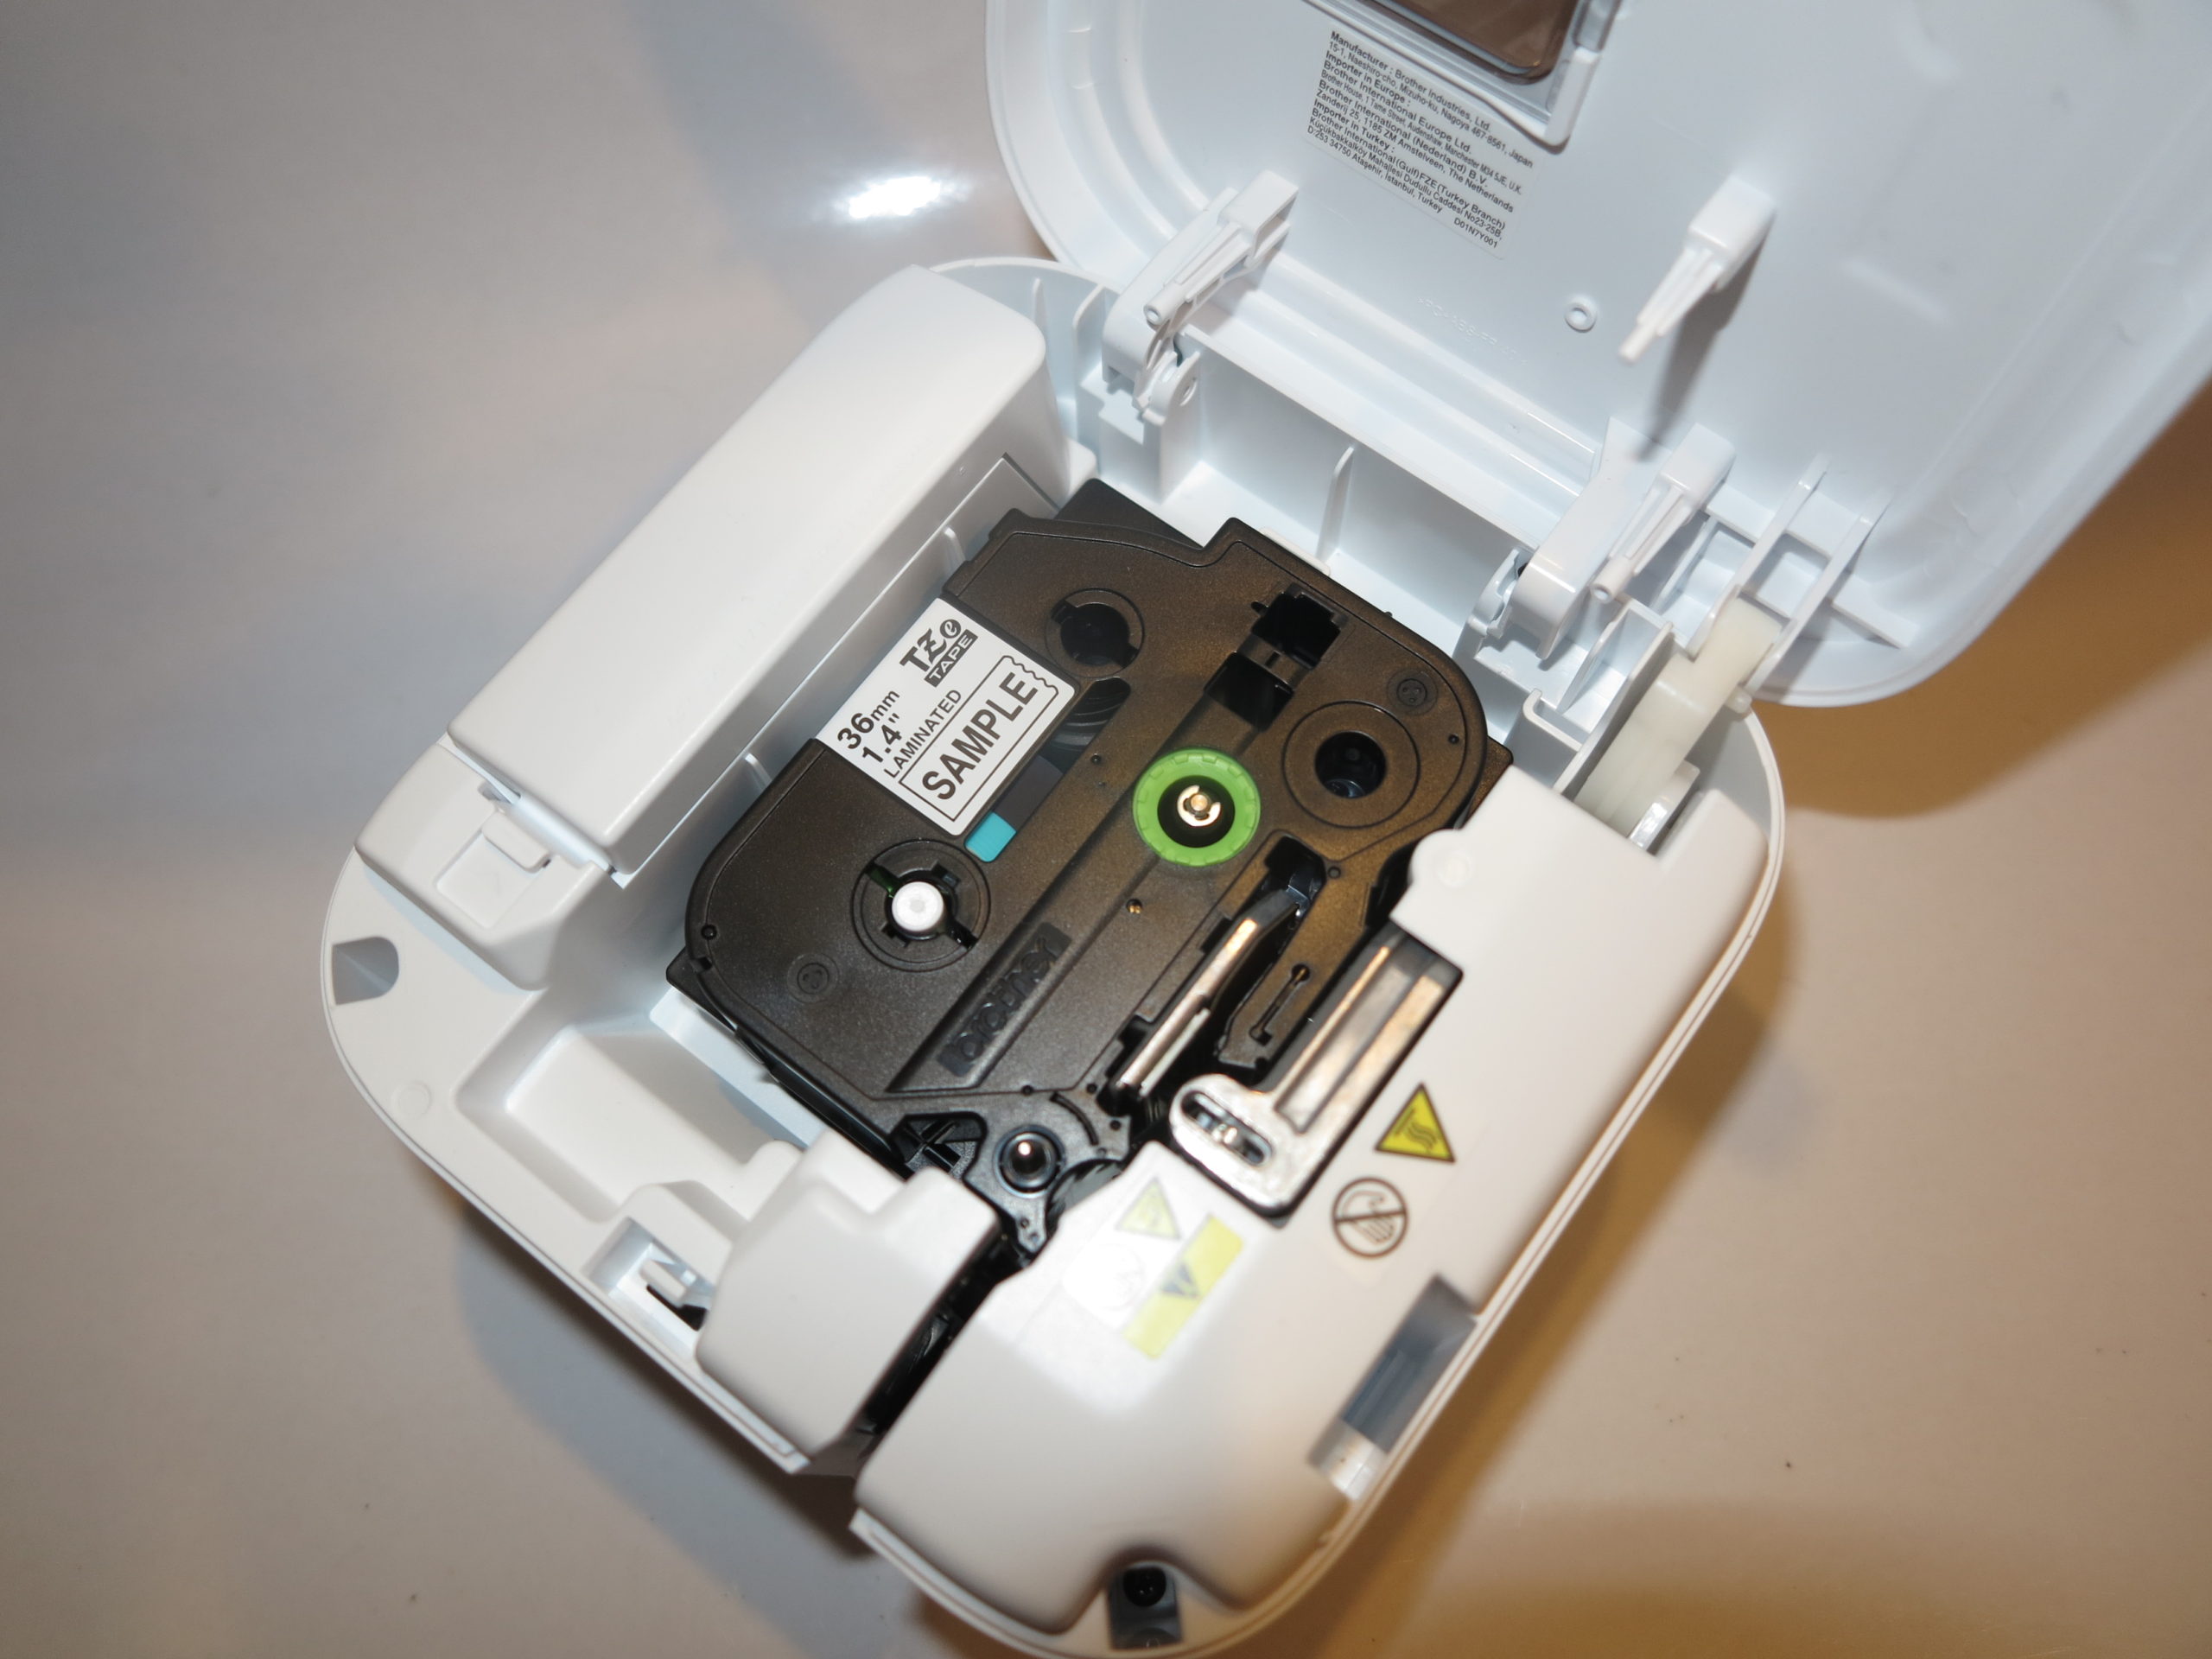
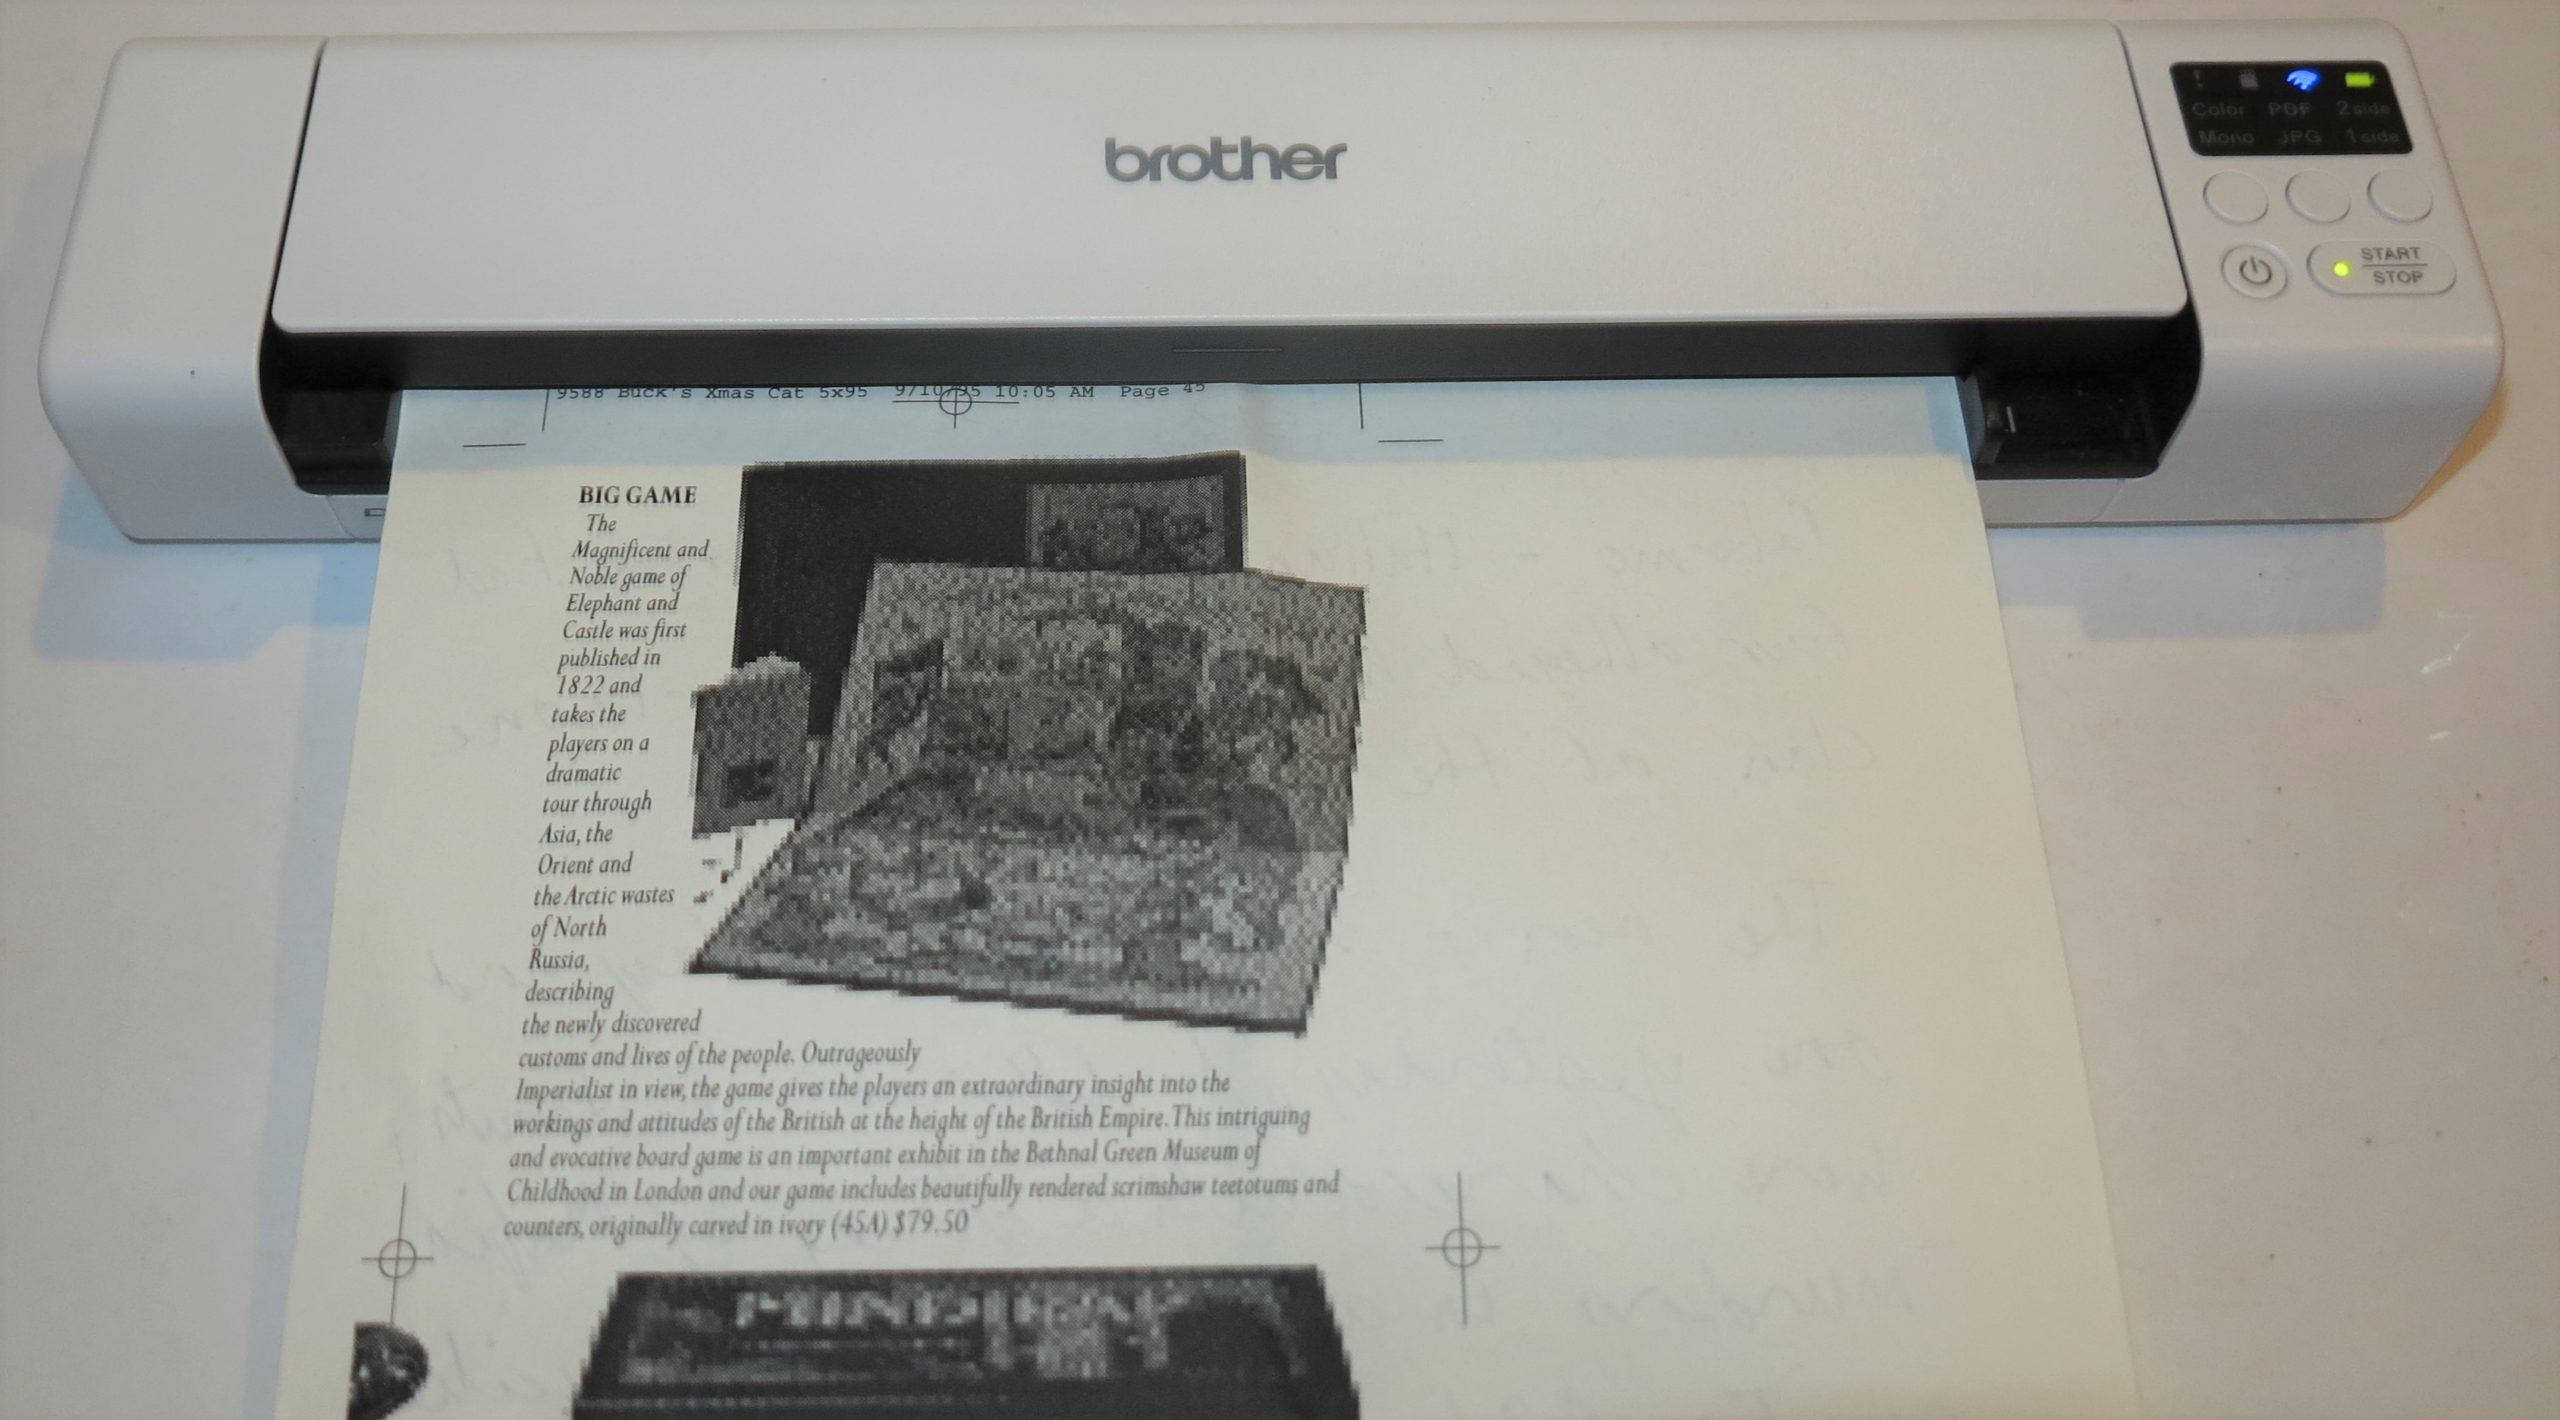
Two scan heads allow the Brother DS-940DW Wi-Fi mobile scanner to scan both sides of a page simultaneously/
The clamshell design makes it easy to remove jammed paper.

The Brother DSMobile DS-940DW Wi-Fi mobile scanner is powered from an internal rechargeable battery or an external USB-based power supply which you have to provide. That could be through your computer, a USB charger or a USB powerbank. But the same USB power supply also charges the battery whether you are running the scanner or not.

Connectivity and Setup

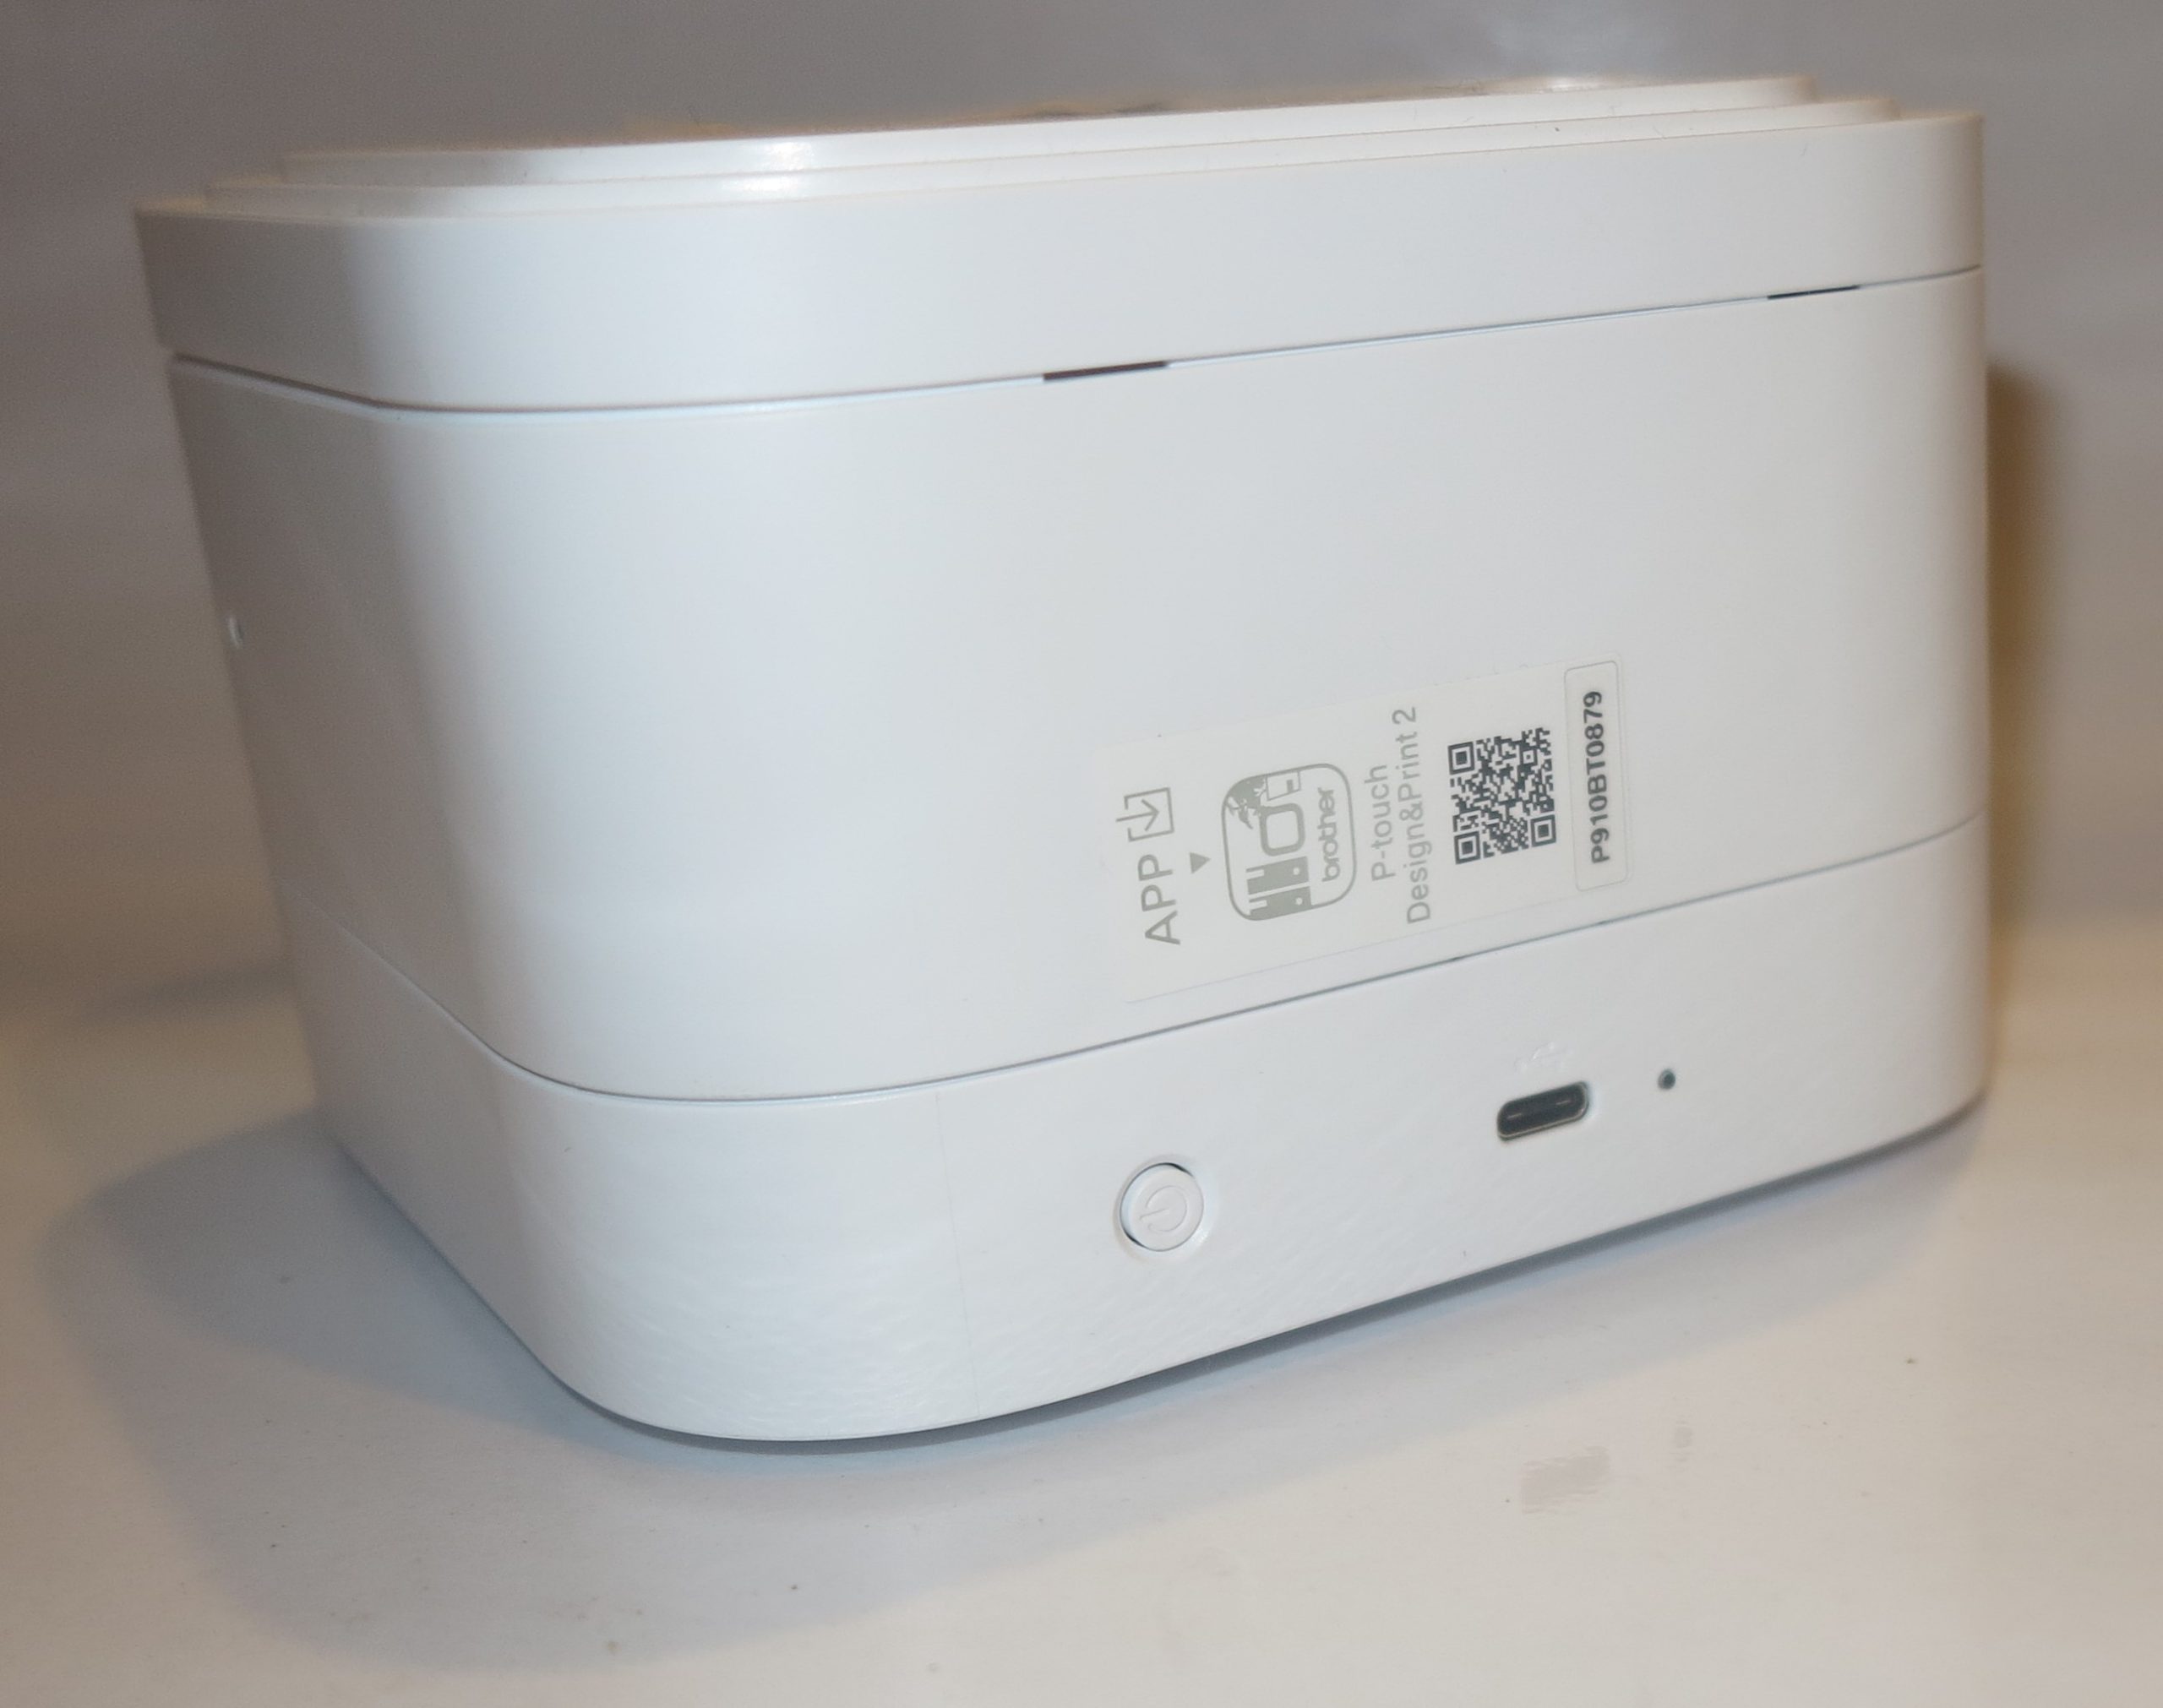
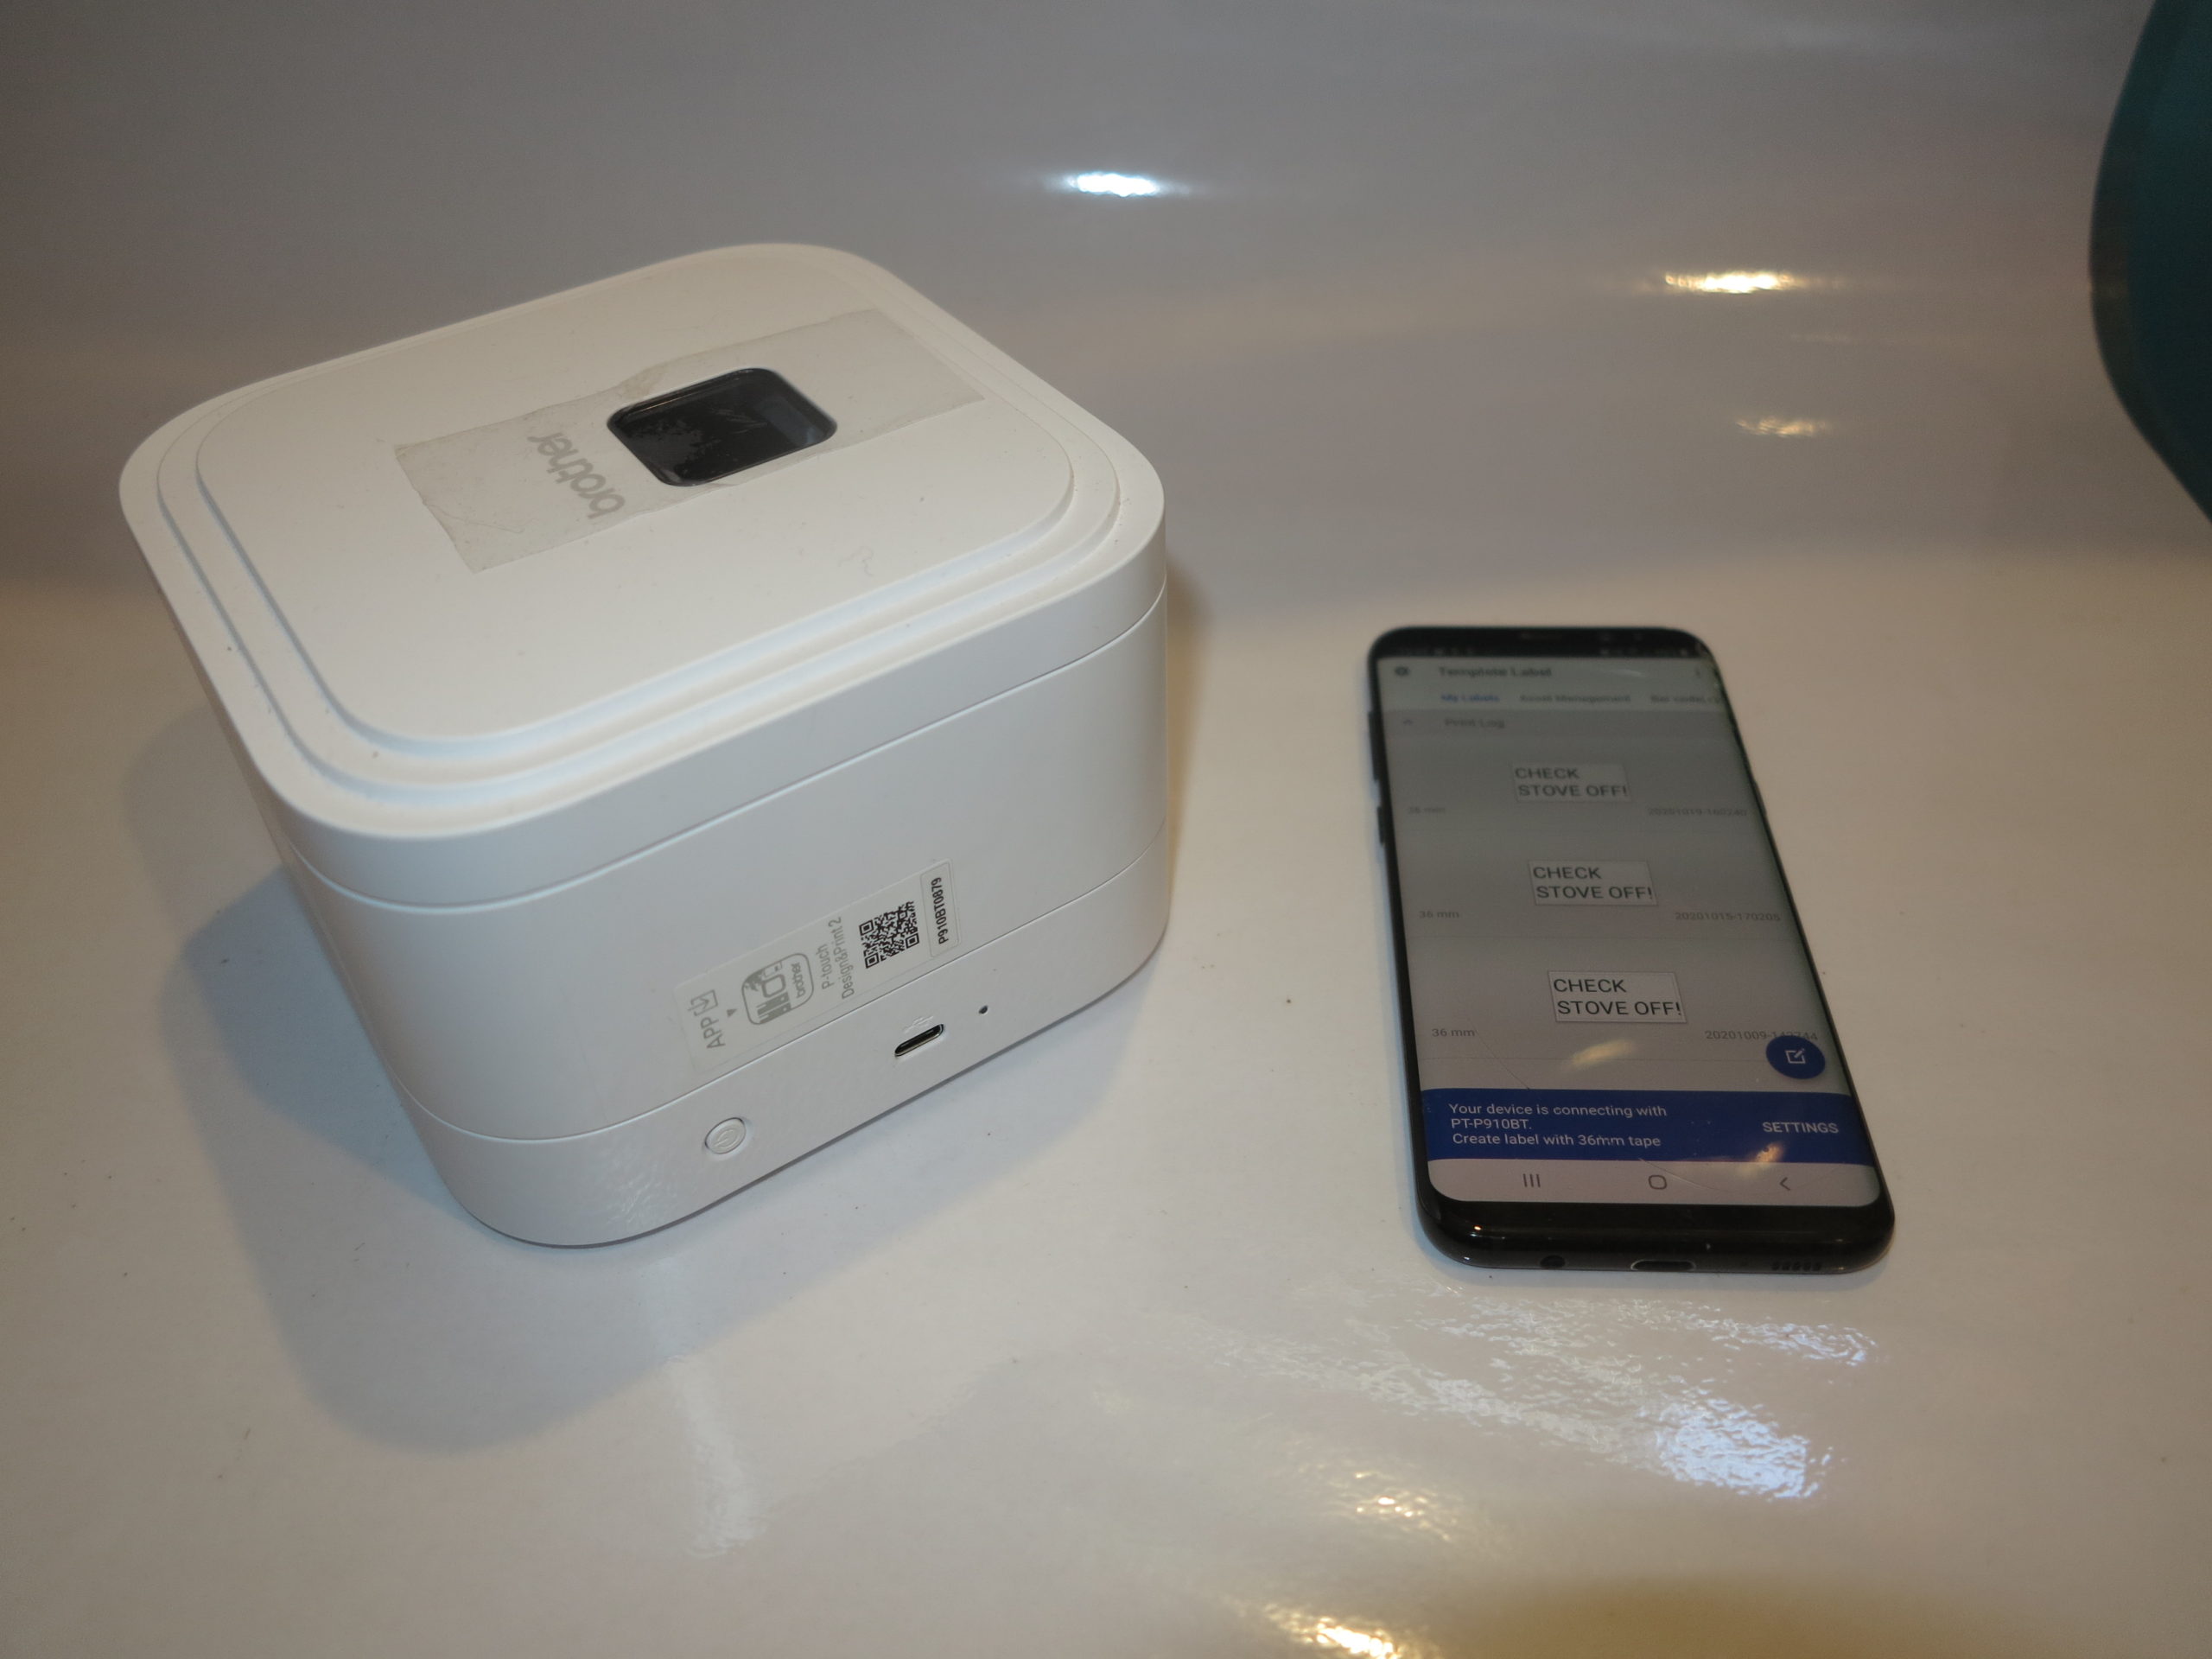
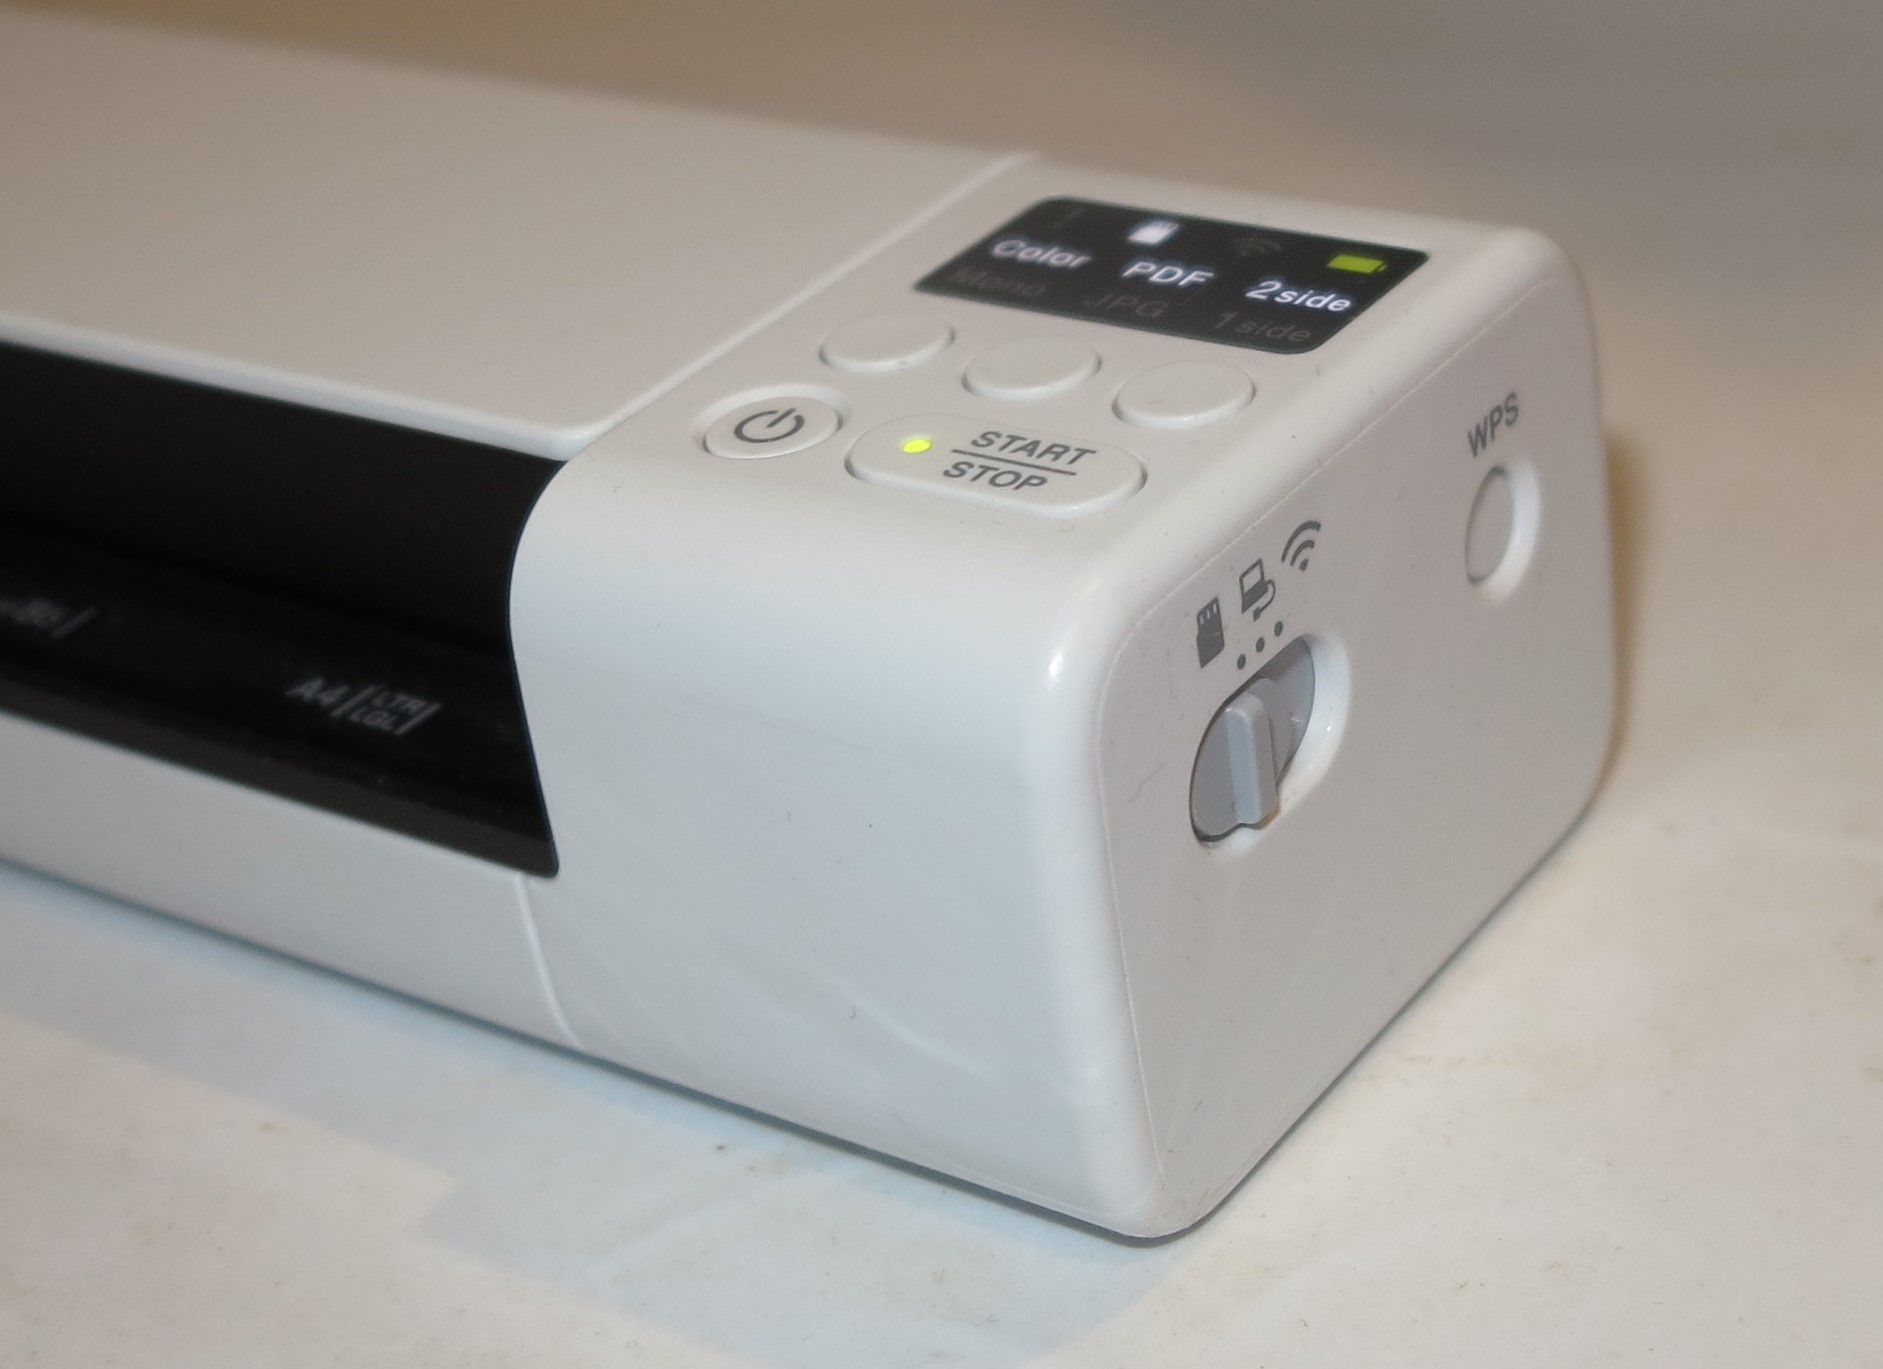
The Brother DS-940DW mobile scanner has an easy-to-find slider switch on the right-hand side that selects between SD card operation, direct USB connection and Wi-Fi network connection. This makes it easier for the user to switch between the mode appropriate to their scanning needs, be it to scan to their laptop via USB or to their mobile device via Wi-Fi or simply to scan to the installed SD card.

Direct connection

Brother DS-940DW Wi-Fi mobile scanner USB 3.0 microB socket

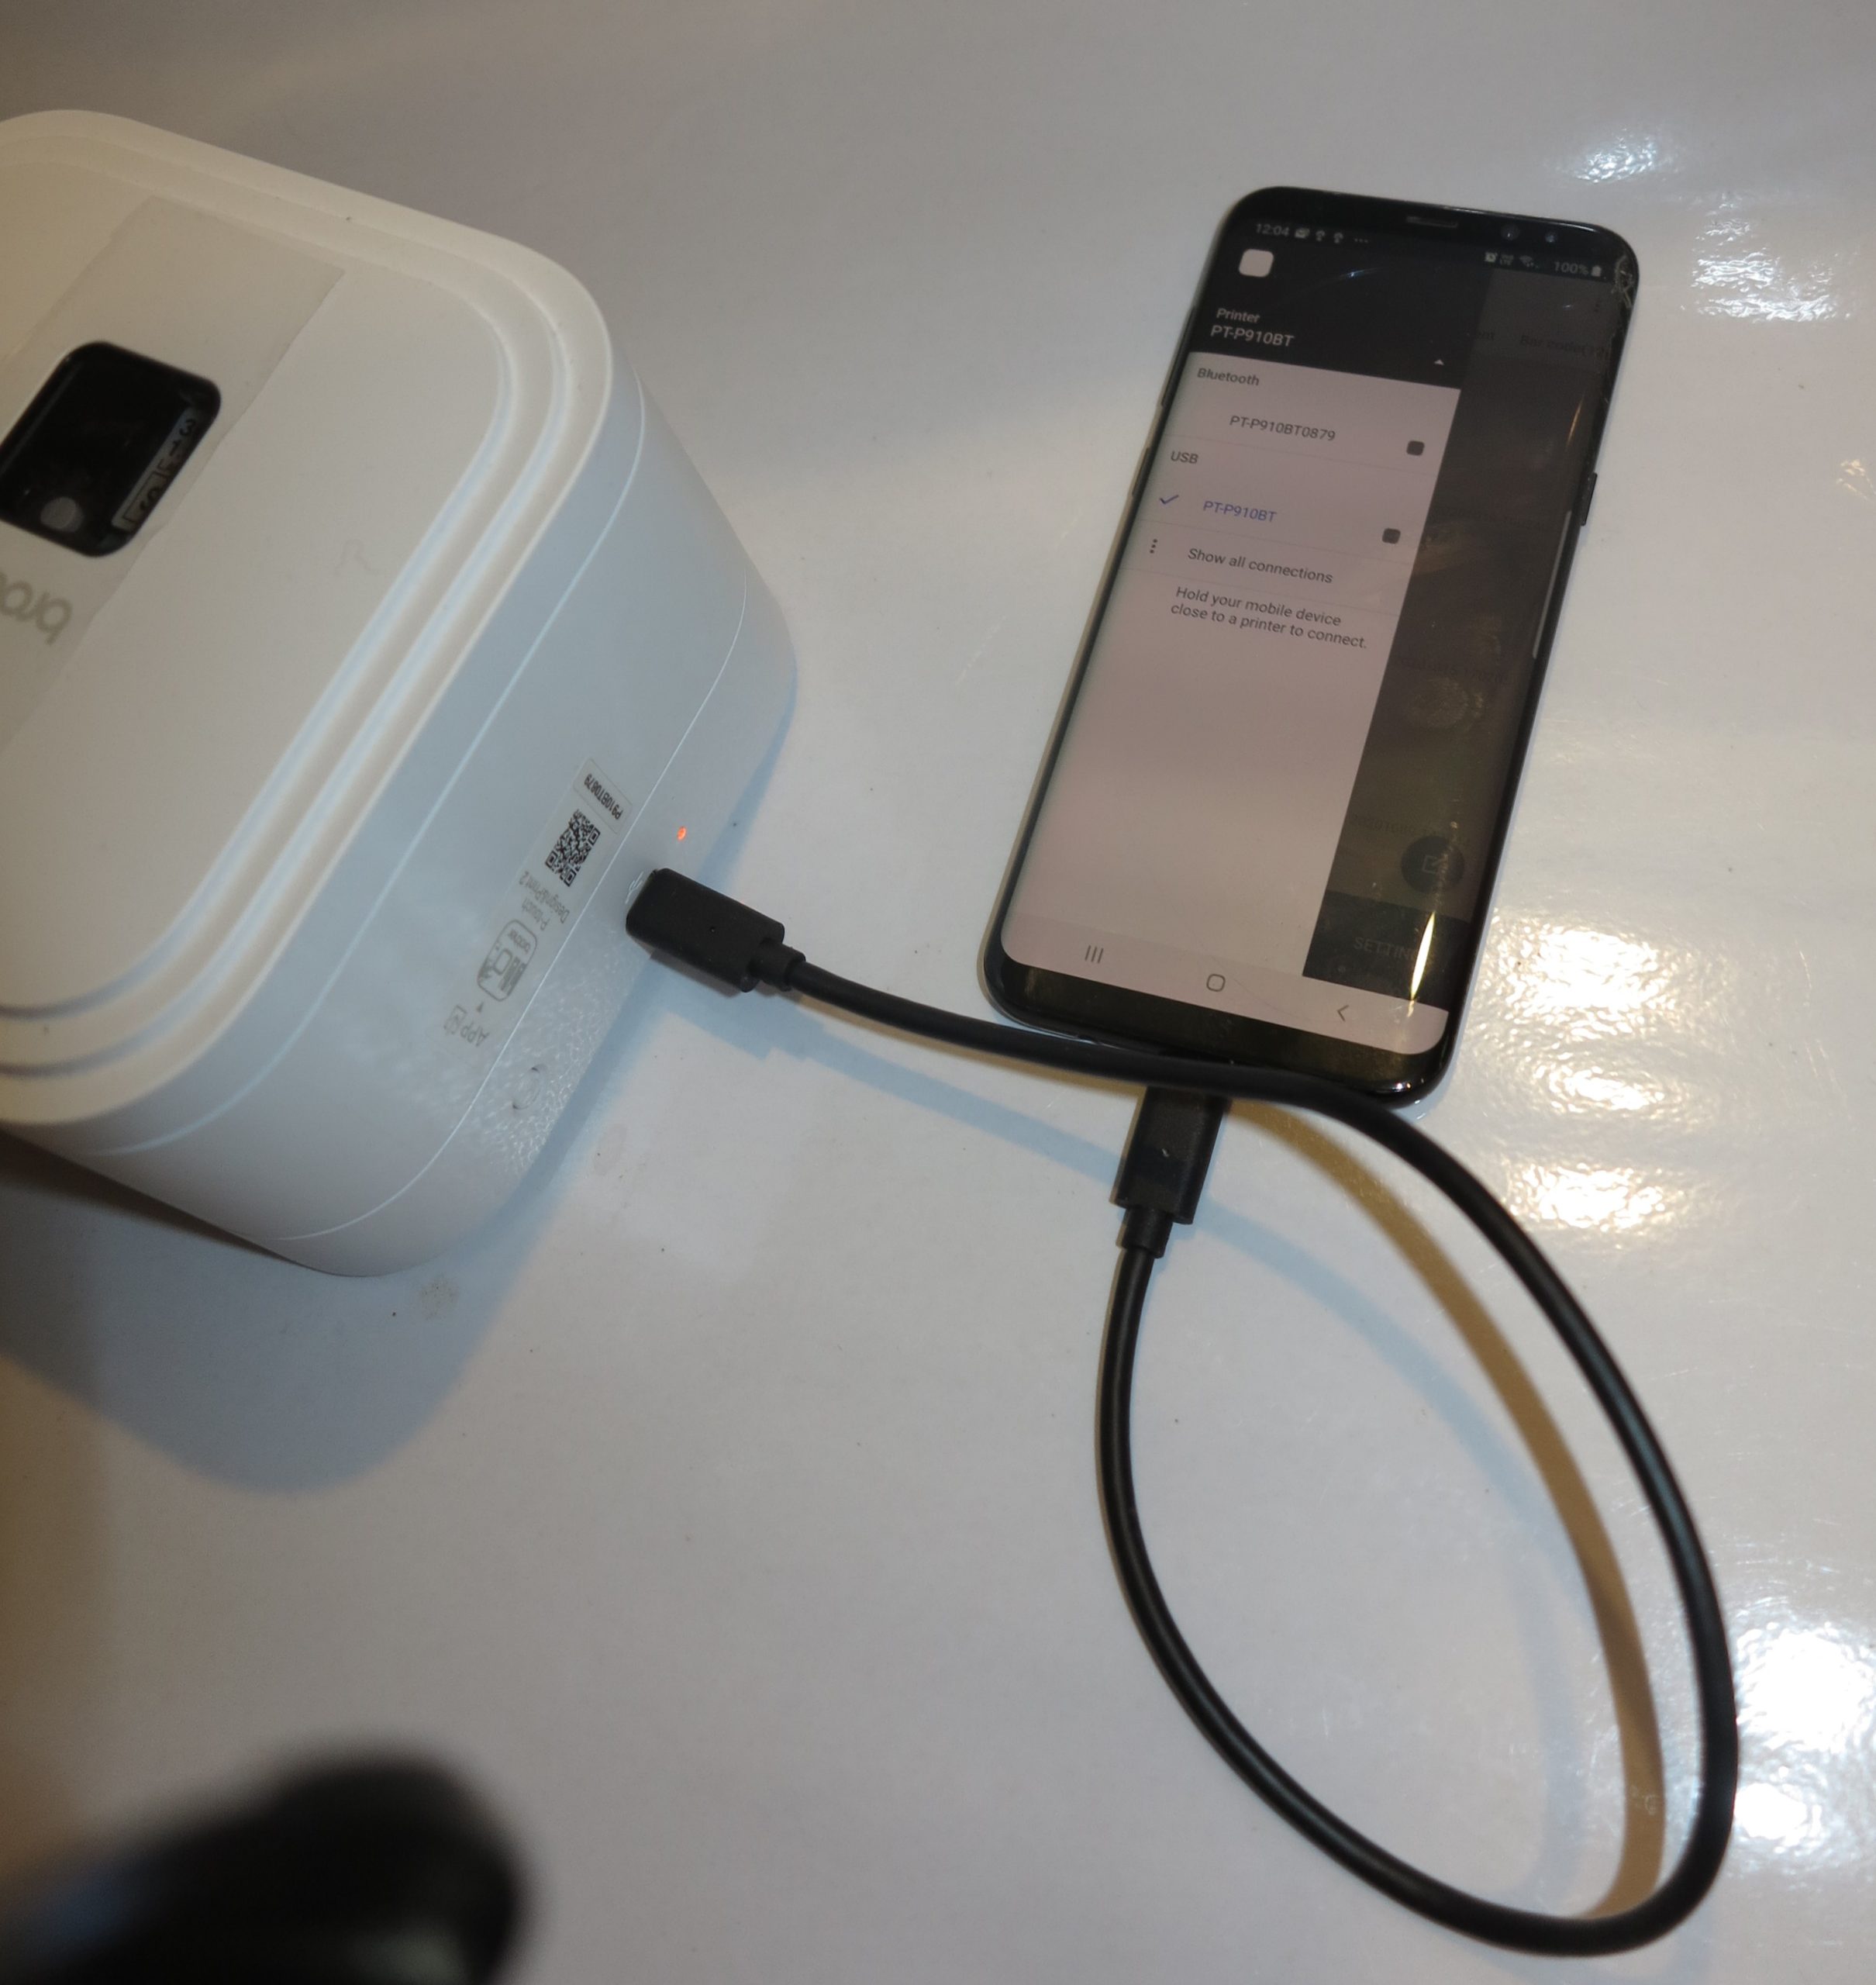
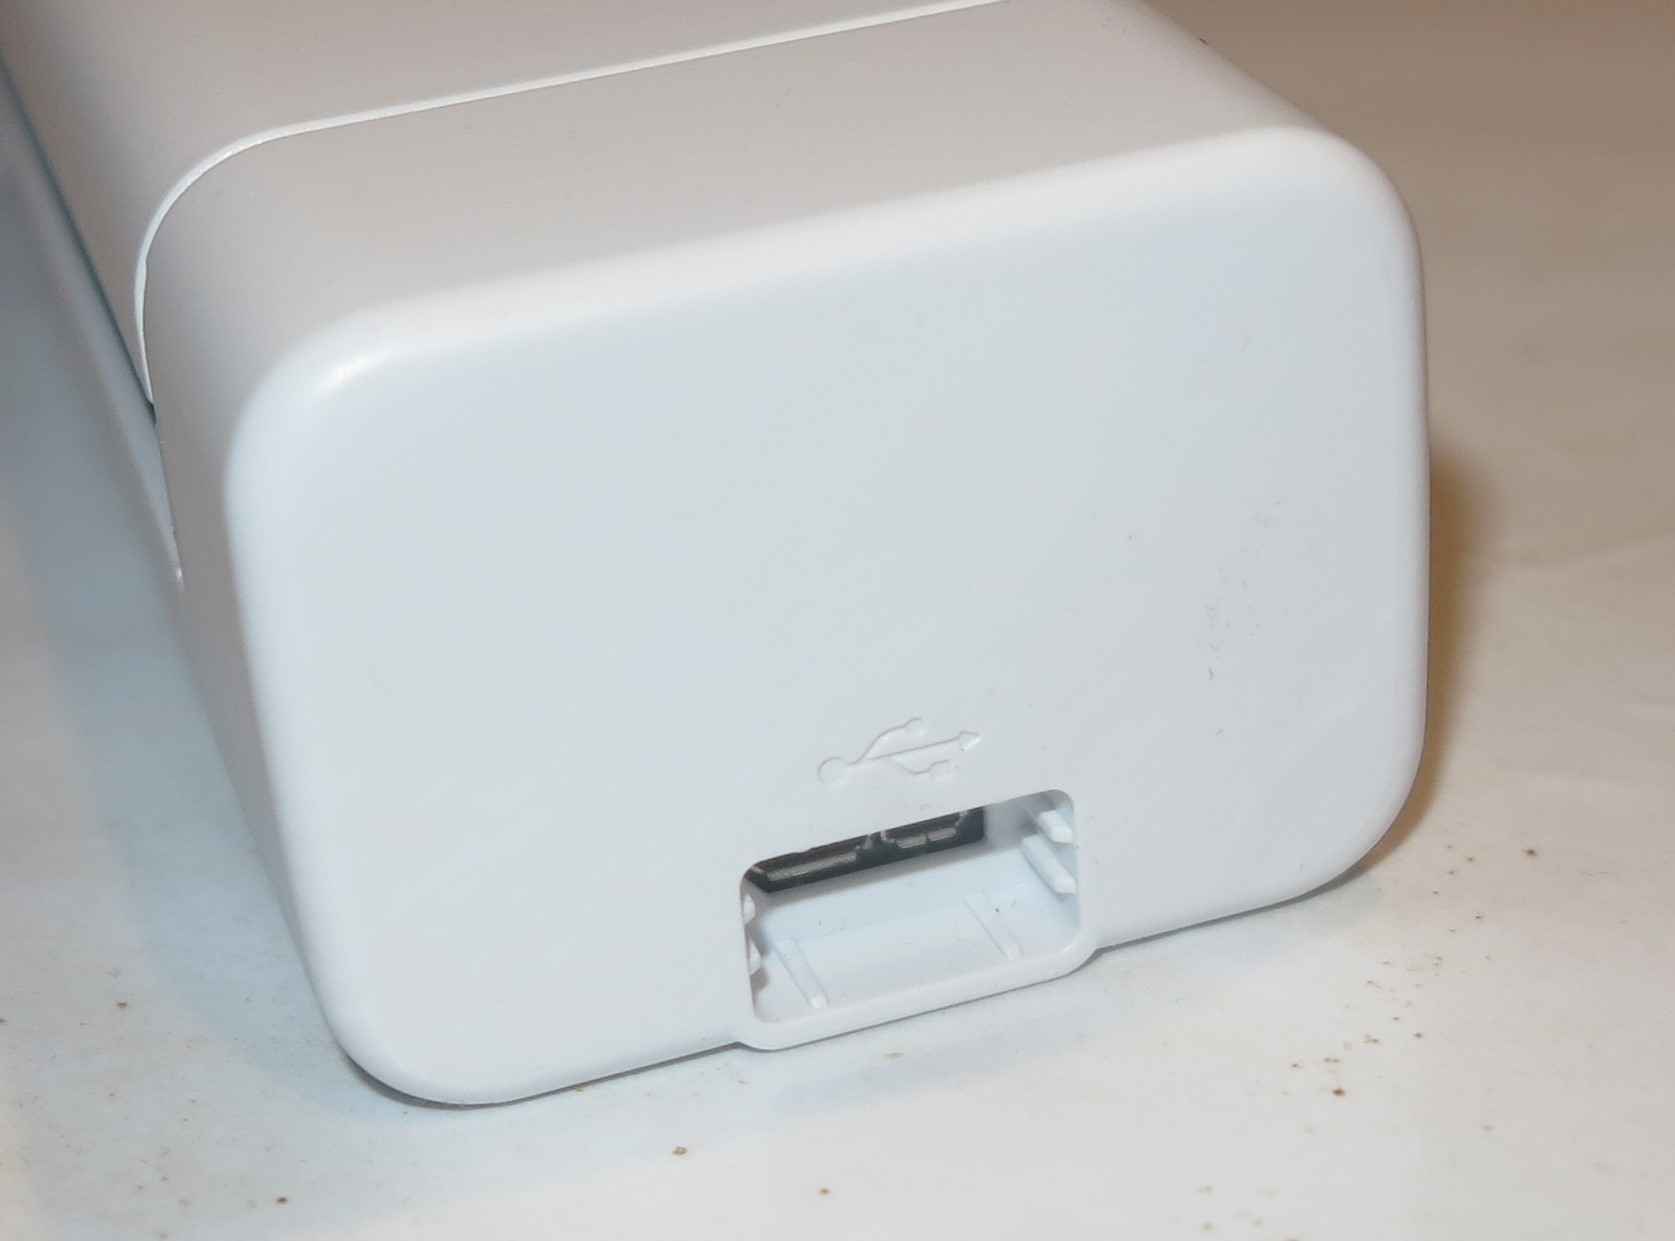
You connect the scanner to the host computer or a power supply using a USB 3.0 or USB-C cable with a USB 3.0 microB plug on it

If you intend to use the Brother DS-940DW scanner with your regular computer via USB, you connect it to the host computer using a USB 3.0 cable supplied with the scanner.

But if your computer is equipped only with USB-C connectors like some new Ultrabooks or you use a USB-C charger to power your scanner, you would need to purchase a USB Type-C to  USB 3.0 microB cable (OfficeWorks Australia, Office Depot USA, B&H Photo Video USA,Walmart, Amazon) rather than use the supplied USB Type-A cable.

Brother DS-940DW Wi-Fi mobile scanner microSD card slot

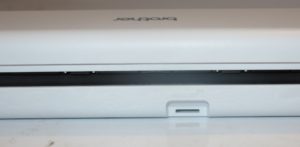
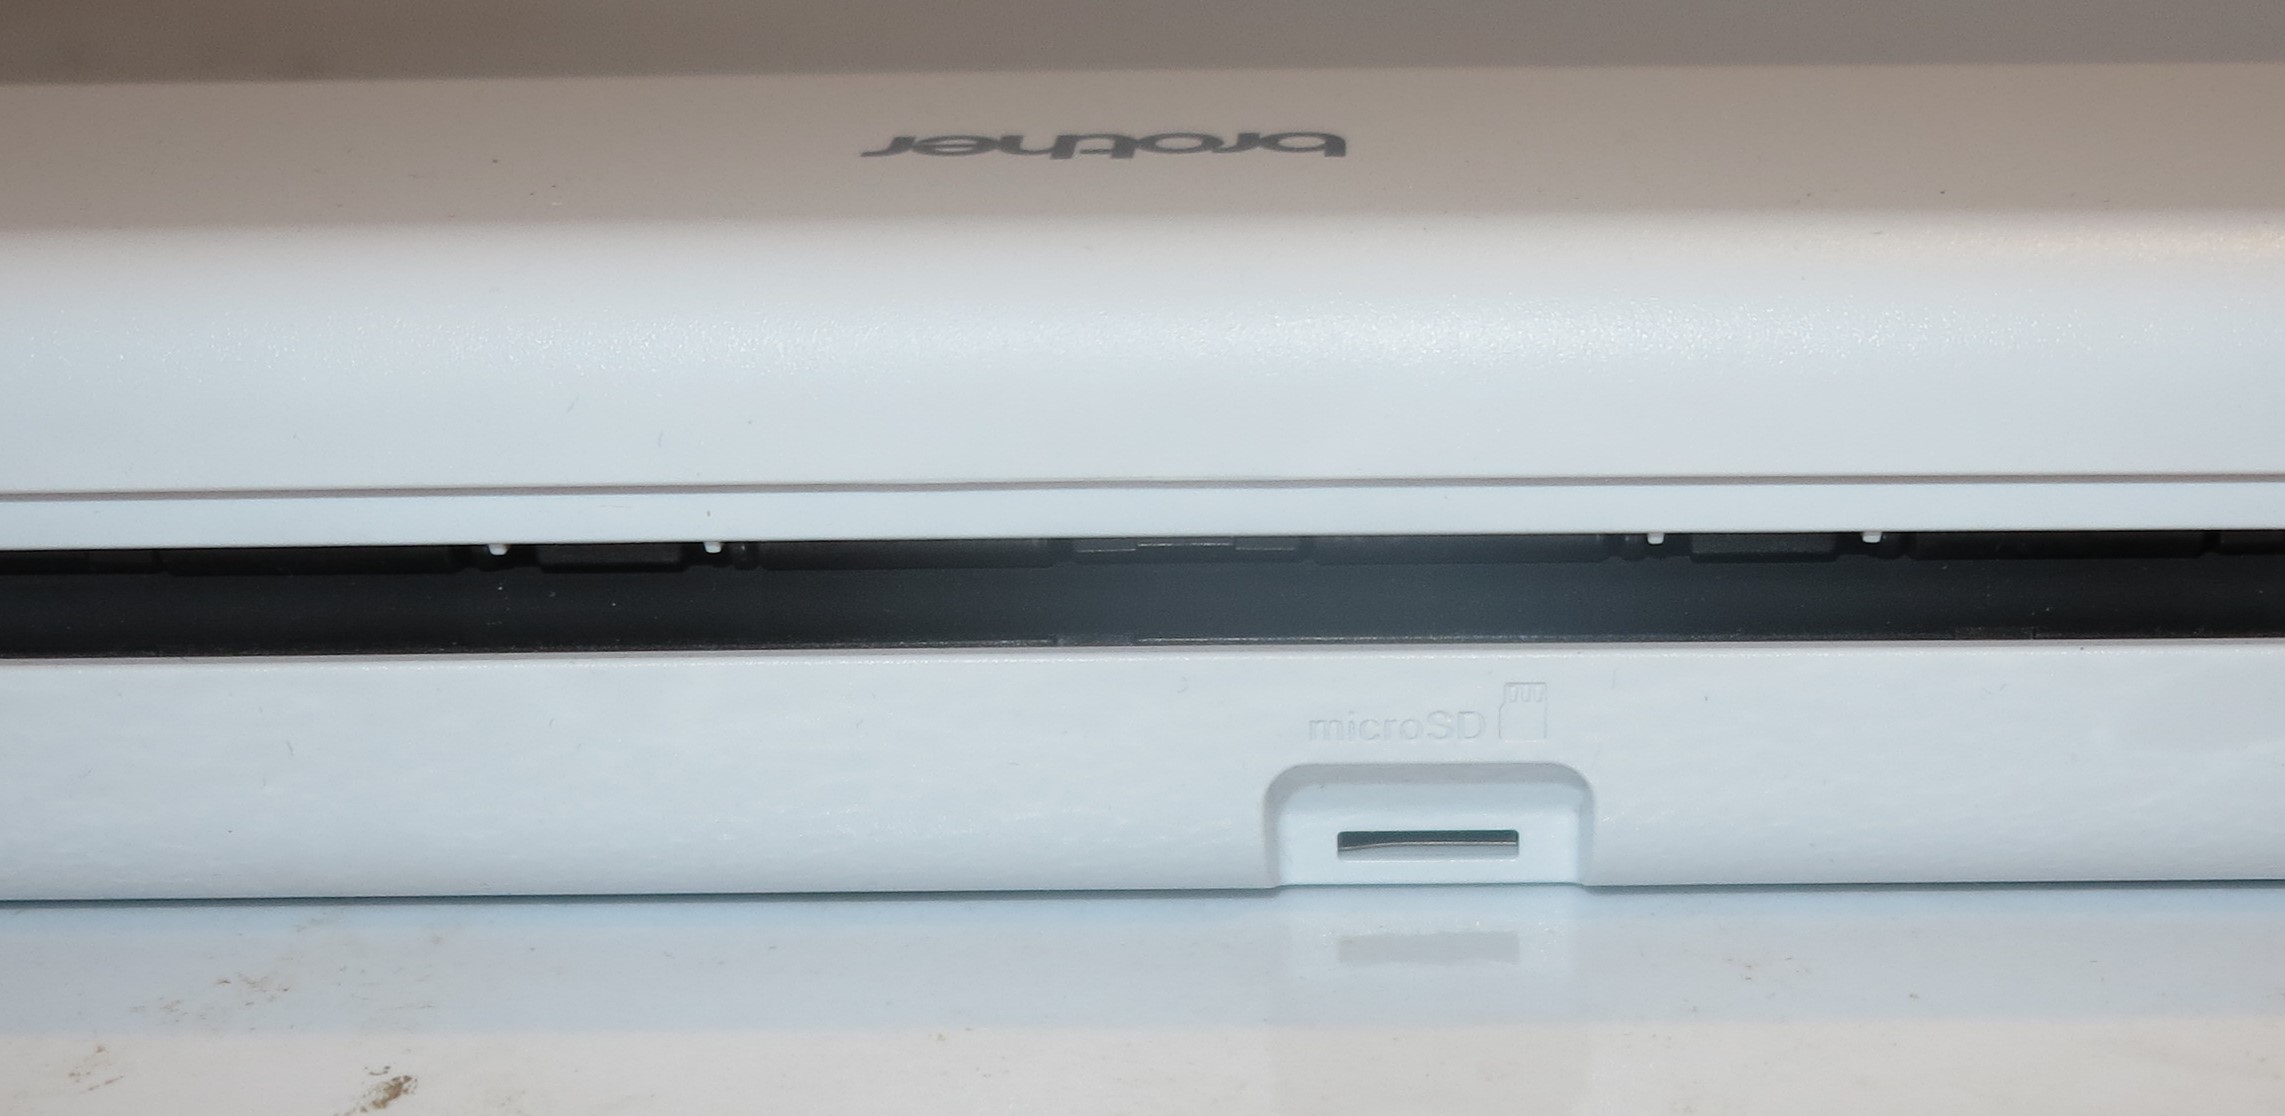
microSD card slot for offline scanning to microSD cards

In this case, if you did use the scanner offline and scanned documents to an SD card installed within the machine, the SD card will be presented to your computer’s operating system as another logical storage volume. This is similar to what happens when you are using a USB memory stick or an SD card reader.

Wi-Fi network connection

Brother DS-940DW Wi-Fi mobile scanner operation mode switch

It is easy to change between WI-Fi, dirrect or offline scanning at the flick of a switch

The scanner can be connected to the computer via a USB cable or via a Wi-Fi network, whether one that it creates or an existing small network. But setting it up to work with an existing Wi-Fi network requires you to work it as its own Wi-Fi access point then log in to a specified Web page which has a “Wireless Setup Wizard” to associate it with the existing network. You can use WPS-based push-button or PIN setup if your access point or router supports these methods. For this function, there is a hardware button located on the side of the scanner near the operation mode switch.

I am identifying the issue of having this mobile scanner on an existing small Wi-Fi network due to the idea of setting up these mobile devices as part of a mobile network where there are more than two devices to be on that network. It is in addition to having this same device work as part of your home or small-business network.

Brother DS-940DW Wi-Fi mobile scanner control panel detail

Control panel with buttons to start scanning, determine whether to scan in colour or black and white or scan both sides of the page. Another button allows you to determine whether the scanned results are to be a JPEG image file or a PDF document file

When the Brother DSMobile DS-940DW mobile scanner is connected to the host computer via USB, it exposes a Mass Storage device class for the internal microSD card reader. This is in conjunction to vendor-specific devices that depend on the host computer running a Brother-supplied driver and scan-monitor software.

There is a default arrangement that if you enable Wi-Fi mode on the scanner, it will check for previously-configured networks before it goes to own-access-point mode which is indicated by a steady Wi-Fi light. Successful connection to a previously-configured network is simply identified by a steady Wi-Fi light after a bit of flashing.

Software installation

If you are setting the Brother DS-940DW mobile scanner to work with your regular computer, you would need to install the drivers from the Brother support Website for this machine to work. You will also be supplied with the Brother iPront&Scan software which can do most of the essential scanning tasks.

Brother throws in complementary software like a business-card scanning app so you can scan your pile of customers’ or business partners’ business cards in to a contact-management database. This is software you can install when you download the driver and software package or install at a later date.

Mobile users will need to install the Brother iPrint&Scan app from their mobile platform’s app store. Here, they will need to use this simple software to scan the documents in to their device and “take them further” as they see fit.

Document Handling

Brother DS-940DW Wi-Fi mobile scanner ready to scan A4 page

Scanning a standard A4 or letter document page

The Brother DSMobile DS-940DW can only handle one page at at time but can scan both sides of that page at once. The double-sided scanning approach is similar to some of Brother’s multifunction printers that use single-pass duplex scanning.

When you scan a document, you need to make sure that the black paper guide is lined up against the original document’s edge before you start the scanning process. Here, you are making sure that the document isn’t skewing or likely to jam.

To deal with paper jams, you press the front of the scanner above the document-feed slot in order to expose the scanning heads to remove the misfed original. Here, the “clamshell approach” makes it easier to rectify any paper jams.

Brother DS-940DW Wi-Fi mobile scanner ready to scan an ID card

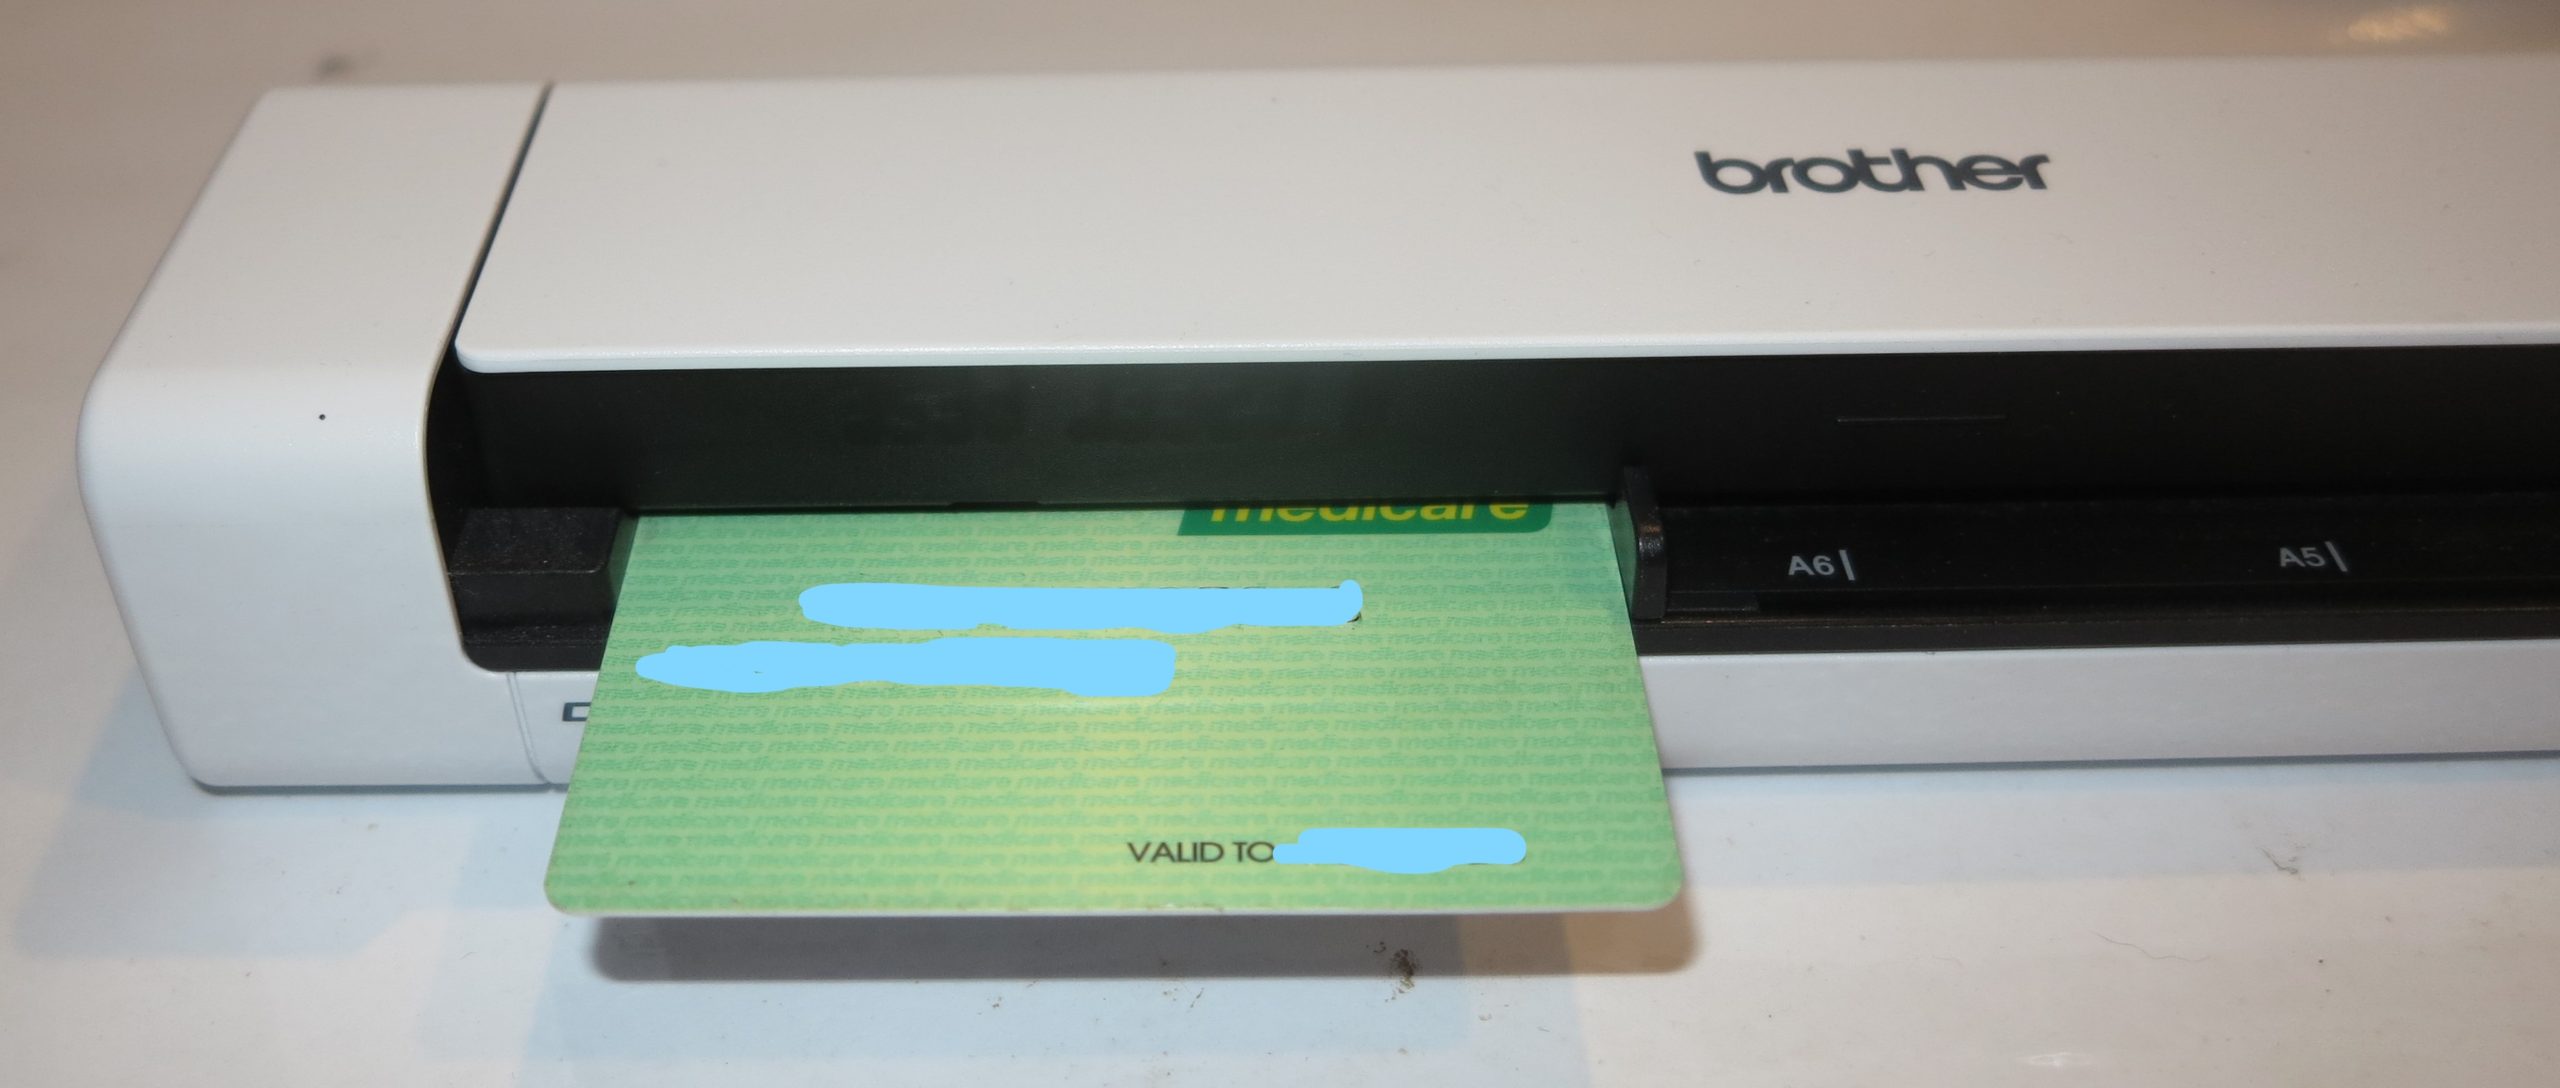
Ready to scan an ID card of standard “credit-card” thickness and with embossing – it can.

The Brother DS-940DW was able to scan ID cards, even those with embossed characters properly. I would see this as being important where users have to scan them to prove a customer’s identity during an “on-the-road” transaction.

Walk-up functions

The Brother DS-940DW has a built-in SDHC-compliant microSD card drive so you can scan documents offline to a microSD card. This is presented to the host computer as a standard USB Mass Storage Device and you use your operating system’s file manager to get at your scanned files which exist on that SD card.

I wouldn’t really expect this to work properly with the idea of showing your scanned photos through a smart TV or similar device that has its own USB port. It is because most of these dedicated-purpose devices don’t do a good job at handling multiple-function devices connected to their USB ports thanks to their firmware not supporting USB hubs as a device class.

Computer functions

I have used the scanner with the Brother iPrint&Scan software and found that it is competent as a basic scanning package whether to store the scan to your computer’s file system or to an online storage service.

At the moment, the Brother iPrint&Scan desktop scanning software works on a “pull-scan” approach where you have to start the scanning job from the software rather than a “push-scan” approach pressing the machine’s START/STOP button to initiate the scan job. This is due to the scan monitor software associated with the machine and providing this functionality not installing properly. I have addressed this issue previously on this site due to various scan-monitor programs taking time to respond properly when you start a scan job on the printer or scanner, with the idea of operating systems undertaking this role.

The Brother DSMobile DS-940DW network mobile scanner works with the Brother iPrint&Scan mobile app available on both the Apple and Google app stores. Here, it worked properly where you can simply save the scan to your mobile device or share it with other apps that handle the supported file types using the “share to” shortcut that iOS and Android provide.

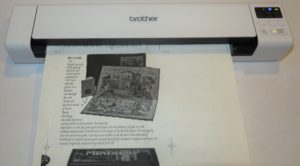
Scan speed and quality

The machine can scan the pages you feed through it quickly and yields a high-quality reproduction of these pages. I had tried it with an ordinary A4 document, a snapshot photo, two till receipts and two ID cards and this was proven for each of them. With the photo, there wasn’t any difference with the colour saturation that was yielded.

If you are scanning till receipts with the scanner, it is a good idea to set the machine or your scanning software to scan the receipt single-sided. This will avoid problems with reverse-side text that may “come through” during the scan which may be a problem with receipts coming from devices that are loaded with “branded” paper that has advertising material printed on the back.

Limitations And Points Of Improvement

A key issue that I found with the Brother DS-940DW mobile scanner was a poor user experience when I enrolled it with an existing Wi-Fi home network from my smartphone. This could be improved upon through having a native mobile platform app for configuring this scanner’s network connectivity. It can include the ability to transfer a network’s connection details that are stored in your mobile device to the scanner as part of configuring that device.

For those of us who use a regular computer and the scanner’s Web user experience for configuring it to work with an existing Wi-Fi network, that user experience could be improved with an indicator that highlights successful connection to that network. As well, a hardware switch could be used to toggle between the scanner’s own network and an existing network, which may come in handy for troubleshooting or if you don’t want to use an existing network that you set up the scanner for.

It could also benefit from the full set of USB 3.1 specifications including the Type-C connection and USB Power Delivery for quick charging. Most likely I would see Brother offer this connection in a newer portable printing devices as the USB Type-C connection becomes the norm for portable computer equipment.

I also see the Brother DSMobile DS-940DW network mobile scanner being an ideal device to implement Mopria Scan driver-free scanning technology (Mopria Alliance press release PDF) which is currently implemented as an app for Android devices.

As well, it could support a transparency-scanning mode that capitalises on the single-pass auto-duplex scan method. Here, one of the scanning heads could simply be a white backlight while the other simply reads the image on the film. This would come in to its own with a wide range of applications like photographers with their negatives and slides, the medical profession with their film-based X-rays or businesses who have archived documents using microfilm and similar technologies.

Conclusion and Placement Notes

I do see the Brother DSMobile DS-940DW network mobile scanner as an agile highly portable pure-play document scanner that can answer many different needs. Here, it works well with anyone whose office is the driver’s seat of a car or the back of a van and can even answer the requirements to use mobile-platform devices as one’s primary workplace technology.

It is easy to consider a mobile scanner, especially a network-capable machine, to be a toy but I do see the Brother DSMobile DS-940DW mobile scanner as a tool. This is more so for mobile workers who need to scan receipts for work transactions incurred while travelling or to scan documents such as work authorisations and customer ID at the customer’s premises.

The fact that you can switch between scanning to an SD card, a USB-connected host or a Wi-Fi-connected host using a hardware switch makes the job of selecting the right mode for the job easier. For example, a mobile professional could switch the scanner over to “scan-to-card” mode and scan the fuel receipt to an SD card installed in the unit and serving as a “digital receipt shoebox”. Then they scan that work authorisation that their customer had signed when they visited and use the Wi-Fi link with their iPad running an email app to send the signed authorisation to their office.
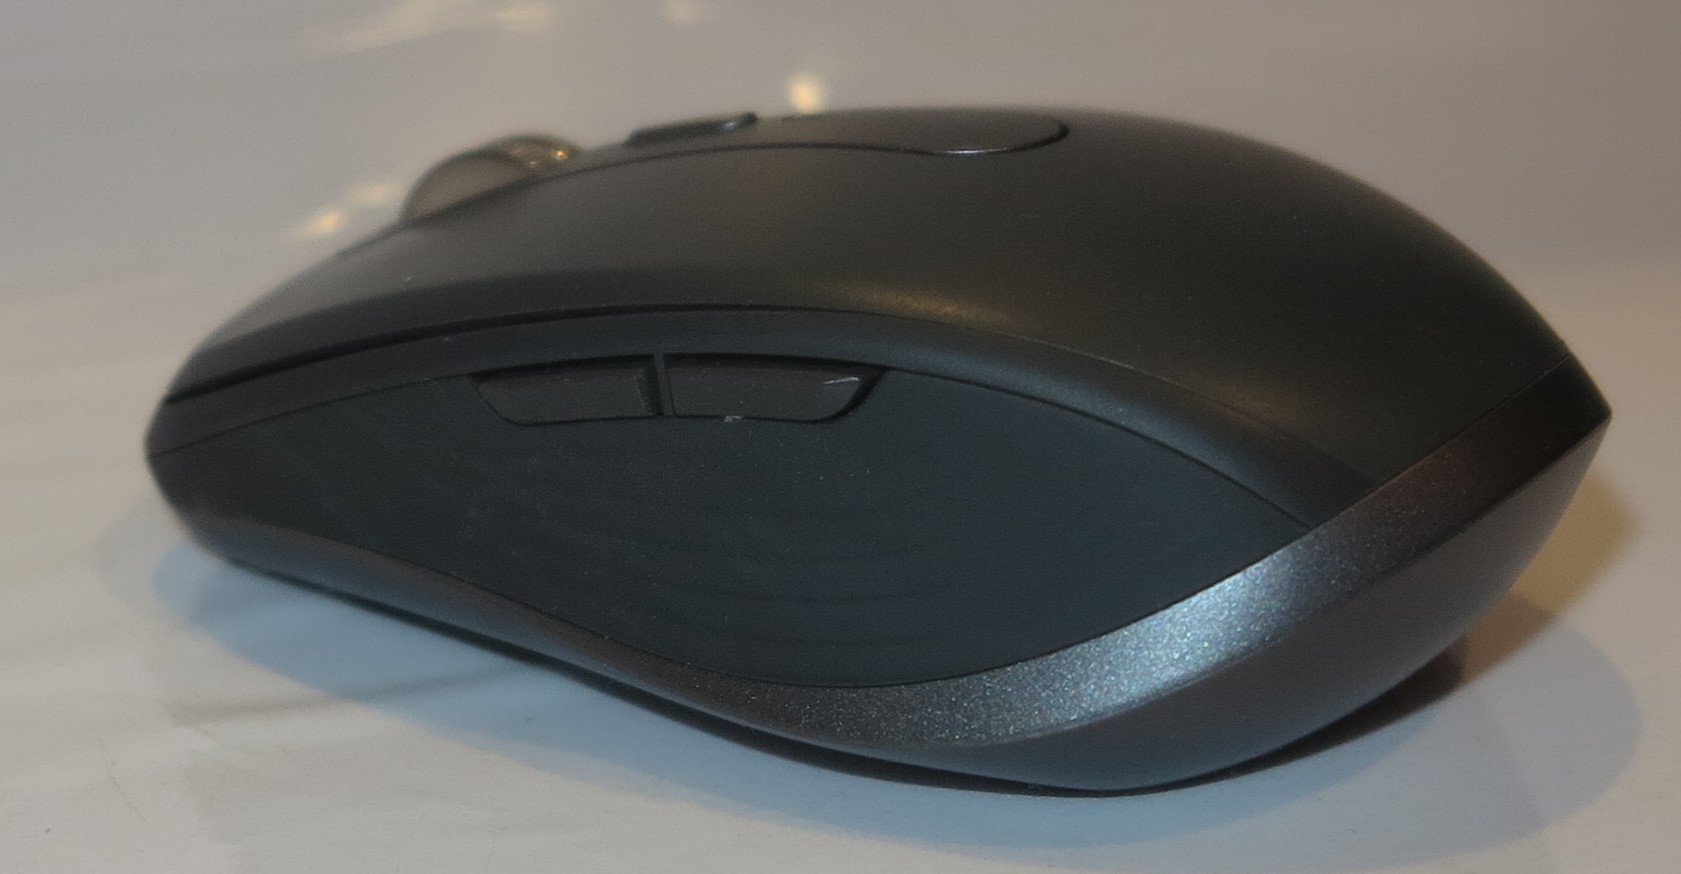
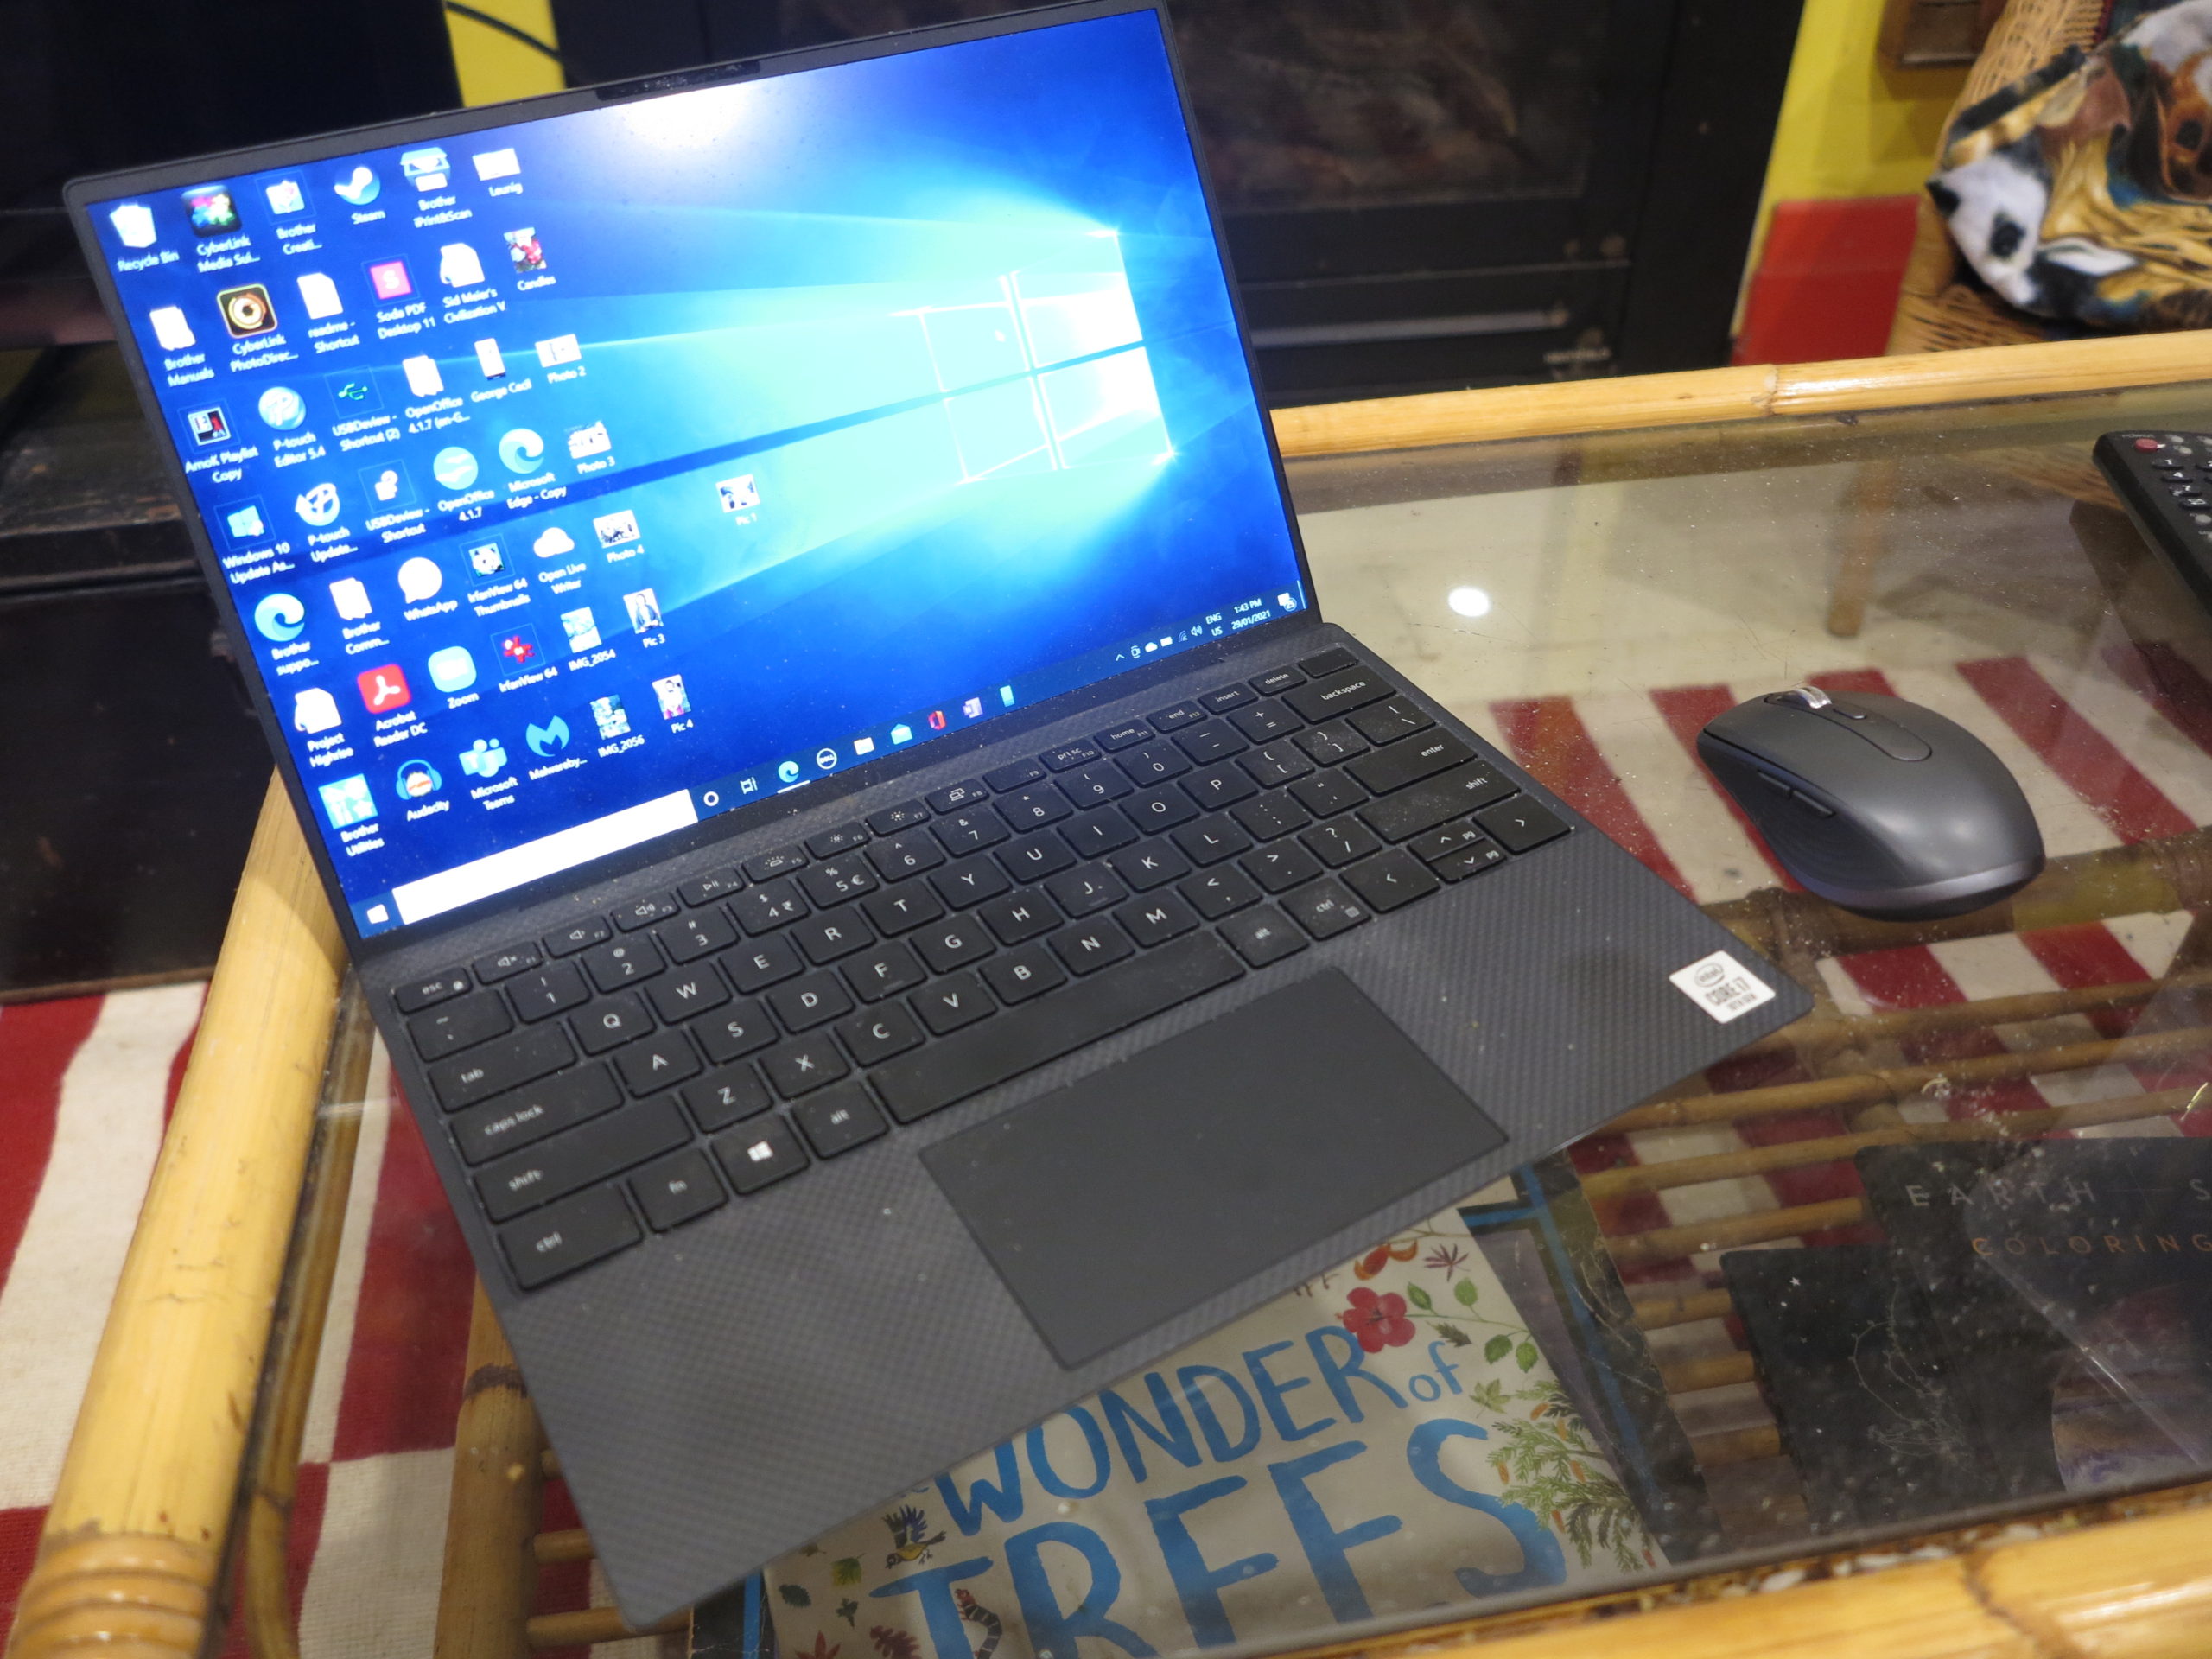
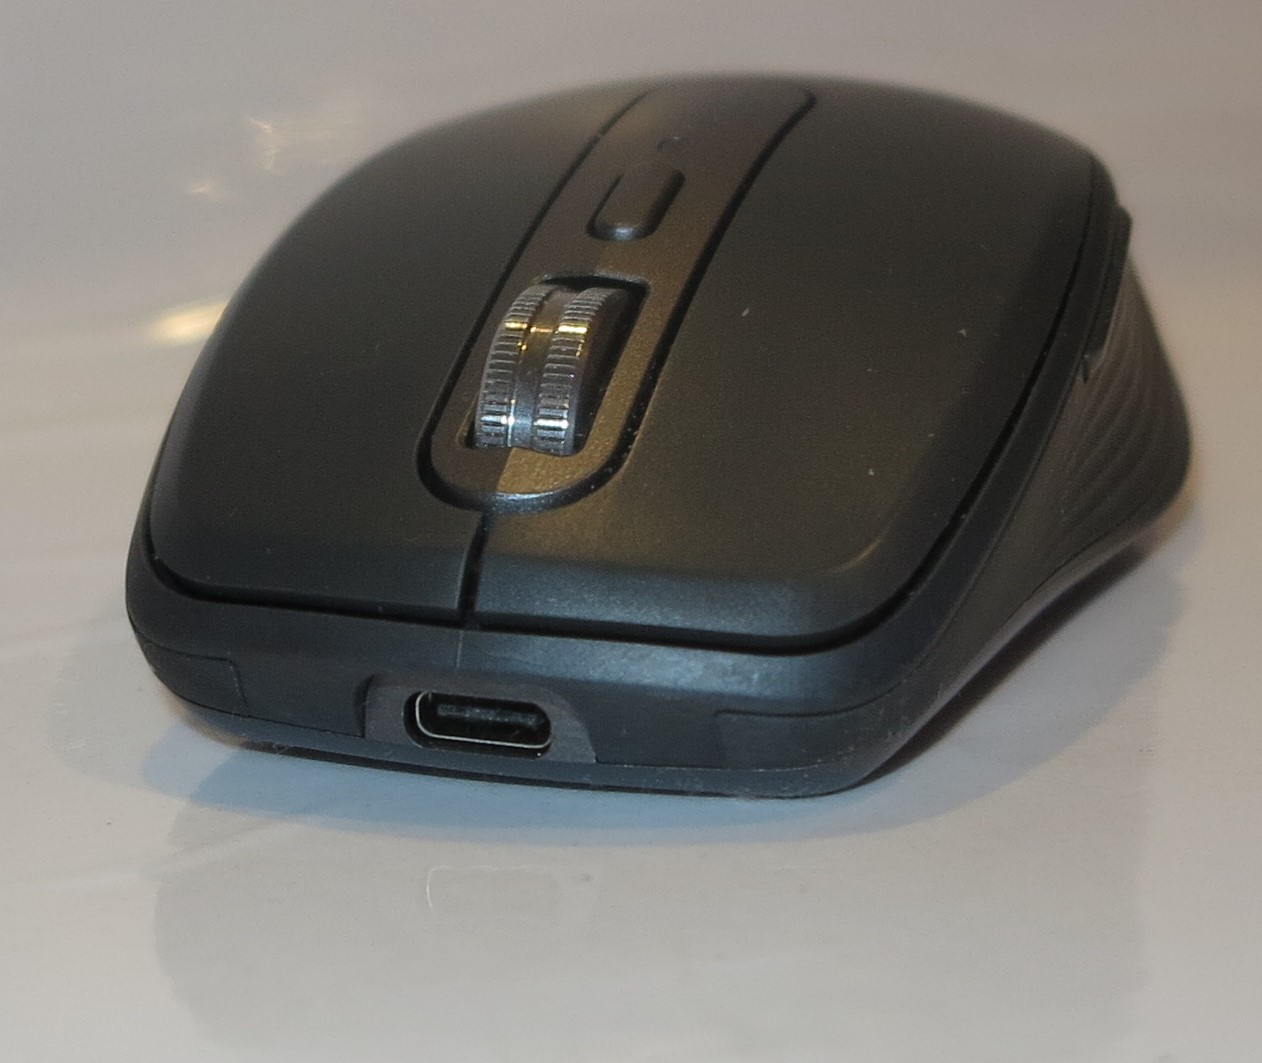
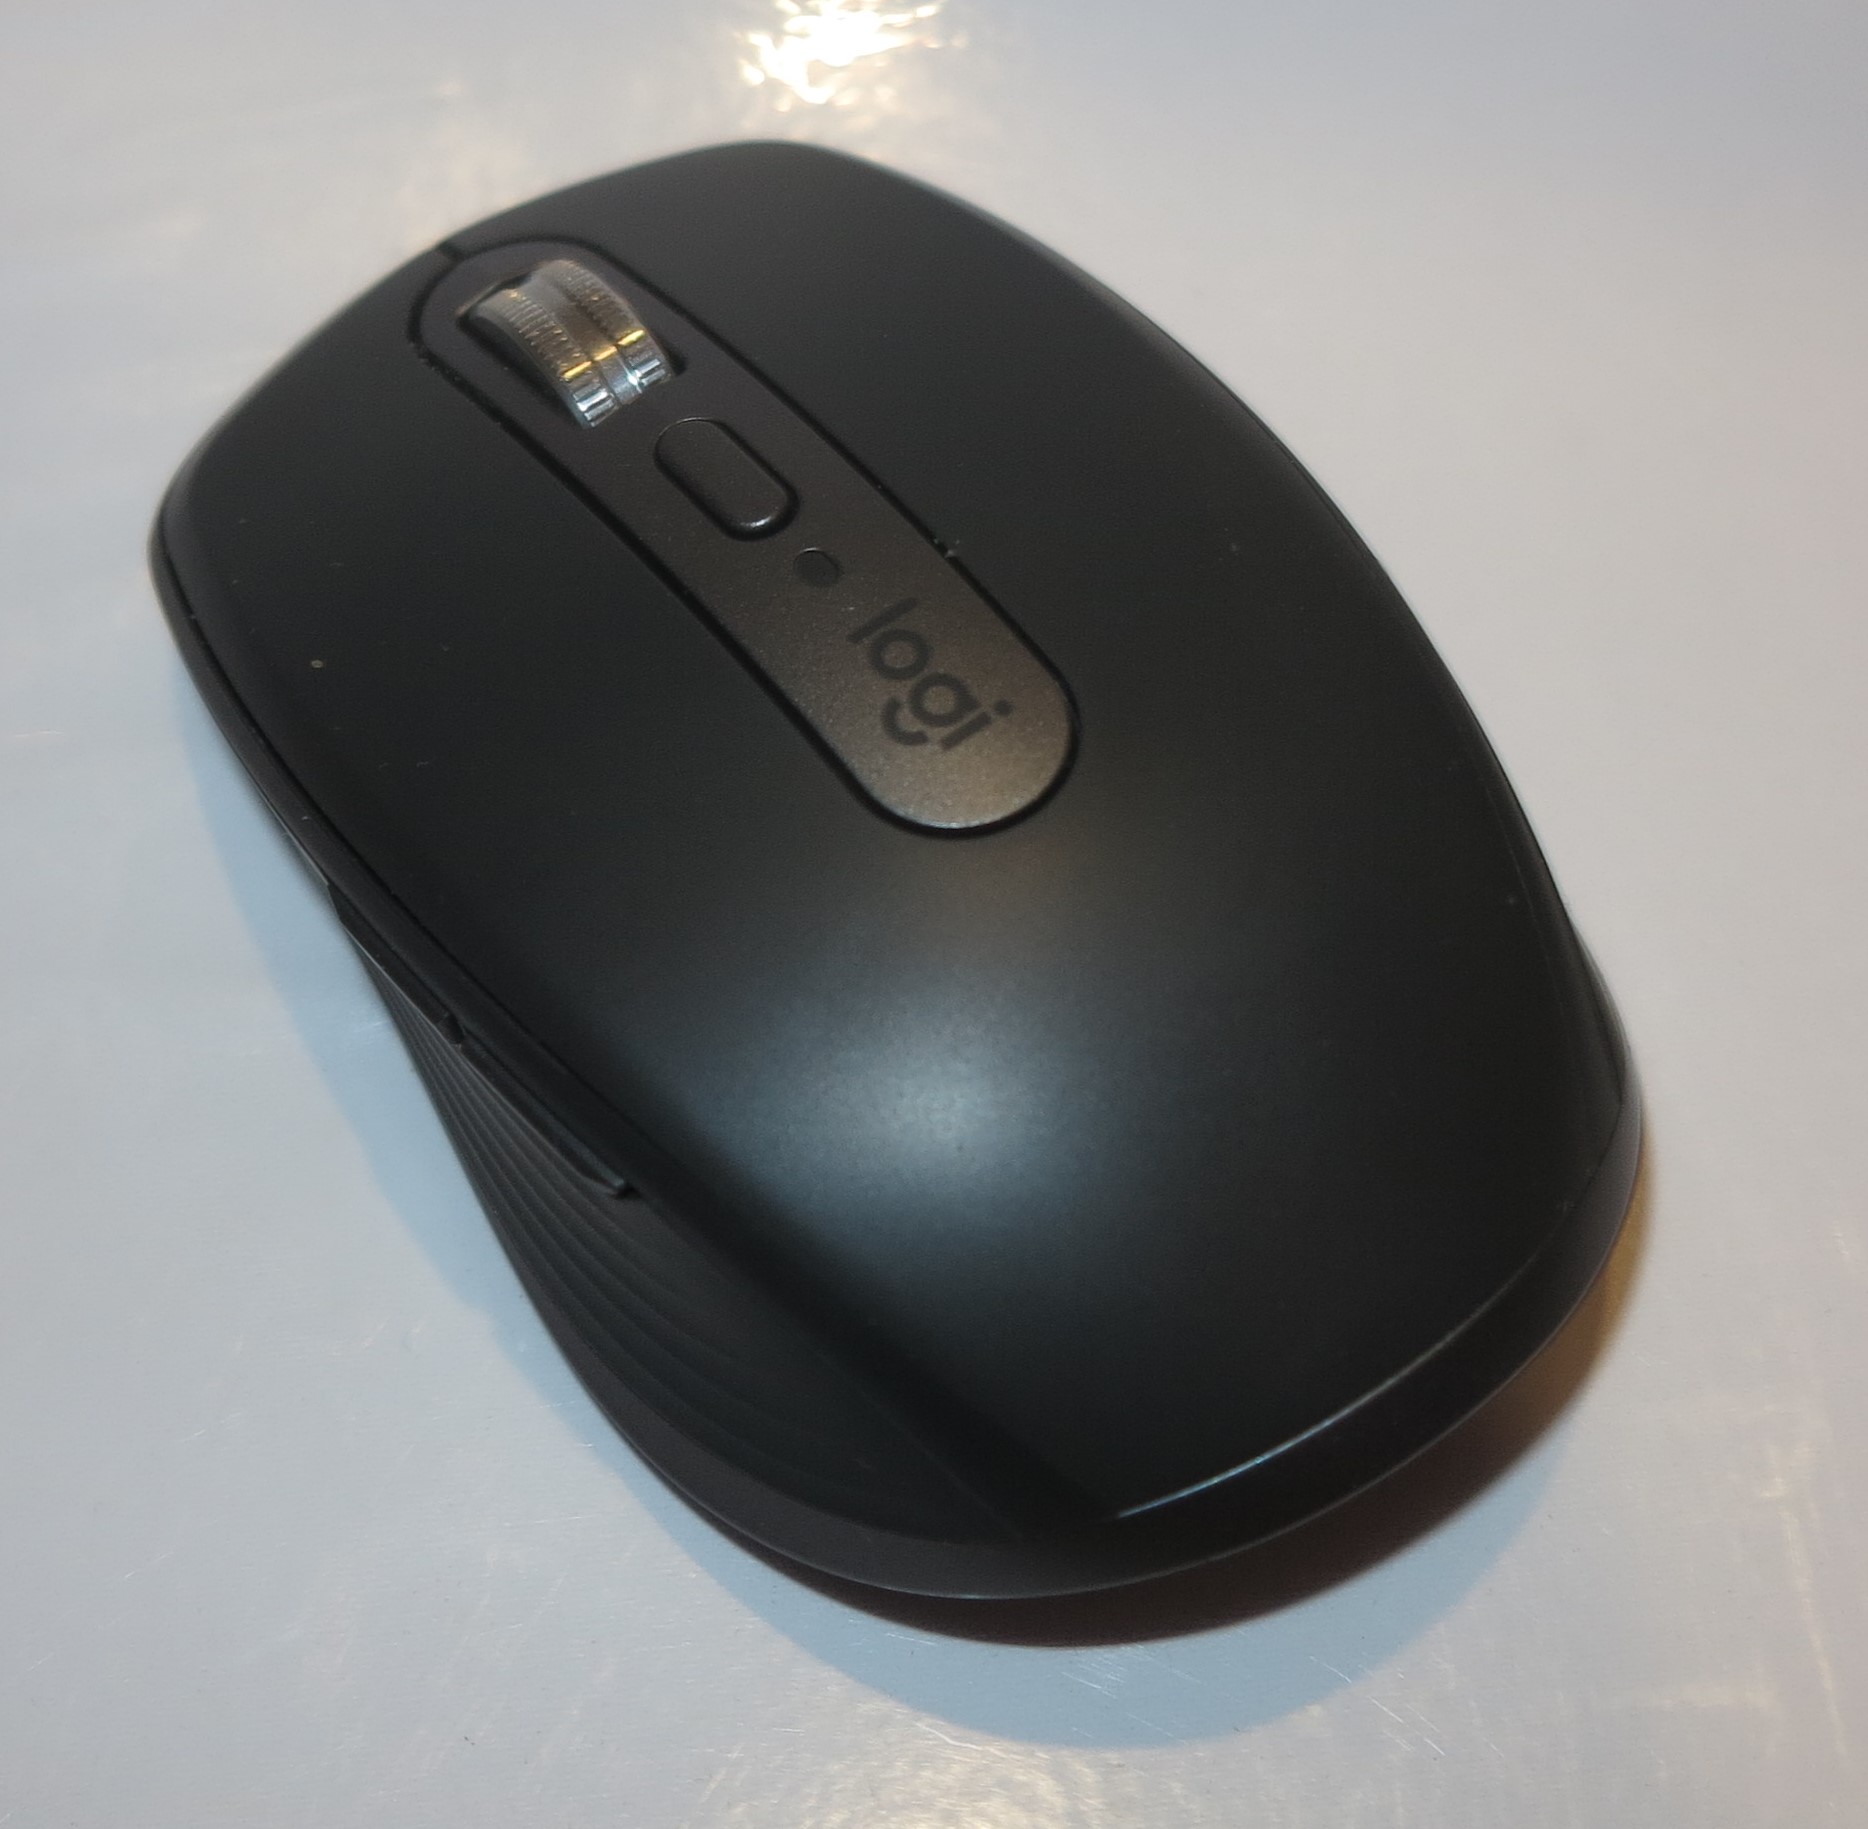
Product Review–Brother MFC-J5845DW INKVestment multifunction inkjet printer

Introduction

The Brother MFC-J5845DW is the first Brother printer that combines the INKVestment tank-based printing technology previously seen in the Brother MFC-J1300DW printer with the landscape (lengthways) printing method that Brother had pioneered. Here, like most of the Brother printers that use this printing method, it has an expandable paper tray so you can load it with A3 paper. It can scan A4 pages and can print both sides of an A4 or smaller page.

A step-up model known as the MFC-J5945DW has, as an extra function, two separate paper trays rather than one, which can allow you to have A3 paper or a different media type “on the ready”. There is a more expensive variant known as the MFC-J6545DW that is equipped with A3 scanning and the ability to print on both sides of an A3 page which could be seen as a way to make more utility of the booklet-printing function in the supplied print driver software in the context of printing A4 multipage documents on A3 paper.

These printers have a two-year manufacturer’s warranty and they come with a supply of ink that will last for two years under average usage conditions. This is in the form of a set of high-capacity ink cartridges and a set of extra-high-capacity ink cartridges in the box as well as the starter cartridges to get your machine going. But with these machines, I always list out the cost of the cartridges because you may end up replacing the cartridges sooner than estimated due to practices like using them as the “short run printing press” including printing many photos or presentation materials which this printer is very adept at as you will see later on.

Brother MFC-J5845DW INKVestment multifunction inkjet printer

Print Scan Copy Paper Trays Connections
Colour Colour Colour 1 x A3(standard) USB 2.0
Piezoelectric Ink-Jet 1200dpi on glass platen

600dpi using ADF

ID Copy
Book Copy
Thin-Paper Copy
other special copy features
50 Sheet A3 Multi-purpose tray Ethernet
Wi-Fi 4 (802.11g/n)
Own-access-point
Wi-Fi 4 (802.11g/n)
Auto-Duplex (A4 only) ADF IPv6 capability
Document Send/Receive
Real-Time Super-G3 Colour Fax via phone
Email-based T.37 IP Fax
Scan-to-email
TIFF-FAX
JPG
PDF
Walk-up Printing USB PDF
JPG
TIFF
Driver-Free Mobile Printing Apple AirPrint
MoPria support
Online Services Print From Scan To
Dropbox
Box.com
OneDrive
Google Drive
OneNote
Evernote
Dropbox
Box.com
OneDrive
Google Drive
OneNote
Evernote
Multiple Users for Online Services No
“Own Account” Guest Access for Online Services No


Prices

Printer

Recommended Retail Price: AUD$699

Inks and Toners

High Capacity Extra High Capacity
Price Pages Price Pages
Black AUD$41.00 3000 AUD$74.00 6000
Cyan AUD$41.00 1500 AUD$123.00 5000
Magenta AUD$41.00 1500 AUD$123.00 5000
Yellow AUD$41.00 1500 AUD$123.00 5000

The printer itself

Connectivity and Setup

Brother MFC-J5845DW INKVestment multifunction inkjet printerThe Brother MFC-J5845DW INKVestment multifunction printer connects directly to the host computer via USB 2.0. Or it can connect via a network using Ethernet or Wi-Fi with a best-case performance for a Wi-Fi segment being 802.11n (Wi-Fi 4).

It didn’t take long to get the Brother MFC-J5845DW INKVestment printer set up, thanks to the instructions that came with the machine. This even included the use of the machine’s display to show how to prepare the ink cartridges and load the paper.

You still have to open the lid to connect the printer to any wired connection other than its power. This is something that has been common with all of the recent Brother multifunction inkjet printers, but it can confuse people who aren’t used to this kind of connection arrangement.

Paper Handling

The use of Brother’s landscape-printing approach for printing on common office paper sizes has allowed the printer to turn out documents very quickly. It also allows for a relatively-compact printer even though there is some overhang thanks to the INKVestment cartridges.

There is still a straight-through bypass feed on the back of the printer for using occasionally-used paper sizes and types.

Walk-up functions

INKVestment cartridges in place

Brother high-capacity INKVestment cartridges in place

There is the ability to copy as well as scan to or print from USB memory keys. As well, this printer has the ability to work with online services, mainly the “big-name” file-storage services and the main cloud-driven online notebooks like Evernote and OneNote.

The digital copying functionality supports book copying and ID-card copying but it still has the same problem associated with the rest of the Brother multifunction stable. That is where the scanner doesn’t scan to the edge of the glass platen, which is a limitation for most of us who line the original up against the edge of the glass in order to stabilise it during scanning or copying.

The fax-machine functionality which works with the plain-old telephone service or the T.37 email-based setup is very similar to what is offered in recent Brother multifunction printers. This includes the ability to use Dropbox, OneDrive or similar services to store received faxes but it could support a more comprehensive “fax-vault” function with the ability not to print incoming faxes out as they are received or to store to local storage media that can be encrypted.

Computer functions

I downloaded the Brother MFC-J5845DW printer’s drivers from Brother’s support Website and installed them from the downloaded package, with it working out properly. This meant it didn’t take long to get the printer up and running.

I have used the Brother MFC-J5845DW printer for Mopria-based driver-free printing from my Android phone and this worked very smoothly. Here, the printer was quickly discovered using the Mopria print software on the phone very quickly and I was able to immediately turn out a PDF file very quickly.

Print / scan speed and quality

I have used the Brother MFC-J5845DW to turn out a large print run and found that this printer is quick on the mark. I even noticed negligible dwell time between printing each side of a page when it turned out an auto-duplex print job with it printing on both sides of the paper. The documents came out very sharp for an inkjet but some people may not find them as sharp as a business-grade laser printer’s output.

I created a test page with lines at each margin on each side of the page and used that to identify if there is any page shift when the printer is printing on both sides of a page. This is important for those of us who take advantage of auto-duplexing for purposes beyond paper economy. This is where you use the printer for desktop-publishing jobs where you are creating things like luggage tags, door hangers and the like where you need to cut out a particular shape but you have the design on each side.

The Brother MFC-J5845DW exhibited a slight shift of a few millimetres between the front and the back along the long edge during this test. There wasn’t any of that shift on the short edge, illustrating that this kind of shift happens in the same direction as the paper is fed.

I have printed some test photos through the Brother MFC-J5845DW INKVestment multifunction printer and they have come up on a par with the same images printed on the Brother MFC-J5720DW multifunction printer.

There is still strong colour saturation, which will earn its keep with brochure and presentation printing. But on this printer, the skin tones come up without being too red and that is without taking away the vibrancy from primary colours that exist in the same image. As well, the Brother MFC-J5845DW shows increased sharpness and definition which can underscore a perceived improvement in how accurate it reproduces the photos, proving that the four-ink inkjet printers like what Brother offers can yield some very good photo-printing output.

This test was showing that Brother is improving on how their office inkjet printers can handle presentation-grade and photo-grade print jobs where visual appeal and quality do matter. The MFC-J5845DW and its current INKVestment peers are working towards that holy grail of being the desktop short-run printing press for small businesses and community organisations.

Limitations And Points Of Improvement

Brother could then have their inkjet printers use Wi-Fi 5 (802.11ac) or Wi-Fi 6 (802.11ax) technology in order to allow the printers to work with these networks without reducing the network segment’s throughput and performance. This may be something that will come about in a subsequent product generation once the necessary silicon arrives.

As well, Brother could have their multifunction printers work as T.38 IP-based real-time fax endpoints especially as most phone setups are moving away from the “plain-old telephone system” technology to VoIP. They can also support a full “fax-vault” function especially as faxing is still valued by the medical and legal professions as a preferred means for exchanging highly-confidential documents “over the wire”.

Conclusion and Placement Notes

What I have seen of the Brother MFC-J5845DW INKVestment multifunction inkjet printer and its peers is that it combines Brother’s inkjet printer technology improvements in one value-for-money unit. This is the high ink capacity approach offered by the INKVestment tank+cartridge ink-delivery platform alongside the landscape printing approach that improves printing speed for standard-size documents and provides the ability to print to A3 or similar-sized paper.

I would seriously consider the Brother MFC-J5845DW as a value-for-money high-ink-capacity inkjet multifunction printer that works well as a general-purpose A4-based printing workhorse but you want to occasionally turn out A3 print jobs.

The fact that it works on inkjet technology can be a bonus if you are placing emphasis on media flexibility especially when it comes to making hard copies of digital photos or printing presentation-grade work. This is where it performed exceptionally by yielding high-definition hard copies of the test photos.

I would also consider the Brother MFC-J6545DW full-A3 model as an ancillary “A3 specialist” printer for workplaces where an A4 colour laser printer or multifunction is being used as a regular document printer while you use that printer for the large paper sizes.

Product Review–Creative Labs Stage Air desktop soundbar

Introduction

When Creative Labs launched the Stage Air desktop soundbar, they were positioning it as a single-piece soundbar to exist on your desktop under your computer monitor. This is in the same vein as those soundbars or TV speaker bases that are connected to larger TV sets to improve their sound. This unit isn’t just a desktop soundbar but able to work as a portable Bluetooth speaker thanks to it having its own battery power.

I then organised to review one of these desktop soundbars to find out how they perform as a desktop computer speaker system or portable Bluetooth speaker and am now reviewing one of these units.

Creative Labs Stage Air desktop soundbar speaker

Price

The Unit Itself

Recommended Retail Price: AUD$79.95

Form Factor

Single Piece soundbar

Connections

Input Count as for a device
Analogue Inputs 1 x 3.5mm stereo line input
Digital Inputs Bluetooth 4.2 A2DP wireless connection
Network
Bluetooth A2DP with AVRCP

Speakers

Output Power 5W per channel Stereo
Speaker Layout 2 speakers in one cabinet 2 x full-range speakers
Enclosure Audio Qualities Use of one passive radiator

The unit itself

Setup and Connection

Creative Labs Stage Air connection Options: 3.5mm stereo line-in jack, USB Micro-B charging port, USB Type-A port for MP3 playback from USB Mass-Storage Devices

Connection Options: 3.5mm stereo line-in jack, USB Micro-B charging port, USB Type-A port for MP3 playback from USB Mass-Storage Devices

The Creative Stage Air desktop soundbar sits just under my monitor properly and would be able to fit under most of the monitors or all-in-one computers easily. The connections are in a recessed space on the back of the speaker with a 3.5mm stereo jack for your computer, a USB Micro-B power connection and a USB Type-A connection for use with a memory key full of MP3 audio files.

The controls are located on the right-had-side of the speaker with the power / source button located on the right near you. Here, you press this button until the lamp on the front turns green to use the line input connection for your computer sound.

Creative Labs Stage Air desktop soundbar controls on right side - Power, Up, Down, Bluetooth pairing

Controls on right side – Power, Up, Down, Bluetooth pairing

To use it as a Bluetooth speaker, you would press this source button until the lamp turns blue. If no device is paired to this unit, the light will flash and the speaker will announce an invitation to put your Bluetooth host device in to pairing mode to complete the setup.

To have the speaker work with a new Bluetooth device. you would need to hold down the  Bluetooth-icon button to start the pairing process. This may be a procedure you need to do whenever you want to have it work with a new Bluetooth device and there is no knowledge of whether the Creative Stage Air soundbar can work in a multipoint fashion supporting multiple Bluetooth devices.

Useability

It is easy to tell which input source you are using by the colour of the front light – blue for Bluetooth and green for line-in. As well, the voice prompts for the Bluetooth setup process make it easy for new users to enrol a new device with the Creative Stage Air desktop soundbar.

Initially adjusting the volume may be confusing with the + button located towards you and the – button located away from you where you may be used to setups that have buttons in the reverse order. But you can still feel the controls to identify which ones they are when adjusting the volume from the speaker.

Network Performance

While I was using the Creative Stage Air desktop soundbar with my smartphone as a Bluetooth speaker, I noticed that it didn’t take long to pair up with the smartphone. As well, there wasn’t any jitter in the sound while I was playing music using the Bluetooth connection.

Sound Quality

What really shows up with a speaker system is its sound quality including whether it is too bassy or too brittle in the sound.

Firstly, I had run some audio content from my smartphone and from the computer with it coming across with a tonal quality that has a rich bass sound and a treble sound that is bright enough. It can cope with bass-heavy electronic dance music and yield the appropriate amount of “punch” in that music.

I have played some video content through my desktop PC and have found that the Creative Stage Air desktop soundbar does treat the audio mix properly. This is to assess how a speaker or headphone setup can handle speech, sound effects and music with it affecting its prowess for viewing video content, playing games, engaging in videocalls or similar activities.

The speech comes across clearly with male voices having a deep rich sound. The sound effects come across with some authenticity, something I had noticed while watching an episode Julie Zemiro’s Home Delivery on ABC iView with the sound of the car engine whenever they went anywhere. It is while the music in the video content contains the right balance of clarity and depth. I also watched an episode of a police drama and found that some effects like the gunshots had that bit of punch in them, something that would be of importance when playing a lot of first-person shooter games.

Achieving the right amount of bass response for a small area is facilitated using a passive radiator which is like a speaker driver but not driven by the amplifier circuitry. This was used in some “ghetto-blaster” designs to increase the bass response in a power-efficient manner and is commonly used on many Bluetooth speakers for the same purpose.

As part of testing speaker setups, I take the volume setting up to as high as it will go before I notice any clipping or distortion in the sound. This is to identify how powerful the amplifier circuitry really is and I could take it up all the way without it distorting.

The sound output would really be loud enough for close-up listening at your computer desk or to fill a small area while there is still a rich tone.

Other issues

The unit can run on its own battery for what would be expected for a portable Bluetooth speaker but if you are using it regularly with a computer, I would have it work with a USB power supply.

Limitations and Points Of Improvement

One design improvement I would like to see is the implementation of USB Audio as an audio pathway for this device. This is rather than just using the USB Micro-B port for providing power to the speaker. It would then mean that one cable can be used to provide sound and power from the host computer to the speaker rather than using another connection method like Bluetooth or line-level analogue for that purpose.

Similarly, Creative Labs could move towards using USB-C for power and audio connections especially where more computers are being equipped with this connection. It can also lead to them evolving the Stage Air desktop soundbar towards an elementary USB hub function especially where laptops and small-form desktop computers are being equipped with fewer USB connections.

Other alternative connections that can be looked at include the use of an HDMI or DisplayPort input and output connection so that the speaker can be connected between a host computer and a monitor that uses one of these connections and you want to use the “display audio” function that is part of the host’s graphics infrastructure.

The side controls could be made easier to identify by touch so you can know which one is which quickly without looking at them. This could be through raised O, + and – symbols for the power / source and volume buttons or through other means. It is because most of us may he simply used to using the speaker’s volume controls to quickly raise and lower the volume of our computers.

If Creative wants to support playback of file-based audio content from a USB Mass Storage device, they could have the Stage Air also work with other file codecs, especially FLAC and AAC. This is more so as these codecs, especially the FLAC codec, gain traction as higher-quality alternatives to the MP3 audio codec.

As well, if the Stage Air desktop soundbar is to live under that monitor or all-in-one’s screen most of its working life, I would recommend the use of a headphone jack or Bluetooth headphone support. This would avoid the need to swap out the speaker cable for your headphones when you want to connect them to your computer.

Conclusion

I would position the Creative Stage Air desktop soundbar as something that can serve as a portable Bluetooth speaker or as a single-piece alternative to a modest two-piece desktop computer speaker setup. It can also include improving your DAB+ or Internet radio’s sound output, something you may want to do with a small unit that has a headphone connection on it.

But you may find that its sound output is more so for use in the office or at home where you aren’t placing value on a heavy bass response.  The idea that the Stage Air is battery powered may come into its own when you are travelling and want something powerful enough to fill a small room like your average hotel room with music from your laptop, smartphone or a portable audio device. This is while it doesn’t take up much room in your luggage.

On the other hand, if you place value on stronger bass response, most of the three-piece desktop computer speaker setups with a dedicated active subwoofer may answer your needs.

Product Review–Brother VC-500W Colour Label Printer

I am reviewing the  Brother VC-500W colour thermal label printer which is the first label printer to implement colour direct-thermal printing. This was a machine I had previously covered when it was launched in to Europe due to its use of a direct-thermal colour printing process to turn out labels.

This is based on ZINK colour direct-thermal printing which was an R&D project within Polaroid to combine what their legendary SX-70 instant-camera platform was about with digital photography. But this effort was spun off as a separate entity which licensed it to different product manufacturers who primarily made pocket photo printers and similar devices. Polaroid even used this technology recently to create a digital instant camera that conveyed what their best-selling instant cameras were  about in to the digital world.

Brother VC-500W direct-thermal colour label printer

Connectivity

Touch control on Brother VC-500W colour direct-thermal label printer

Touch control on Brother VC-500W direct-thermal colour label printer.
Left touch panel glows blue for connection to a Wi-Fi network or white when it is its own access point.
Moving your finger in the ridge at the front while it is lit up cuts off the label

The Brother VC-500W colour label printer uses Wi-Fi for network connectivity. This is in addition to it using USB connectivity for regular computers. This can be as its own access point or as part of an extant Wi-Fi network. You can switch between these two modes by pressing the Wi-Fi button on the top left of the unit. If this button glows white, you are using it as its own access point which has the ESSID (network identifier) which starts with VC-500W. If the button glows blue, you have successfully connected it to an existing Wi-Fi network. As well, if the button is dark, the Wi-Fi functionality is disabled. This arrangement avoids situations where you don’t know if your printer switched to own-access-point mode or infrastructure mode on its own accord.

If you are not using Wi-Fi, you connect the Brother VC-500W colour label printer to a regular computer’s USB port using a supplied Type-A to Type-Micro-B cable. This will work with most regular computers as long as you download and install the Brother driver software from their Website.

This unit requires you to set it up as its own access point then log in to its own home page in order to configure it to work with an existing Wi-Fi network. Here, you press the Wi-Fi button until it turns white. Then you connect your regular computer or mobile device to this label printer by Wi-Fi to the ESSID that starts with VC-500W and has the last four digits of the unit’s serial number written on its underside. Then you point your Web browser to 192.168.0.1 and work through the online wizard to enrol it with the Wi-Fi network of choice.

Brother ZINK label roll installed in VC-500W direct thermal colour label printer

ZINK-based colour label roll installed in the printer

The existing-network Wi-Fi functionality is limited to the basic level of Wi-Fi network setup. Here, you can only connect it to a Wi-Fi network that is typically set up for home or small-business use with the WPA2-Personal (common Wi-Fi password) configuration. You can’t operate it on advanced enterprise networks or properly-configured public-access Wi-Fi. As well, this printer doesn’t support WPS push-button setup. As well, if you intend to take your printer between home and work and use it with the existing networks in both locations, you have to configure the printer to each network every time you start using it in that location.

From my experience, I had found that the software download and installation on both my Windows-based desktop computer and my Android phone worked according to plan.

Use

Colour label printed out of Brother VC-500W direct-thermal colour label printer

Colour label printed out by this label printer

I was using the Brother Color Label Editor which is available for iOS or Android on my Android-based smartphone to test the Brother VC-500W colour label printer out. Here, I found that like most newly-released devices, the printer needed to be brought up-to-date with the latest firmware.

The only form of driver-free app-free printing that this printer supports is for the Apple AirPrint platform and this only works with handling image files and PDF files.

The Brother P-Touch Editor and Color Label Editor software does take some time to get used to and both these applications that are supplied for use with this printer  The software is primarily pitched towards home users who create gift tags and the like where beauty is more important.

As well, it is as though the bar-code functionality on P-Touch Editor has been disabled for this printer which is a shame especially for small businesses who may want to create colour labels or ID tags that have machine-readable barcodes or want to use the QR code for something like Wi-Fi network details or Weblinks to be read by a smartphone’s QR-code reader. Here, you would have to use another program or Website to create the barcode then paste the image in to P-Touch Editor.

The colour output is mostly highly saturated and vivid which would suit most applications. Here, I am not thinking of high-quality photo reproduction but something of use to an ordinary household or small business who just wants colour labels.

Limitations and Points Of Improvement

The Brother VC-500W colour label printer could implement WPS-PBC, Wi-Fi Easy Connect or similar technologies to permit a simplified Wi-Fi setup experience. As well, it could benefit from a mobile-platform app-based setup experience especially if intend to use it primarily with mobile devices. Support for Wi-Fi enterprise connectivity could go a long way towards having this machine appeal to the business community.

The fact that the Brother VC-500W is a very compact label printer which encourages us to take it between places could incite Brother to allow this printer to remember the configuration of preferably four or five Wi-Fi networks. This could encourage the ability for users to take it between places.

As for driver-free printing, Brother could add support for the Mopria standard in order to allow it to work with Android or Windows devices in that way.

Brother could see the use of ZINK technology come in to its own for direct-thermal colour transactional printing. If they were able to work with ZINK, they could share the knowledge that they built up with their PocketJet direct-thermal printers and making this medium more stable then lead towards improving the stability and longevity of ZINK-based documents. It can also extend to the idea of creating ZINK-based receipt/coupon printers for business applications where full-colour printing comes in to its own.

A wider-framed version of the Brother VC-500W that can take wider ZINK rolls could allow it to compete with the HP Sprocket and other ZINK-based photo printers. It can also open up increased use cases for colour labelling like personnel ID tags, cleanskin wine-bottle labelling amongst other applications.

The printer’s P-Touch software should be able to expose the business-focused printing abilities as well as the craft-focused printing abilities rather than limiting it to the craft-focused functionality. This can be important for people who value full-colour label and tag printing within the office especially if it is also about data-driven or barcode printing.

A question that also needs to be raised about the ZINK-based printing technology that this printer uses is the shelf life for consumables based on this technology. Here it may be about how long the rolls can exist whether within or out of their wrapping before they either print below par or jam up inside the printer. This is because of a reality where we would buy multiple sizes of the label tape to suit different printing needs and use each different one according to need.

Conclusion

I would see the Brother VC-500W Colour Label Printer satisfy most colour-labelling needs especially for householders who are using this kind of labelling for their personal crafts.

For example, I would see it come in to its own with people who are doing their own preserving and bottling and want to use personalised jar or bottle labels for those jars of jam, marmalade or something similar they are giving to their friends and family. In this case, the printer can be used with the CZ2005 50mm-wide roll of tape because they have a larger area for their graphics or photos.

It may also earn its keep in the education and allied sectors for creating unique and distinctive IDs for managing staff, students and other people who visit the premises.

In this case, I don’t really see the Brother VC-500W as being a “toy”. It also is a chance for Brother to exploit the ZINK technology for direct-thermal colour transactional printing applications.

Product Review–Dell Inspiron 14 5000 2-in-1 convertible laptop

Introduction

I am reviewing Dell’s value-priced 2-in-1 laptop computer, the Inspiron 14 5000 which is positioned as a mid-tier computer for this class.

There is a model in the lineup that costs under AUD$1000 which has the Intel i3 CPU,  4Gb RAM and 256Gb SSD storage. I would see this as being of value for most users who are dabbling in the idea of a Windows-based 2-in-1.

Dell Inspiron 14 5000 2-in-1 at Rydges Melbourne (Locanda)

Dell Inspiron 14 5000 2-in-1 - viewer arrangement at Rydges Melbourne (Locanda)


Price
– this configuration
AUD$1398
Market Positioning Mainstream consumer laptop
Form Factor Convertible laptop
Processor Intel i5-8265U
cheaper option:
Intel i3-8145U
better option:
Intel i7-8565U
RAM 8GB
cheaper option: 4GB
Secondary storage 256GB SSD
cheaper option: 128Gb
SDXC card reader
Display Subsystem Intel UHD 620 integrated graphics
better option:
NVIDIA GeForce MX130 Discrete graphics with Optimus (2Gb)
Screen 14” widescreen touch display (Full HD) LED backlit LCD
Audio Subsystem Intel HD audio
Audio Improvements MaxxAudio Pro
Network Wi-Fi Wi-Fi 5 (802.11ac)
2 streams
Ethernet
Bluetooth 4.1
Modems
Connectivity USB and Thunderbolt 3 1 x USB-C with DisplayPort alt and PowerDelivery
2 x USB 3.0
1 x USB 2.0
Other Data Connections
Video DisplayPort via USB-C
HDMI 1.4b
Audio 3.5mm input-output jack
Digital via HDMI or DisplayPort
Authentication and Security
Operating System in supplied configuration Windows 10 Home

The computer itself

Aesthetics and Build Quality

The Dell Inspiron 14 5000 has a very similar styling to most of today’s laptops with the grey housing and black keys and screen escutcheon. It doesn’t come across with a cheap-looking finish.

This computer doesn’t come across as being flimsy. It can work smoothly between the different setups whether it be a tablet, tent mode or the traditional laptop setup. Here, you don’t need to exert much pressure on the lid and it moves very smoothly. A problem that can occur if you use it in viewer mode is that if you put a bit too much pressure on the screen, you can find that the screen collapses too quickly. This may be of concern for those of us who attempt to type with the on-screen keyboard.

There is venting along the back and on the bottom of the keyboard unit. In normal use in all modes, I have noticed that the Dell Inspiron 14 5000 hasn’t built up any heat or become too hot to be comfortable.

User Interface

The illuminated keyboard on the Dell Inspiron 14 5000 2-in-1 looks like what is expected for most of the value-priced consumer-grade laptops. It has the tactile feel that is expected for most modern keyboards and you still have the ability to touch-type accurately. The illumination could be improved through the use of an “on-demand” mode to prevent the keyboard lighting up longer after you stop interacting with it and this could come in to play while the unit is running on batteries.

Dell Inspiron 14 5000 2-in-1 convertible - keyboard left hand side connections (USB-C, HDMI, 2 x USB 3.0, audio jack)

Dell Inspiron 14 5000 2-in-1 convertible – keyboard left hand side connections (USB-C, HDMI, 2 x USB 3.0, audio jack)

The trackpad on this Dell Inspiron 2-in-1 has the full precision ability which allows for multi-touch operation as expected for relatively-modern laptops. The touchscreen is also responsive and accurate as expected and isn’t easily triggered by you typing on the keyboard.

Unlike some very cheap Chinese-built 2-in-1 convertible laptops, the Dell Inspiron 14 5000 disables the keyboard and trackpad when it is placed in a tablet, viewer or tent mode. This means it fulfils the expectations of a 2-in-1 convertible and you don’t have accidental operation.

An improvement that I would like to see for use in any of the “tablet” modes would be to have a power switch and volume buttons located on one of the sides of the screen. This could allow the user to quickly shut the unit down or adjust the sound output when it is used as a tablet or a viewer setup.

Audio / Video

Dell Inspiron 14 5000 2-in-1 convertible - keyboard right hand side connections (SD card reader, USB 2.0 port)

Dell Inspiron 14 5000 2-in-1 convertible – keyboard right hand side connections (SD card reader, USB 2.0 port)

Dell has implemented the Waves MaxxAudio sound tuning but this doesn’t really improve the sound quality especially for music when you use this computer’s speakers. This is still a problem with laptops because of the shallow cramped design that is part of their construction. Here, I would recommend the use of headphones ore external speakers if you want more out of these computers.

The Intel UHD 620 integrated graphics performed properly for handling Web video but I have done further research on this graphics subsystem. Here, it is able to be an all-rounder for most tasks including some gaming where you aren’t critical about its performance. The high-end variant with the NVIDIA discrete graphics infrastructure would come in handy if you are wanting performance for gaming or photo and video editing.

Dell has done the right thing for battery life by keeping the display resolution for the integrated display at Full HD rather than offering a configuration with a 4K UHDTV screen resolution. The DisplayPort via USB-C connection option can come in to its own for higher resolution computing needs when you have this computer teamed with an external monitor or TV of that resolution.

Connectivity, Storage And Expansion

This computer, like most of the configurations of the Dell Inspiron 14 5000 comes with the 256Gb solid-state storage. This is while one of the configurations equipped with 8Gb RAM comes with 128Gb. It can work well for most “secondary-computer” applications but could be made as an across-the-board baseline. As well, a 512Gb solid-state drive could be offered as a premium option.

The solid-state storage that serves as the Dell Inspiron’s system disk is augmented by a full SD card reader that can work with the standard SD cards. This means that you could load your photos from your digital camera in to your computer without the need for using an SD-card reader.

The RAM capacity satisfies most needs but a 16Gb RAM specification could be offered as a premium option especially for units kitted with the i7 CPU.

The Wi-FI does come across as being strong and quick for most of today’s Wi-Fi networks and hasn’t been much of a worry. The Bluetooth connection also worked properly with my JBL headphones and is a feature that is to be made use of on a laptop for private listening or wireless keyboards and mice.

The USB connectivity does suit most needs including having a USB-C connection with DisplayPort alt and Power Delivery support. Here, it can play well with setting up a USB-C monitor or dock as the heart of a laptop-centric desktop workspace where you are implementing an external monitor, keyboard and mouse.

The two traditional Type-A connections on the left work to USB 3.0 specifications while the right-had Type-A connection works to the 2.0 specification. This can come up as a problem if you are using high-performance plug-in USB peripherals like USB modems that answer high-bandwidth mobile broadband services or USB memory keys with high storage capacity and high performance.

There is also an HDMI connection for existing flatscreen TVs and monitors when you want the second screen, while you have the 3.5mm audio jack for connecting headphones or speakers for better sound.

Battery Life

The Dell Inspiron 14 5000 2-in-1’s integral battery can satisfy a workday of ordinary text-based computing. This is even if you do your computing totally online such as Web-surfing on your home network or at a Wi-Fi hotspot.

Online video streaming for 90 minutes with full-screen video and the sound via a Bluetooth headset allowed the battery to run from full capacity to half capacity. You may find that you have to use an external power supply like a USB-C PD battery pack or the computer’s supplied battery charger if you are considering full-on binge-viewing or similar activity for over two to three hours flat-out.

Other Usage Notes

I showed the Del Inspiron 14 5000 2-in-1 convertible to the chairman of the Men’s Shed that I go to regularly and he found that the screen size was “just right” – not to small or too big. Another person who is involved in business IT saw this computer as being suitable as a general-purpose household or personal computer where you are not asking for anything special in performance or security.

As well, I had used the Dell Inspiron 14 5000 2-in-1 during the broadcast of the Australian Federal Election vote count. Here, I found that the tablet mode worked very well for using the computer as a “second screen” in this context.

Limitations And Points Of Improvement

A feature that I would like to see with the Dell Inspiron family of value-priced 2-in-1 laptops is for one or more variants to be equipped with the Thunderbolt 3 connector. This is more so on machines that are targeted towards affordable price segments due to the fact that they could be optioned up for better graphics with an external graphics module.

It could also be a good idea to implement USB 3.0 for all of the Type-A connections on this computer. Here, it can be of benefit to users who are likely to use two unwieldly-sized plug-in USB 3.0 peripherals that have a large form factor like some mobile-broadband modems or high-capacity USB memory keys.

Another feature that would work well for this class of laptop is to have a power switch and volume buttons installed on the edge of the screen. This can simplify the process of regulating the volume or quickly turning off the laptop when you are done.

The illuminated-keyboard feature could have an option to work only while you are working with the keyboard with it turning off a few seconds after you stop using the keyboard. This can be a way to allow for improved battery runtime.

Conclusion

The Dell Inspiron 14 5000 series 2-in-1s fills the gap for a convertible notebook that suits the needs of most householders without sacrificing performance for most computing tasks. This includes using it as a second screen or viewing online video, with the fact that the 14” screen keeps the idea of a highly portable computer alive while maintaining a larger screen.

This model even has some configurations that suit a budget user, someone who wants an all-round performer and someone who is after improved graphics performance.

I would make sure that Dell keeps the Inspiron 14 5000 series of 2-in-1 laptop computers as a value-priced product that suits most users and to keep one model with some desirable specs at an affordable price point. Here, it could be about preserving a lineup of 2-in-1 convertible laptops of different screen sizes, powertrains (CPUs, graphics processors, chipsets), RAM capacities and storage capacities under the Inspiron banner in order to make this computer class affordable for most users.

Product Review–Brother MFC-J1300DW INKVestment colour inkjet multifunction printer

Introduction

I am reviewing the Brother MFC-J1300DW INKVestment colour inkjet multifunction printer. This is Brother’s attempt at a high-ink-capacity approach to inkjet printing where there is an ink tank for each colour. But, unlike Epson who use separate tanks that are filled from a bottle, they use cartridges which hold some of the ink and the ink is transferred to a holding tank before it is used.

There is the Brother DCP-J1100DW which doesn’t have the fax ability and may be an economical path. Luckily it has the automatic document feeder which is of importance if you do want to scan or copy multiple pages at once.

Brother MFC-J1300DW INKVestment colour inkjet multifunction printer

Print Scan Copy Paper Trays Connections
Colour Colour Colour
B/W
A4 x 1 USB 2.0
Piezoelectric Ink-Jet 1200 dpi ID Copy
Book Copy
Thin Paper Copy
Multi-purpose tray capacity Ethernet
Wi-Fi 4
(802.11g/n)
Own-access-point
Wi-Fi 4
(802.11g/n)
(Auto-Duplex ADF IPv6 capability
Document Send/Receive
Real-Time Super-G3 Colour Fax via phone
Email-based Scan-to-email TIFF-FAX
JPG
PDF
Walk-up Print and Scan USB
SD Card
PDF Print
JPG (Print and Scan)
TIFF (Print and Scan)
Mobile Printing Apple AirPrint
Google CloudPrint
MoPria support
NFC support with Android iPrint
Online Services Print From Scan To
Dropbox, Box.com, OneDrive, Googlr Drive

Evernote, OneNote

Dropbox, Box.com, OneDrive

Evernote, Onenote

Multiple Users for Online Services Yes
“Own Account” Guest Access for Online Services No


Prices

Printer

Recommended Retail Price: AUD$300

Inks and Toners

Standard High Capacity
Price Pages Price Pages
Black AUD$41 3000
Cyan AUD$41 1500
Magenta AUD$41 1500
Yellow AUD$41 1500

The printer itself

Connectivity and Setup

The printer can be connected directly to the host computer using a USB cable. But it can be connected to your network via Ethernet cable or Wi-Fi wireless. This supports the ability to directly enter your Wi-Fi network’s passphrase as part of a wizard-based setup routine on the control panel.

Like with most of Brother’s inkjet printers, the cables for the USB or Ethernet connection are snaked in under the scanner platen which may be seen as being awkward for a newcomer.

Brother MFC-J1300DW INKVestment colour inkjet multifunction printer - ink cartridges

Ink cartridges as part of Brother INKVestment system – no need to deal with ink bottles

The Brother INKVestment approach offered by the MFC-J1300DW inkjet multifunction printer is based around high-capacity cartridges that offload ink in to tanks integrated in the machine. This is based upon a continuous-inking approach that Epson and others use for their “tank-based” printers but uses the simplicity associated with cartridge-based printers. It meant that there were no special procedures needed to be performed to get the printer up and running.

Paper Handling

Being a compact printer, the Brother MFC-J1300DW uses the traditional portrait feed-through method that most inkjet printers use. As well, it has a small A4 paper tray for storing paper, but this can be a limitation if you expect it to print a large job.

There is a low-profile automatic document feeder that works as expected and can come in handy for copying or scanning multiple pages or sending a fax.

Walk-up functions

Brother MFC-J1300DW INKvestment colour inkjet multifunction printer

A low-profile design is what this printer is about

There is support for Brother’s cloud-driven Web Connect functionality. This includes cloud-hosted scan-to-email, a fax-vault function with the ability to receive faxes to email or online storage, amongst other things.

A problem that can appear with “walk-up” scanning directly to removeable media is that the pictures don’t come out with a similar kind of quality that you would expect if you scan to a regular computer. I had noticed this with a project where I was to scan some pictures for broadcast use and found that you can’t determine the level of JPEG compression for pictures stored to the removable medium. This could be rectified through the use of an option to determine the JPEG compression level for SDXC cards or large-capacity high-speed USB devices along with support for USB 3.0 for the “walk-up” USB interface.

There is a USB port and SD card slot for printing photos from memory cards but this function is very limited. It doesn’t support DPOF printing where you can set up a print order on your camera, nor does it support PictBridge printing from your camera. As well, I could only see the first 300 pictures on an SDHC card that has 1099 pictures on it available for printing. What seems to be happening is that the user class who value the high-quality digital cameras is being forgotten about when it comes to walk-up printing functionality.

The Brother MFC-J1300DW is able to work as a Super G3 fax machine but doesn’t support T.37 or T.38 IP-fax endpoint abilities. It may not be seen as an important feature except for some professions like the legal and medical profession who do rely on fax transmission of documents. This is augmented with a “fax vault” function that allows received faxes to be forwarded to an online-storage service like Dropbox or an email address, but this function requires forwarded faxes to be printed locally by the machine as they arrive.

I would personally require this forwarding-to-online-storage function to have an option of not printing faxes successfully forwarded to online storage. This would be of value for out-of-hours fax reception in an environment where there is a risk of confidential faxes being seen by the wrong eyes. It could also use an SSD or SD card as an alternative to these options where you don’t want confidential material on an online service or via an insecure email setup.

Computer and mobile-device functions

I have installed the drivers from Brother’s Website for this printer on to both my Windows 10 computer and a friend’s Macintosh running one of the newer versions of MacOS which was to be used by them to scan some photos. Here, the driver-installation procedure went according to plan for both platforms.

I used my Samsung Android mobile phone to print out an email using the Mopria driver-free printing protocol and this setup worked properly via the home network. Here, the Mopria subsystem discovered the printer properly and turned out the document as expected.

Print / scan speed and quality

The print speed was very typical for an average inkjet printer that uses the orthodox printing arrangement rather than the newer landscape printing arrangement.  Here, it still turned out a sharp document for each print job I had sent to it.

I kept an eye on how this printer handles two-sided printing, especially when it comes to any “drifting” between the front and back of the page. There wasn’t any of that issue with this machine which would make it work properly with desktop-publishing jobs involving oddly-shaped documents like bookmarks or hang-tags.

I have test-printed two photos on to photo-grade paper and have found that there is the sharpness and definition in the images. The pictures do come out bright but the colour saturation could be improved slightly especially when handling reds.

I have scanned some photos with this printer and have found that there are problems with handling high-contrast photos especially if they are the kind of snapshot prints you get from a minilab. It may be a problem associated with most consumer scanners especially when it comes to reflective material.

Limitations And Points Of Improvement

This baseline home printer could be improved upon through the use of landscape printing. It is more so if the goal is to make this class of home multifunction printer more compact. As well, it could benefit from a “mezzanine” photo-printing tray like what the previous Brother home MFC printers offered along with having a deeper paper tray so you can have a larger amount of paper on board.

Having a higher-capacity paper tray can exploit the INKVestment system further by allowing for larger print runs to be fulfilled. Here, it would work well towards the end of school or college / university semesters where there is the likelihood of large assignments being printed out, whether at a proof-reading stage or for handing in.

Similarly, having the output tray as a separate item that is integrated with the printer rather than being attached to the paper tray can make the printer easier to load. This could also allow Brother to innovate further by designing an output tray that automatically extends when a print job is about to be turned out and retracts when the documents are removed.

Most of these Brother printers could support SMB or HTTP-based scanning to or printing from network and Internet resources. A feature like that could make more use of NAS systems as a digital document archive. Similarly, Brother could maintain interest in the standards associated with walk-up printing of digital images from cameras , be it PictBridge wired connectivity or DPOF removable-media-based print orders. This would earn its keep with printing out “there-and-then” prints of photos you took with your digital camera.

A question that can easily crop up with the Brother “INKVestment” approach is the cost of buying replacement ink cartridges at a later time like after that promised year of use. Here, it will be about whether it would be cost-effective to buy newer cartridges for the printer or simply to replace it with a machine of similar standard. But I have found that the cost to replace all cartridges on this printer wouldn’t be more than the initial purchase price of this machine, thus it doesn’t appear to be “disposable”.

Similarly, using the tank approach in the INKVestment system could allow for the ability to replace empty cartridges while there is ink in the tank so as to cater for heavy print runs. This could be facilitated through the use of an indicator that shows whether a cartridge is empty while there is reserve ink in the tank. Even an option for higher-capacity cartridges can come in handy where there is a situation of peak usage.

Conclusion and Placement Notes

I expect that the Brother MFC-J1300DW INKVestment colour inkjet multifunction printer is being positioned as a general-purpose home or home-office printer with the focus on a long time between replacing ink. Here, I would see it work well as a multifunction printer to be kept in a study or similar location and handle a typical household’s print requirements.

Product Review–Brother HL-L3230CDW Colour LED Printer

Introduction

I am reviewing the Brother HL-L3230CDW which is their latest iteration of a colour LED-based xerographic printer. These xerographic printers works in a similar manner to a laser printer but uses a row of LEDs rather than a laser steered by moving mirrors to light the imaging drum with what you are printing as part of the printing process.

Brother is positioning the HL-L3230CDW as a follow-on model to their HL-3170CDW colour LED printer and its stablemates. But they are also running this model as a baseline printer for their new colour LED xerographic printing engine. The higher-priced pureplay stablemates based on the new engine also have a colour LCD touchscreen and offer more in the way of walk-up printing options such as working with Brother’s Web Connect online printing subsystem. There are also some colour LED multifunction printers with the fax-equipped models supporting this same Web Connect as well.

Brother HL-L3230CDW colour LED printer

Print Scan Copy Paper Trays Connections
Colour 1 A4 tray(standard) USB 2.0
LED xerographic 1 sheet multi-purpose tray Ethernet
Wi-Fi 4 (802.11g/n)
Own-access-point Wi-Fi 4 (802.11g/n)
Auto-Duplex IPv6 capability
Document Send/Receive
Mobile Printing Apple AirPrint
Google CloudPrint
MoPria support


Prices

Printer

RRP: AUD$329

Toners

Standard High Capacity
Price Pages Price Pages
Black AUD$146 2500
Cyan AUD$106 1300 AUD$159 2500
Magenta AUD$106 1300 AUD$159 2500
Yellow AUD$106 1300 AUD$159 2500

Servicing and Other Parts (Laser Printers)

Price Pages
Drum Kit – per colour AUD$299 18000
Belt Kit (Colour lasers) AUD$194.50 50000
Waste Toner Bin AUD$43 50000

The printer itself

Connectivity and Setup

Brother HL-L3230CDW colour LED printer control panel

The control panel on the Brother HL-L3230CDW colour LED printer

The Brother HL-L3230CDW is able to connect to your computer directly via USB or via your home network using Wi-Fi 4 (802.11g/n) or Ethernet. This review will be the first product review on HomeNetworking01.info to implement the new Wi-Fi Alliance “generation mumbering” scheme that has just been set in stone when it comes to what kind of connectivity to expect from a Wi-Fi wireless-network device.

There is a small LCD display as well as a D-pad for basic machine setup functionality so you are not expecting much from this printer beyond a baseline print device.

Brother HL-L3230CDW colour LED printer toners in place

Toner cartridges and drum units in the Brother HL-L3230CDW colour LED printer

You have to open a lid to gain access to the toner cartridges. drum units and belt unit. Here, each colour toner cartridge is installed in its drum unit but you separately replace the toner cartridge and the drum unit unlike what happens with HP LaserJet printers.

Here, each of the parts are easy to remove and reinstall which can be of benefit when dealing with paper jams. If you are dealing with a paper jam that occurred around the back of the printer, the fuser rollers are exposed when you open the back panel and release another black plastic panel to rectify the paper jam. This is a risky situation due to these rollers being hot after a print job.

Brother DR-253CL drum and TN-253Y toner cartridge

Toner cartridge and drum unit as separate pieces – installed in a similar manner to Brother monochrome laser printers

A security issue that will always come up regarding dedicated-function devices that connect to your network and the Internet is making sure these devices are kept up-to-date with the latest firmware. This is something I will be paying attention to regarding these devices and writing up about in these product reviews.

Brother integrates in to their print monitor software installed on your computer a software-update monitoring function. If there are new versions of the driver or printer firmware, this program will let you know so you can update this software, whereupon you can update this software. It will lead to the installation of a printer-firmware update tool to install newer firmware.

Paper Handling

The Brother HL-L3230CDW has a standard paper tray for ordinary document paper. But like most of the popularly-priced Brother printers. it has a single-sheet multipurpose feed slot which can be annoying if you are doing things like run a batch of labels or print on special media.

Walk-up functions

Due to its position in the market for its product type as an economy “bare-bones” printer, this printer doesn’t offer walk-up printing from USB, network or online resources.

Computer functions

I have installed the driver software on to my Windows 10 computer from Brother’s official support Website and this installation went according to plan.

As for printing from mobile devices, the Brother HL-L3230CDW can print using Brother’s own iPrint&Scan app. But it supports driver-free printing in the form of Apple’s AirPrint and the Mopria platform as well as supporting Google Cloud Print.

There is support for code-based secure job release but it requires you to enter the pre-determined release code using a “pick-and-choose” method not dissimilar to text entry on a Smart TV or video peripheral using its remote control.

Print speed and quality

If the Brother HL-L3230CDW colour LED printer hasn’t been used for a significant amount of time, it would take around 20 seconds to yield the first page of the document from when you send the print job from your computer. If it was recently used, the printer would take around 10 seconds to turn out the first page of the print job. This is something that would be expected for most economy laser printers.

This printer would yield sharp crisp document output even for colour work thus making it suitable for basic office printing including printing of desktop publishing work.

I printed two test photos using Windows 10 Photos app along using the best printing-quality setting available and they came out slightly pale compared with Brother’s recent premium colour laser printer – the HL-L8350CDW. Most of the colours still come out vibrant although it doesn’t handle the flesh tones really well.

Even though I haven’t had the chance to personally test the Brother HL-3170CDW or its stablemates that are based on the second-generation LED xerographic print engine, I had noticed a significant improvement on photo output quality over the generations compared to when I tested the HL-3075CW which used Brother’s first-generation LED xerographic print engine.  What is showing up with the Brother HL-L3230CDW is that it is capable of yielding photo output that is good for ordinary use but not fully presentation-grade.

The Brother HL-L3230CDW’s LED print engine is the second colour LED print engine that Brother designed to implement an automatic duplexer across all of the models. But I have paid some attention to registration shift between the front and back of the same sheet of paper during a double-sided print run. Here, I had noticed a slight vertical shift where the back page was slightly shifted down from the front by a few millimetres. This is something that may be common with most desktop printers equipped with this feature but may be of concern with turning out print jobs like doorknob hangers, luggage tags or the like where you need to cut out a particular shape.

Unlike the premium Brother colour laser printers, the Brother HL-L3230 doesn’t implement a “quick turnaround” approach to automatic duplexing. Rather it seems to work one sheet of paper at a time while doing a double-sided print run.

Limitations And Points Of Improvement

One feature that Brother could work on with the economy colour LED printers is the registration shift for auto-duplexing. Here, they could make sure that there isn’t any drift between the front and back of the printed page, which can be of benefit for printing special-shaped work. It can also lead towards designing automatic duplexer mechanisms for printers that are paper-agile such as being able to work with smaller paper sizes or thicker paper.

The manual bypass tray could be able to support multiple sheets of paper, which can be of benefit if you are turning out a significant quantity of labels, printed envelopes or other special documents.

Another issue that will be of concern is the cost to replace the drum units when they come up for replacement. This can cause one to consider buying a new printer from the same range rather than replacing the necessary parts. It is more so where the drum units are being rated for fewer pages than the other components.

Another improvement I would like to see regarding this printer is the option to start a firmware update for a network-connected printer from its control panel through the “Machine Info” menu. This could be augmented through a message on the printer’s display to say that new firmware is available like I have seen with some of the multifunction units they offer.

Conclusion and Placement Notes

Personally, I would see the Brother HL-L3230CDW as an entry-level casual-use option for a xerographic-based colour printer that is suited for small jobs. This could be something that is a home office or a private “document-preview” printer.

An issue that will be of concern is that if at least one drum unit or the belt unit comes up for replacement at the same time as a toner replacement, it could make us think that this printer is worth replacing rather than the necessary parts. This is a problem that I see being endemic with economy-positioned printers.