Tag: Apple Macintosh

Google improving on their simplified cross-platform software development platform

Article

Samsung Galaxy Tab Active 8" business tablet press picture courtesy of Samsung

It will become easy to develop apps to run on smartphones..

Microsoft helps with Google’s Flutter 2 update to improve apps on Surface Duo | Windows Central

Google’s Flutter 2 update could be a major win for apps on Windows 10 | Windows Central

My Comments

Now with three major desktop computing platforms and two mobile computing platforms on the market, there is a demand to create software that can run on all of them. It also means that the software has to operate in a manner that suits the different user experiences that different computing devices offer.

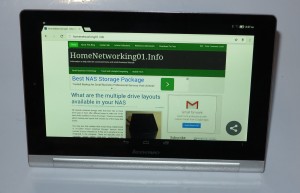
Lenovo Yoga Tablet 2 tablet

.. and tablets

The differing factors for the user experiences include screen size and general aspect ratio as in “portrait” or “landscape”; whether there is a keyboard, mouse, stylus or touchscreen as a control interface; or, nowadays, whether there are two or more screens. Then you have to think of whether to target a mobile use case or a regular-computer use case and optimise your software accordingly. You may even have to end up targeting “small mobile” (smartphone), “large mobile” (iPad or similar tablet), “desktop” (desktop or laptop computer including 2-in-1 convertibles) or “lean-back” (smart TV / set-top / games console) use cases at once.

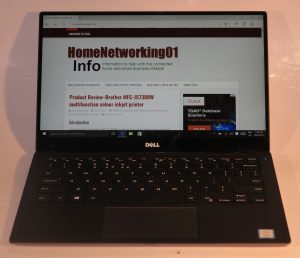
Dell XPS 13 Kaby Lake

.. and laptops with the same codebase

Google and Microsoft have established a partnership to make Google’s Flutter 2 software development platform as something to create desktop+mobile software solutions. It is building on Microsoft’s foundation stones like their BASIC interpreters which got most of us in to personal computing and software development.

Here it is about creating common codebases for native apps that target iOS, Android, Windows 10, MacOS and Linux; alongside Web apps to work with Chrome, Firefox, Safari and Edge. But the question that could be raised is if an app is targeted for Google Chrome, would this work fully with other Chromium-based Web browsers like the new Microsoft Edge browser, the Opera browser or Chromium for Linux.

The creation of Web apps may be about being independent of platform app stores which have a strong upper hand on what appears there. Or it may be about reaching devices and platforms that don’t have any native software development options available to average computer programmers.

Some of the targeted approaches for this new platform would include “progressive Web apps” that can run on many platforms using Web technology and omit the Web-browser “chrome” while these apps run.

The new Flutter 2 platform will also be about creating apps that take advantage of multiple-screen and foldable setups. This is in addition to creating fluid user interfaces that can run on single-screen desktop, tablet and smartphone setups. The idea of creating a user interface for multiple-screen and foldable setups is seen as catering to a rare use case because of fewer foldable devices like the Microsoft Surface Duo on the market let alone in circulation. Another question that can crop up is multiple-screen desktop-computing setups and how to take advantage of them when creating software.

What I see of this is the rise of software-development solutions that are about creating software for as many different computing platforms as possible.

COVID-19 brings back interest in the regular computer

Articles

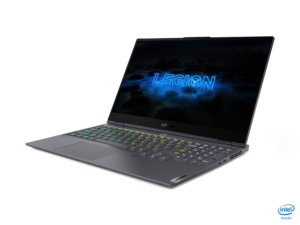
Lenovo Legion Slim 7i gaming laptop press image courtesy of Lenovo

The Lenovo Legion Slim 7i gaming laptop representing the kind of investment taking place for regular computers in this era

The PC is suddenly cool again … for now | CNBC

The pandemic has made it harder to buy a new laptop | The Verge

My Comments

Due to us having to stay home more due to the COVID-19 coronavirus plague, we have had to rely on online services for our work, education and social life.

What this has meant is a stronger interest in the use of desktop and laptop regular computers that have more powerful silicon and run desktop operating systems. These purchases are justified more due to increased usage of these systems and a longer lifespan that they typically have. Let’s not forget that these computers typically have or are able to be connected to larger screens and better input devices suited for long usage sessions.  As well, the money that people have saved by not going out or travelling is financing the purchase of these systems.

Short supply early in the pandemic

This high demand for newer computers has caused problems in the supply of these computers due to factories in China that supply parts or subassemblies for these systems shutting down during the first few months of this pandemic. Another factor that slowed down the supply of thee computers was the logistics associated with their parts being limited due to various restrictions on the transport modes and ports / airports to limit the spread of the virus. But once it became a known quantity and factories were able to adapt to the bug in a prophylactic manner, the backlog of computer orders was able to be fulfilled by the major vendors.

The steady rise of Chrome OS as a viable alternative

Google’s Chrome OS is coming to the fore in this context due to schools and workplaces implementing Chromebooks as a viable computing platform. This is due to it having a limited third-party software base, although it can run Android software, and its support for a secure computing environment. But even these machines are becoming more capable with them acquiring faster silicon and more memory.

But could this mean that more software providers, especially games studios, will have to write software for the Chromebook? Similarly will there be requirements to create software development environments that target many platforms including Chrome OS at once?

Laptops still hold their ground with ever-increasing computing power

There is a strong interest in the portable form factors like laptops because of their innate flexibility. As I have mentioned before when raising the issue of whether to buy a desktop or laptop computer in this era, this could suit household members who don’t have a dedicated workspace and end up using the dining table; people who prefer to use the computer to suit seasonal needs like outside or by the fire.

It is leading towards a significant trend for increased computing power in these computers, especially the ultraportable units like Ultrabooks or MacBook Air units. Around September, this meant the arrival of Intel’s Tiger Lake silicon with the Xe graphics infrastructure. Here the Xe integrated graphics processors were on a par with low-tier mobile dedicated graphics processors and could offer elementary games-grade graphics performance with a Full HD screen.

For example Intel have just premiered at CES 2021 the Tiger Lake H35 silicon which is their attempt to bring on gaming-grade performance to Ultrabooks. This is in addition to opening up Chrome OS to Tiger Lake performance silicon.

This has come about because the computer industry has found that over the past year that it is increasingly justifiable to invest in regular-computer platforms. That is thanks to these units being able to last and be relevant for the long term. It also has been underscored over the past ten years with laptops, all-in-ones and low-profile desktop computers being found to exhibit real computing power for primary workday use.

Continual post-pandemic interest in the regular computer

There is doubt whether the demand for regular computers will last long as more of us return to work or school. It may not be an issue for laptop users if your workplace or educational institution implements “bring-your-own-device” policies or they have bought the device for you to use during your tenure with them, and you are able to take your computer between there and back.

Similarly, some pundits may be seeing the increased and continual interest in remote working with this maintaining a need for the regular computer. This may be enforced by offices being required to work at reduced capacity to avoid the risk of contagion until we are sure this pandemic is totally under control. It is also along with businesses looking towards downsizing their office premises or moving away from inner-urban areas due to the reduced need for on-site staff.

Here, this could evolve towards the use of local “third places” like libraries and cafes as alternative workspaces with, perhaps, interest in local flexible shared-working facilities. Similarly, hotels are seeing renewed interest in offering their guestrooms for day use and pitching this towards remote workers. These will continue to exist as an alternative to working from home, especially where one wants to avoid home distractions.

This may be also augmented by a desire to “move away from the city” and only visit there for regular but infrequent workplace meetups, as those pundits in the real-estate game are underscoring. Here, you would have to have a decent Internet connection and a decent computer at your new country house to be able to work from there.

Conclusion

Again these will be about maintaining interest in the regular computer, especially laptop computers.

This is due to them being conducive for long working sessions thanks to properly-sized hardware keyboards and larger screens that these computers have. As well, most of these units will also appeal for use beyond work like playing powerful rich games, doing further learning or supporting entertainment needs.

Here, the laptop will maintain its space for those of us who like flexible working whether at or away from home.

How to adapt to multiple-screen computing

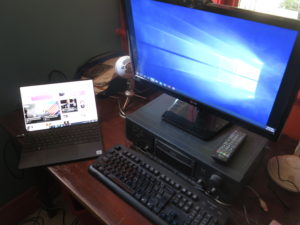
Desktop workspace with Dell XPS 13 laptop computer

The computing setup with multiple screens – now very ubiquitous

Computing setups that are equipped with two or more screens are becoming more ubiquitous due to the affordability of these setups. As well, it is becoming more acceptable in general business and personal computing to operate with multiple displays at your main workspace thanks to a range of productivity benefits.

You may find that there is a steep learning curve as you set up your workspace for multiple-screen computing. This is something that I am facing as I move from a traditional desktop computer centred around a traditional PC tower to a laptop computer that is connected to a dock and I want to keep the existing monitor going.

An example of this is when you move away from your desktop computer with the traditional single-monitor approach to a laptop-centred computing setup and retain your desktop computer’s monitor because it has plenty of mileage left in it. It can also happen if you are using an all-in-one desktop computer like the iMac that has an integrated display and you use a similarly-sized monitor to create a multiple-screen computing setup.

Those of you who use a traditional desktop computer may head towards multiple-screen computing if you decide to buy a new monitor and keep the existing monitor going. You will find out if this is feasible for most of these computers if there are two or more display outputs on your computer, especially its graphics card.

Praise and worship at church

Using a computer in conjunction with a projector to show material to a large audience like this church setting will have you working a multiple-screen setup due to the use of a smaller screen for control or cueing purposes

This can also happen when you are using a projector or large-screen TV as the “big screen” in your display setup, something that is commonly done for multimedia or games applications or to show content to large audiences.

Occasionally I have had to deal with multiple screen computing setups. This was either as part of helping some people out with their computing setups. Or it was to help a small church with their AV and IT needs which has been the basis of some articles I have published and targeted to that same audience.

Now, thanks to a computer upgrade towards a laptop, I have headed towards regular use of a multiple-screen setup by maintaining my existing monitor as a second screen for that setup. In this case, I use the larger-screen second monitor for working on documents in my primary laptop-centric workspace.

Why go multiple-screen for your computing needs

Most computer users who make heavy use of their productivity software will want to benefit from multiple screens. This is due to the effectively-large working area that these setups offer.

.. as will using your laptop with your TV to watch Netflix

For example, a person who is building a document or presentation from online research will be having multiple programs running so they can add content from the online research in to their “magnum opus” easily. Some of these users will even have multiple Web-browser sessions running concurrently along with the program they are using to build their content. Or a user could engage in a videoconference and look up relevant material or take notes on another screen during the call.

People who work with large spreadsheets will also benefit especially if the spreadsheet becomes wide. It also applies to those of us who use desktop publishing, illustration or photo-editing programs to lay out publications or create our computer-graphics masterpieces. You may come across an increasing range of monitors that can be switched between landscape and portrait orientation, which may allow you to adapt them to support a wide or tall project.

Those of us who make use of online news services will benefit from multiple-screen computing> This can be about being able to monitor a current event that appears on an online news service while engaging in another activity like creating that document, spreadsheet or presentation.

Multiple-screen setups also are about a larger screen that is used to show material to other people. This is very common with projector-based setups or where the large-screen TV set is used. Increasingly a lot of software focused to this kind of effort is being designed to take advantage of multiple displays.

This same application is being extended to videoconferencing setups like with Zoom’s Multiple Monitor setup. Here, that allows a “gallery” view to exist on one screen and the current speaker to appear on the other screen, and to allow shared resources to appear on the secondary screen. It also extends to those of us who use text-based “chat” or social-media platforms and want to follow them while doing other computing activities including browsing the Web.

Some games are even exploiting multiple-screen operation in order to provide multiple concurrent views of the same action. Or they even use this to effectively create larger and wider views of the action.

Typical configuration

Here, you are typically implementing the multiple-screen display setup in the “extend” operating mode. This has the screens set up as one large display area or “canvas” but most operating systems make one screen become the primary screen where programs appear by default when they are launched. Typically it is the screen that will be used during the boot process and will show the startup images like the interactive login screen or operating-system splash screen. If you use a laptop or all-in-one computer, the integrated screen will always be deemed the primary screen.

Even with projectors or TVs, you may have to implement “extend” behaviour and work your computer’s regular display as your primary display to allow some presentation, multimedia or games software to work properly with multiple screens. In the same context, some users may have the computer’s primary display working as a “content preview” screen and shift the content to the large screen when it is ready to show.

For laptop users, they may use the “external monitor only”” display option but run multiple external monitors, This would come in to play if you are connecting multiple monitors to an outboard dock of some sort.

Laptop users will also need to be used to switching frequently between single-screen and multiple-screen setups. This is due to themselves using the laptop’s screen as the only screen when they use it in a portable context away from their desktop workspace but work with multiple screens while at the desktop workspace. They will also have to cope with being able to “go multiscreen” at a moment’s notice if they choose to connect the computer to a large-screen projector or TV.

Your mouse pointer

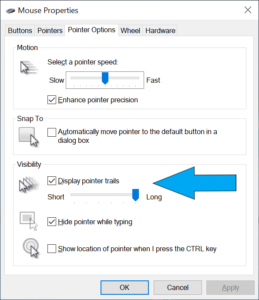
Mouse Options in Windows Control Panel - Pointer Trails called out

Using “pointer trails” a.k.a. “comet tails on your mouse pointer can make it easier to discover across the multiple screens

The first issue you will face is locating your mouse pointer. In this situation, you need to know which screen it exists on at the current time, or whether you are moving from one screen to another. This can be very difficult with screens of different sizes like a setup involving your laptop screen and your large-screen monitor. It can also be difficult where you have two screens that are separated from each other including dealing with monitors that have large screen bezels.

These kind of options are introduced in to the main regular computing platforms as a measure to increase accessibility and useability of these platforms for those of us with limited abilities. This is due to these platforms being used by an ageing user base for both work and play along with younger people that have limited abilities wanting to he productive with these platforms.

One way is to enable “comet tails” on your mouse pointer. This has a decaying trail of the pointer arrow which will appear as you move your mouse pointer with your input device. Windows has this as part of its Mouse control options in the Control Panel. MacOS X requires you to use a third-party app to have this same functionality for locating the mouse pointer.  You may also find that adjusting how your mouse pointer looks such as its size or colour may help you with making it more discoverable for you.

Another technique that you will have to perform frequently is to bring up the secondary or context menu simply as a way to locate your mouse pointer. Here, the large area occupied by the context menu stands out more visibly than a small mouse arrow or I-cursor. People who use a pointing device that has a secondary button can use this button on all desktop operating systems. But Apple Mac users who use a pointing device without a secondary button, as what was part of the original Macintosh setup, can achieve this same function by holding down the Ctrl key on the keyboard and clicking their pointing device.

The two main desktop operating systems also have their own tricks to make the mouse pointer discoverable at a moment’s notice through a special mouse-action or keypress. Here, it can be useful for identifying where your mouse pointer is across that large area.

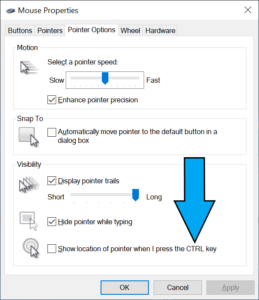
Mouse options in Windows Control Panel - option to highlight mouse pointer when you press CTRL

Windows users can set things up to quickly highlight where the mouse pointer is when they press the CTRL key

Apple Mac users can set their computer to quickly enlarge the mouse cursor when you move the mouse (or your finger on the MacBook’s trackpad) vigorously. Here, you click on the Apple menu, then click on System Preferences, then click on Accessibility then click on Display, You subsequently select Cursor and tick the “Shake mouse cursor to locate” option. Windows users have to go the the Mouse control options in the Control Panel and select “Show location of cursor when I press the CTRL key“. Here, when you press and release the CTRL key, a large circle appears then reduces in size around where the mouse cursor is.

Laptop users who run a multi-screen setup comprising of their laptop’s screen and the large monitor in an “extended” arrangement may find that the small screen could be kept for “parking” application user interfaces that they aren’t giving all their attention to. They then keep the large screen for the applications they are focusing on at the moment. An example of this could be a Web browser with a page they are reading or an office application with the document they are working on existing on the large screen. That is while an email client, messaging application or media player that only needs occasional attention could be visible just on the laptop’s smaller screen.

Moving apps between screens with the keyboard

People who are new to multiple-screen computing or switch between single-screen computing and multiple-screen computing will come across situations where the app they are using doesn’t appear on the screen they want to use. This may be of concern where a user starts a program they previously ran on a multiple-screen setup doesn’t appear on a single-screen setup due to the absence of the screen they were using. Or they want to quickly move an app to another screen.

This situation will come in to play for those of us with laptops who work only with the laptop screen while away from the main workspace. Here, you may find that a program you use on your external monitor isn’t visible on the laptop’s screen but appears on the Windows Taskbar or MacOS Dock as an app that is in use. This may happen where an app doesn’t adapt to different multiple-screen setups properly.

Here, software that adapts properly between single-screen and multiple-screen computing setups will, for example, move to the single screen in a single-screen setup if it was last operated on other monitors in a multiple-screen setup.

It also applies to those of us who are using a computer as part of an AV playout setup and have to move a program’s screen between the cue / monitoring screen and the main screen. That also extends to people using the big TV screen to view videos or pictures or play games on a laptop. It is more so with Web browsers or other programs that don’t handle multiple screens properly.

Windows simplifies the process of moving apps between screens with the keyboard. Here, Windows users need to Alt-Tab to the program you are trying to bring back in to view in order to give it logical focus. Then you use the Windows + Shift + left or right arrow keys to bring the program to the integrated screen.

Apple Mac users would then have to invoke Mission Control by pressing the F3 key. Then they would have to use the trackpad or other pointing device to move the program between screens. As far as I know, there isn’t an approach to using the keyboard to move an app or window between screens on the MacOS.

Screenshots

You may find that the procedure for taking full-screen screenshots may be very different here. In most cases, the operating system will encompass what is seen on both screens in a full-screen screenshot.

In the case of Windows, you may find that PrtScr may yield you something to large for your screenshot. Here, moving the cursor in to the screen where you want to take the screengrab then pressing CTRL+ALT+PrtScr would “grab” what is on that screen and store that to the Clipboard. If you want both screens, you would press CTRL+PrtScr. Then, you simply past that in to Windows Paint or your favourite image editor, redact it then save it as a file. Other operating systems will use a similar means to take screenshots of a particular screen in a multiple-screen shot.

But mostly you will have to resort to window-specific screenshot commands like Alt+PrtScr for Windows or Cmd+Shift+4 then Spacebar for MacOS to grab screenshots of the relevant windows.

Conclusion

As you head towards multiple-screen computing, take your time to get used to it. Here, it is about moving an application window between the different screens or working out how to quickly locate that mouse pointer.

Apple to use the ARM microarchitecture in newer Mac computers

Article

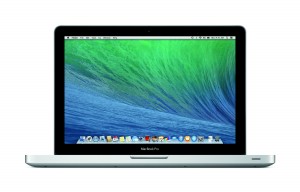
Apple MacBook Pro running MacOS X Mavericks - press picture courtesy of Apple

The Apple Mac platform is to move towards apple’s own silicon that uses ARM RISC microarchitecture

It’s Official: The Mac Is Transitioning to Apple-Made Silicon | Gizmodo

My Comments

This week, Apple used its WWDC software developers’ conference to announce that the Macintosh regular-computer platform will move away from Intel’s silicon to their own ARM-based silicon. This is to bring that computing platform in to line with their iOS/iPadOS mobile computing platform, their tVOS Apple TV set-top platform and their Watch platform that uses Apple’s own silicon.

Here, this silicon will use the ARM RISC instruction-set microarchitecture rather than the x86/x64 architecture used with Intel silicon. But Apple is no stranger to moving the Macintosh computing platform between microarchitectures.

Initially this platform used Motorola 680×0/PowerPC silicon which used a Motorola RISC instruction set microarchitecture. This platform initially had more chops compared to Intel’s x86 platform especially when it came to graphics and multimedia. Then, when Apple realised that Intel offered cost-effective microprocessors using the x86-64 microarchitecture and had the same kind of multimedia prowess as the Motorola processors, they moved the Macintosh platform to the Intel silicon.

But Apple had to take initiatives to bring the MacOS and Mac application software over to this platform. This required them to supply software development tools to the software-development community to allow programs that they write to be compiled for both Motorola and Intel instruction sets. They also furnished an instruction-set translator or “cross-compiler” called Rosetta to Mac users who had Intel-based Macs so they can run extant software that was written for Motorola silicon.

For a few years, this caused some awkwardness with Mac users, especially those who were early adopters, due to either the availability of software natively compiled for Intel silicon. Or they were finding that their existing Motorola-native software was running too slowly on their Intel-based computers thanks to the Rosetta instruction-set-translation software working between their program and the computer’s silicon.

Apple will be repeating this process in a very similar way to the initial Intel transition by the provision of software-development tools that build for Intel i86-64 based silicon and their own ARM-RISC based silicon. As well they will issue Rosetta2 which does the same job as the original Rosetta but translate i86-64 CISC machine instructions to the ARM RISC instruction set that their own silicon uses. Rosetta2 will be part of the next major version of MacOS which will be known as Big Sur.

The question that will be raised amongst developers and users of high-resource-load software like games or engineering software is what impact this conversion will have on that level of software. Typically most games are issued for the main games consoles and Windows-driven Intel-architecture PCs over Macs or tvOS-based Apple TV set-top devices, with software ports for these platforms coming later on in the software’s evolution.

There is an expectation that the Rosetta2 “cross-compiler” software could work this kind of software properly to a point that it can satisfactorily perform on a computer using integrated graphics infrastructure and working at Full HD resolution. Then there will be the issue of making sure it works with a Mac that uses discrete graphics infrastructure and higher display resolutions, thus giving the MacOS platform some “gaming chops”.

I see the rise of ARM RISC silicon in the tradition regular computing world and having it exist alongside classic Intel-based silicon in this computing space like what is happening with Apple and Microsoft as a challenge for computer software development. It is although some work has taken place within the UNIX / Linux space to facilitate the development of software for multiple computer types thus leading to this space bringing forth the open-source and shared-source software movements. This is more so with Microsoft where there is an expectation to have Intel-based silicon and ARM-based silicon exist alongside each other for the life of a common desktop computing platform, with each silicon type serving particular use cases.

Why I refer to desktop and laptop computers as “regular” computers

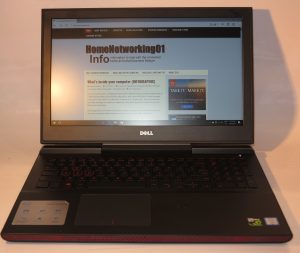
Dell Inspiron 15 Gaming laptop

Why I refer to computers like this as “regular” computers

Through this Website, I refer to the desktop and laptop computers that run Windows 10 PC, macOS, desktop Linux or Chrome OS as regular computers and refer to these operating systems as regular-computer operating systems. This is in a manner to distinguish them from the smartphones or tablets that run iOS, Android or similar mobile-platform operating systems, or devices like Smart TVs, games consoles or vehicle infotainment systems that run a dedicated operating system.

It is based on the fact that these desktop and laptop computers have their design roots in the original personal computers that were built and sold from the late 1970s. Here, the goals were to concentrate all of your computing power to a box that existed at your workspace while you were using it with the system able to do whatever task you wanted it to do once you loaded the appropriate program.

Another factor that is also underscored is the way that the “regular” computer can be optimised to suit one’s computing needs more easily through the use of an operating system designed to be highly configurable from the outset. This includes the ability to choose computers with the right amount of performance for what you want to use them for, the ability to connect devices to them so they can answer your needs better or even modify them to suit newer needs.

It was compared to the previous idea of computing which was centred around large mainframes kept in special computer rooms and users interacting with them using “green-screen” VDU terminals. As well, they have been seen since that period as the example of what desktop or personal computing was about.

It is compared to the mobile-platform devices that had their design roots in the handheld mobile phones and PDAs that came through in the 1990s. Here, it was about a battery-operated device you could hold in your hand and carry personal information with you or use as a communications device.

It is also compared to the likes of games consoles, Smart TVs, set-top boxes and vehicle infotainment systems that are designed around a particular goal. These implement a particular operating system or variant of a desktop operating system highly shoehorned for high-reliability “always-alive” operation in their chosen primary task.

The reason I use the term “regular computer” rather than “personal computer” for this class of traditional computer design is because there may be an argument that the mobile-platform devices like today’s smartphones are more of a personal computer than the traditional devices. There is also the fact that businesses have purchased these computers and implemented them as the workspace-based all-in-one solution for your office tasks since the late 1980s.

Here, it is to distinguish these desktop and laptop computers, including the tablets and 2-in-1s, that are using the traditional computing architecture and running the likes of Windows, macOS or desktop Linux from the other classes of personal-computing devices that have become more popular.

Keeping hackers away from your Webcam and microphone

Article

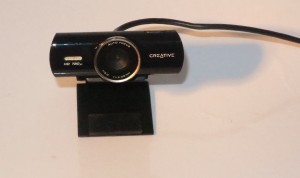
Creative Labs LiveCam Connect HD Webcam

Software now exists so you can gain better control over your Webcam

How To Stop Hackers From Spying With Your Webcam | Gizmodo

My Comments

A privacy issue that is being raised regarding the use of cameras and microphones connected to your computer is the fact that malware could be written to turn your computer in to a covert listening device.

Those of us who use a traditional “three-piece” desktop computer and have a physically-separate external Webcam may find this an easier issue because you cam simply disconnect the camera from your computer. But the issue of your Webcam or your computer’s microphone being hacked to spy on you would be of concern for those of us who have the camera or microphone integrated in the computer as with portable or all-in-one equipment, or the monitor which is something that could be offered as a product differentiator by display manufacturers.

The simplest technique that has been advocated to deal with this risk is to attach an opaque sticker or opaque sticky tape over the camera’s lens. Some computer and monitor manufacturers have approached this problem using a panel that slides over the Webcam as a privacy shield. But you wouldn’t be able to control the use of your computer’s integrated microphone unless it had a hardware on-off switch.

Most of the mobile computing platforms require that newly-installed software that wants to use the camera, microphone, GPS device or other phone sensors have to ask permission from the phone’s owner before the software can be installed or use these devices. The Apple iOS App Store even vets software to make sure it is doing the right thing before it is made available through that storefront and this is also becoming so for software sold through the Google Play Android storefront and the Microsoft Store Windows storefront.

Lately there have been some software solutions written for the Windows and Macintosh platforms that allow you to take back control of the camera and microphone due to the fact that these regular-computer platforms have historically made it easier for users to install software from anywhere. But I would also suggest that you scan the computer for malware and make sure that all of the software on the computer, including the operating system, is up-to-date and patched properly.

One of these solutions is Oversight which has been written for the Macintosh platforms and can detect if software is gaining access to your Mac’s Webcam or microphone. It also can detect of two or more programs are gaining access to the Webcam which is a new tactic for Webcam-based spyware because it can take advantage of people using the Webcam for business and personal videocalls and record these conversations. The user has the ability to allow or block a program’s access to the Webcam or microphone.

For the Windows platform, a similar program called “Who Stalks My Cam” detects events relating to your computer’s Webcam such as software wanting to acquire material from it.  This has the abilities for you to stop a program that is using the Webcam running or to shut down the Webcam process. But there is also the ability to track processes that are running while the computer system is idle because some spyware processes can be set up to come alive when the system isn’t being actively used. The program even allows you to “whitelist” programs that you trust like over-the-top communications programs or video-recording software so that it doesn’t get in their way.

The ability to track usage of attached / connected cameras and microphones or similar hardware like GPS units by software running on your computer will end up becoming part of a typical desktop/endpoint security program’s feature set as people become concerned about the use of these devices by spyware. This is in conjunction with operating systems also hardening access to devices that can be used to spy on their users by implementing software certification, sandboxing, privileged access and similar techniques.

It is definitely another threat vector that we are being concerned about when it comes to data security and personal privacy.

Using audio-editor software to salvage legacy media

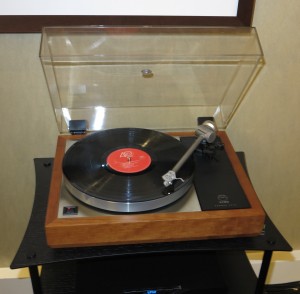
Linn Sondek LP12

You may want to get those old familiar records on to your computer to play on your home network

A task that you will want to do is to record content held on vinyl, cassettes and other legacy media to your computer. This may be to copy it to a CD or have as audio files that you can play on a computer, mobile device or through your home network. It is a task you will end up doing either for family-memory recordings or recorded material where there isn’t a chance of it being reissued on modern audio formats.

What do you need?

Here, you will need to use an audio-interface device such as a sound card or sound module to connect the turntable or tape player to the computer; along with an audio-editing program which records the sound and allows you to edit these recordings.
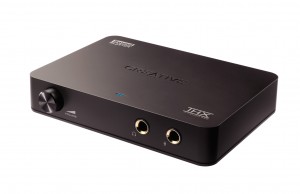
Creative Labs Sound Blaster Digital Music Premium USB sound module press image courtesy of Creative Labs

Creative Labs Sound Blaster Digital Music Premium USB sound module – useful for copying old media to your home network

Audio-interface devices need to be equipped with line-level input connections so you can connect them to an amplifier’s tape-recorder connections or to a source device like a tape deck that has these kind of connections. On the device’s side you will typically have a 3.5mm stereo audio phone jack that is typically highlighted in green or marked LINE IN or some better sound modules may be equipped with a pair of RCA sockets that are similarly marked.

If you are using a laptop computer, an “all-in-one” computer or a small desktop computer, it is a good idea to purchase a sound module that connects via USB, Thunderbolt or similar connectivity technology and use that as your audio-interface device because most of these computers don’t implement line-level input connections on their integrated sound hardware. Similarly, a dedicated sound card may work wonders for sound quality and computer stability if you are using a traditional desktop computer that can be outfitted with standard expansion cards.
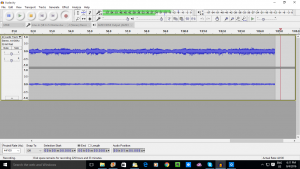
Audacity audio-editor software recording

Audacity – a typical and common audio-editor program

One common software tool is the open-source Audacity program which is highly capable advanced tool but may take a bit of time learning. On the other hand, there is NCH’s Wavepad which comes across as a “free-for-personal-use” program for basic tasks or you can buy a fully-function program for under $100. This one does provide an interface that you can easily get a grip of for most editing tasks. It is also worth noting that you may have ended up with an audio-editor program if you bought an audio-interface device for your computer like a USB sound module; or it may have been bundled with a comprehensive multimedia package or perhaps your computer.

How do I go about this?

Create a software monitor path using your audio-editing software

Here, you create a “confidence monitoring” path to be sure that the sound that you want to record is getting from the source device to the software. This can be useful if you want to hear the source coming through that software or as a troubleshooting tool.
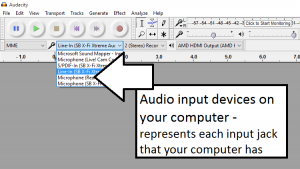
Audacity - audio inputs

Audio inputs on Audacity

Select the “recording device” or “source input” that your source device or amplifier is connected to directly on the audio-editor software. Typically this refers to the actual jack on the sound-card or sound-module that your source device is connected to. Then you select the “playback output” or “playback device” directly on audio-editor software if the software allows you to do so.
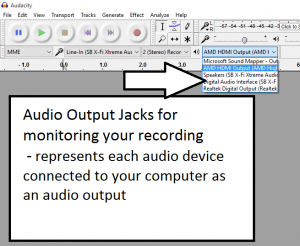
Audacity - audio outputs

Audacity – audio outputs

If you use a hi-fi amplifier with a “tape-monitor” switch, connect the sound module’s audio input and output to the amplifier’s tape input and output connections. Then you select the source you want to record using the input selector and enable the tape-monitor function on the amplifier if you want the monitoring ability.

Some highly-sophisticated amplifiers have the ability to select which audio source is recorded by a connected tape deck such as through a “record select” switch, or there are amplifiers and receivers that have two tape loops but have a “dubbing” switch that determines how the sound flows between those connections. In the former situation, you may have to set the “record select” switch to the appropriate input and in the latter situation, you may have to select “Source” on the tape-dubbing switch unless you are recording from a tape deck connected to the other tape loop, where you would select that recording device using the tape-dubbing switch.

For the software, you would have to select the sound-module audio input connected to the tape output as the recording device and the sound-module audio output connected to the amp’s tape input as the playback device. Then you would have to enable software monitoring, also known as “software playthrough” in the audio-editing software to verify that the sound is coming through. On the other hand, modern Windows operating systems have the “Listen” tab in the Recording Devices Properties dialog box to allow you to “listen” to the source through your computer’s default audio-output device or an audio output device of your choosing, again useful for verifying your setup.

Setting recording level and parameters

Most of the software will have a level meter but this may require you to enable a “monitor” function on the software to see the meter in action. It is also the time where you can troubleshoot any connection problems.

VU meters on Philips DCC-900 in play mode

VU meters that indicate playback output level

If you are playing a a recording on a playback device equipped with VU meters that show the output level during play, check these meters for audio output coming from that recording. As well, if the equipment uses an adjustable level for its line-level outputs, adjust this control to at least 75% or 80% of its maximum level. Then you use the software’s level meters to determine the recording level, making sure you allow a bit of headroom on the meters. On the other hand, you may try adjusting the software’s recording level to maximum and winding back the source equipment’s output-level control to achieve the right signal level if the source equipment is connected directly to the audio-capture device.

As well, you set the digital-recording parameters to 16 bit quantisation and 44.1 kHz sampling rate for all legacy recording media if you use an analogue signal path. Also set up the recording parameters to record in stereo unless the recording was recording from a mono source or recorded with mono equipment, whereupon you set the parameters for mono recording. Using 44.1 kHz sampling rate works properly for burning to CD, or you could use 48 kHz if you are working towards using the material in a video project, but you can use either

You may find that using one of the audio filter functions on your amplifier like a “subsonic filter” may come in handy when recording vinyl for example. Similarly, using the Dolby noise-reduction function on your cassette deck may benefit the transfer process for a suitably-recorded tape.

Assuring proper computer performance

It may be a good idea to make sure that as few applications and tasks are running on your computer before you commence recording. This is because you need to dedicate your computer’s processor and RAM resources to the recording task and make sure that it will record reliably and properly.

This may involve closing email clients, games, office applications and Web sessions before you commence the recording session. Then, while you are recording, you make sure you aren’t using any other app on the computer that is doing the recording.

For laptops, it may be better to have them connected to AC power so that the recording session isn’t destroyed due to the battery dying. Sometimes, you may have to set your computer’s power-usage behaviour to “full-on” or “high-performance” for your recording job so that it doesn’t go to sleep during recording.

Recording

When you are ready to record, start the software recording then start your legacy media playing. Once the recording is complete, make sure that you save the sound file or project depending on the software so you don’t lose the recorded sound.
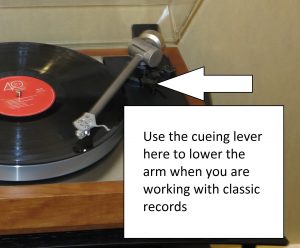
Use your turntable's cueing lever or button to lower the arm when you start playing that record

Use your turntable’s cueing lever or button to lower the arm when you start playing that record

If you are recording from vinyl using a manual or semi-automatic turntable, use the cueing function if it has one to lower the stylus to the record rather than actually lifting the arm on. It is typically represented by a lever at or near the arm’s pivot or some turntables have a button on the front of the base or near the front edge. This will protect the stylus from being chipped and avoids unnecessary loud clicks.

What you will end up with is a large WAV or AIFF uncompressed PCM file for the whole recording or a side of the recording if you record different files for each side or program.

Changing the media during recording

If you have to attend to the medium such as to change sides on a record or tape, you could pause the software’s recording function before you turn the record or tape over. This has all of the album recorded as one file and may be found to reduce glitches.

On the other hand, you may want to stop and save the recording before you attend to the medium then start recording the other side to a new file. This can work well with most studio recordings which are centred around individual tracks or where each side represents a logical part in the recording.

Some audio-editing programs support a silence-based automatic pause or stop function so as to have the recording stop when the source material hits the end of the side.

Editing

Most such software offers the ability to edit a recording that you have made. This can range from simple “cut-and-splice” editing such as to split a recording in to multiple files, combine two recordings in to one recording or remove unwanted noise from a recording.  Anyone who has worked with open-reel tapes or MiniDisc will be familiar with these editing techniques. Your first recording will be a time to become familiar with how your software implements these editing techniques and the way you perform them.

Audacity and some other audio-editing tools allow you also to “mark up” a recording file with index markers kept as a separate file or as part of a logical “project” file. This may be used to facilitate exporting of the file as individual tracks, but allow you to use the effects to adjust the sound across the whole of the audio recording. On the other hand, you may use the cut-and-splice editing techniques to break up the audio files in to individual tracks.

These audio-editor programs also offer the ability to adjust the sound of the recordings courtesy of built-in “effects” or audio-processing routines. There are the elementary effects like equalisation (tone adjustment) or dynamic-range compression but a lot of the programs offer routines geared towards this activity like audio-level normalising, noise-removal and speed adjustment (handy for tapes that have been recorded on portable equipment with half-dead batteries, using a turntable that is only capable of working at 33rpm and 45rpm to work with 78s or salvaging open-reel tapes recorded at speeds not supported by the deck you are playing them on).

A good practice is to save your recording when you get your editing perfect. Sometimes you may want to save the recording as a copy if you are trying an edit or effect out so you don’t ruin your original recording or a successful edit or effect treatment. This may be an important practice as you become familiar with your editing software and will be of value if you are trying to “bring out” poorly-recorded material like cassette recordings made using portable recorders with their integrated microphones.

Editing techniques for legacy media transfer

A good editing technique would be to trim off silence at the start and end of the whole recording and excess silence that has existed between sides or programs of that recording.  For example, some recordings especially those that are on a tape have a longer silent period before the end of the side to preserve a logical program break but have extra space available on the medium for that side.

You could also be removing unnecessary clicks and pops, especially those that are loud and are typically of equipment being started or stopped.

As well, you use the normalising function to bring the tracks’ peak volumes louder but preserve any dynamic range that exists in the recordings. You may have to set up channel-independent normalisation if you have recorded form most consumer-focused equipment because there is a tendency to make one of the stereo channels stronger than the other.

Similarly, the amplify function can come in handy for those recordings that have come through very weak but this is simply about multiplying the volume in that recording and can lead to clipping and distortion if you aren’t careful.

Various filter and equalisation function can be of use to remove unwanted noise such as tape hiss or vinyl rumble. Here, you may have to save a “reference” version of your file and toy around with these filters if you are trying to remove the noise.

Exporting

Most audio-editing software allows you to export the audio content in to different file formats like MP3, FLAC, WMA or AAC compressed forms or a WAV or AIFF uncompressed form. Some of the programs even allow you to “burn” an audio CD from the files you create thanks to an integral CD-burning software engine.

If you use another program to burn audio CDs, make sure that you export your audio content to WAV or AIFF uncompressed PCM files with one file per track. These are the best-quality audio files you can work with when you are targeting these CDs.

Most exporting procedures also allow you to add metadata to CDs as CD-Text data or to files as integral ID3 data. Here, fill in as much metadata as you can about the recording and assign genres particular to the recording’s content. It is important when you copy the files to your DLNA media server or smartphone, or make use of CD-Text when you burn CDs.

Then, you can get away with exporting your legacy-media salvage effort to FLAC files which are a lossless file being handled by most good-quality audio equipment. Similarly, you could export the recording to a 320kbps MP3 file if you want widest compatibility with older MP3-playing equipment.

Conclusion

Once you use a suitably-capable audio interface device connected to your hi-fi equipment along with audio-editing software, you can use your computer as a tool for recording LPs that won’t ever be released anymore or salvaging family memories thus having them on your home network.

More malware being discovered for the Macintosh platform

Article

Apple MacBook Pro running MacOS X Mavericks - press picture courtesy of Apple

Even Apple Macintosh users need to keep secure computing habits

Mac Malware Opens OS X Backdoor to Attackers | Tom’s Guide

My Comments

A lot of Apple Macintosh users have jumped to this platform based on an initial fact that there was very little malware written for it. But now, as more people are using Macs, they are becoming a target for malware including some “backdoor” software which weakens the MacOS’s defences against other malware.

This time, what was being called out was a Trojan-horse program that pretends to be a file-conversion program, the kind of program that is easily downloaded in a hurry.

Keep your Mac’s operating system and software patched and updated

A good practice regarding keeping your Mac secure, as with other computing platforms, is to make sure that the MacOS operating system is up-to-date with all the patches that Apple releases. This is because Apple may have released bug-fixes or remedied exploits that have been discovered in your version of the MacOS operating system.

Preferably, I would recommend you have this set up to work automatically so that when you are connected to the Internet via Wi-Fi or Ethernet, your Mac is kept updated and patched.

You can set this up to be performed automatically by going to [Apple] – [System Preferences]. Then you go to the App Store panel if you have one of the newer versions of MacOS (Yosemite onwards) then check the boxes for “Automatically check for updates” and “Download newly available updates in the background”. This will then make the “Install OS X Updates” option available which you should check.

For Macs that run prior versions, you would still go via [Apple]-[Software Update] and set the appropriate options to automatically patch your version of MacOS X.

You can manually update and patch your Mac by visiting the App Store if you are in Yosemite or newer versions and tick off all of the software that needs updating in the Updates panel. For prior operating systems, you would need to visit the [Apple]-[Software Update] menu and click the option to download and install the latest patches for your Mac.

You can still visit the Updates panel in the App Store and go through all the apps that need updating so you can be sure they are up-to-date. If you have software that isn’t delivered via the App Store, use its interface or the software developer’s Website to keep it up-to-date. This is also important because older versions of application and other software can carry bugs or exploits.

This is something you should do when you switch your Mac on if you haven’t used your Mac or haven’t connected it to the Internet for a significant amount of time, such as with a secondary-use MacBook or a Mac that you use as part of multi-platform computing.

Upgrade your Mac’s operating system if you can

It may be worth upgrading your Mac’s operating system to a newer version if your computer can handle it. In most cases, you can update the system for either pennies’ worth or for free. Here, you could check the App Store or Apple’s website regarding newer operating systems for your Mac.

The main advantages that these new operating systems offer encompass system-wide hardening including the availability of the Mac App Store where the software is verified before it is made available.

Make sure you download software from reputable sources

For all computing platforms, one requirement for safe and secure computing is to obtain computer software from known reputable sources.

In the case of the Macintosh, either download new software from the Mac App Store where the software is verified or from the website of a trusted and known developer. Even when you obtain software from the Mac App Store, check the quality of the software by looking through the reviews that are posted about it and checking the reviews also for other software offered by the same developer. I have written an article about obtaining software from app stores because there has been a risk of them turning in to the equivalent of bulletin boards and download sites that host poor-quality software.

When it comes to software delivered in a packaged form, avoid the temptation to install from anything unless you have bought it yourself from a reputable dealer.

Consider desktop-security software for the Mac

This may sound foreign to Apple Macintosh users but you may also find that it may be worth considering the installation of a desktop-security / endpoint-security program on your Mac. It is more so if you or others who use your Mac are not astute when it comes to downloading software or handling the Internet.

Most of the developers who have written these kind of programs for the Windows-based computers have now written versions of these programs for the Macintosh platform because of the rise of threats against this platform. Like with Windows, the better desktop-security programs also offer protection against Internet-borne threats such as site-reputation checking, content filtering, and spam filtering. Similarly, better-quality software runs in a manner that doesn’t impinge on your Mac’s performance.

Conclusion

Like other computer platforms like DOS / Windows, the Apple Macintosh needs its users to be careful about keeping their computer and data secure. This includes keeping the operating system up-to-date along with being sure about what software you have on your computer.

WhatsApp to go native for regular computers

Article

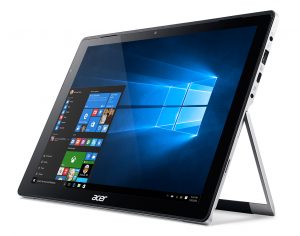
Acer Switch Alpha 12 tablet press image courtesy of Acer

WhatsApp to work natively on your Windows 10 tablet

WhatsApp Has A New Desktop App For Windows And OS X | Engadget

From the horse’s mouth

WhatsApp

Blog Post

Download link

My Comments

I have provided some previous coverage about the issue of native client apps that run on desktop operating systems for messaging platforms. As I have highlighted in the article, I underscored the performance issue which will benefit heavy multitaskers and gamers, the ability to work tightly with the operating system’s functions and abilities and the existence of 2-in-1s and ultraportable computers as a viable alternative to mobile-platform tablets.

Apple MacBook Pro running MacOS X Mavericks - press picture courtesy of Apple

.. or your Apple Macintosh computer

The regular computer was the class of compute that benefited from the instant-messaging app but mobile-platform smartphones and tablets took over the role of personal-communications devices with the different messaging platform vendors focusing on these devices as their terminal of choice. Skype and Viber have kept the desktop (regular-computer) usage case alive and now Facebook offered a Windows 10 desktop native client for their Messenger platform.

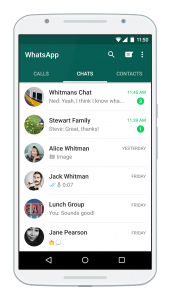
WhatsApp Android screenshot courtesy of WhatsApp

for secure online communications so you don’t have to rely on your smartphone or tablet

Now WhatsApp have answered this call for their secure communications platform by offering native clients for the Windows (8+) and MacOS X (10.9 Mavericks + ). Like with Viber, these desktop native clients are pitched to be a secondary user interface for your WhatsApp account that is set up on your smartphone. This means that once you install WhatsApp on your Windows PC or Mac, you then have to bind the desktop app to your WhatsApp account by using your smartphone’s WhatsApp client to scan a QR code shown on your regular computer by the desktop WhatsApp client.

For WhatsApp users, using these native clients rather than the WhatsApp Web application means that you have the benefits of this platform on your regular computer without the unnecessary overhead that the typical desktop Web browser can impose on your session. Nor do you need to keep a Web-browser tab or session open for desktop-based WhatsApp communication.

This is a sign that regular desktop and laptop computer users, including multitaskers and gamers, are not being forgotten about when it comes to mobile messaging networks.

Rotating videos shot with smartphones

When you shoot video using a smartphone or tablet held in the vertical (portrait) position, it will come out vertical and you may have to rotate your head to watch it comfortably on most display situations. Even if you use a camcorder or high-end digital camera to shoot your video footage, you may find that you have shot some footage at an awkward angle and may want to correct that.

But you can rotate the video footage so it appears right-way-up when you play it. Here, the video will come out in a “pillar-box” form when played full-screen with black borders on each side of the vision.

You can do this with both the main regular-computer operating systems using either an application that comes with the operating system or available as a free download from the vendor.

Apple Macintosh

Current versions of QuickTime Player for OS X have the ability to rotate the video and save a rotated copy.

To do this, open the video in QuickTime Player, then select “Rotate Video” under QuickTime Player’s Edit Menu to get it the “right way up”. Once you are satisfied, press Command-S on the keyboard to save a rotated copy of the clip.

Windows

If you download Windows Movie Maker, which is part of the free Windows Live Essentials package available from Microsoft, you can use this elementary video editor tool to rotate your video clips.

Here, you import your video clip to Windows Movie Maker, then you rotate your video clip using the Rotate buttons on the toolbar. Once you are satisfied, save a copy of the clip in any of the formats that Windows Movie Maker supports.

Conclusion

At least Apple and Windows offer inclusive solutions to correct your video footage that you take with your smartphone so you can make it comfortably watchable.