Tag: Apple MacOS X

Google improving on their simplified cross-platform software development platform

Article

Samsung Galaxy Tab Active 8" business tablet press picture courtesy of Samsung

It will become easy to develop apps to run on smartphones..

Microsoft helps with Google’s Flutter 2 update to improve apps on Surface Duo | Windows Central

Google’s Flutter 2 update could be a major win for apps on Windows 10 | Windows Central

My Comments

Now with three major desktop computing platforms and two mobile computing platforms on the market, there is a demand to create software that can run on all of them. It also means that the software has to operate in a manner that suits the different user experiences that different computing devices offer.

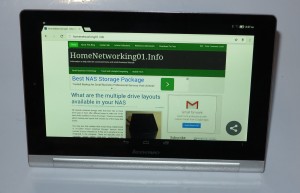
Lenovo Yoga Tablet 2 tablet

.. and tablets

The differing factors for the user experiences include screen size and general aspect ratio as in “portrait” or “landscape”; whether there is a keyboard, mouse, stylus or touchscreen as a control interface; or, nowadays, whether there are two or more screens. Then you have to think of whether to target a mobile use case or a regular-computer use case and optimise your software accordingly. You may even have to end up targeting “small mobile” (smartphone), “large mobile” (iPad or similar tablet), “desktop” (desktop or laptop computer including 2-in-1 convertibles) or “lean-back” (smart TV / set-top / games console) use cases at once.

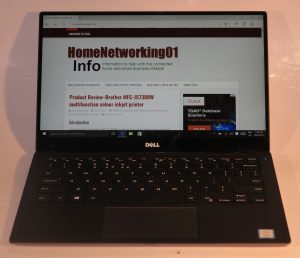
Dell XPS 13 Kaby Lake

.. and laptops with the same codebase

Google and Microsoft have established a partnership to make Google’s Flutter 2 software development platform as something to create desktop+mobile software solutions. It is building on Microsoft’s foundation stones like their BASIC interpreters which got most of us in to personal computing and software development.

Here it is about creating common codebases for native apps that target iOS, Android, Windows 10, MacOS and Linux; alongside Web apps to work with Chrome, Firefox, Safari and Edge. But the question that could be raised is if an app is targeted for Google Chrome, would this work fully with other Chromium-based Web browsers like the new Microsoft Edge browser, the Opera browser or Chromium for Linux.

The creation of Web apps may be about being independent of platform app stores which have a strong upper hand on what appears there. Or it may be about reaching devices and platforms that don’t have any native software development options available to average computer programmers.

Some of the targeted approaches for this new platform would include “progressive Web apps” that can run on many platforms using Web technology and omit the Web-browser “chrome” while these apps run.

The new Flutter 2 platform will also be about creating apps that take advantage of multiple-screen and foldable setups. This is in addition to creating fluid user interfaces that can run on single-screen desktop, tablet and smartphone setups. The idea of creating a user interface for multiple-screen and foldable setups is seen as catering to a rare use case because of fewer foldable devices like the Microsoft Surface Duo on the market let alone in circulation. Another question that can crop up is multiple-screen desktop-computing setups and how to take advantage of them when creating software.

What I see of this is the rise of software-development solutions that are about creating software for as many different computing platforms as possible.

How to adapt to multiple-screen computing

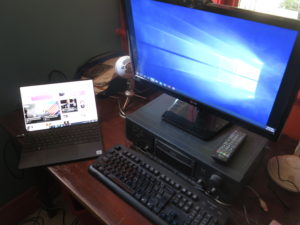
Desktop workspace with Dell XPS 13 laptop computer

The computing setup with multiple screens – now very ubiquitous

Computing setups that are equipped with two or more screens are becoming more ubiquitous due to the affordability of these setups. As well, it is becoming more acceptable in general business and personal computing to operate with multiple displays at your main workspace thanks to a range of productivity benefits.

You may find that there is a steep learning curve as you set up your workspace for multiple-screen computing. This is something that I am facing as I move from a traditional desktop computer centred around a traditional PC tower to a laptop computer that is connected to a dock and I want to keep the existing monitor going.

An example of this is when you move away from your desktop computer with the traditional single-monitor approach to a laptop-centred computing setup and retain your desktop computer’s monitor because it has plenty of mileage left in it. It can also happen if you are using an all-in-one desktop computer like the iMac that has an integrated display and you use a similarly-sized monitor to create a multiple-screen computing setup.

Those of you who use a traditional desktop computer may head towards multiple-screen computing if you decide to buy a new monitor and keep the existing monitor going. You will find out if this is feasible for most of these computers if there are two or more display outputs on your computer, especially its graphics card.

Praise and worship at church

Using a computer in conjunction with a projector to show material to a large audience like this church setting will have you working a multiple-screen setup due to the use of a smaller screen for control or cueing purposes

This can also happen when you are using a projector or large-screen TV as the “big screen” in your display setup, something that is commonly done for multimedia or games applications or to show content to large audiences.

Occasionally I have had to deal with multiple screen computing setups. This was either as part of helping some people out with their computing setups. Or it was to help a small church with their AV and IT needs which has been the basis of some articles I have published and targeted to that same audience.

Now, thanks to a computer upgrade towards a laptop, I have headed towards regular use of a multiple-screen setup by maintaining my existing monitor as a second screen for that setup. In this case, I use the larger-screen second monitor for working on documents in my primary laptop-centric workspace.

Why go multiple-screen for your computing needs

Most computer users who make heavy use of their productivity software will want to benefit from multiple screens. This is due to the effectively-large working area that these setups offer.

.. as will using your laptop with your TV to watch Netflix

For example, a person who is building a document or presentation from online research will be having multiple programs running so they can add content from the online research in to their “magnum opus” easily. Some of these users will even have multiple Web-browser sessions running concurrently along with the program they are using to build their content. Or a user could engage in a videoconference and look up relevant material or take notes on another screen during the call.

People who work with large spreadsheets will also benefit especially if the spreadsheet becomes wide. It also applies to those of us who use desktop publishing, illustration or photo-editing programs to lay out publications or create our computer-graphics masterpieces. You may come across an increasing range of monitors that can be switched between landscape and portrait orientation, which may allow you to adapt them to support a wide or tall project.

Those of us who make use of online news services will benefit from multiple-screen computing> This can be about being able to monitor a current event that appears on an online news service while engaging in another activity like creating that document, spreadsheet or presentation.

Multiple-screen setups also are about a larger screen that is used to show material to other people. This is very common with projector-based setups or where the large-screen TV set is used. Increasingly a lot of software focused to this kind of effort is being designed to take advantage of multiple displays.

This same application is being extended to videoconferencing setups like with Zoom’s Multiple Monitor setup. Here, that allows a “gallery” view to exist on one screen and the current speaker to appear on the other screen, and to allow shared resources to appear on the secondary screen. It also extends to those of us who use text-based “chat” or social-media platforms and want to follow them while doing other computing activities including browsing the Web.

Some games are even exploiting multiple-screen operation in order to provide multiple concurrent views of the same action. Or they even use this to effectively create larger and wider views of the action.

Typical configuration

Here, you are typically implementing the multiple-screen display setup in the “extend” operating mode. This has the screens set up as one large display area or “canvas” but most operating systems make one screen become the primary screen where programs appear by default when they are launched. Typically it is the screen that will be used during the boot process and will show the startup images like the interactive login screen or operating-system splash screen. If you use a laptop or all-in-one computer, the integrated screen will always be deemed the primary screen.

Even with projectors or TVs, you may have to implement “extend” behaviour and work your computer’s regular display as your primary display to allow some presentation, multimedia or games software to work properly with multiple screens. In the same context, some users may have the computer’s primary display working as a “content preview” screen and shift the content to the large screen when it is ready to show.

For laptop users, they may use the “external monitor only”” display option but run multiple external monitors, This would come in to play if you are connecting multiple monitors to an outboard dock of some sort.

Laptop users will also need to be used to switching frequently between single-screen and multiple-screen setups. This is due to themselves using the laptop’s screen as the only screen when they use it in a portable context away from their desktop workspace but work with multiple screens while at the desktop workspace. They will also have to cope with being able to “go multiscreen” at a moment’s notice if they choose to connect the computer to a large-screen projector or TV.

Your mouse pointer
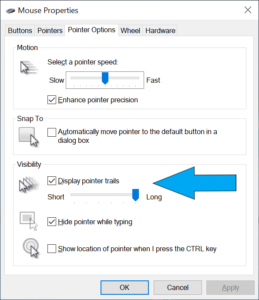
Mouse Options in Windows Control Panel - Pointer Trails called out

Using “pointer trails” a.k.a. “comet tails on your mouse pointer can make it easier to discover across the multiple screens

The first issue you will face is locating your mouse pointer. In this situation, you need to know which screen it exists on at the current time, or whether you are moving from one screen to another. This can be very difficult with screens of different sizes like a setup involving your laptop screen and your large-screen monitor. It can also be difficult where you have two screens that are separated from each other including dealing with monitors that have large screen bezels.

These kind of options are introduced in to the main regular computing platforms as a measure to increase accessibility and useability of these platforms for those of us with limited abilities. This is due to these platforms being used by an ageing user base for both work and play along with younger people that have limited abilities wanting to he productive with these platforms.

One way is to enable “comet tails” on your mouse pointer. This has a decaying trail of the pointer arrow which will appear as you move your mouse pointer with your input device. Windows has this as part of its Mouse control options in the Control Panel. MacOS X requires you to use a third-party app to have this same functionality for locating the mouse pointer.  You may also find that adjusting how your mouse pointer looks such as its size or colour may help you with making it more discoverable for you.

Another technique that you will have to perform frequently is to bring up the secondary or context menu simply as a way to locate your mouse pointer. Here, the large area occupied by the context menu stands out more visibly than a small mouse arrow or I-cursor. People who use a pointing device that has a secondary button can use this button on all desktop operating systems. But Apple Mac users who use a pointing device without a secondary button, as what was part of the original Macintosh setup, can achieve this same function by holding down the Ctrl key on the keyboard and clicking their pointing device.

The two main desktop operating systems also have their own tricks to make the mouse pointer discoverable at a moment’s notice through a special mouse-action or keypress. Here, it can be useful for identifying where your mouse pointer is across that large area.
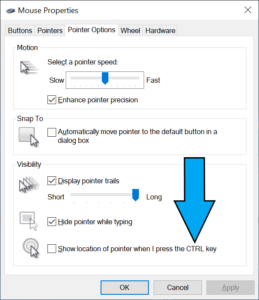
Mouse options in Windows Control Panel - option to highlight mouse pointer when you press CTRL

Windows users can set things up to quickly highlight where the mouse pointer is when they press the CTRL key

Apple Mac users can set their computer to quickly enlarge the mouse cursor when you move the mouse (or your finger on the MacBook’s trackpad) vigorously. Here, you click on the Apple menu, then click on System Preferences, then click on Accessibility then click on Display, You subsequently select Cursor and tick the “Shake mouse cursor to locate” option. Windows users have to go the the Mouse control options in the Control Panel and select “Show location of cursor when I press the CTRL key“. Here, when you press and release the CTRL key, a large circle appears then reduces in size around where the mouse cursor is.

Laptop users who run a multi-screen setup comprising of their laptop’s screen and the large monitor in an “extended” arrangement may find that the small screen could be kept for “parking” application user interfaces that they aren’t giving all their attention to. They then keep the large screen for the applications they are focusing on at the moment. An example of this could be a Web browser with a page they are reading or an office application with the document they are working on existing on the large screen. That is while an email client, messaging application or media player that only needs occasional attention could be visible just on the laptop’s smaller screen.

Moving apps between screens with the keyboard

People who are new to multiple-screen computing or switch between single-screen computing and multiple-screen computing will come across situations where the app they are using doesn’t appear on the screen they want to use. This may be of concern where a user starts a program they previously ran on a multiple-screen setup doesn’t appear on a single-screen setup due to the absence of the screen they were using. Or they want to quickly move an app to another screen.

This situation will come in to play for those of us with laptops who work only with the laptop screen while away from the main workspace. Here, you may find that a program you use on your external monitor isn’t visible on the laptop’s screen but appears on the Windows Taskbar or MacOS Dock as an app that is in use. This may happen where an app doesn’t adapt to different multiple-screen setups properly.

Here, software that adapts properly between single-screen and multiple-screen computing setups will, for example, move to the single screen in a single-screen setup if it was last operated on other monitors in a multiple-screen setup.

It also applies to those of us who are using a computer as part of an AV playout setup and have to move a program’s screen between the cue / monitoring screen and the main screen. That also extends to people using the big TV screen to view videos or pictures or play games on a laptop. It is more so with Web browsers or other programs that don’t handle multiple screens properly.

Windows simplifies the process of moving apps between screens with the keyboard. Here, Windows users need to Alt-Tab to the program you are trying to bring back in to view in order to give it logical focus. Then you use the Windows + Shift + left or right arrow keys to bring the program to the integrated screen.

Apple Mac users would then have to invoke Mission Control by pressing the F3 key. Then they would have to use the trackpad or other pointing device to move the program between screens. As far as I know, there isn’t an approach to using the keyboard to move an app or window between screens on the MacOS.

Screenshots

You may find that the procedure for taking full-screen screenshots may be very different here. In most cases, the operating system will encompass what is seen on both screens in a full-screen screenshot.

In the case of Windows, you may find that PrtScr may yield you something to large for your screenshot. Here, moving the cursor in to the screen where you want to take the screengrab then pressing CTRL+ALT+PrtScr would “grab” what is on that screen and store that to the Clipboard. If you want both screens, you would press CTRL+PrtScr. Then, you simply past that in to Windows Paint or your favourite image editor, redact it then save it as a file. Other operating systems will use a similar means to take screenshots of a particular screen in a multiple-screen shot.

But mostly you will have to resort to window-specific screenshot commands like Alt+PrtScr for Windows or Cmd+Shift+4 then Spacebar for MacOS to grab screenshots of the relevant windows.

Conclusion

As you head towards multiple-screen computing, take your time to get used to it. Here, it is about moving an application window between the different screens or working out how to quickly locate that mouse pointer.

Rotating videos shot with smartphones

When you shoot video using a smartphone or tablet held in the vertical (portrait) position, it will come out vertical and you may have to rotate your head to watch it comfortably on most display situations. Even if you use a camcorder or high-end digital camera to shoot your video footage, you may find that you have shot some footage at an awkward angle and may want to correct that.

But you can rotate the video footage so it appears right-way-up when you play it. Here, the video will come out in a “pillar-box” form when played full-screen with black borders on each side of the vision.

You can do this with both the main regular-computer operating systems using either an application that comes with the operating system or available as a free download from the vendor.

Apple Macintosh

Current versions of QuickTime Player for OS X have the ability to rotate the video and save a rotated copy.

To do this, open the video in QuickTime Player, then select “Rotate Video” under QuickTime Player’s Edit Menu to get it the “right way up”. Once you are satisfied, press Command-S on the keyboard to save a rotated copy of the clip.

Windows

If you download Windows Movie Maker, which is part of the free Windows Live Essentials package available from Microsoft, you can use this elementary video editor tool to rotate your video clips.

Here, you import your video clip to Windows Movie Maker, then you rotate your video clip using the Rotate buttons on the toolbar. Once you are satisfied, save a copy of the clip in any of the formats that Windows Movie Maker supports.

Conclusion

At least Apple and Windows offer inclusive solutions to correct your video footage that you take with your smartphone so you can make it comfortably watchable.

Regular operating systems and their vulnerability to security threats

Article

Which Is More Vulnerable To Viruses And Hackers: Windows 10 or Mac OS X? | Gizmodo

My Comments

Lenovo ThinkPad X1 Carbon Ultrabook

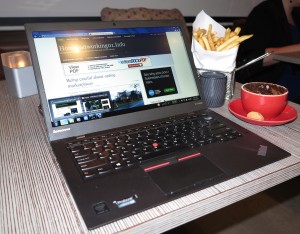
The Lenovo ThinkPad X1 Carbon – an example of a laptop based on a regular computing platform

During the 2000s, the personal computing scene focused on so-called “regular” personal computers i.e. desktop and laptop computers that ran a desktop-grade operating system. The main platforms were the Windows platform heralded by Microsoft and with hardware made by plenty of other manufacturers and the Macintosh platform that was made by Apple. Of course, there were a few personal computers that ran one of many open-source Linux distributions which were effectively UNIX.

There was the issue of security risks magnified due to an increased amount of personal and business computing time spent online through the Internet. In most cases, especially with the Windows platform, these risks were mitigated using a desktop or endpoint security program installed on the client computer. Although I have constantly seen the Apple Macintosh platform at risk of security exploits, that platform wasn’t at risk because there were fewer computer users using that platform.

Enter Windows Vista. This operating system had improved security features like operating as a regular user unless necessary but these were tacked on to the Windows XP codebase. This led to poor performance and computer users saw the value of switching to the Apple Macintosh platform for regular computing needs with some even using Apple’s iWork office tools as a way simply to dump Microsoft.

This led to the Apple Macintosh platform becoming more vulnerable due to its increased popularity and the use of “write once run anywhere” code like Java. Apple had to pull their finger out to improve the Macintosh platform’s security and, like Microsoft, engage in regular software updates and patches.

Improvements

Major upgrades for pennies’ worth or free

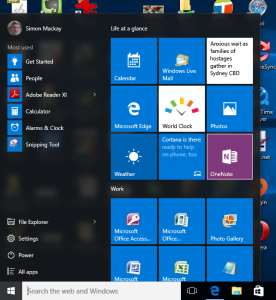
Windows 10 Start Menu

Windows 10 – a free upgrade from Windows 7 or Windows 8.1

Microsoft and Apple had even started to offer newer iterations of their operating systems to home users and small businesses at prices that would represent chump change or, later on, offer these iterations for free.

Apple started the ball rolling with Mac OS X for pennies’ worth starting with OS X Lion and for free starting with Mavericks. Subsequently Microsoft used Windows 8 to facilitate a software upgrade for pennies’ worth and used Windows 10 to instigate a free software upgrade program.

The major upgrades typically had security improvements like creation of app stores and newer secure codebases.

Blind updates for security patches

A way software developers keep their software going strong is to deliver updates and patches that rectify software bugs and allow the software to improve in performance. The delivery of these updates is being used to harden the software against known security exploits, often as soon as these holes are discovered.

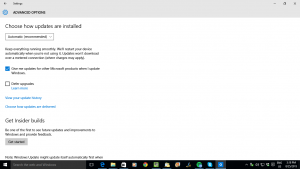
Windows Update - one stop shop for software patches along with automatic delivery

Windows Update – one stop shop for software patches along with automatic delivery

This process typically involved users finding patches or newer code on the developer’s Website but Microsoft and Apple have put an end to this. Initially they set up a “one-stop-shop” program for downloading these updates including any peripheral-driver updates but have improved on this by providing for “blind updating”. This is where the operating system automatically downloads and installs these patches as soon as they become available.without you needing to do anything except, perhaps, reboot the computer when prompted.

Microsoft and Apple are even working on having these patches become effective once they are installed without you needing to reboot your computer. This is being achieved in the newer operating-system variants and with some newer patches.

The option for secure boot

Apple implemented in the Macintosh standard firmware a way to only let MacOS X boot on their Macintosh computers and this provided a sense of security because it can only allow these computers to run Apple-authorised code.

Microsoft and Intel are now implementing this through UEFI and Secure Boot which allows for authorisation of operating systems and pre-boot software that runs on a computing device. This has been considered controversial because it would wrest control of the computer from uses who may want to deploy Linux, especially a custom Linux distribution or wish to run with a dual-boot setup.

App stores and walled gardens

Windows 10's own app store

Windows 10’s own app store

Another weapon that Microsoft and Apple are deploying comes from the world of mobile computing where mobile operating systems implement an “app store” which is a one-stop software “shopping mall”.

Like a suburban shopping mall with its physical goods, these app stores have tight controls on who can sell their software there. Here, the software has to be provided by an identifiable developer and approved and audited by the operating system developer who runs that app store.

There is also a requirement for the software to be sandboxed and have access to certain parts of the operating system rather than having full run of your computer.

Another factor that is also considered important is that if an application “does the right thing” by its users and the operating-system vendor, it is typically highly recommended or featured such as being given an “editor’s choice” or put in the “spotlight”. This gives the program increased exposure which attracts more installations and more purchases. As well, there are user-review mechanisms where people can uprate or downrate the software.

But both the Macintosh and Windows platforms require the ability to work with established software deployments that are typically installed via removable media or a download from the developer’s site. This is due to their legacy where people installed software from floppy disks or CDs or downloaded software from bulletin boards and download sites.

Windows 10 is providing a way to harden things further when it comes to this software in the form of Device Guard. This is a form of sandboxing which allows only certain programs to run on a computer but is made available to the Enterprise Edition only. It is because the process for setting up this whitelist would be considered very difficult for householders, small businesses and community organisations.

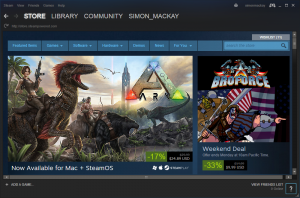
Steam - one of the most common games managers

Steam – one of the most common games managers

For games, major games studios are implementing their own app stores and games delivery systems in order to allow for cross-platform game and supporting-content delivery. Here, they want regular-computing gaming to have that same level of confidence associated with console or mobile gaming. This is although Apple and Microsoft deliver games through their app stores. The best example of this is Valve’s Steam online games shop but there are others like EA’s Origin.

Conclusion

What is happening is that for both the Windows and Macintosh computing platforms, they are being made more secure and malware-resistant and it is becoming a race between Apple and Microsoft to keep the regular computing environment as safe as a mobile computing environment.

What is this about “cyberflashing” and how to prevent it?

Samsung Galaxy Note 2 smartphone

Taking control of local data-transfer functionality like AirDrop can help you avoid unwanted surprises

Article

Cyberflasher Airdrops rude images to victim’s iPhone | Naked Security (Sophos)

My Comments

A problem that has started to surface for Apple iOS users is the ability for someone to send gross images to strangers courtesy of the AirDrop feature that newer iterations of this platform have. Situations where this typically happened were when the offender and victim were on public transport or in public areas.

This feature makes it easy to share photos between iOS and MacOS X devices in a local area using Bluetooth and Wi-FI technologies and provides a thumbnail image of incoming photos rather than a dialog box asking if you want to receive the image.

This was feasible with Android and other open-frame mobile operating systems courtesy of Bluetooth Object Push Profile but these platforms. especially Android, hardened themselves against this by making your phone undiscoverable by default and providing a narrow time limit for having your phone discoverable by Bluetooth devices. As well, these platforms required your permission to start receiving the file and you didn’t see one bit of that file until you gave the go-ahead.

Android and Windows improved on this using a passcode that you and your correspondent exchange before a file is transferred and the NFC functionality that is part of recent Android versions requires you to physically touch the backs of the phones as part of instigating the data transfer.

The same situation may also crop up with Wi-Fi Aware as it implements Bluetooth local discovery for ad-hoc Wi-Fi networks created by mobile devices and will require users to be able to take control of what notifications and files they receive on their devices if this technology is for transferring files.

Protecting yourself

A good practice to observe is to turn off the AirDrop feature unless you make regular use of it. Or, at least, set AirDrop’s discoverability settings to “Off” or “Contacts Only” rather than “Everyone” so that every man and his dog can’t discover your phone. You would turn this function on if you are expecting a photo from someone not yet in your Contacts List.

In some situations, you may have to disable Wi-Fi and Bluetooth unless you are actually using these features such as linking to a hotspot or using a Bluetooth headset.

You may find that changing your device’s identity to your initials or something innocuous rather than your first name may work wonders in these situations.

I would also prefer that any local data transfer or similar activity between users takes place in a manner where each participant can see each other. This may be at the same table in a café, restaurant or library, the same seating cluster in a lounge area, the same row of seats in a public-transport vehicle or a similar area of close proximity. As well, such activity should be preceded by relevant conversation.

What must be preserved

If a setup allows for local data transfer between computer devices using a wireless medium, there must be a way of allowing the users to confirm their intent to transfer the data between each other. This means that the sender and receiver know whom the data is coming from and to and must occur before a single bit of the actual data changes hands.

This may be through the sender exchanging a simple passcode to the receiver or requiring the devices to physically be near each other at the start of the data transmission. The latter solution may be in the form of NFC where the users touch the backs of their devices together, or a QR code shown on the sending device’s screen that the receiving device has to scan before transmission takes place.

If a user wants to simplify this process, they could create a “trusted recipients” list which can be their Contacts list or a separately-created list. Personally, I would use all of the “friends” in a social network as this list because that tends to encompass too many people and an account can too easily be compromised.

The same thing must also apply to social networks, online gaming and similar services where one user may want to enrol another user in to their personal lists. This is more important if any of these services facilitate the transfer of files between users or support any form of instant messaging.

Macintosh users–keeping your computer secure

Article

Apple users: Try these five tips for better Mac security | Naked Security

My Comments

Just lately, I have heard over the dinner table that a few Apple Macintosh computer users have been facing issues with malware and other software with questionable behaviour. Some of these attacks were mainly “overlay attacks” that worked with the user’s Web experience.

What previously used to happen was that Windows computers were the target for viruses, worms, Trojans and similar malware due to them having a stronger installed base compared to the Apple Macintosh platform. This caused some people to switch to the Apple Macintosh platform because of less malware threats occurring on that platform.

But even in 1989 when I was made aware of the virus issue, the awareness about viruses and similar malware was targeted across all personal-computing platforms that were in operation through that year i.e. the MS-DOS-based IBM PC, the Macintosh, the Commodore Amiga and the Apple II amongst others. At that time, there was awareness about keeping a “clean” system and keeping control over how you shared your files.

Similarly, we started to see the arrival of signature-driven anti-virus programs that could scan hard disks or removable “floppy disks” for viruses. Some of these initially scanned the boot sector but moved towards checking files for these viruses. They became a very important part of every computer user’s software toolkit as the virus activity increased. But through the 1990s as the Internet came on the scene, the malware activity was more focused on the MS-DOS / Windows platform with Apple Macintosh users not having as much of that activity. At that time, the MS-DOS / Windows platform was effectively the computing platform for most personal and business computing applications including gaming with the Macintosh being used by creative types due to its inherent prowess with multimedia.

This lead to a sense of complacency concerning secure computing for the Macintosh platform on both Apple’s and their users’ part. Microsoft took proper steps in updating and patching the Windows computing platform since 2001 with the arrival of Windows XP and hardening that platform with the arrival of Windows Vista and 7. Similarly, Windows users jumped over to the Macintosh platform for their home computing because they saw Windows as being slow and virus-ridden; and also due to the arrival of Apple’s iPod and iPhone products.

Lately, the Apple Macintosh has become the target for various malware campaigns including “write-once run-anyone” attacks based on Adobe Flash and Java software platforms. This is due to the increased new-found popularity that the Macintosh has acquired and, in another context, activities involving the Internet, networks or removeable media are still being seen as vectors where the Mac can share Windows-targeted malware.

Upgrade to Mavericks if you can

To stay secure, Apple Macintosh users need to upgrade to the 10.9.2 Mavericks version of MacOS X, with this version being equipped with various security improvements in a similar way to what Microsoft did with Windows 7. This can be done with newer Macintosh computers and for free with Macs running Lion or Mountain Lion versions.

Keep the operating system and software up-to-date

As well, as part of proper computer housekeeping, it is important to keep the Mac “lock-step” with the latest operating-system updates. Here, you can use the Apple-Menu / System Preferences / App Store option to have the Mac check for and download the updates from Apple by itself; or go to the Apple-Menu / Software Update menu to cause it to check for updates. The latter option can be of use with a MacBook that is used “on-the-road” and you are able to check in at a Wi-Fi hotspot or other Wi-Fi network.

Similarly, keep Adobe Flash and Oracle Java up-to-date by using options in the Apple-Menu / System Preferences menu to check for automatic or manual updating for these programs. If any other “write-once run-anywhere” software-development platforms show up on the Macintosh platform, treat these like you would with Adobe Flash – they can become a path for distributing malware that “hits across all platforms”.

This also applies to the application software and utilities you also run on your Mac and, here, you go to whatever software-option menu there is to check for software updates or cause automatic software updating to occur.

Don’t enable Java if you don’t need it.

As for Java which appeals as a “write once run anywhere” coding system, don’t enable it unless you are intending to run a known trusted program that uses this language or are developing Java software. OS X Mavericks comes with this deactivated by default but you can deactivate this in your Web-browser option menus.

Take advantage of full-disk encryption if you have confidential data

Another practice you could use for all computer platforms is to take advantage of full-disk encryption. Most operating systems provide this as a function that you can use with MacOS X providing it “across the board” for recent iterations in the form of FileVault. Similarly, a commercial or open-source third-party full-disk-encryption tool can do the job better than what the operating system provides.

These tools encrypt and decrypt on an “on-the-fly” basis and mainly protect the local volumes on the computer with some business-tier USB memory keys providing a similar full-disk encryption for their own volumes.

Use a good anti-malware or desktop security program for the Macintosh

Check for and use a good anti-malware program for the Mac platform like Kaspersky, Sophos, AVG or ClamXav . As well, keep the anti-malware program that you run on automatic update in order to keep them ahead of the malware game.

It is also worth noting that the good programs in this field can also keep the Macintosh from being a conduit for spreading Windows-based malware around the Windows platform. This is whether the files are passed through email, message-based file transfers, network-hosted / Internet-hosted file sharing points or removeable media.

Another sign of a good anti-malware program is the ability for it to scan your computer’s primary storage (RAM and paging files) to protect against malware that works on data being held in this space. This is because most data normially encrypted on a secondary storage or in transit is kept “in the clear” in the RAM and is vulnerable to RAM-scraping malware.

Keep stock of what is installed on your Mac

Another way malware gets on to computers is when you load software “in a hurry”. Typically what can happen with some freeware tools is that they can “push” browser extensions and toolbars or utilities of doubtful provenance on to a computer. This can lead to it underperforming or malware creeping in and taking over the system.

If you download from the Mac App Store or similar download locations, check for the app’s reputation by looking at comments, star-ratings and the like. This is something I have raised previously in relation to app stores for mobile-computing platforms along with the newer App stores that are opening up for regular computers and dedicated-purpose devices.

With your browsers and other applications, keep tabs on what plugins, extensions, toolbars and other add-on modules are running and if you notice something being awry about the module since you installed, don’t hesitate to remove it. A good article on this topic concerning uninstalling applications on the Mac is this one on MacRumors.com which highlights that dragging an application bundle to the Trash may not be the only method available.

Conclusion

The main issue here is that the Apple Macintosh is a computing platform vulnerable to malware and will become more so as it be becomes more popular as a mainstream computing platform. So you would need to continue with proper computer-housekeeping practices to keep your Mac from these threats.

Computers or other devices perform better after a reboot–why this?

Article

Why Rebooting Your Computer Fixes Problems | Lifehacker Australia

My Comments

Why is it that your laptop, tablet or smartphone performs so much better when you restart it? Why is it that some devices implement a watchdog circuit to force them to restart by themselves when they are critically underperforming?

This is typically to make sure the computer is working on a clean slate as regards to its primary storage (RAM – random access memory). Most software, especially if it is poorly written, can take up more of this memory as it is used. But when you close that program, it releases the memory it used. But a lot of recent regular-computer and mobile operating systems encourage the ability to run multiple programs at the same time, with the ability for programs to “sink” in to the background when they are not being used.

If this situation is allowed to get out of control, most operating systems undertake “paging” or “virtual-memory” procedures where they use space on the secondary storage as primary storage. At this point, most computer start to underperform and become devilishly slow. The worst-case situations that come about include programs or the computer simply “freezing” or “locking up” thus becoming unresponsive, a situation commonly described as “hanging”.

Even placing that PC or other device in to a “sleep” or “hibernate” mode or allowing the device to fall to sleep wouldn’t really rectify the problem because these modes cause the device to preserve its current operating state either to the RAM or its secondary storage (hard disk or solid-state drive). This is typically to provide a quick start-up for the device.

But when a computer or device is restarted using the operating system’s restart option or having it then shut down properly before you restart it, this causes all the programs it runs to start on a clean slate. For mobile devices, it may require the user to press the hardware Power button for a long time to bring up a “power-option” menu with the shutdown or restart option or pressing two buttons together for a long time to force a full shutdown or restart of an obstinate device.

You know when this restart has occurred when you see a longer boot time and see the startup screens or other startup graphics appear on your device’s display. You typically will then notice that the device is performing with a bit more “pep” in it. This is because the device is working on a clean slate with fresh “known” data.

A good practice to do in order to keep your computer running smoothly is to have it restart at least once a fortnight. This may be something you have to do when you install or update software. I also see this being more important for laptop users who typically close the lid when they have finished with their machine, causing it to go to a sleep or hibernate mode, or desktop users who turn off the monitor or use the sleep or hibernate modes at the end of a computing session.

This is also a good practice with well-used smartphones and tablets, especially if these devices are being used with poor-quality apps from the app store.

Formatting external hard drives to native file systems may allow them to work optimumly

Article

Using external drives to save space on your Mac? Format them first. | MacFixIt – CNET Reviews

My Comments

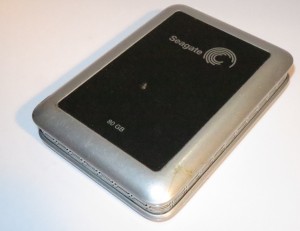
External hard disk

A typical external hard disk

This article highlighted the benefits of formatting external hard disks that are to be connected to an Apple Macintosh as HFS+ file-system disks. This advice hails well for formatting an external hard disk to an operating system’s native file-system such as NTFS for Windows or ext3 for Linux. This is because most of the external hard disks come preformatted to FAT32 more as an interchangeable file system that can be used on Windows, Macintosh and UNIX/Linux.

In the context of an external hard disk that you attach to a network-attached storage device for extra capacity, it may be worth looking through the instruction manual for your NAS or router to find the optimum file system. Some of the NAS units may work with ext3 or NTFS as the file system whereas most, including the routers with NAS functionality will stay with FAT32.

But this situation would apply to external hard disks that are primarily connected to the host computer all of the time rather than the “portable” hard disks that are likely to be moved between different computers and file systems. It wouldn’t hold well with thumb-drives and memory cards that you would expect to move between various computer devices including specific-purpose devices because most of these devices would only know the common FAT32 file-system.

This advice is best applied with an external hard disk that you have just purchased rather than one that contains all of your data because a format routine can wipe all of the data that exists on the hard disk.

What to do if the App Store gives your Mac the Dreaded Beach Ball

Article

Tackle a hung App Store update in OS X | MacFixIt – CNET Reviews

My Comments

You have that Macintosh computer running with Apple’s App Store as your preferred download spot for programs. But you notice that the Mac is not being its usual self while you are running an App Store update or download. It starts to show that dreaded “beach ball” for ever during the update process while nothing is happening. This means that the App Store client application is hanging and effectively slowing down the rest of your system.

The main problem that can lead to this typically are about the App Store working with corrupted files in its folders as what happens with any computer programs. This encompasses where the installation packages are held after they are downloaded as well as any temporary files that the App Store creates. The folders will exist on the “Macintosh HD” secondary storage location which is the main storage location for all of your Mac’s programs and data.

Here, when you notice this behaviour, you would have to “force-quit” the App Store application. Either this is done by selecting “Force Quit” from the Apple menu or pressing CommandOptionEsc on the keyboard. You could also “force quit” from the Dock by using Option-Right-Click on the unresponsive application’s icon. After you have done this, the Mac should be more stable by now.

Dealing with the corrupted data

Installation package folder

Then you would have to use Finder to clear out the App Store Updates folder which is at Macintosh HD/Library/Updates. This is where the software update or download packages are held by the App Store before being installed. Once you clear this folder out, it means that the App Store application can draw down fresh “known-to-be-good” install packages from the iTunes App Store.

Temporary and “work” files created by the App Store

Another location that you may have to clear out are the App Store Caches. These represent the temporary files that the App Store application creates as it goes about its work.

Here, you run Terminal and type in: “open $TMPDIR../C” to expose the “cache” folders where data that the App Store needs for speedy operation exists. In this window, look for folders that begin with “com.apple.appstore” and remove these folders.

You also go back to Terminal and type in “open $TMPDIR../T” to expose the temporary-file folders. Here, you look for the folders that begin with “com.apple.appstore” and remove them.

The App Store will take longer to start as it re-builds the cache and temporary files with the fresh “known-to-be-good” data.

Permissions fix for the system resources

This is another area that could house corrupt data and could generally affect your Mac’s stability. It is because the information about the permissions required by the applications to use system resources is kept as data on the Macintosh HD.

Here, you use the Disk Utility to do this task. You select the Macintosh HD in this program’s sidebar and click “Repair Permissions” in the “First Aid” tab to start it repairing any corrupt system-permissions data.

Tips to avoid this problem

If you are using a Wi-Fi wireless LAN connection or a mobile-broadband connection, and you intend to do a lengthy App Store update, make sure that you are getting a consistently strong signal from the wireless network. This is because a poor or inconsistent wireless signal could lead to an increased risk of failed downloads.

As well, it may be a good idea to have your MacBook connected to external power while you are doing a lengthy update. This avoids the risk of a failed download occurring because the battery is on the way out.

Here, you could confine the App Store software updates to your home or workplace so you can be sure of a smooth update scenario.

Setting up Apple iChat for Facebook Chat and Messaging

Windows users have been able to use the Facebook Messenger as a desktop option for gaining access to Facebook’s chat and messaging features. Similarly, users of the iOS and Android mobile platforms have benefited from having access to the Facebook Messenger app as a dedicated path to this same service.

But how can you gain full-time access to the Facebook chat and messaging functionality on your Apple Macintosh without the need to open your Web browser? You can when you use the iChat software that is integrated with the Mac OS X operating system.

Here, the Mac has to be equipped with iChat AV 3 or later which is part of the operating system from 10.4 Tiger to 10.7 Lion. It will provide an “always-live” messaging and “green-dot” presence feature that you would expect with the Web-driven Facebook messaging interface.

  1. To set this up, you click on the “Preferences” item in the iChat menu.
  2. Click on the “Accounts” option in this window, then click the + icon at the bottom of this window as if you are adding a new iChat account.
  3. Select “Jabber” as the account type.
  4. Supply the credentials as:
    Screen Name: <Your_Facebook_User_Name>@chat.facebook.com
    Password:<Your_Facebook_Password>
  5. For the Server Options, make sure that “Automatically find server name and port” option is checked. If this doesn’t work, you may have to fill in “chat.facebook.com” in the Name and 5222 in the Port for the Server details
  6. Then click Done to add the account.

For this acoount to work automatically, you have to select the “Enable this account” and “Log in Automatically” options for it to log in and show you as online when you use your Mac. Here, you will see the list of all the Facebook Friends who are currently online with that green dot.