Tag: HDMI

Keeping online video going with an older TV

Cable TV in the man-cave

Older TVs may end up in a secondary lounge area or bedroom

There is a very strong reality as far as the modern television set is concerned. It is that they last for more than 10 years thanks to electronic design that is about long-term reliability. This is bolstered by technical standards relating to broadcast TV or device interconnectivity that stay the same for the long haul.

Increasingly, as we buy a better or larger TV for the main lounge area where we watch most of our content, the older set that this new set will replace ends up in a secondary lounge area, a bedroom or even a secondary residence. In some cases, the older set will end up in the hands of a family member or friend who doesn’t have a TV or has one that is on the way out.

It is the same practice that happens with the refrigerator where an older fridge serves as an overflow-storage fridge whenever one buys a newer better fridge for their kitchen.

Online video via your home network

But it is underscored by a problem that will get worse with the rise of online video. Increasingly, manufacturers who don’t understand this reality are abandoning their older sets as they evolve their smart-TV platforms. This leads to smart TVs based on the older software not being supported by content providers when they launch front-end software for their new online video services. Or the set works with a limited, buggy operating system and applications which can impact your enjoyment of online video.

Let’s not forget that there are the TVs that don’t have any smart-TV functionality. Typically they will have, at best, network connectivity to work with a DLNA-based media player so you can see images or video you have on a NAS on these sets.

Here, you may have to rely on set-top devices to keep your older TV working in an optimum manner with the latest online video services. In this situation, it is easier to replace the set-top device if its manufacturer abandons the device’s software or the content providers abandon the set-top device’s platform.

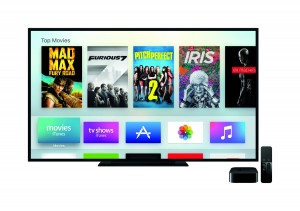
Apple TV 4th Generation press picture courtesy of Apple

The Apple TV set-top box – an example of a popular online-media platform

At the moment, there are a few set-top platforms that are worth using for this purpose. The tvOS-based Apple TV; Android-based boxes running the Android TV operating system; Chromecast and Roku platforms still maintain support for older devices. The XBox One and PlayStation 4 games consoles also benefit from continual software upgrades as well as having apps for popular online-video services. Let’s not forget that you may find that some of the “décodeurs” offered as part of the multiple-play “n-box” setups by the French telcos like the Freebox Révolution may qualify in this regard.

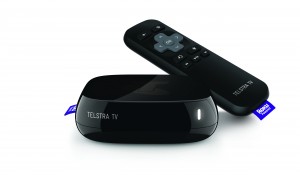
Telstra TV media player (provisional design) press picture courtesy of Telstra

A Roku set-top box that is continually updated can also serve this need

You will also find that Apple TV and Chromecast are still alive with the AirPlay and Chromecast mobile-to-set-top streaming protocols. This will mean that most content services can be streamed from your iOS or Android mobile device to the set-top device. You may also find that Android TV will also support Chromecast streaming.

Other considerations

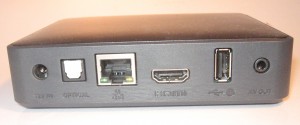
HDMI connection on video peripheral

HDMI connections – a preferred output on video peripherals

Your TV will have to, at least, support HDMI connectivity in order to work with these set-top devices. This is because most of these devices will have HDMI as their only AV connectivity option.

But you may find that the TV in question may provide only one HDMI input. This is more so with cheaper sets like house-brand specials offered by discount stores. In this case, you may end up having to use an HDMI switcher if you need to run multiple set-top boxes or other devices with these sets. Some audio devices like home-theatre-in-box units or AV receivers may answer this functionality need through the provision of extra HDMI inputs.

If your TV supports HDMI-CEC under its many names like Anynet+, Simplink, Bravia Sync or Viera Link, some of the set-top boxes like the tvOS-based Apple TV or the Chromecast will take advantage of this functionality. This will be in the form of the TV coming on and selecting the input the set-top device is connected to when you use its remote or, in the case of the Chromecast or Apple TV, you start streaming to that device from your smartphone. You may also find that you can control the set-top device with your TV’s remote so you don’t always have to rely on the set-top device’s remote.

HDMI-ARC is also relevant in relation to your older TV especially if you intend to use a soundbar, home-theatre-in-box system or AV receiver with it to improve its sound. This allows you to hear the sound from the set’s own broadcast tuner, network functionality or video devices connected directed to the set’s HDMI inputs via that audio device. If the older TV doesn’t have this connection but you want to use an external audio device, you may have to connect that device to the set’s digital audio output.

As far as traditional broadcast TV is concerned, you may find that your old TV will support the current digital-TV standard that is in place in your country. This is true if the digital-TV standard hadn’t changed since your country switched over to digital TV. But if your country is yet to switch to digital TV, you can plug in a set-top box when that day comes. Similarly, if your country has started to implement a newer digital-TV standard like DVB-T2 or ATSC 3.0, you would need to use a set-top box to gain access to broadcasts based on these standards. This extends to implementing interactive-TV platforms like HBBTV or the interactive provisions that ATSC 3.0 offers.

What manufacturers need to do

TV manufacturers need to understand the reality that the sets they make will be serving us for a very long time even if they try to force planned obsolescence on their products.

Here, if they offer a smart-TV product, they have to provide continual software support for at least 5 years, if not more. This may also have to be about at least providing software updates that answer data-security, software-quality and newer industry-standards needs.

As well, the manufacturers would need to maintain their products to commonly-accepted standards for broadcast reception and device / network interconnection. This is more so as a TV set ends up relying on external devices in order to stay up-to-date.

Conclusion

In order to keep your older TV set that you have pushed down to that secondary lounge area or bedroom, or have inherited from someone else going, you will need to consider the use of extra devices. This is more so if you want to keep it using the online services reliably.

Why is there an audio driver with your computer’s graphics chipset?

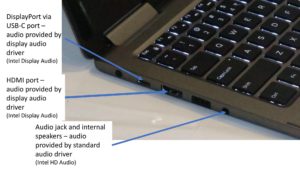
The HDMI and DisplayPort outputs make use of the display audio device driver for sound they send to the external display

Some of you may take stock of what device drivers and software exist on your Windows computer and may find two or more audio device drivers on your computer with one being referred to as an “HDMI” or “Display” audio driver. Such a driver will have a reference to the graphics chipsets that are installed in your computer. Why does this driver exist and how could I take advantage of this setup?

The standard audio setup

Most computers are nowadays equipped with an on-board audio infrastructure of some sort. This was initially a sound card but is nowadays an on-board audio chipset like Realtek or Intel HD Audio. Here, it would have its own digital-analogue audio circuitry and would be serving integrated speakers or audio equipment like computer speakers that are connected to the computer’s own audio jacks.

The better implementations would have an SP/DIF audio output which would serve an outboard digital-analogue converter or digital amplifier. In this case, the audio infrastructure would repackage the sound in to an SP/DIF-compliant form either as a PCM stream or a bitstream supporting Dolby Digital.

In this case, the above-mentioned sound infrastructure would work with its own driver software and be listed as a distinct audio device in Windows. With most of the recent laptops that have sound tuning provided typically by a name-of-respect in the professional-audio or hi-fi scene, this driver also has the software component that is part of this tuning.

HDMI and DisplayPort adds a point of confusion

Windows Sound Control Panel

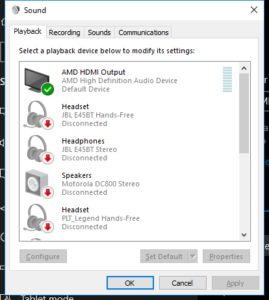
HDMI output for monitor as a unique audio playback device in Windows

HDMI and DisplayPort display connections have the ability to transport a digital audio stream along with the video stream over the same cable. Therefore, display-chipset and graphics card manufacturers have had to support digital-audio transport for host-computer audio through these connections.

In some early setups, it required that the computer’s sound card or audio chipset expose a digital-audio stream via the HDMI or DisplayPort connection. With graphics cards, this typically required a wired connection between an SP/DIF digital output on a sound card or motherboard audio chipset and a digital input on the graphics card.

But recent implementations used a cost-effective digital-audio processor as part of the graphics infrastructure which simply repackages the digital audio stream from the host computer to a form that can be handled by the display or audio device connected via the HDMI or DisplayPort connection. During the initial setup of an HDMI or DisplayPort connection, it will be about determining what audio codecs, bit-depths and sampling frequencies the connected monitor, TV, home-theatre receiver or other audio-equipped device can handle.

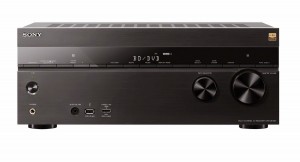
Sony STR-DN1060 home theatre receiver press picture courtesy of Sony America

If you connect your computer to your monitor or TV even via the HDMI connections on one of these home-theatre receivers, you will be using the HDMI audio subsystem and display audio driver as outlined here

This also applies to computers and display setups that use the USB-C port as a “DisplayPort alt” connection like some of the laptops that have come my way for product review. But if you are using a USB-C expansion module that has audio connections, you may find that this device may use a USB-based sound chipset to serve those connections. Typically this chipset will use the USB Audio Device class drivers that are part of the operating system rather than the “display audio” drivers.

If you connect your computer to your display via an HDMI audio device like a home-theatre receiver, soundbar or HDMI audio adaptor, you will find that the audio device will be identified as the sound-output device for the “display audio” device.

In this case, you would see another audio device listed in your computer’s audio device list with a name that references your computer’s graphics chipset like Intel Display Audio or AMD HDMI Audio. The only audio-endpoint device that these drivers refer to are whatever audio device is connected to your computer’s HDMI or DisplayPort connection.

In-room AV connection panel

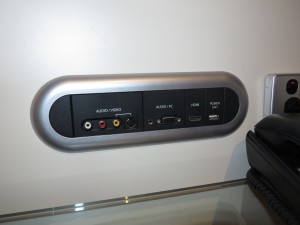
If you use the HDMI input on your in-room AV connection panel like this one at Rydges Melbourne, you would have to use the “display-audio” sound driver for your computer’s sound

Where you connect a computer to a speaker-equipped display or audio device that uses HDMI / DisplayPort alongside a traditional audio input connection like RCA or 3.5mm jack, the “display audio” driver would be used while you use the HDMI or DisplayPort connections. This also applies to the device connection panels you may find in your hotel room and you connect your laptop to the HDMI input on these panels. In this case, you have to use the “display audio” driver when you select the “virtual channel” or source associated with the HDMI input.

What do I do about the existence of these “display audio” drivers?

If you are trying to rationalise the driver software that exists on your computer, don’t remove the “display audio” or “HDMI audio” drivers associated with your computer’s graphics infrastructure. This is because if you connect a TV, monitor with speakers or home-theatre audio device to your computer via the HDMI or DisplayPort connections and you remove the “display audio” driver, the sound won’t play through devices connected via those connections.

Instead, keep these “display audio” drivers up-to-date as part of updating your computer’s graphics-infrastructure software. Here, it will preserve best compatibility for the communications, games and multimedia software and Websites you run on your computer if you are using audio-capable devices connected via HDMI or DisplayPort along with this audio-capable hardware hanging off these ports.

Also remember that if you are using an audio-capable display device connected via the HDMI or DisplayPort connections, you need to use the “diisplay audio” driver to hear your computer’s or application’s sound through that device. This may require you to have it as a “default sound playback device” for software that doesn’t support audio-device switching like Spotify or Web browsers.

Computer systems with multiple graphics chipsets

Computer systems that implement multiple graphics chipsets may also run multiple “display audio” drivers for each chipset. Here, the audio to be sent via the HDMI or DisplayPort output would be processed by the “display audio” chipset for the currently-used chipset.

Some setups may require you to manually select the “display audio” chipset that you are using when you are directing the sound via your audio-equipped display device. This may especially apply to the use of external graphics modules.

But on the other hand, a multiple-graphics-chipset computer may implement a virtual “display audio” or “HDMI audio” driver that automatically steers sound output to the HDMI or DisplayPort device via the currently-used graphics chipset without you needing to intervene. This kind of driver will be relevant with computers that implement NVIDIA Optimus or similar logic to automatically select the appropriate chipset depending on whether you are after high graphics performance or longer battery runtime.

A solution for “steering” Windows sound output towards the devices you want

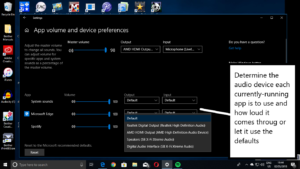
You can steer particular applications’ sound through your laptop’s HDMI output using the display audio driver

When I installed the Windows 10 April Update (Build 1803) on my computer, I had found the improved sound-management ability that this operating system update offers can make better use of this arrangement. I chose to create a sound setup to steer multimedia to better sound outputs while keeping the audio prompts that Windows makes during errors towards a lower-quality output and documented how this is done.

Here, the “display audio” driver will earn its keep as a way to allow the speakers in your smart TV, home-theatre setup or audio-equipped monitor connected to your computer’s HDMI or DisplayPort output to be used only by the software that you want.

There are two situations that this will encompass. One is to have a laptop connected to the large TV or home-theatre setup for some Netflix binge-watching or full-on game-playing but you rather have Windows sound its notification sounds through the laptop’s own small speakers.

The other is where you use a monitor with not-so-great speakers as your primary display but want music or other multimedia to come out through a better sound system connected to your computer. It also includes desktop computers used in an AV playout role with a projector and PA system conveying the audio-video content to the audience but using a monitor with not-so-great speakers as the operator’s display.

The first situation involving a laptop would have the standard audio driver serving the integrated speakers set up as a “default” sound device while the Web browser, game or multimedia software uses the display-audio driver as the output device. The second situation using a monitor with not-so-great speakers would have the display-audio driver as the default driver while the Web browser or multimedia software handling the AV content to be played to the audience uses the audio driver associated with the better sound system.

Conclusion

Simply, the “display audio” or “HDMI audio” driver works with your computer’s graphics infrastructure as a separate audio driver to present sound from your computer to an audio-capable monitor or A/V device connected via its DisplayPort or HDMI connections.

Video peripherals increasingly offering audio-output abilities

Article

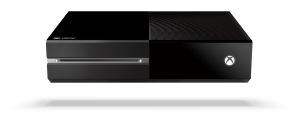
XBox One games console press image courtesy Microsoft

Newer iterations of the XBox One to have connectivity for WISA-compliant speakers

Wireless speaker support could be coming to Xbox One consoles | Windows Central

My Comments

An increasing trend for video-peripheral devices like set-top boxes and games consoles is to offer an ability to connect speakers or headphones directly to these devices even though these devices are normally seen as video source devices. This goes against the conventional wisdom of a TV, soundbar and / or home-theatre receiver serving as the audio destination device for a home AV setup.

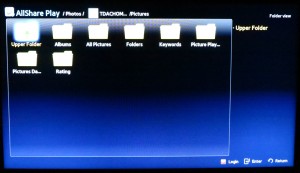
DLNA media directory provided by server PC

But what of Smart TVs being able to pass audio to these devices?

For example, Humax are offering a Bluetooth A2DP audio output on their premium PVRs so that the soundtrack from whatever you are watching on the PVR’s “current” tuner or hard disk can be fed through a Bluetooth headset or speaker. Just lately, Microsoft partnered up with the WISA Association to provide wireless-speaker output through WISA-compliant speakers from subsequent XBox games-console designs.

Let’s not forget that some soundbars and audio amplifiers are equipped with one HDMI-ARC connection for the TV and don’t add a video source to the home AV setup. The same situation also encompasses a large number of popularly-priced DVD and Blu-Ray home-theatre systems that only have one HDMI-ARC connection for the host TV as the only way to connect video equipment to these systems.

The limitation that is being shown up here is that you can’t stream the soundtrack of video content through the speakers or headphones connected through these devices’ Bluetooth or wireless-speaker outputs unless you are viewing the content hosted by the device itself. Or you may find it difficult to watch what you want yet hear it in the manner that suits the situation such as via headphones or a better speaker setup.

This is very similar to the old practice of connecting a video recorder’s audio output to a hi-fi amplifier to pipe the sound from either a TV broadcast or a videotape through the better-sounding hi-fi speakers.  There were even some video recorders that had their own headphone amplifiers or users simply connected them to hi-fi amplifiers or similar devices with integrated headphone outputs in order to add private or late-night listening abilities to that TV which wasn’t equipped with a headphone output. In that case, you only had access to the video recorder’s tuner or its tape transport through the hi-fi system with the video recorder offering some advantages over what was integrated in that old TV.

It may not be seen as a limitation except if a video peripheral connected to the TV or the TV’s own abilities provide content different to what is available in the “speaker-ability”-equipped video peripheral.

But what can be done to improve upon this reality would be for TV and video-peripheral manufacturers to answer this trend in an improved way.

Use of HDMI-ARC input functionality for host-TV audio

One way would be for the video-peripheral vendors who provide this kind of Bluetooth / WISA or similar “speaker output” ability to implement HDMI-ARC connectivity on their device’s HDMI output socket. It is very similar to the approach used by a popularly-priced DVD or Blu-Ray home-theatre system which only has one HDMI socket,

This means that if the device is connected to the ARC-capable HDMI socket on the TV, it can stream the sound from the TV’s own tuner, “connected-TV” functionality or video peripherals connected to the other HDMI inputs on the TV through this device’s “speaker output”.

Here, you may have to use the device’s controller to select “TV audio” to hear the sound associated with the TV’s sources through the Bluetooth speaker for example. But some TVs that implement this system properly may offer an “audio output” option on the audio menu so you can direct the sound to the audio-capable device by selecting that device rather than the TV’s internal speakers.

The TV to support multiple HDMI-ARC video peripherals

A TV could also implement HDMI-ARC across multiple HDMI sockets to cater for multiple video peripherals that support this functionality. It would come in to its own where different video peripherals use different connection methods for audio devices or you use a soundbar or home theatre setup equipped with a single HDMI connection alongside one of these video peripherals.

Here, you would have the ability to direct the sound to one or more of the HDMI-ARC devices instead of or in addition to the integral speakers.

The first application that one may think of would be to provide late-night private listening using a pair of Bluetooth headphones connected to a cable box, or to switch to WISA-capable speakers connected to a newer XBOX rather than hear the sound through the TV’s speakers. On the other hand, the setup could allow the concurrent operation of multiple audio outputs such as to use a Bluetooth headset connected via a cable box and run at an independent volume level for someone who is hard of hearing while everyone else in the room hears the TV content through the TV’s or home-theatre’s speakers.

In both situations, it would be desirable to hear whatever source is connected to the TV such as a Blu-Ray player or a network media player through the Bluetooth headphones connected via the Bluetooth-capable cable TV box.

How should the digital audio be delivered?

A question that can be raised is how the digital audio is to be delivered to the different HDMI-ARC devices.

This can affect whether to run a stereo or surround soundmix for the content’s soundtrack; whether the soundtrack should be delivered as a Dolby Digital / DTS bitstream that the HDMI-ARC audio device decodes or as a PCM bitstream already decoded by the TV or source video peripheral; or simply whether to stay within the “CD/DAT-quality” digital parameters (16 bit 44.1kHz or 48kHz sampling rate) or allow “master-grade” digital parameters (24 bit 96kHz or 192kHz sampling rate).

This situation may be determined by the destination audio device’s abilities such as whether it can decode Dolby Digital or DTS audio or if it can handle digital audio at “master-grade” bitrates. Similarly, it may also be about achieving a common specification for all of the connected devices, including whether and how to concurrently provide multiple audio streams for the same content such as to offer a two-channel soundmix and a multichannel soundmix.

This can lead to situations like supplying multiple soundmixes of a kind via HDMI-ARC in order to make situations like multilingual audio, audio description or selectable commentary work well for different viewers. Similarly, it could be feasible to offer a “surround via headphones” binaural soundmix like Dolby Headphone to Bluetooth headsets connected to a cable box while offering a full surround soundmix through a multiple-speaker home theatre setup.

Conclusion

What will eventually be raised is what can be achieved at a common baseline specification, including issues of processing power and HDMI bandwidth that the setup can handle. This is especially if a device like a games console or set-top box is working as a content source and audio sink while the TV works as an audio “hub”.

It is more so where we are expecting that flat-screen TV, especially one installed in a secondary lounge area, being required to become an AV hub for all of the video peripherals that are connected to it.

Buying a projector for your small business

Some of you may be buying a projector for the first time such as to add large-screen video display to your organisation’s presentation abilities; or you are replacing your existing video projector that has got a bit long in the tooth.
Praise and worship at church

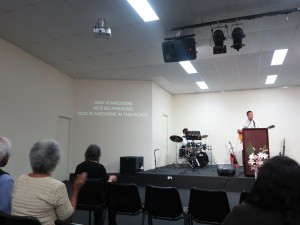
Choosing the right projector can allow a church or other organisation to gain the most mileage from it

But when you are considering the purchase of a projector, take time to consider where you are intending to use it and what you are using it for.  This will make sure you are going to end up with a machine that can satisfy your needs exactly by projecting the brightest and sharpest image where you are using it.

What to look for

There are certain attributes that you need to look for when buying that projector such as its brightness and contrast-ratio specifications along with factors that affect how you can install your projector.

How your projector’s image will look

Brightness (lumens)

This specification affects how bright the images that appear on the screen will be. A projector with more lumens is also able to deal with competing light sources like room light easily. Today’s office projectors will typically end up with a brightness of at least 3000 lumens.

It is worth noting that a projector will yield the quoted brightness when it is using a relatively-new lamp and set to operate at full brightness.

Video and photo material along with games places more demands on the visibility of the image especially in existing light compared with graphic material that changes infrequently. This may call for a projector to have increased brightness. As well, you may have to look for a projector with increased brightness if you aren’t able to control the ambient lighting especially for video or photo content such as with rooms that have a lot of natural lighting.

The rule of thumb here is to buy the brightest machine you can afford no matter how small or brightly-finished the room is. This is more important if your room has large windows and you have a view to using the projector there during the day such as hospitality applications; or you intend to run the projector with the room’s lighting switched on which is the reality with most business or worship applications.

Contrast Ratio

This specification identifies how dark the black parts of an image will be and how white the white parts of that same image will be. It may influence the “perceived sharpness” of the projected images.

How your projector will “fit in” to your venue

There are certain specifications that concern how far back you have your projector from the screen or wall you are projecting the images on in order to have the largest useable image.

Throw Ratio
Projector setup diagram with distances

Throw distances and ratios explained in a projector setup

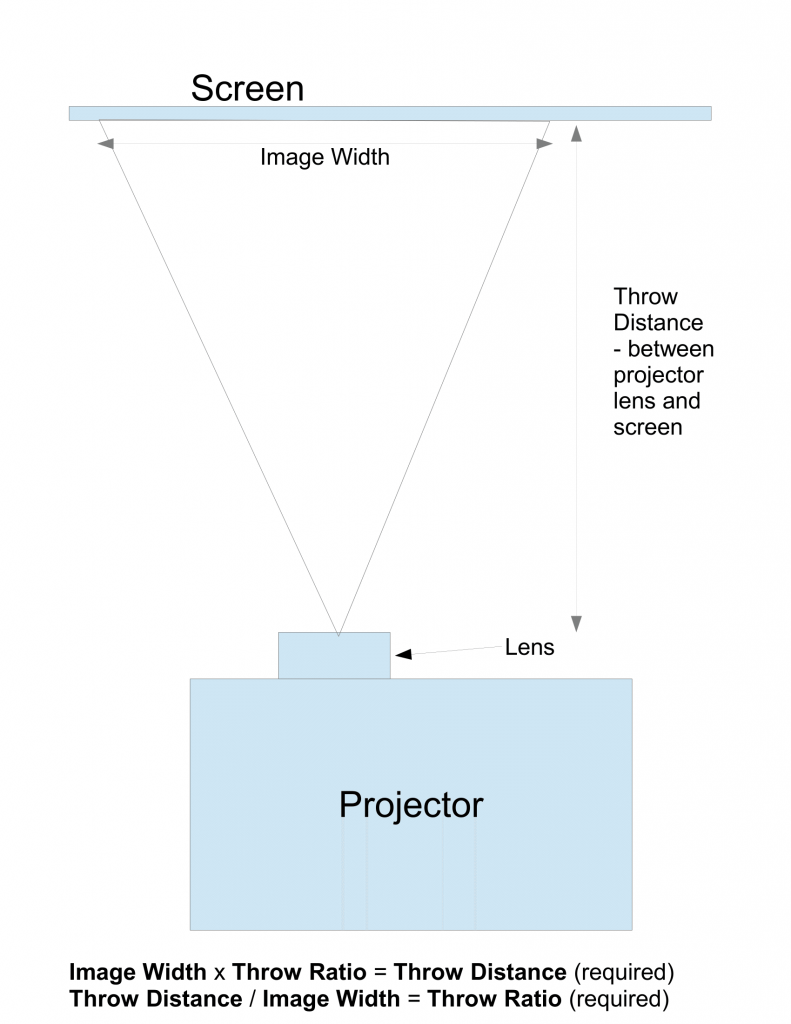
The projector lens’s throw ratio determines the effective size of the projected image in relation to the “throw” which is the distance between the projector’s lens and the screen. A lower figure allows for the projector to be closer to the screen for the same image size than a higher figure.

A projector that has a zoom lens, like most of the equipment pitched at small businesses and community organisations, will be specified a minimum and maximum throw ratio that is determined by the focal length you set the lens to. The zoom lens may help you with getting your image “just right” for your setup after you position the projector for best image size.

The “standard” throw ratio for most office and classroom projectors will come in at between 1.5 and 2.0 while a short-throw projector will come in at between 0.5 and 0.7. The newer ultra-short-throw projectors typically have a throw ratio of 0.3, allowing you to position them very close to the screen.

When you choose your projector, a short-throw projector can earn its keep in small rooms or for portable / temporary setups. These machines can earn their keep if you want your projector to be “ahead” of your audience. There are environments where an ultra-short-throw projector can come in handy like a small room such as a classroom, or a permanent installation for a space which gets crowded very quickly like a bar. Similarly, you may find that your venue has a bulkhead near the screen’s location where you can feasibly mount your projector, which may call for an ultra-short-throw model.

Projection Distance

Manufacturers will also provide a minimum and maximum projection distance specification in order to specify how close to or back from the screen the projector should be to yield a useable bright image.

But your setup’s “throw distance” will be based on the throw ratio of your projector’s lens multiplied by the width of the screen and this should be within the distances specified for the projector you are using. Once you know this figure, you can then determine how far back the installation’s ceiling bracket should be positioned.

Aspect ratio and Resolution

A projector, like a digital camera, is specified with a native aspect ratio which is the aspect ratio for the actual LCD or DLP image panel that realises the pictures. As well, they have a maximum native resolution that the LCD or DLP can handle for best results.
The "pillar-box" effect when you show 4:3 material on a natively widescreen display

The “pillar-box” effect when you show 4:3 material on a natively widescreen display

They can handle other aspect ratios but will yield “letterboxed” or “pillarboxed” images which have the black borders at the picture’s edges. You may have noticed this effect when you watch television and you watched some newer widescreen content on your old TV or you watched older TV content on your newer flat-screen LCD TV. In this case, you would need to determine your screen size based on the projector’s native resolution.

A projector with a wide native aspect ratio like 16:9 makes better use of wide screen areas whereas a projector that uses 4:3 as its native aspect ratio may work well for narrower screen areas including “traditional” screens.

Native 16:9 projectors are important if you are regularly showing live TV, movies or other video content turned out in this ratio; as well as yielding that wide look that easily impresses. You can get away with a native 4:3 projector if you occasionally show video but show a lot of graphics material or digital photos prepared in this ratio. It is also worth knowing that projectors that have a native 16:10 aspect ratio may allow for some flexibility between allowable screen area and what you show and is a go-between for 4:3 and 16:9 as well as accommodating scanned 35mm slides and prints.

As for the resolution, I would work towards projectors with a vertical resolution of at least 768 lines even for business applications. 16:9 projectors with the 1920×1080 “Full HDTV” resolution would earn their keep with most of today’s TV and video content, especially if you are running them with an HDTV set-top box or Blu-Ray player.

This is important because your audience will want to see a very sharp clear picture and the eye is less forgiving about fuzzy or blocky images on the big screen.

Connectivity and Functionality

Essential Connections

Economy data projector with VGA input sockets

Nowadays a projector should have an HDMI socket for newer computer and video equipment as well as a VGA socket for legacy equipment

Make sure that the projector that you are after has at least an HDMI input with HDCP for today’s computer and video equipment along with a 15-pin “VGA” RGB input for older computers that don’t use this connection.

If you intend to use your projector with consumer video equipment especially the Apple TV box or pay-TV services, make sure that the HDMI connection supports HDCP content projection. As well, a projector that implements HDMI-CEC control functionality can be a real boon with providing “one-remote” operation with most consumer electronics equipment especially Blu-Ray players.
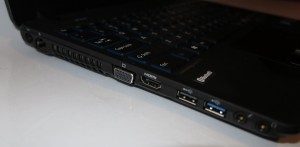
HDMI is now par for the course for computer display connections

HDMI is now par for the course for computer display connections

Integrated image/video projection functionality

An increasing number of projectors are being equipped with the ability to display images and video footage held on a USB memory stick, onboard memory or other media which can make them become today’s equivalent of the old movie and slide projectors. This feature can be used for “there-and-then” applications or where you can’t connect a computer to the projector and is highly relevant to portable applications.
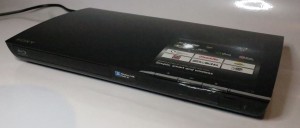
Sony BDP-S390 Blu-Ray Disc Player

Most recent Blu-Ray and DVD players can show still and video material from USB storage devices

On the other hand, if you don’t want to use a computer to show pictures or file-based video content, you can use a recent DVD or Blu-Ray player, network media player or similar device to fulfil this role.

Wireless and network projection

Another feature that is available with an increasing number of video projectors is the ability to project images from a computer or mobile device via a network, a dedicated Wi-Fi link or a Bluetooth link.

Most of these implementations are very dependent on the client device running particular software or the purchase and installation of certain interface devices. At the moment, Miracast and Intel WiDi are considered stable standards in this space but you need to be sure if there are other implementations that are able to work across devices offered by multiple manufacturers.

On the other hand, there are video-peripheral devices like the Apple TV and the Google Chromecast which can answer this role effectively. This is more so if you want native network-projection support from iOS and Mac OS X devices in the case of the Apple TV or Android and Chrome OS devices in the case of the Chromecast.

Audio

Most projectors will have an integrated amplifier and small mono speaker for sound reproduction and many will have an audio DAC if they are equipped with an HDMI connection. This is good enough at a pinch but I would rather use a powerful sound system such as a hi-fi, home-theatre or PA system for reproducing the sound.

It is also worth knowing that most of the projectors with an integrated amplifier and speaker will have a stereo line-out connection, typically in the form of a 3.5mm stereo phone jack. This comes in to its own with HDMI-equipped projectors that reproduce the sound from the HDMI connection and earns its keep if you have the sound system located close to the projector so you can keep a short unbalanced analogue audio link between the projector and the sound system’s amplifier.

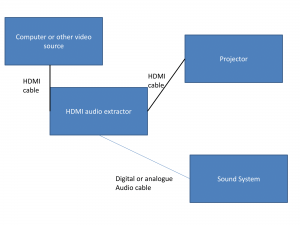
If you want the sound to be reproduced independently of the projector such as to play music without a visual display, you may have to either connect your computer directly to the sound system or use an HDMI audio-extractor also known as an HDMI audio adaptor or HDMI DAC for best results with your sound system.

Lamp life

A projector will have its lamp life rated based on how long the machine will continuously operate before the lamp is half as bright. This is against the common logic of rating the lamp life based on how long it will operate before it “blows” (burns out). But I still factor in the reliable operation angle in that same equation. This specification is based on having the projector run at full brightness but being treated properly.

But most of today’s projectors implement lamp-management logic to effectively run the lamp for a longer service life. Examples of this include offering an “eco-mode” or similar setting to run the lamp at reduced brightness, tapering the lamp’s brightness slightly when the projector is showing the same image for a long time or some even adjusting brightness based on room lighting.

Problem can still surface with some projectors where the lamp lasts a long time but hits the end of its useful life and a good quality replacement isn’t available for that machine anymore. This can happen when a manufacturer makes equipment that is less “parts-common” with prior models when it comes to user-replaceable parts and it could be more financially viable to replace the machine with something of a similar or better standard when the bulb comes up for replacing.

Solid-state lighting (“lamp-free”) projectors

An increasing number of manufacturers are offering projectors that implement solid-state projection lighting which implements LED and/or laser-diode lighting technology. This is compared to the common practice of using a bulb-based lamp and allows for lower maintenance requirements. Manufacturers call these projectors “lamp-free” by virtue of not having to factor in the risk of the projection lamp “blowing” and stopping the show or you having to keep a spare lamp on hand.

These projectors offer best value for installations like displays where you are likely to have the projector running constantly. In other cases, you can get by with a projector that implements the regular light-bulb technology.

Buying guidance

When you choose your new projector, buy a projector which has as high a lumens rating as you can afford and look towards units with at least 3000 lumens. This is more important if you intend to use it in settings where you intend to run video content or show photographs in ambient lighting or your environment is brightly finished or has plenty of natural lighting.

Look towards purchasing projectors that support a 16:9 or 16:10 native aspect ratio unless you are using a narrow wall space as your screen.

Short Throw or Ultra Short Throw projectors earn their keep with small rooms or where you want the projector to be in front of the audience.

If you expect to frequently run your projector for long sessions, like a display, a worship scenario, or a bar that is showing the big sports fixtures every weekend, look for equipment that has a very long lamp life. If you can afford it, you may want to consider a projector that implements solid-state “lamp-free” technology.

Making sure your projector lasts a long time

You will typically get around five to seven years useful life out of a good-quality projector if it is operated and maintained properly.

To achieve this, make sure that the machine is on a sturdy surface before you turn it on. This also is of importance if you are using something to raise the front of the projector slightly to get the picture right. As well, transportable projectors have to be handled gently especially when they are on or just been turned off. If you are setting up an integrated installation, make sure you are using a good-quality mount kit and that it is anchored properly to the mounting surface.

At the end of each session, make sure that the projector is properly shut down so that the lamp, image panel or electronics isn’t damaged by excessive built-up heat. This procedure is more important for transportable or other small projectors, or units that are in an installation where they can be enclosed when not in use like “drop-down” installations. Here, you have to turn off the projector using the standby button on the unit’s control panel or its remote. At this point, the lamp and the circuitry associated with the projector’s signal path are turned off but the fan will continue to run for a few minutes. Depending on the machine you are using, an indicator light on the projector will flash or glow to let you know that this is taking place. This cool-down process is completed when the fan shuts down and only the “standby” indicator glows or no lights glow depending on the machine. Only then you can unplug it from the AC power.

Avoid the temptation to turn the projector on and off too frequently because this can shorten the projection lamp’s lifespan. Here, if you need to have nothing on the screen such as when loading up subsequent content, use the “Mute” or “Blank” button on the unit itself or the remote; or a similar function on your display computer’s software to achieve this goal.

If your projector uses filters, make sure you change them on a regular basis. As well, it is a good idea to clean the ventilation grilles to stop dust building up in them. This may simply be a case of running your vacuum cleaner’s crevice nozzle over these grilles; and is more important in dusty areas.

Be aware of how your projector fan sounds when you are using your projector. If you hear excessive grinding or squealing noise, this is an indication that the fan’s bearings are on the way out and it could cease to do its job. It leads to unreliable operation and heat build-up which could shorten the lamp’s lifespan. This may be a time to send the projector to a repair workshop and have the fan replaced.

The screen you use for your projector

The other factor that you also have to consider when you buy a projector, especially for the first time, is the screen on which your projected content will appear. This may not be of concern if you are simply replacing an existing projector with a newer model.

Fixed Screens

Some of you may use a white wall or whiteboard as a fixed screen for your projector when you are on a budget or, in the case of a whiteboard, you intend to implement an interactive-whiteboard display.

On the other hand, you may purchase a dedicated fixed screen that mounts on the wall or on an adjustable bracket.  Wall-based setups will occupy wall space even when they aren’t used and you may use doors, shutters or curtaining that complement your décor to conceal the screen when it is not in use. The adjustable-bracket setup will earn its keep with classrooms, worship applications and the like where you have a main focal point of attention.

Here, it would be preferable to have a fixed-screen setup if you have a permanent setup or can keep unencumbered wall space available for a screen.

Retractable and Portable Screens

But, if you don’t have that wall space, you may find that you have to purchase a retractable screen of some sort.

Portable screens

These come in a portable form that either is the classic tripod screen that most of us are familiar with or a “pull-up” screen which is a simpler larger form with the screen coming out of a large tube that sits on the floor or table. Some of the “pull-up” screens may be designed so that they can be attached to a wall, bulkhead or other similar feature on a temporary basis so they are effectively portable pull-down screens.

Fixed retractable screens
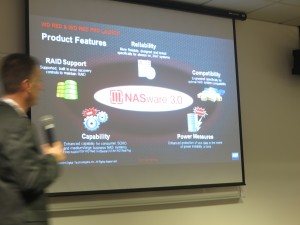
Presentation shown on retractable screen

A presentation shown on a retractable screen

On the other hand, you have fixed retractable screens that have a roll that is permanently mounted.

These screens, commonly described as “roll-up” or “pull-down” screens, are pulled down like a traditional roller blind when they are needed. They can be mounted with the tube that the screen rolls into exposed or this tube can be concealed, whether in the ceiling or a specially-built pelmet with the screen emerging from a slot in the ceiling or pelmet.

There are some more expensive varieties that extend and retract under electric control but are more suited to permanent installations. These may look more elegant and opulent but you will also find that they last a lot longer because they are less subject to the manhandling that a typical manual roll-up screen is subjected to. I would recommend this type of pull-down screen for those venues where the equipment is expected to gain a lot of regular use.

What to look for here

Here, you need to place importance on the screen’s build quality because this affects both durability and image quality. This is more important with retractable and portable screens when your screen will be set up and put away by many different people such as what happens if you have a high turnover of staff or volunteers.

As well, when you buy that portable screen in a “bricks-and-mortar” retailer, try to set it up and pack it up yourself before buying it. This will allow you to identify if it is well-built and can be easily set up or packed up by an inexperienced person, something expected of in volunteer-driven organisations like churches, or businesses like bars or cafés which have a high staff turnover rate. You also have the chance to see how stable the screen is once it is assembled in order to be sure of a high-quality picture and less need to adjust the projector during a showing.

It is worth paying attention to the fabric that the screen is made of. A heavy fabric or a lighter fabric that uses tensioning at the edges leads to high-quality images especially when you intend to use it with ultra-short-throw projectors. You can get away with a matt-white screen finish when you are using today’s video projectors so avoid being sold the exotic finishes like glass-beaded surfaces if you want to save money.

Conclusion

Whether you are replacing an existing projector or are buying a new projector and screen setup for your organisation, it pays to take some time to purchase the right equipment for your needs rather than rushing in to it. This will allow you to see a highly-reliable setup perform for many years of use.

HDMI for your small organisation’s video display needs

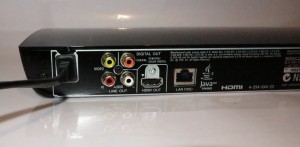
Sony BDP-S390 Blu-Ray Disc Player connections

Most video peripherals like the Sony BDP-S390 Blu-Ray player nowadays have an HDMI connector on them

I have been assisting a small church in their purchase of a newer projector for use through their worship services. Here, I have been steering them towards using equipment that uses HDMI connectivity rather than the 15-pin “VGA” cables. But why am I steering them towards this?

Video peripherals use HDMI as a standard connector

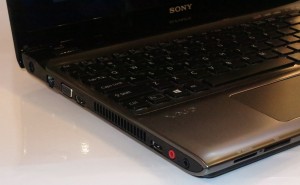
Sony VAIO E-Series mainstream laptop SVE15129CG Left-hand-side connections - Gigabit Ethernet, VGA, HDMI, USB 3.0, 3.5mm microphone jack, 3.5mm audio output jack and SD and MemoryStick card readers

… as do an increasing number of laptop comptuers

Increasingly every video peripheral ranging from Blu-Ray players and network-media receivers to cable boxes and digital-TV tuners implements HDMI as a “best-case” connector. If the video peripheral had analogue component video connections, it would come with RCA-based YCC connections as that “best-case” analogue connection.

Most of the economy-class data projectors that are in circulation would implement as their best connector an RGB connector in the form of the 15-pin screw-on “VGA” connector that is intended as a baseline connection for computers because a lot of computer monitors use this connection. This is although most computers and monitors are moving towards DVI-D or HDMI connections.

If we are chasing the idea of connecting a laptop for presentations, a Blu-Ray / DVD player for movies or a DVB-T digital-TV tuner for the big news or sports broadcast, we would have to switch between different connection types for the application which can cause a lot of confusion. This is more so with people who haven’t had much experience or can get flustered easily with connecting different AV equipment.

Increased installation flexibility

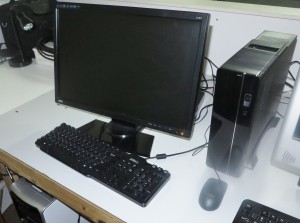
New desktop comptuer at church

New desktop comptuer at church – something that could benefit from an all-HDMI connection for the projector

One main advantage of an HDMI setup for your video display needs is increased installation flexibility. This is brought on by the audio signal carried in a digital form on the same cable. It is typically to allow the one-cable setup between a video peripheral and a TV with even a surround-sound setup having one cable from the video peripheral to the surround-sound amplifier which can be capable of being a video switcher, then another cable from that surround-sound amplifier going to the TV.

HDMI offers a maximum length of 25 feet / 7.62 metres between two pieces of equipment but there are solutions to cover larger installations. For example, you could use a line-powered active HDMI splitter as a repeater for a length up to 30 metres. Some devices in their own right, like HDMI-capable digital-analogue converters or amplifiers can be repeaters. Or you could use a “Category-5” HDMI balun pair along with Category-5 Ethernet cable for a distance of 330 feet / 100.58 metres between the pieces of equipment.

In these setups, you are running just one cable which passes along the digital representation of high-resolution images and sound between the source device and the display.

Audio setups

HDMI also uses the same cable to pass along a digital representation of the sound along with the high-resolution video signal. This can be a 7.1 surround-sound Dolby Digital or DTS bitstream or a simpler stereo PCM bitstream,

HDIM audio-extractor box setup

What an HDMI audio-extractor box is all about

In a video-presentation setup where you are using a projector, you will also find that the sound system is located either near the video source device like a computer or near the projector. The device that is handy for these situations is an HDMI audio adaptor, known as an HDMI audio extractor or HDMI digital-analogue converter.

Here, these devices connect the HDMI video source to the audio equipment either via an SP/DIF or AES/EBU digital connection; or a stereo line-level analogue connection and pass the sound signal from the video peripheral to the sound system. There is an HDMI output on these devices to connect the device to the display for the “final leg” of the signal’s journey.

Some projectors even have an HDMI audio-adaptor function typically to feed an integrated mono speaker for “quick-setup” arrangements. These will also have a line-out connection in the form of a 3.5mm stereo phone jack so they can be connected to an external sound system that is located up front and can put up a stronger sound.

Here, you could locate this device close to the sound system irrespective of where the display device is located and be able to hear good-quality noise-free sound. One main advantage of this is to be able to keep any unbalanced analogue audio connections as short as possible thus reducing the possibility of unwanted noise getting in to the amplifier which can happen easily with longer unbalanced analogue connections.

Another point of flexibility is HDMI Audio Return Channel. This is relevant to TVs with integrated tuners, multiple HDMI inputs and/or smart-TV functionality where a digital sound stream is sent back from the TV’s own sources to the amplifier to feed the speakers associated with that amplifier.  Here, this also leads to a high-quality sound path between that wall-mounted TV and a more powerful home-theatre setup that is located in a position for easier control.

HDMI-CEC

Yet another point of flexibility that HDMI offers is Consumer Electronics Control. This uses the same HDMI cable as a control cable and, as I have observed, has reduced the need to juggle remote controls to operate a Blu-Ray player for example. For example, it allows the TV to “light up” and select the appropriate input when you are loading a disc in the Blu-Ray player. Similarly, you use the TV’s remote to navigate the disc menu and get the movie underway. When used with a projector and computer that supports it, it could be feasible to use the projector’s remote to page through a presentation or start and stop video content, being seen as a presenter’s dream come true.

This is implemented mainly on higher-end big-name TVs, and most home-theatre amplifiers pitched to the residential-use market along with nearly all home-theatre video peripherals especially Blu-Ray players. Most manufacturers market this feature under their own marketing names like AnyNet (Samsung) or VIERA Link (Panasonic) but will cast a reference to HDMI-CEC in the device’s operating instructions or setup menu. An increasing number of premium-grade HDIM-equipped projectors pitched for home-theatre use also offer this function. Toshiba implements this function in their latest computers “out-of-the-box” and there is an RCAware add-on black box which allows this to work with other computers.

Moving your existing video display setup to HDMI

I would recommend that you move your video-display setup towards HDMI as part of your equipment replacement cycle.

Make sure your equipment has HDMI when you are purchasing or specifying newer projectors and other display equipment. If possible, prefer that the equipment works at 1080p if you are running a lot of video content as more video is captured or mastered in this resolution. Examples of this include Blu-Ray discs, console and PC games, along with consumer and semi-pro still and video cameras that can record in 1080p.

When you improve your playout computer equipment, upgrade the video cards to those that have HDMI outputs or, for portables, use USB DisplayLink adaptors that have HDMI outputs or specify newer equipment with these outputs. This is easy to achieve if you are purchasing current-generation laptop computers as they come with HDMI or DisplayPort connections whether “standard” or of a smaller form-factor. Similarly, current-issue display cards for desktop computers will be expected to have HDMI or DisplayPort connections. In the case of DisplayPort connectors, you would need to use a DisplayPort-HDMI adaptor cable to connect them to HDMI display devices.

As well, it could be a chance to replace DVD players with Blu-Ray players because these have the HDMI output and can show high-resolution video that the connection is known for. Similarly, digital-TV tuners and set-top boxes that you use to receive broadcast TV in your installation should have HDMI connections. If you are wanting to show legacy sources like VHS tapes through your video system, a composite-HDMI adaptor may come in handy. These devices convert the analogue signals from the legacy source such as the video recorder to a digital signal and even upscale them to a higher resolution before passing them along an HDMI cable.

When you revise the installation, make sure you are pulling HDMI cable or, if you use Cat5 or Cat6 cable for the extended cable runs, replace the baluns that you use with other technologies like VGA with those that work with HDMI. As well, the equipment should be connected via HDMI cables. For that matter, the HDMI baluns can be purchased from dedicated electronics stores like Radio Parts, Jaycar or Maplin.

What can be done here?

Integrating HDMI-CEC in more equipment

A projector that is equipped with HDMI-CEC could allow for the use of the remote control as a control surface for connected video peripherals. It can also allow a computer, for example, to cause the projector to be switched on and off as needed. The command set for HDMI-CEC could be extended to exchange status details that are of concern to projector operation like lamp condition and runtime.

As computers are being used as playout equipment in the business location, they could benefit from being HDMI-CEC control-target or control-source equipment. This could be facilitated through hardware and software additions that are provided by more computer and display-subsystem manufacturers. The software could support “page-through” on presentation software or use of the D-toggle on the remote as a virtual mouse. Similarly, a playout computer with HDMI-CEC “control-source” functionality can be able to turn on and turn off display or amplification equipment or provide “master volume” control over the system.

Conclusion

Moving your small business’s or community organisation’s display technology to HDMI can provide for increased flexibility when managing how this equipment acts when playing video material. It would also become simpler to achieve a “best-quality” setup so that your customers, patrons or congregation can see sharper images on the screen.

MHL to work with the next-generation USB and HDMI specifications

Article

Mobile 4K video getting wired to TVs through USB 3.1, MHL | PC World

From the horse’s mouth

MHL Consortium

Press Release

My Comments

There are now plans afoot to link MHL and USB standards together to allow smartphones, tablets and laptops to show 4K-grade ultra-high-resolution video on the latest TVs using the latest iterations of these standards.

What is MHL

MHL, short for Mobile High-Definition Link, is a specification which provides a way for “open-frame” mobile devices to pass high-definition audio / video content, device power, along with control and data signals via a USB connection. Ideas that are being pushed for this application include viewing AV content held on your smartphone on the big display, or using a projector to show presentations and other video content.

This typically requires the use of a MHL cable which would be connected between the microUSB socket on the smartphone or tablet and a specially-identified HDMI socket on the TV or similar equipment. But you may connect the MHL-capable device to an HDMI-capable display device by using an active MHL adaptor which exposes the HDMI-capable video to the display device.

Here, it is primarily pitched at providing a wired connection for showing video content that you have on your mobile device on the large TV screen but is being used for some “dongle-type” devices that link your home network and online-video services to your TV. It is also being used as a method to share the mobile device’s display to the car’s dashboard courtesy of some “open-frame” automotive-smartphone link specifications.

This technology complements the Miracast specification by being a high-reliability wired specification that uses common connection types and established infrastructure for the same purpose of linking your mobile device to an external display.

The improvements that will come about

One main improvement that this announcement is about is evolving MHL to new expectations and technologies. Here, it is the use of the new small USB Type-C connectors which will be coming to newer smartphones and tablets through the next or subsequent model year.

As well, most of the 4K-capable display devices will work with HDMI 2.0 which is optimised for the ultra-high-resolution video that will be coming about on them. The new specification variant melds MHL in to the newer expectations that will be required for mobile devices in order to work with these displays.

What I see of MHL engaging in this improvement is that they are putting a step forward to integrated open-frame portable computing setups.

Product Review–Denon DHT-S514 soundbar

Introduction

Previously, I reviewed the Denon DHT-T100 TV speaker base which was the first of the “TV extension speaker” products which are to improve an existing flat-screen TV’s sound output without the need for a full-on many-speaker surround-sound system. It was in the form of a speaker-equipped “plinth” which the TV sits on,

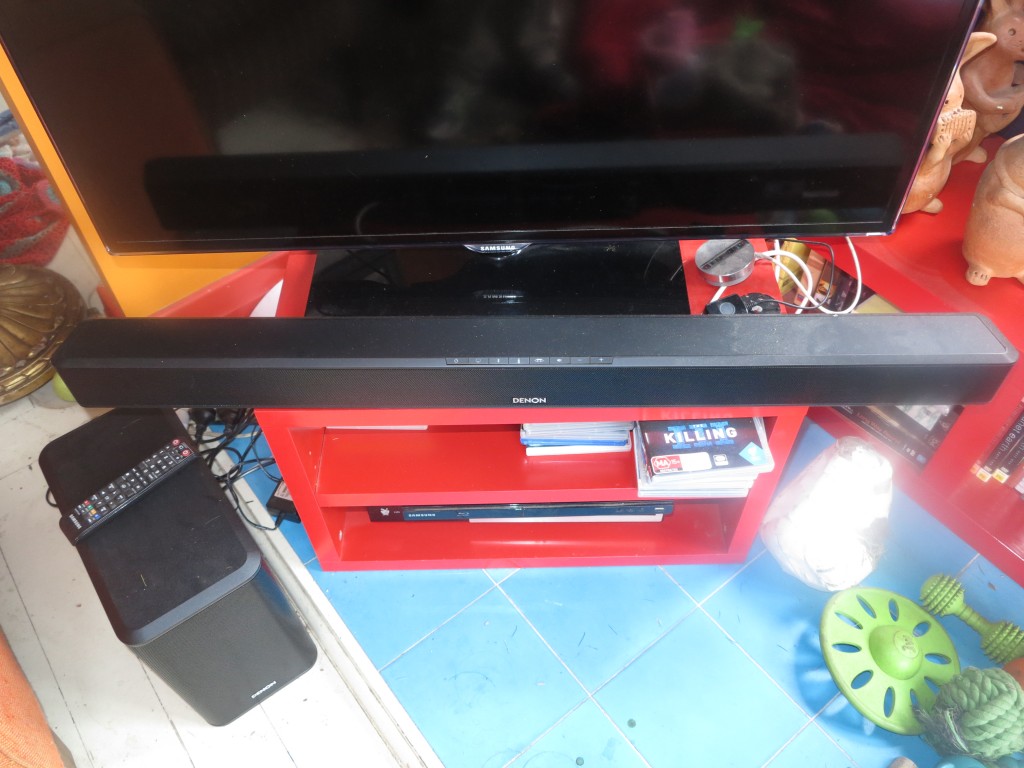
Now I am reviewing the Denon DHT-S514 soundbar which is in the other form-factor for this class of device. Here, it is a long tube or bar that has the speakers and is placed in front of the TV or mounted underneath the TV if it is wall-mounted. These devices also need to use a subwoofer to reproduce the bass notes due to the small size of the speakers and enclosure.

IMG_1852

Price

RRP: AUD$999

Specifications

Connections

TV
Analogue 1 x 3.5mm stereo input jack
Digital SPDIF PCM or Bitstream (Dolby AC-3)
Optical via Toslink socket,
Coaxial via RCA socket
HDMI ARC return feed
Other sources
Video peripheral HDMI input
Aux Input Bluetooth A2DP

Sound Decoding

Surround Sound Dolby Digital AC-3
Stereo PCM

Amplifier And Speakers

Arrangement Single-piece unit with 2 channels plus external active subwoofer
Amplifiers
Speakers – per channel 14mm tweeter,
51x127mm midrange
Speakers – subwoofer 2 x 133mm woofers

 The soundbar itself

Setup

Denon DHT-S514 soundbar unit

The soundbar unit

It can use HDMI connectivity but the ARC functionality isn’t all that polished especially whein I tried to connect this soundbar between a TiVo PVR and the HDMI-ARC-equipped Samsung Smart TV. Here, it preferred to play the TiVo’s audio rather than the Samsung TV’s audio when I selected the Samsung TV’s integrated tuner using the TV’s remote.

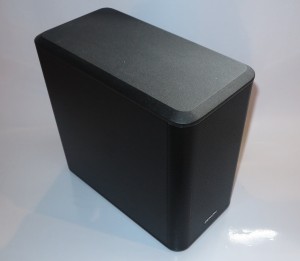
Denon DHT-S514 wireless subwoofer

The wireless subwoofer – handles all the bass

What really worked well in a surefire manner was to connect the Denon soundbar to the TV’s SPDIF digital output and have it learn the TV remote’s volume and mute commands for regulating its sound level. The soundbar also comes with an infra-red repeater which can work well with very-low-slung TVs where installing the unit gets in the way of the TV’s remote “eye”.

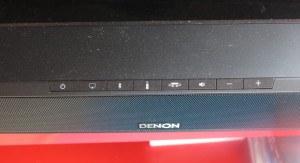
Denon DHT-S514 soundbar controls

Simple controls on the soundbar

Installing the subwoofer was effectively a simple “plug and play” operation where there was no need to “pair” it with the soundbar. This is due to an automatic routine that takes place when it is first powered up while the soundbar is on.

Sound response

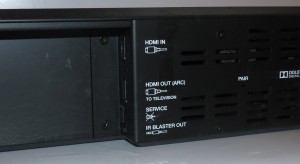
Denon DHT-S514 HDMI (input and output) and IR blaster connections

HDMI (input and output) and IR blaster connections

I found that the Denon DHT-S514, like the Denon DHT-T100, worked well on the “Movie” mode which provided the “focused” dialogue while music and effects were placed “further out”. This appealed to most TV content that we watched including some “studio-based” TV content like “The Voice” as well as some good-quality British and European drama content.

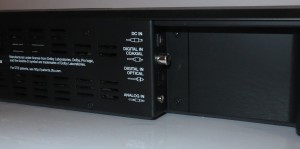
Denon DHT-S514 soundbarSPDIF (optical and coaxial) and analog input connections

SPDIF (optical and coaxial) and analog input connections

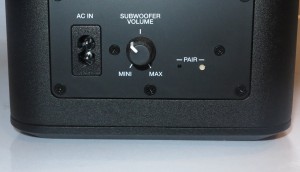
The subwoofer was very effective with the bass response and I found that having its level control set between 45-50% yielded a certain amount of punch to the sound without it being excessively boomy. Sometimes you may have to roll its level control back slightly when you are playing bass-rich content through the soundbar at very high levels. As well, you may have to increase the subwoofer volume in a room replete with plenty of soft furnishings like wall-to-wall carpeting or heavy drapes.

With audio equipment, I turn the volume up with music-based content to see how loud it can go before it starts to clip and sound awful. I can run the Denon DHT-S514 at 80% volume and find it fills the large open area with clear sound before it starts to sound awful.

Denon DHT-S514 subwoofer volume setting

An ideal position to have the subwoofer set so it doesn’t dominate too easily

The “night mode”, which is accessible by you pressing on the “sound mode” button for a long time until the lights dim, does provide a compressed sound and contain the bass. This would be effective for people who watch content late at night without disturbing others.

I had noticed that the sound came across clearly across all TV content requirements with the voices having that bit of “fullness” in them. Sound effects came across with a distinct “punch” and this wasn’t just limited to the highly dramatic effects associated with stunts. Even ambient sound gained a bit of that “fullness” while hearing someone knock on a door or a door closing in the movie had that sense of authenticity about it.  It didn’t treat music like a second-class citizen but gave it that full “hi-fi” sound even for someone singing in “The Voice”.

There is also that apparent wide sound separation even if you are viewing “from the wings” when you are watching the TV content through the Denon DHT-S514 soundbar.

Limitations and Points of Improvement

There are a few items that Denon could work on when refining their soundbar products especially to improve their useability.

One would be to improve the HDMI behaviour so that you can use the remote control for an HDMI-ARC-enabled TV to switch between the TV’s sources and any HDMI sources connected directly to the Denon soundbar. This could make things easier if you connect the soundbar between a cable box, Blu-Ray player or other video peripheral and the TV because all of the available HDMI sockets on that set are occupied by your video peripherals.

Another would be to provide an improved “night-mode” indication such as on-unit LEDs that light a different colour while in this mode rather than dimming, which may be hard to notice visually. Similarly, the “night mode” could be made accessible through a separate button on the soundbar itself because most of us will drive this system with the TV’s remote rather than juggling two or more remotes.

As for the subwoofer, an improvement that could come for this setup could be the ability to adjust its volume at the soundbar or its remote control rather than adjusting a small knob on the subwoofer itself. This could effectively make it easier to adjust the bass response to your liking.

Use of advanced sound-management technologies like those offered by Audyssey or Dolby in these soundbars can go a long way in providing consistent volume or bass levels when you are watching different video content.

The Bluetooth could also support A2DP source functionality so the soundbar can be used with a Bluetooth headset for late-night listening or to help a person with hearing limitations hear the TV content.

Conclusion and Placement Notes

The Denon DHT-S514 soundbar could become a more powerful alternative to the DHT-T100 speaker base when you are thinking of a dedicated-device solution to improve your TV’s sound reproduction. These are especially important for those of us who use a stereo system to play our music and don’t want to head down the path of the “full-on” surround-sound system. They are also important for those of us who find it difficult to cope with different operating procedures or juggling different remote controls when it comes to watching TV.

This would come in handy with larger lounge areas or lounge areas that are replete with heavy soft furnishings that absorb the sound too easily because of its increased output power. As well, it would work well with larger TVs or sets that are mounted on the wall or on an adjustable bracket because of the lightweight soundbar that can be mounted on the wall under the TV or anchored to the adjustable bracket along with the TV using appropriate mounting strips.

Managing multiple sound devices in Windows

A common situation that will face most of us who use Windows or Macintosh regular computers is the issue of dealing with multiple sound-output devices with these computers.

There are examples of this such as:

  • USB speakers with a laptop

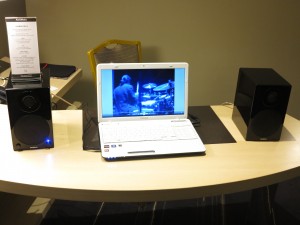
    USB-driven hi-fi speakers with a laptop

    Desktop or laptop with regularly-used sound system (integrated speakers, desktop speakers served by installed sound card or integrated sound subsystem)

  • A hi-fi-grade “USB DAC” connected to or integrated in a hi-fi amplifier or home theatre receiver for high-quality sound reproduction.
  • Bluetooth speakers, headsets, and audio adaptors or AV equipment that has Integrated Bluetooth A2DP functionality as I have covered in another article.

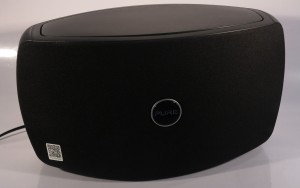
    Pure Jongo T6 wireless speaker

    A Bluetooth speaker that could be an extra speaker for a laptop

  • A media hub or “jack pack” in a hotel room that works with a flat-screen TV installed there, or a home theatre receiver or flat-screen TV that is connected to the computer via HDMI or DisplayPort
  • Virtual-sound-card programs like Airfoil or Jamcast that use network-connected devices as a computer’s sound card.
In-room AV connection panel

In-room AV connection panel at Rydges Hotel Melbourne – HDMI connection

But you can have problems with these kind of setups. Some programs like Windows Media Player, Skype or some games may allow you to determine the sound-output device they use but you may have to switch the default sound device you are using to suit most programs like Web browsers and Spotify where you can’t determine the sound-output device for the program. A few of the games may allow you to run a headset from a separate sound device for online game chat or voice recognition.

Similarly, a computer’s audio subsystem may have different output or input connections such as a line-out jack or an SP/DIF jack on a good sound card or an integral microphone and an audio-in jack on a laptop’s sound subsystem. These can be listed as separate sound devices depending on the device driver in place.

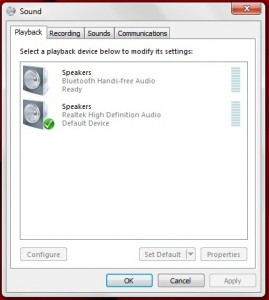
Bluetooth device listed alongside default audio device

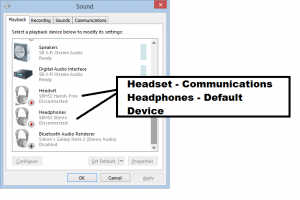
List of audio playback devices in Windows – the one with the green tick is the Default Device

Microsoft Windows from version 7 onwards allows you to determine two “default sound devices”:

  • Default Communications Device, which defines devices you would use for VoIP, video telephony and similar applications
  • Default Device, which covers all sound-output needs including music, video, games and system notifications as well as communications sound.

The idea behind this setup is that you could have a device like a mono Bluetooth headset or not-so-good speakers like your laptop’s speakers being used by a softphone application while a pair of good speakers or a hi-fi system is used for music playback or game sound-effects purposes.

It is feasible to determine a device as being a Default Communications Device or Default Device in the context of recording or sound-capture only. This is achieved in the Recording Devices menu when you right-click on the Speaker icon.

Selecting a Default Device in Windows

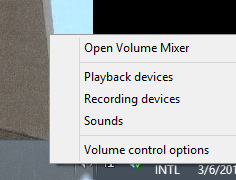
Right-click sound menu

Pop-up menu when you right-click on the Speaker icon on the Taskbar

Windows 8 and 8.1 users will need to use the Desktop view rather than the Modern tiled view to select the Default devices.

  1. Right-click on the Speaker icon on the Taskbar
  2. Select Playback Devices
  3. You will see a list of audio output devices on the screen
  4. Right-click the device you intend to use and select Default Device or Default Communications Device depending on your needs.

How do you cope with temporary devices?

A temporary device like a Bluetooth headset or HDMI-connected TV is one you wouldn’t be connecting to your computer all the time.

Here, you make your temporary device the “Default Device” when you start using it. What happens when you disconnect the device, whether logically or physically, is that the computer will fall back to the sound subsystem it last used before you connected the temporary device.

Bluetooth devices

A computer will remember all Bluetooth devices that have been paired with it previously but those that aren’t logically connected to the computer are listed as “disconnected” devices.

If you use a Bluetooth device between multiple source devices, you will have to make sure you disconnect it from the existing source device before you logically connect it to your PC. Some source devices like iOS devices may require you to “unpair” the device rather than logically disconnect it. Then, when you want to use that source device with your Bluetooth device, you have to connect it or pair it again.

Bluetooth headset as two devices

A Bluetooth headset or other device with A2DP and Hands-Free functionality is represented as two devices

A Bluetooth headset, car Bluetooth subsystem or other Bluetooth with A2DP audio playback and hands-free / communications-headset functionality will be listed as two sound devices – a Headset device which represents its communications functionality and a Headphones device which represents its A2DP music-playback functionality. Here, once you have logically connected the headset, you make the Headset device the Default Communications Device if you just intend to use it as a communications headset for VoIP and similar applications. On the other hand, you make the Headphones in that device the Default Device when you want to play music and other audio content in private and this also makes the Headset in the same physical device the Default Communications Device.

Sony devices with NFC have simplified the process of connecting and disconnecting by allowing you to touch the source device to the output device to connect or disconnect them. But this may only work with computers that have the NFC functionality in them.

To connect a previously-paired Bluetooth device in Windows 8.1

Windows 8.1 has introduced a “connect / disconnect” routine to Bluetooth audio devices so you can properly connect and disconnect these devices without having to go through a pair-up routine.

  1. Make sure the device is logically disconnected from your phone or other source devices and is paired to your computer or set up your Bluetooth device to work in Multipoint mode.
  2. Right-click on the Speaker icon in your Desktop
  3. Select “Playback Devices”
  4. Right-click on the device you want to connect
  5. Select “Connect” to connect the device to your system
  6. Once it says “Connected” under the device’s icon, right-click on the device and select “Default Communications Device” or “Default Device” to suit which of your computer’s sound output will come through that device.

To disconnect a previously-paired Bluetooth device in Windows 8.1

  1. Right-click on the Speaker icon in your Desktop
  2. Select “Playback Devices”
  3. Right-click on the Bluetooth device you are currently using
  4. Select “Connect” to disconnect the device from your system

What can be done here?

Allowing a user to class certain devices as “temporary” devices or “permanent” devices.

A common situation that can happen here is the use of temporarily-connected devices like Bluetooth headsets, USB DACs or HDMI connections. Here, a user could class these as “temporary” devices and the computer determines them as default audio or communications devices when they are connected.

But when they are disconnected, the computer falls back to its “permanent” devices such as its integrated speakers or regular desktop speakers.

Other “default sound device” classes for audio-video playback, games or system notifications

It could be easier to implement an application-specific “default sound device” for applications beyond communications. Here, it could be feasible to implement an application class for audio-video playback or gaming so that you could make sure that system notification sounds don’t play through the hi-fi speakers for example but you have Spotify playing through those speakers.

A Tile or Charm on the Modern view for selecting sound output devices.

The Windows 8 Modern view a.k.a. Metro view could benefit with an option directly selectable from that interface for managing the sound devices. This could be in the form of a Modern-View app downloadable from the Windows Store that puts up a dashboard for managing your sound input and output devices.

Sony now issues the latest premium home-theatre system with the expected features

Article – From the horse’s mouth

Sony

Sony launches new premium 3D Blu-ray Home Cinema System : Consumer Products Press Releases : Sony Australia

My Comments

I had some experience with two of Sony’s premium network-capable Blu-Ray-based home-theatre systems, especially the BDV-E990W (BDV-N990W) unit. This was in the form of setting up the prior model which was the BDV-E980W (BDV-N980W) for them and eventually troubleshooting it to find out they had ended up with a faulty unit which was replaced under warranty with the ‘E990W. Even when they received the replacement model, I was involved in setting it up and testing it to make sure it worked.

These home-theatre systems were very capable when it came to functionality such as being able to work with their setup which involved their first flatscreen TV which was a low-end entry-level model from a discount store along with a recent-issue cable-TV set-top box. This was because of the number of HDMI input ports along with the HDMI output port that these systems were equipped with.

The reality with this setup was that most older and low-end “bargain-basement” flatscreen TVs don’t have the HDMI-ARC functionality for returning sound from the TV’s tuner or video peripherals connected to the TV’s HDMI ports. Also, by connecting the cable box to the home theatre system, there is a guarantee of “best-case” video and audio quality for the premium pay-TV channels even if the TV had just one HDMI connection which is something that a lot of cheaper sets like the Kogan “Kevin 37”, which was on sale at the time of Kevin Rudd’s economic stimulus package, had. Here, you have the ability to have best-case sound and vision even if you start out cheap with your flatscreen TV and gradually upgrade to better equipment as you can afford it.

For that matter, I would like to see the HDMI Consumer Electronics Control and Audio Return Channel features effectively “pushed down” to lower-tier flatscreen TV sets. This is more so as we see manufacturers equip Blu-Ray home-theatre systems, soundbars and similar “compact” AV equipment with this functionality and use it as a way to cut costs by reducing the number of HDMI and other connections on these devices. Similarly, from my experience the HDMI Consumer Electronics Control functionality has helped with simplifying the operation requirements with consumer AV setups and this has been a boon with older friends of mine who aren’t confident with operating consumer-electronics equipment.

I have also been pleased with the wireless surround-speaker link which pleased the house-proud owner who wouldn’t like the sight of cables coming from the front to the back of the viewing area. The microphone-assisted auto calibration routine made things easier for keeping the soundfield at an optimum level which has led to a “properly-placed” surround-sound experience when I watched the “Back To The Future” Blu-Ray with her and is to be used when you rearrange the lounge area in such a way as to relocate the speakers relative to each other.

These sets also offered what was expected for equipment that was to be part of the home network where they gave access to Internet-hosted radio and TV services as well as access to DLNA-hosted media collections on that network.

But the Sony BDV-N9100 Series adds some extra icing on the cake for Android users. It has integrated Bluetooth A2DP audio streaming so you can wirelessly play your smartphone or tablet through the system’s speakers. This is finished off with NFC “touch-and-go” setup for Android devices that implement NFC functionality. Like the rest of the current Sony Blu-Ray home-theatre range, this unit also has the “sports sound” mode labelled as “Football” but this should be used with all of the stadium sports like cricket, baseball or most Olympic Games events.

An improvement that I would like to see for these systems is for Sony to provide units with the same connectivity and functionality at a more reasonable price that can appeal to most purchasers. The best way to go about this would be to add some of the high-end functionality to mid-tier models and add extra functionality just to the high-end models. Similarly, these units could effectively answer Panasonic by integrating Skype capability with the optional camera. But, as high-end highly-capable home-theatre setups that are part of the home network, they have earnt their keep in this regard.

Affordable long-run HDMI via Cat5 cable becomes a reality

Article

HDBaseT takes HDMI and 4K further | TV and Home Theater – CNET Reviews

From the horse’s mouth

HDBaseT

Home Page

My Comments

There are the home and small-business environments where you may want to have your AV source and control equipment away from the flatscreen TV or projector but want to see the high-resolution display. Such applications range from the home theatre through to a video projector set up in a bar to show sports events to a church using two video projectors to show the song lyrics, prayer requests and the like during service to its large congregation.

This has been made easier with HDBaseT which uses the Cat5 Ethernet cable to transmit HDMI AV up to 4K UHDTV along with power, 100BaseT Ethernet and USB over a run of up to 100 metres (328 feet) per inter-equipment “hop”. Then a single path between source and final endpoint could have 8 “hops”. This could cater for setups with a single wire passing a few “digital power amplifiers” positioned close to speaker setups as it heads towards a display or projector in order to serve a room’s AV requirements.

But this concept has been put out of reach of most small-business, non-profit and home users because this typically required the purchase of at expensive HDBaseT adaptors for each end of the cheap Cat5 cable run.

Now the standards body who are behind the HDBaseT standard are encouraging manufacturers to integrate the connectivity in to their equipment. When a customer purchases a display, matrix switcher, AV receiver or other equipment that has this connectivity, they reduce the need to buy another HDBaseT adaptor. This can reduce the cost required to provide another display or projector in that bar or restaurant.

Of course, the article cited a home theatre receiver and a single-wire TV display as a prototype along with a few video projectors having this technology.

The technology is also able to lead to the implementation of “one-wire” display equipment that will typically be confined to display panels. This avoids the need to run mains wiring to the display’s location which could reduce the material cost and safety issues associated with these installations.

For this technology to work properly, the display and other equipment must support standard HDMI-CEC control signals or other common industry standards for controlling the devices to allow a true mix of vendors through an installation’s life. Similarly, when this technology gets underway with integration in devices, it should then be feasible to see it available in reasonably-priced projectors.

What I like about this for smaller organisations is the concept of a standard leading to integrated video setups being available to suit the premises better at a cost that is more reasonable to this user base.