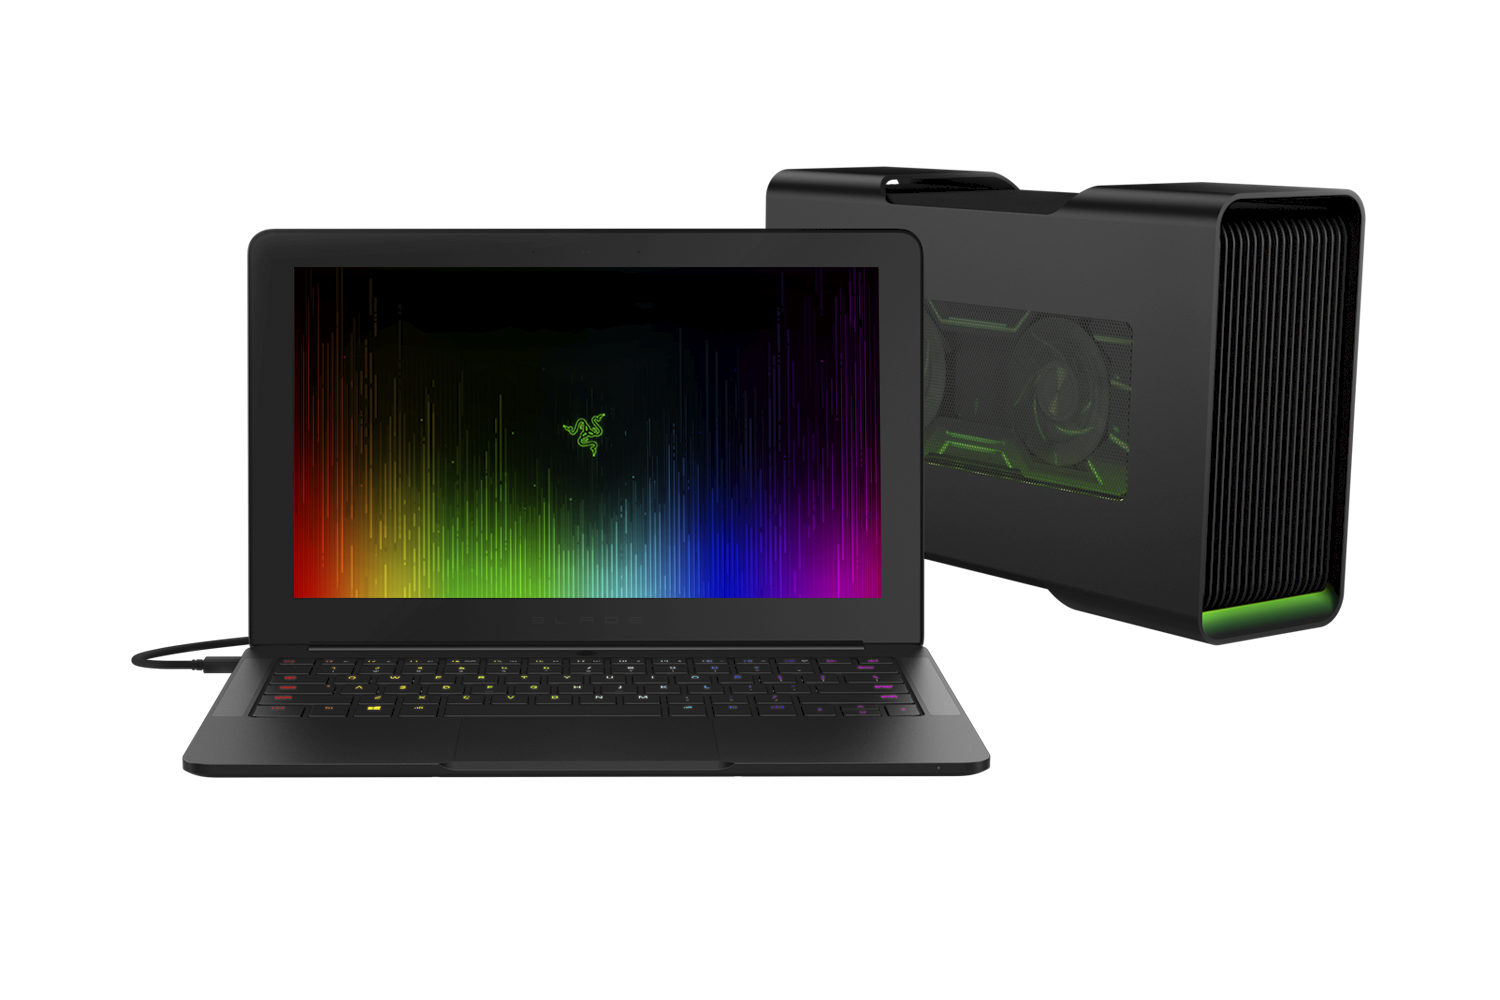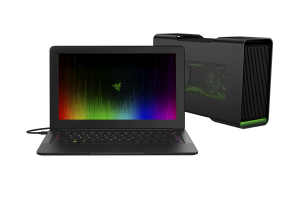
Razer Blade gaming Ultrabook connected to Razer Core external graphics module
Just lately, as more premium and performance-grade laptops are being equipped with a Thunderbolt 3 connection, the external graphics modules, also known as graphics docks or graphics docking stations, are starting to trickle out on to the market as a performance-boosting accessory for these computers.
The Thunderbolt 3 connection, which uses the USB Type-C plug and socket, is able to provide a throughput similar to a PCI-Express card bus and has put forward a method of improving a laptop’s, all-in-one’s or small-form-factor computer’s graphics ability. This is being facilitated using the external graphics modules or docks that house graphics processors in the external boxes and link these to the host computer using the above connection. What it will mean is that these computers can benefit from desktop-grade or performance-grade graphics without the need to heavily modify them and, in the case of portable computers, can allow for “performance” graphics to be enjoyed at home or in the office while you have battery-conserving baseline graphics on the road,
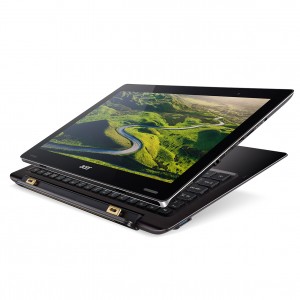
Acer Aspire Switch 12S convertible 2-in-1 – can benefit from better graphics thanks to Thunderbolt 3 and an external graphics module
The devices come in two classes:
- Integrated graphics chipset (Acer Graphics Dock) – devices of this class have a hardwired graphics chipset similar to what is implemented in an all-in-one or small-form-factor computer.
- Card cage (Razer Core, Akitio Node) – These devices are simply a housing where you can install a PCI-Express desktop graphics card of your choice. They have a power supply and interface circuitry to present the desktop graphics card to the host computer via a Thunderbolt 3 connection.
What will they offer?
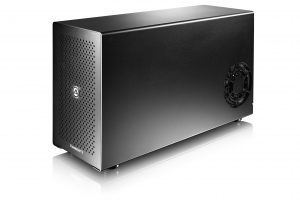
Akitio Node Thunderbolt 3 “card cage” external graphics module
All these devices will have their own video outputs but will yield what the high-performance graphics chipset provides through the host computer’s integral screen, the video outputs integrated with the host computer as well as their own video outputs. This is in contrast to what used to happen with desktop computers where the video outputs associated with the integrated graphics chipset became useless when you installed a graphics card in these computers.
I have read a few early reviews for the first generation of graphics modules and Thunderbolt-3 laptops. One of these was Acer’s integrated graphics module kitted out with a NVIDIA GTX960M GPU, known to be a modest desktop performer but its mobile equivalent is considered top-shelf for laptop applications. This was ran alongside an Acer TravelMate P658 and an Acer Aspire Switch 12S, with it providing as best as the graphics would allow but highlighting where the weakness was, which was the mobile-optimised Intel Core M processors in the Switch 12S convertible.
Simplified plug-in expansion for all computers
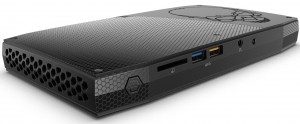
The Intel Skull Canyon NUC can easily be “hotted up” with better graphics when coupled with an external graphics module
Another example was a manufacturer’s blog post about using their “card-cage” graphics dock with one of the Intel Skull Canyon “Next Unit Of Computing” midget computers which was equipped with the Thunderbolt 3 connection. This showed how the computer increased in graphics performance once teamed with the different graphics cards installed in that “card-cage” module.
It opened up the idea of using an “AV system” approach for enhancing small-form-factor and integrated computers. This is where you connect extra modules to these computers to increase their performance just like you would connect a better CD player or turntable or substitute an existing amplifier for something more powerful or plug in some better speakers if you wanted to improve your hi-fi system’s sound quality.
This usage case would earn its keep with an “all-in-one” computer which has the integrated monitor, the aforementioned “Next Unit Of Computing” midget computers or simply a low-profile desktop computer that wouldn’t accommodate high-performance graphics cards.
Software and performance issues can be a real stumbling block
What I had come across from the material I had read was that as long as the host computer had the latest version of the operating system, the latest BIOS and other firmware to support graphics via Thunderbolt 3, and the latest drivers to support this functionality then it can perform at its best. As well, the weakest link can affect the overall performance of the system, which can apply to various mobile system-on-chip chipsets tuned primarily to run cool and allow for a slim lightweight computer that can run on its own batteries for a long time.
At the moment, this product class is still not mature and there will be issues with compatibility and performance with the various computers and external graphics modules.
As well, not all graphics cards will work with every “card-cage” graphics module. This can be due to high-end desktop graphics cards drawing more current than the graphics module can supply, something that can be of concern with lower-end modules that have weaker power supplies, or software issues associated with cards that aren’t from the popular NVIDIA or AMD games-focused lineups. You may have to check with the graphics module’s vendor or the graphics card’s vendor for newer software or firmware to be assured of this compatibility.
Multiple GPUs – a possible reality
A situation that may have to be investigated as more of these products arrive is the concurrent use of multiple graphics processors in the same computer system no matter the interface or vendor. The ability to daisy-chain 6 Thunderbolt-3 devices on the same Thunderbolt-3 connection, along with premium desktop motherboards sporting this kind of connection along with their PCI-Express expansion slots, will make the concept become attractive and easy to implement. Similarly, some vendors could start offering Thunderbolt-3 expansion cards that plug in to existing motherboards’ PCI-Express expansion slots to give existing desktop PCs this functionality.
Here, the goal would be to allow multiple GPUs from different vendors to work together to increase graphics performance for high-end games or multimedia-production tasks like video transcoding or rendering of video or animation projects. Or it could be about improving the performance and efficiency of a multiple-display setup by allocating particular graphics processors to particular displays, something that would benefit larger setups with many screens and, in some cases, different resolutions.
Highly-portable gaming setups being highlighted as a use case
A usage class that was always put forward for these external graphics modules was the teenage games enthusiast who is studying at senior secondary school and is ready to study at university. Here, the usage case underscored the situation where they could be living in student accommodation like a college dorm / residence hall or be living in a share-house with other students.
The application focuses on the use of a laptop computer that can be taken around the campus but be connected to one of these modules when the student is at their home. I would add to this the ability to carry the graphics module between their room and the main lounge area in their home so that they could play their games on the bigger TV screen in that area. This is due to the device being relatively compact and lightweight compared to most desktop computers.
That same application can cover people who are living in accommodation associated with their job and this is likely to change frequently as they answer different work placements. An example of this would be people whose work is frequently away from home for significant amounts of time like those who work on ships, oil rigs or mines. Here, some of these workers may be using their laptop that they use as part of their work during their shift where applicable such as on a ship’s bridge, but use it as a personal entertainment machine in their cabin or the mess room while they are off-shift.
What could be seen more of these devices
Once the external graphics modules mature as a device class, they could end up moving towards two or three classes of device.
One of these would be the integrated modules with graphics chipsets considered modest for desktop use but premium for laptop use. The expansion abilities that these may offer could be in the form of a few extra USB connections, an SD card reader and / or a higher-grade sound module. Perhaps, they may come with an optical drive of some sort. Some manufacturers may offer integrated modules with higher-performance graphics chipsets along with more connections for those of us who want to pay a premium for extra performance and connectivity. These would be pitched towards people who want that bit more “pep” out of their highly-portable or compact computer that has integrated graphics.
Similarly, it could be feasible to offer larger-screen monitors which have discrete graphics chipsets integrated in them. They could also have the extra USB connections and / or secondary storage options, courting those users who are thinking of a primary workspace for their portable computer while desiring higher-performance graphics.
The card-cage variants could open up a class of device that has room for one or two graphics cards and, perhaps, sound cards or functionality-expansion cards. In some cases, this class of device could also offer connectivity and installation options for user-installable storage devices, along with extra sockets for other peripherals. This class of device could, again, appeal to those of us who want more out of the highly-compact computer they started with or that high-performance laptop rather than using a traditional desktop computer for high-performance computing.
Portable or highly-compact computers as a package
Manufacturers could offer laptops, all-in-one and other highly-compact or highly-portable computers that are part of matched-equipment packages where they offer one or more external graphics modules as a deal-maker option or as part of the package. These could differ by graphics chipset and by functionality such as external-equipment connectivity or integrated fixed or removable storage options.
This is in a similar vein to what has happened in the hi-fi trade since the 1970s where manufacturers were offering matched-equipment packages from their lineup of hi-fi components. Here they were able to allow, for example, multiple packages to have the same tape deck, turntable or CD player while each of the package was differentiated with increasingly-powerful amplifiers or receivers driving speakers that had differing levels of audio performance and cabinet size. It still was feasible to offer better and more capable source components with the more expensive packages or allow such devices to be offered as a way to make the perfect deal.
Conclusion
Expect that as more computers equipped with the Thunderbolt 3 over USB-C connection come on the market the external graphics module will become a simplified method of improving these computers’ graphic performance. It will be seen as a way for allowing highly-compact or highly-portable computers to benefit from high-performance graphics at some point in their life, something that this class of computer wouldn’t be able to normally do.