Tag: WiFi wireless

Sony’s Personal Content Station–a mobile Wi-Fi NAS that you touch on with your Android phone

Article

Sony’s Personal Content Station uses NFC for mobile backups, aims for April release in Japan

My Comments

I was impressed with the Sony Personal Content Station which is an elegant ceramic-white device that works as a 1Tb mobile NAS for your mobile devices and, perhaps, your home network.

One feature that stands out is to be able to use NFC-based pairing to permit device-to-NAS file transfer between an NFC-equipped Android handset or tablet and this device. Of course, it works as a Wi-Fi NAS for other devices and you can of course upload from a USB-connected device or dump the contents of your SD “digital film” card to this device.

There is the ability to show the content on a TV whether directly-connected via HDMI or via a DLNA network connection. Of course, a good question worth raising is whether the Personal Content Station could interlink with an existing home network as a media server / NAS or simply be one of many devices of this ilk that are their own network. This includes whether a Wi-Fi Direct transfer could occur while the Personal Content Station is connected to the home network.

Another question yet to be raised is whether “other” NFC-initiated Wi-Fi-Direct file transfer software like Samsung’s S-Beam could do the file-transfer job without the need to install Sony’s software. This could avoid the need to “crowd out” an Android phone with many of these apps to suit different devices. Similarly, I would prefer this device to support any DLNA “media-uploader / media-downloader” standards so you can move content between this device and similar devices; and your mobile handset or digital camera via Wi-Fi by using one piece of software.

Guest Post: Basic Security for Your Home Wireless Network

Netgear DG834G ADSL2 wireless router

Netgear DG834G ADSL2 wireless router

So, you’re ready to set up that nice and convenient home wireless network.  You’ve got the router out of the box and you’re ready to plug everything in, but there’s just one problem.  You’re concerned, or maybe you’re even a little bit paranoid.  You’re wondering who out there might be able to pick up the signal.  Setting up a wireless network in your home can be very simple, but it can also pose a few risks if you get lazy or you’re using older wireless router technology.  Once you’ve set up the router, yes, other people with wireless devices may be able to detect the signal you’re broadcasting, but depending on the precautions you’ve taken, you can determine what happens when they see that signal.

 Whether you live in an apartment complex, a tightly-packed subdivision, or on some rural street, there will always be opportunity for someone to detect your wireless signal.  All they have to do is look for it.  Does it mean they’ll try to connect to it?  No.  There isn’t any reason to panic about who might be able to see it.  It doesn’t matter.  What matters are your security and the preventative measures you’ve put in place to block unwanted access when that stray individual does decide to try to connect to your network and attempts to access your internet or your computer.

 Securing your internet connection and your personal network is a relatively simple thing to do.  Many newer routers or modem/ router combos will take you through a setup wizard that should walk you through activating security protocols, such as WEP or WPA and changing the SSID (network name).  Setup wizards aren’t necessarily the best option when setting up your wireless network’s security, but if you don’t know what you’re doing, it can work.  Just remember to change the SSID and avoid using WEP security.

 Why?  Not changing you router’s default SSID can be a sign to outsiders that the user who set up the network has no idea what they’re doing.  It can make that wireless signal a potential target.  You can change it to whatever you want.  As for WEP, it’s useless and simple to break through.  A tech savvy 8-year-old could break through WEP security in minutes.  If you’re in the market for a wireless router (or already purchased one) and one of the device’s selling points is WEP security, stay far away.  Instead, look for devices offering WPA security, or better yet, WPA2 security.

Then set an encryption key password that isn’t your dog’s name, your street address, the town where you grew up, or something equally lame and easy to crack.  Make it tough.  Make it long.   Don’t make it what you think is tough, make it genuinely tough.  Try a password creation exercise.  Write out strings of numbers and letters or a piece of paper.  Or write out a series of words that have no apparent or logical connection to one another.  Or make up words that aren’t in any dictionary.  Be creative and don’t worry if you can’t remember it or not.

Since we’re talking about a home network, it isn’t a big deal if you write down your insane password and store it somewhere, preferably in a place you will remember.  That way, when you have additional devices you want to grant internet access to, whip it out, you’re ready to go, and no paranoia.

Editor’s note:

Most recently-issued ISP-supplied or retail wireless routers are implementing a “secure by default” strategy which makes the process of creating a secure wireless network simple for most of us.

This includes strategies like WPS easy-setup routines with a random passphrase, and an increasing number of routers provided by the ISPs or telcos as customer-premises equipment use SSIDs that typically have a service marketing name followed by three or four random digits such as “BIGPOND1223 or OPTUS4345. These strategies relate the experience of a secure home network to that of installing or using a typical door lock, something most of us identify with regularly.

Guest post by Jack Pike Television lover and guru of all things Cable, spends his time blogging with Time Warner Cable when not enjoying the tube.

What’s next for the all-in-one printer–now to be a wireless hotspot

Articles

HP’s new all-in-one printer adds more to that ‘all’, turns into a WiFi hotspot

HP printer can act as Wi-Fi hot spot | CNet

My comments

The network-capable multifunction printer has come to a point in the level of functionality that it can offer. Now HP has taken this further by making the Wi-Fi network functionality work as a wireless access point or wireless client in one of their latest SOHO / small-business laser multifunction printers.

Here, the wireless segment created by this printer can serve up to 9 users as well as providing for CD-free driver installation for most operating systems. Of course, like all HP consumer and SOHO / small-business network-enabled printer devices, this printer offers the expected ePrint “email-to-print” ability for smartphone and tablet users and AirPrint for iOS-based Apple mobile devices.

The printer can work as an elementary low-traffic wireless router to a static-IP, dynamic-IP or PPPoE Internet service that comes via an Ethernet cable. It also has home/SOHO WPA2-Personal security with the shared password, which may be of benefit for small businesses who rent office space such as a serviced office and have wired Internet access as part of the deal.

But I would like to see the printer able also to work as an access point for those of you who may work from a garage or barn and share network and Internet facilities with the main house or have to use this feature as an infill access point for a dark spot in the network’s wireless coverage. Similarly, it could benefit from anther Ethernet socket on the back for use with other wired-Ethernet devices like network-attached storage.

Of course, the idea of “ganging” the Ethernet socket and the Wi-Fi circuitry in a network-capable device like a printer that offers Ethernet and Wi-Fi connectivity to make it be network infrastructure has impressed me. It then allows these functions still to be of use even if just one is implemented for connection to a host network.

The Wi-Fi network to be important in the car over the next five years

Article

In-car wi-fi to boom over next five years – Manufacturers expected to introduce it as standard | TechEye

My Comments

Previously, I have covered the concept of the in-car network, mainly in the context of linking with another network like a home network so as to transfer entertainment content, maps and similar material to a hard disk in the vehicle. This also encompassed the ability for the vehicle to link to a wireless-broadband service for such purposes as obtaining “nearest available services” information or playing online media such as Internet radio to the car speakers. This extends to commercial and government applications where data can be obtained from the office while on the road and shown up on in-dash displays.

The next five years will see this becoming an important OEM and aftermarket feature for most cars. There have been some factory-supplied and aftermarket systems being presented which use a mobile phone as a Bluetooth-linked or USB-linked wireless-broadband modem with the processing in the dashboard or the dashboard as a control surface for the phone or certain apps within the phone. A few implementations use a wireless-broadband modem or modem-router (MiFi style) as an Internet link to the dashboard and the passengers’ devices.

It is perceived that Wi-Fi will be seen as another link to the car infotainment system for the smartphones and tablets to use. It would typically be implemented in the Wi-Fi Direct manner with the access point in the dashboard or the car being a client to an existing wireless network. This could allow concepts such as a smartphone being a DLNA media server for the car, the in-dash navigation being able to benefit from the address book that the smartphone or tablet has or rear-seat entertainment setups being auxiliary screens for a tablet thanks to Miracast.

But I have always seen it beyond the in-vehicle network that applies within the confines of a vehicle. Here, I have seen these networks link with stationary networks like home networks for syncing content to and from the vehicle or updating large amounts of data like maps while at home. Similarly, I would see the vehicle-based network interlink with a home network at a secondary location like a holiday home to do things like serving music to DLNA-capable AV devices for example.

This could be a very interesting trend to see just as we have seen in-car entertainment evolve over the last fifty years with technologies like tape and disc playback, radio reception, mobile telephony, satellite navigation and the like.

Wirelessly playing music held on your mobile device through other equipment

You may have your music held on a smartphone or tablet but you want it coming through better and louder speakers. Similarly, you have packed out your laptop computer or an external hard disk which you connect to your laptop with music. But you still want the flexibility of moving around your space with your phone or positioning your laptop wherever you want it.

Devices you can use

Primarily you could use a wireless media adaptor that is connected to existing audio equipment or speakers. This function may be integrated in some audio devices like Internet radios or music systems. On the other hand, you could purchase a wireless-enabled speaker system such as a speaker dock which integrates the wireless media adaptor with the speakers.

Methods

Bluetooth

Creative Labs Sound BlasterAxx PS-SBX20 Bluetooth wireless speaker (Image courtesy: Creative Labs)

Creative Labs Sound BlasterAxx PS-SBX20 Bluetooth wireless speaker system for the smartphone, tablet or laptop

A common method would be to use a Bluetooth link. This is supported by every smartphone and tablet but would only work with a Bluetooth audio adaptor or Bluetooth speaker system.

Here, the Bluetooth audio device must work to the Bluetooth A2DP audio profile for music playback and AVRCP audio control profile if you want to control the phone from the device’s controls.

To set up your wireless link, you would have to “pair” you mobile device with the Bluetooth audio device. Here, you place the device in “discoverable” mode and then use the mobile device’s “add Bluetooth device” function to discover the audio device. Most recent devices go in to “discoverable” mode when they are first plugged in but with a device that is already connected to power, you may have to hold down a “setup” or “Bluetooth” button. Here, an indicator light may flash in a certain manner to show that the device is in “pairing” or “discoverable” mode.

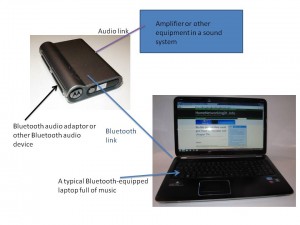
Bluetooth audio setup with a laptop

Bluetooth audio setup with a laptop and a Bluetooth audio adaptor

When you go to your mobile device and use the “add Bluetooth device” function, there will be a list of devices you had already “paired” with your phone as well as a new device name, typically representing the audio device’s brand or model name. Select this device and the pairing process will take place. If your mobile device shows a “password” or “PIN” request as part of this setup, enter 0000 in response to this request.

In this situation, you will likely have your mobile device connecting to your Bluetooth speakers or adaptor. On the other hand, if you already paired your phone or tablet to the Bluetooth audio device and your device and mobile device are on, you would have to go to the Bluetooth menu to select the “Connect” option to establish the connection.

If you subsequently use the same Bluetooth audio device, you may have to “connect” to that device to have it play its music through the audio device. This may require you to enable Bluetooth and, in some cases, select the device’s name to connect it.

Laptop users would then find that the Bluetooth A2DP and Hands Free Profile will present themselves as “sound devices” through the use of class drivers implemented by Windows 7 and MacOS X. You may have to set the Bluetooth virtual sound cards as default sound devices if you are using applications that don’t allow you to determine the sound device for that application. I have covered this issue in further detail in an article about using laptops with Bluetooth devices.

Wi-Fi wireless

Another wireless connection method is to use a Wi-Fi wireless network. This uses a choice of two protocols: Apple Airplay and the open-standard DLNA protocol.

Network setup

These setups require that the mobile device and the wireless network media player are linked through a network that has a Wi-Fi segment and are seen as the same logical network.

In some cases, the network media player can be connected to an Ethernet or HomePlug segment as long as that segment is accessible to the Wi-Fi wireless segment.

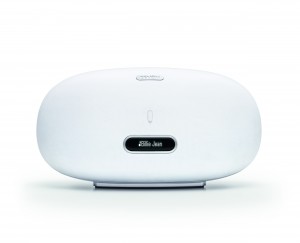
Denon Cocoon 500 Wi-Fi wireless speaker (Image courtesy: Denon Marantz Group)

Denon Cocoon 500 Wi-Fi wireless speaker that works with DLNA or AirPlay setups

These setups can work with network media players and wireless speakers that implement Wi-Fi Direct thus avoiding the need to use a wireless router like a MiFi to create a wireless-network segment. Similarly, some Wi-Fi Direct “master-device” implementations like the Intel implementation used in Windows laptops can allow the device to be a host for a Wi-Fi Direct segment and a client to an existing Wi-Fi network, thus bridging the connections. This can come in handy with public wireless hotspots due to client isolation and, in most cases, Web-based login being established on them; features which could impede the establishment of a Wi-Fi wireless music network.

But you can gain better results with a dedicated WiFi router or access point like one of the portable “MiFi” routers.

Infact most of these setups implement WPS one-push setup for Android mobile devices, Windows 7 computers and most current-issue Internet audio equipment. On the other hand, they will have a pre-determined device-unique WPA-PSK device passphrase for use with Apple devices.

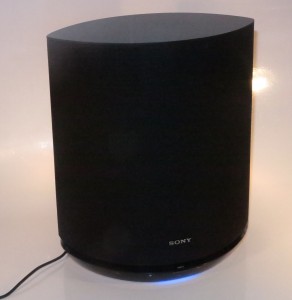
Sony SA-NS410 wireless speaker

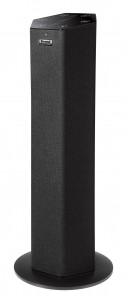
Sony SA-NS410 Wireless Network Speaker

It is also worth knowing that some speakers like the Sony SA-NS310, SA-NS410 and SA-NS510 also have access to advanced functions through the use of a dedicated smartphone app. In the case of these speakers, they have direct access to online music services or Internet radio with this software but you may find that they would work better with a regular small-network setup with a router serving a dedicated Internet connection. Again a “MiFi” may come in handy here when you use them at a hotel or serviced apartment with the existing public-acces Wi-Fi network.

Apple AirPlay

This method works best with iOS devices like the iPhone or with computers that are running iTunes. Here, you have to use the AirPlay functionality within iTunes or the music player in your iOS device to “push” your music to your AirPlay-capable device.

Rogue Amoeba have provided the AirFoil program for MacOS X and Windows platforms which turn your AirPlay-capable devices in to a virtual soundcard for your computer. I have helped a friend with purchasing and installing this program on their Windows 7 computer so they can pipe Spotify through an Apple AirPort Express device connected to their home stereo. This program sells for US$29 per computer.

DLNA

The UPnP AV / DLNA-based media setup is a highly-flexible network media playback setup which is more open-frame in nature. I have covered this setup previously due to this ability and the ability for many hardware manufacturers and software developers to support it.

If the idea is to have your music device such as your laptop or smartphone control the music, you will need to make sure that the device can work as a “MediaRenderer”. Devices like the Sony CMT-MX750Ni music system, the WD TV Live network media adaptors or the Pioneer XW-SMA3 wireless speakers will work with this function out of the box but some devices that support this function may require you to visit their setup menu to enable “DLNA Remote Control” or similar functions.

A DLNA-based setup requires a media server to be installed on your computer or mobile device. Windows-based computers will perform this function using Windows Media Player but you can use other third-party players like TwonkyMedia. Here you would have to point these programs to your music library.

Android phones and tablets can work from one of many different DLNA media server-controller apps like TwonkyMedia or AllShare, which is set up to share the content on your device or the SD card.

Depending on the media-client device, a DLNA setup can be managed from the media client device’s control surface or from your computer or mobile device. For example, Windows Media Player that comes with Windows 7 or 8 offers a “Play To” function which allows you to have your content “pushed to” devices that support this kind of control.

DLNA can work as a virtual sound card for Windows computers if you use the Jamcast virtual-sound-card software on your computer, which costs US$29.99. This can be useful for setups like the streaming music services like MOG, Pandora or Spotify which rely on a Web page or client program for them to work.

On the other hand, you could use the DLNA setup to have a laptop play music from your smartphone or tablet. This can be achieved with TwonkyMedia Manager for all platforms or with Windows Media Player 12 (Windows 7 and 8). In the case of Windows Media Player 12, you would select “Stream” – “Allow remote control of my player” to have this option work.

Worth knowing

Sometimes if one of the wireless speakers doesn’t work properly such as failing to reinstate with the device or network or a Wi-Fi speaker failing to connect to another wireless network segment, you may have to reset the speaker. This is a procedure that is dependent on the speaker but may involve you pressing a “RESET” button in a certain way  Then you may have to pair your audio device to the speaker again or configure it to the network you want it to join.

If the idea is to operate that Bluetooth or Wi-Fi speaker at a pool party, avoid the temptation to think that you can operate the iPhone that’s containing the music from the pool or spa. This is where a lot of portable devices become damaged due to the water. Here, it would be better to have the device containing the music, as well as the speaker located as far back from the water as you can, such as near a wall or safety fence.

Conclusion

Once you have your smartphone, tablet or laptop working with a wireless-audio link such as a Bluetooth link, you can be able to have a chance to hear better sound out of these devices while allowing yourself to move the smartphone or similar device around freely.

Update Note

This article, originally published on October 2012, has been updated to make reference to Rogue Amoeba’s AirFoil virtual-sound-card software for Apple AirPlay and to update new pricing details for Jamcast. As well, I have provided direct links to the software developers’ Web pages. I have also created links to the product reviews for the Sony SA-NS410 and SA-NS510 speakers which I had reviewed since the article was first published.

Wi-Fi login problems with iOS 6 devices

Article

What went wrong with iOS 6 Wi-Fi | ZDNet – loop

My Comments

You may have upgraded your iPhone or iPad to iOS 6. But after your Apple device shuts down and restarts as part of applying the update, you find that you are not on your home or business Wi-Fi network even though you downloaded that update through the same network.

The problem is not necessarily a flawed network configuration, but part of the iOS Wi-Fi automatic troubleshooting routine. Here, the software attempts to load a “Success” stub page from the Apple servers. This logic is intended to cause the iOS device to load a login or “assent” page that is part of a public-access or guest-access Wi-Fi network’s user experience. This stub was deleted by a former Apple employee before he left without realising it was part of iOS 6 troubleshooting logic.

The computer press have realised that this logic is flawed because this can place the servers at risk of denial-of-service attacks thus crippling iOS 6 devices. Similarly, someone could use a “man-in-the-middle” or “evil-twin” attack to point the device to a site that is of a malevolent nature. If a “show particular Webpage” logic is to be implemented in a network troubleshooting logic, it could work with a list of commonly-available Websites like Web portals or Web resource pages which the device chooses from at random.

It could be a chance for software developers to create network-test logic that makes less reliance on loading a particular Web site as proof of function. This could be through use of simplified randomised test routines that work with locations that are randomly chosen from a list of commonly-known highly-available Internet locations. This can be augmented by government standards bodies and similar organisations like NIST or BSI adding basic-HTML “Internet Success” pages to their Websites and making the URLs available to the IT industry.

Sometimes an NTP or similar time-fetch routine that obtains the time from one of many atomic-clock time servers to synchronise a device’s internal clock can work as a simplified Internet-functionality-test routine. If the time-server supports HTTP access where the UTC time is obtained via an HTML or text string, this could be achieved using HTTP so as to test Web-access functionality.

By not relying on one particular server as a proof-of-functionality test for Internet access and integrating a “login-page load” failover routine for public-access networks, we can achieve a safe and sure network setup experience.

Pioneer adds another network-capable device to the DJ table in the form of a CDJ

Articles

Pioneer CDJ-2000nexus updates the flagship DJ player, brings WiFi and slip mode (video) – Engadget

Pioneer CDJ-2000 Nexus | Mixmag

From the horse’s mouth

Press Release (Pioneer UK)

Video

http://youtu.be/ULA8Q1djn4w

My Comments

Previously I wrote an article about the Pioneer XDJ-AERO bringing the Wi-Fi network to the DJ table so DJs can link laptops or mobile devices to their performance equipment and bring in the music on these devices as part of their set.

This time, Pioneer has taken this concept further with their CDJ-2000nexus, which is the first “CDJ” to implement network content delivery in a similar vein to the XDJ-AERO DJ console. This requires use of the rekordbox software on the regular or mobile computer to link the CDJ to the content held on the computer.

But, unlike the XDJ-AERO, the CDJ-2000 Nexus has the Ethernet port as its network connectivity option. Here, you could connect two or four of these decks to the LAN ports of a typical wireless router which is pressed in to service as an access point for the mobile devices, the ultra-cool MacBook AIr or other Wi-Fi only devices. Of course, you could connect laptops that have the Ethernet connection to these decks directly if it is just one unit or via an Ethernet switch if you have two or more.

This then leads to various functions and tricks which help with concurrent multi-deck work and, to that extent, there is even the ability to work parts of the same piece across the multiple interlinked decks.

Of course, the Pioneer CDJ-2000 Nexus can work with content held on the USB Mass-Storage devices, SD cards as well as regular or file-based CDs.

As far as I am concerned, it will be interesting to see what else will make the DJ table or booth require its own small network. For that matter, I would recommend that nightclubs who are designing or refurbishing their DJ booth as part of any capital works be encouraged to implement a small network for this area. As well, a surplus wireless router could end up becoming part of the kit a DJ transports with them in their van when they show up at their mobile gigs.

Feature Article–Extending your wireless network’s coverage

This is an update of the article originally published on 11 August 2008 and has been refreshed to encompass newer technologies and equipment features that wireless-network equipment have.

Many of you who have viewed this blog have been looking for information about extending the wireless segment of your home network. Typically it may be to cover a large house or to gain wireless coverage past a radio obstacle like thick brick or stone walls, foil-lined insulation or double-glazing which uses metal-based heat reflection techniques. Previously, I have mentioned about using this technique to mitigate microwave-oven interference on the 2.4GHz band which 802.11g works on.

Most wireless-network equipment manufacturers have released repeater devices that catch the existing wireless-network signal and expose it in to the new area. Some of these setups work on a vendor-specific manner or may work according to standard WDS bridging techniques. But they all require the use of equipment compatible with each other, usually equipment supplied by the same vendor.

Other companies have released “wireless range extenders” which create a new wireless-network segment using a new SSID but bridge it to the existing wireless segment. This can be a point of confusion as you have to determine the best SSID to connect to at your client equipment and you don’t necessarily get the full bandwidth from your home network in this newly-created segment.

The “extended service set”

The method that I am going to talk about here is the establishment of an “extended service set” comprising of multiple access points serving the same network and using the same SSID and security parameters. All the access points have to be connected to a common wired-network backbone which is part of the same logical network; and the access points must be working on the same technology – the same 802.11 variation and operating mode (G-only, N-only, mixed mode, etc).

This method can be performed with access points or wireless routers supplied by different vendors, thus permitting the use of equipment which is suited for the job at hand. It can allow for use of surplus routers simply as access points as long as they are configured correctly.

This setup won’t work properly across networks that are set up as multiple subnets or logical networks. An example of this may include extending a wireless network between two business premises across the street or corridor where they are served by separate Internet services. If you do want to link the two different premises across the street or corridor, you may have to make sure there is a wired or dedicated wireless backbone connecting both these locations before you set up this kind of network.

The diagram below shows what a small network should be like when running an extended service set.
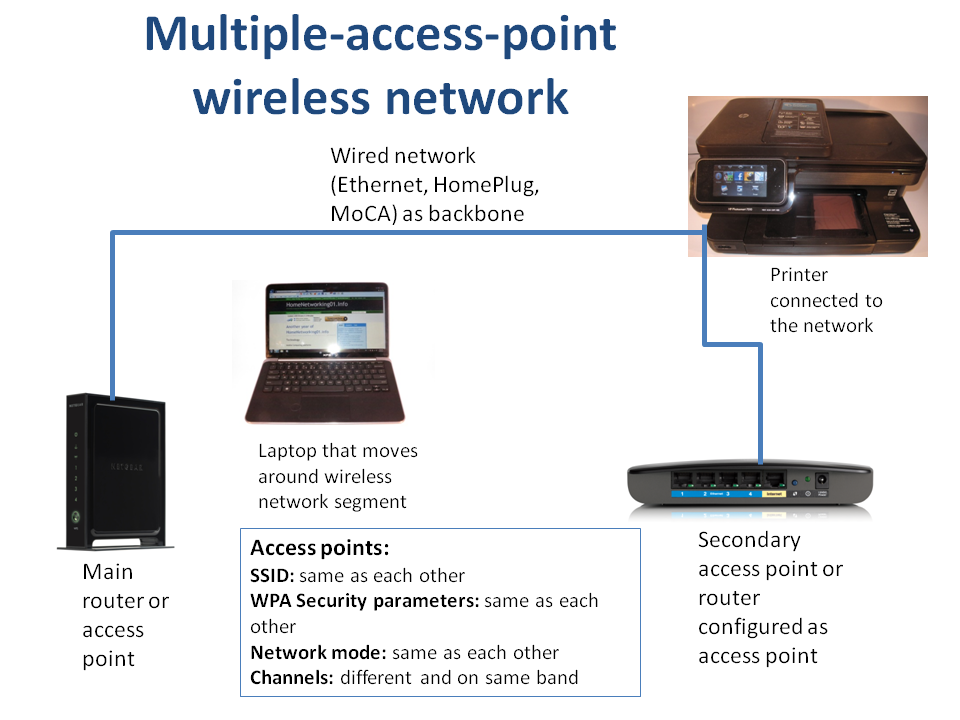
 

Extended wireless-network connection diagram

Connection diagram for the multiple-access-point wireless netwrok

Key Components

The network backbone

The wired-network backbone can work on any wired-network media such as a Cat5 Ethernet, HomePlug power-line, fibre-optic LAN, MoCA TV-aerial coax, HomePNA phone-line or a mix of these technologies bridged to each other. It can even work with a dedicated inter-building wireless backbone that may be used for larger properties or to join shops or offices that are separated by a street.

The network backbone can handle other network traffic from wired-network devices like servers, desktop computers and games consoles; and become the network’s local data path to the Internet. This is while it works as the backbone for the wireless “extended service set”.

You may have be lucky to have an Ethernet cable in your house if you had it “wired for data”. But most houses typically wouldn’t have this facility everywhere. The other technology that I have found to do this job equally well is HomePlug AV powerline networking which works over the cable infrastructure used to provide AC power to your lights and appliances. It can reach further than the existing building, which is a boon if you need to extend coverage to garages, sheds, cabins or other outbuildings or have Internet access in a caravan or campervan used as a “sleepout” or mobile office.

Access Points

These devices are the transmitters that bring the data from the wired network backbone to the wireless client devices and make up the extended service set.

You typically will have one such device in the form of your wireless router which is at your network’s Internet-network “edge”. The wired-network backbone used as part of this “extended service set” would be connected to one of the LAN ports on this device. If you use a wireless router with one Ethernet port for the LAN and that port is used for a desktop computer or similar wired-network device, you will need to expand the number of sockets by using an Ethernet switch. These will typically be a “dime a dozen” for a five-port or eight-port unit. There are also some HomePlug-Ethernet bridges that have a built-in four-port switch that are worth considering if you are setting up a HomePlug backbone.

Repurposing the old wireless router

If you upgraded your wireless router to a newer model, you will still have your existing router gathering dust. Similarly, you may have changed broadband technologies like moving from cable to DSL or from DSL to a next-generation broadband technology and your router’s Internet connection may have been served by a technology-specific internal modem or connection.

This router that became surplus to your needs can work as an access point but will need to be configured appropriately.

Here, you will need to disable the following functions:

  • DHCP server
  • UPnP Internet Gateway Device functionality (typically referred to as UPnP)
  • Dynamic DNS functionality (if used)

As well, you will need to set the LAN IP address to something that is within your network’s IP address range but preferably out of the address pool used by the current router. The reason you have to take care of this setup is because there needs to be only one device performing “network-Internet edge” functions such as DHCP in a network and this device should be the one at the logical network-Internet border.

Some of the newer routers that are sold through retail have an “access point mode” option in their setup Web page. This make the effort of setting them up to run purely as an access point a simpler task because it disables the DHCP, Dynamic DNS and other functions associated with an “edge” router at the click of an option.

When you connect this router to the wired backbone, you use any of the LAN ports to connect the backbone. Never use the WAN port on this router for the wired backbone. This may not be an issue if the router you are setting up is a modem-router where the modem is performing WAN functions or you are using a router that has the above-mentioned “access-point mode” and this mode makes the WAN port become a LAN port.

“3-in-1″ HomePlug wireless access points

There is an increasing number of wireless access points that work with a HomePlug or Ethernet backbone. These devices, such as the Netcomm NP290W / Solwise PL-85PEW and the Devolo dLAN Wireless Extender, are as big as a compact “wall-wart” power adaptor used to power most electronic devices from the mains and plug directly in to the power outlet. They bridge between a Wi-Fi wireless segment (as an access point or wireless client bridge in some cases), a HomePlug powerline segment and a Cat5 Ethernet segment.

These units come in handy if you need to extend a wireless network on a temporary basis or simply if a compact device can do the job better than a large access point. They would come in to their own when you are using the extension access point to mitigate microwave-oven interference in the kitchen or if you want to extend the home network to a static caravan where the teenage kids can use that iPhone or iPad.

But with these devices, you have to make sure that you use one of the wired technologies as the backbone. This means that you have to use them with your HomePlug setgment as the backbone and the Ethernet connection to link a device like a desktop computer, PlayStation 3 or a network printer to the home network; or connect to an existing Ethernet backbone and have the device create a new HomePlug segment as well as working as an access point.

Setting Up The Network

Configuring the access points

You will need to know the SSID and the WEP or WPA wireless security parameters that are operational for your network. These are the only factors that need to be common amongst all of the access points of the network. The reason that the SSID and security parameters are set to the same details is so that wireless client devices can roam between the different access points without any user intervention.

The radio channels for each of the access points have to be set differently to each other. It is a good idea to set the access point closest to the kitchen to Channel 1 if you have a microwave oven in that kitchen. This is because, from my research, most of the domestic-market microwave ovens work at 2450 MHz which is between Channels 8 and 9 on the 802.11g channel list. I had tried an experiment to see whether a microwave can upset a wireless-network “cell” that is tuned away from its operating frequency.

If the access points or wireless routers is a consumer model that was made in the last few years, they would be equipped with WPS push-button setup. Here, you would have to make sure that they don’t reconfigure the wireless access-point parameters when you invoke the WPS push-button setup function. There is usually a “Keep settings” option associated with the WPS setup menu/

This option will then allow you to use the push-button setup on the nearest access point to enroll your wireless client device to your home network.

Dual-band wireless networks

If you are operating a dual-band wireless network which works on 2.4GHz and 5GHz, you may have to create separate extended-service-sets for each band. These would have a different SSID for each band like “Network-Name” for the 2.4G band and “Network-Name-5G: for the 5G band. The security parameters are the same for each band; and you may want to run the 2.4GHz band as “mixed mode” and the 5G band as “N-only”. The advantage of this setup is so you can identify any weak spots that affect a particular band in your dual-band wireless network and is more applicable with the 5GHz band that uses a shorter wavelength than the 2.4GHz band.

Here, you could have the main router that serves most of the house being a dual-band dual-radio type, also known as a simultaneous dual-band unit. This can also apply to an access point expected to cover a large area. Then you could use single-band or dual-band single-radio equipment for providing any infill coverage on either of the bands.

The wireless client devices

There is no need to reconfigure any of the wireless client devices such as laptop computers once you have set up the network according to the above instructions.

You will see an improvement in network performance when you operate your wireless client devices in areas where you barely could operate them. The signal-strength bar-graph that is part of your wireless client device’s network management software will register a stronger signal as the client device comes in to vicinity of the access points.

Some devices may not support this automatic roaming behaviour properly and may require you to reselect the network when you move in to the scope of the better access point.

Conclusion

Once you have followed the steps in this article, you will be able to extend the effective coverage of your wireless home network or make your wireless network cover everywhere in your house even if it uses metal-based energy-efficiency measures or has thick brick or stone walls.

Wi-Fi Alliance starts certifying tunnel technology for better wireless performance – PC World Australia

Articles

Wi-Fi Alliance starts certifying tunnel technology for better wireless performance – WLANs / Wi-Fi, wireless, networking, MediaTek, Marvell Technology Group, Wi-Fi Alliance – PC World Australia

WiFi alliance begins Tunneled Direct Link Setup certification, hopes to improve media streaming | Engadget

My Comments

The Wi-Fi Alliance have released a new certification standard for allowing better wireless performance amongst devices in a wireless-network segment. This standard, known as Tunnelled Direct Link Setup, allows devices that are authenticated with the same access point to transmit data directly to each other.

Allowing direct node-to-node connection after an access point establishes the connection to allow for faster data-transfer performance between clients on a Wi-Fi segment. This would also yield an improved quality-of-service for media streaming or improved latency for real-time gaming.

Not like Wi-Fi Direct where a device that is normally a Wi-Fi client is there to facilitate a network connection. This is more about establishing a direct best-case device-to-device connection rather than a via-access-point connection for a file transfer or media-stream method as a way of improving the data-transfer performance.

When a TDLS link is set up, the devices would form this link at the best abilities available to each other, such as higher speed, quality-of-service, power-saving practices or security compared to what the segment’s access point would offer. Similarly, the access point does not need to be upgraded for this functionality to take place.

The access point would still play its role if the client devices move further afield, thus repeating the data between the client devices. Similarly it would also fulfil network-bridging tasks such as linking to the wired backbone or the Internet service in the case of a Wi-Fi router.

This functionality would be part of newer Wi-Fi-network chipsets that would be deployed in newer computers and similar devices. It would be interesting to see how it works further once more TDLS-enabled devices are in the field.

Network-capable speaker units–now coming as a torrent

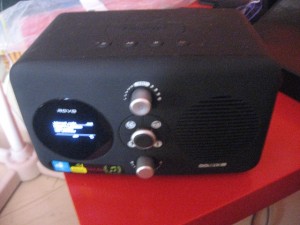
Revo Domino Internet radio

Revo Domino – an example of an Internet radio with DLNA Media Playback

Regular readers of this site would have noticed the Internet radios that I have reviewed earlier on. These were typically tabletop radios that had a broadcast tuner capable of receiving at least FM and / or DAB digital broadcast radio. But they had Wi-Fi and, in some cases, Ethernet network connectivity which allowed them access to, most commonly, the vTuner Internet-radio directory and the ability to play through audio content from any broadcaster that listed its stream in this directory. They also had the ability to play audio content held on a DLNA media server after it was selected on the set’s control surface.

Of course, all of these sets had a line input so they can amplify other audio equipment like portable CD players but most of them had a dock for one of Apple’s iPod or iPhone mobile devices. A few of the sets even had a USB connection so you can play music held on a USB memory key.

Now the network-audio direction is coming in the form of network-capable speaker units that have Apple Airplay and, increasingly, DLNA Media-Renderer operating mode. This meant that you could use software running to these protocols to play music held on a computer, smartphone or tablet through these systems as explained in this feature article. The network connectivity for all of them is Wi-Fi to 802.11g/n standards with WPS “push-push” setup but some of these units would have an Ethernet socket for connection to an Ethernet or HomePlug network segment and / or Wi-Fi Direct so they can become their own access point for smartphones and tablets.

The manufacturers are running a range of two or three units with similar functionality but having differing speaker configurations and / or power outputs with some having the capability to offer a “punchy” sound where that tight bass does exist. As well, one or two of the models in these ranges is equipped with a rechargeable battery pack and designed for portability so they can be used on the beach or on the streets in a similar manner to those classic “ghetto-blasters” of the 1980s.

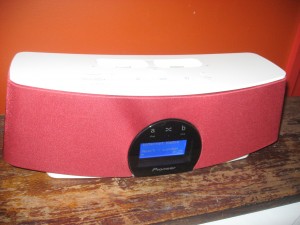
Pioneer NAC-3 Internet radio and iPod dock

Pioneer NAC-3 Internet radio and iPod dock – capable of being controlled by a DLNA control point program

The device that predicted this level of functionality in a network speaker system was, in my opinion, the Pioneer XW-NAC3 speaker dock / Internet radio that I reviewed on this site. Here, it had Wi-Fi and Ethernet connectivity as well as support for Bluetooth A2DP audio streaming. But it used the network connectivity to play broadcast content from Internet-radio stations on the vTuner directory as well as being able to be controlled by a DLNA Media Control Point alongside the basic DLNA MediaPlayer “play-from-own-control-surface” functionality.

Usage Issues

A problem I have discovered with some DLNA server / control point software running on Android devices is that they won’t work properly if you run the device as its own access point. This would be something that you may do if you enable “Wi-Fi tethering” on your phone to share your phone’s Internet access and data allowance with other devices.

Here, you may have to work around this by using another access point to create the temporary Wi-Fi segment. This could be done using an ordinary Wi-Fi router, even one of those “Mi-Fi” devices that work as a router for a wireless-broadband service. This solution may come in to its own with the battery-driven units that don’t have Wi-Fi Direct and you want to play content from your mobile device or laptop.

Another situation that may plague anyone who sets these units up in premises with a public Wi-Fi hotspot is that they may not work properly with these hotspots. Here, most of these public-access networks would be set up for client isolation so that no other client devices can discover each other. As well, most such networks typically use a Web interface for provisioning the Internet service. This will typically make the network unusable for point-to-point use like media playback.

Instead, if you are using that network speaker system in that hotel room or serviced apartment which has a public-access or guest-access wireless hotspot, use a “MiFi” or a similar device to create a Wi-Fi network if the computer, smartphone or speaker system doesn’t support Wi-Fi Direct. Some Wi-Fi Direct setups like the Intel implementations used for laptop computers may allow you to work the temporary network in conjunction with the public-access network and bridge Internet data to this temporary network. This would come in handy with units that offer Internet-radio functionality like the Pioneer NAC-3 or the Denon Cocoon series.

What to look for with these speaker systems

I would make sure that if you are intending to use these network speaker system with a smartphone, tablet or PC, make sure that the unit works with DLNA and Apple AirPlay.

If the speaker unit that you are after doesn’t have Wi-Fi Direct, you may have to make sure you have it working with a wireless access point like your home network’s WiFi router or a “MiFi” when you are using it on a wireless network.

Also pay attention to the sound quality and the functionality of these speakers, especially if you buy units that you intend to use “at home”. As for portable units, look for anything that also works for durability especially if they are intended to be used on the beach or by the pool.

Once you choose the right network-capable speaker system for yourself or to give as a gift, you could then end up enjoying listening to them for a long time.