Official app for Facebook now on Windows 8.1

Facebook client for Windows 8Those of you who like using your Sony VAIO Tap 20, HP x2 Series, Sony VAIO Duo 11 or other Window 8 touch laptop to stalk on Facebook can now do so using a Facebook client that is written to be part of the operating system’s Modern user interface.

Here, you have a 3-pane dashboard with a presence list of the friends you interact with on the right-hand side, the News Feed in the centre of your screen and the grey “selection” menu on the left. The right hand top corner has a one-touch access point for status updates, pending friend requests and conversations that are taking place. There is the same ease in which you can browse what is available, including photos whether as a screen show or as a tiled arrangement.

I have even browsed through various photo albums in a “slide-show” view and the viewing experience comes across very smoothly. For example, when a photo initially appears, you see it looking soft and less detailed but it arrives with more detail coming through. There is the ability to zoom in on an image as well as flick through the slideshows.

Even mouse users, which covers most desktop users, are cared for because you can still use your rodent to scroll up and down using its thumbwheel. The thumbwheel works properly with scrolling the various columns for the News Feeds, the chat you are having, the presence list and the like independently – it depends on what you are actually hovering over. If you flip through photos in someone’s album, you can use the thumbwheel to “speed” through them. Using the SHIFT key with the thumbwheel allows you to detail in and out of the photos.

Its behaviour through a conversation is as expected but I would like to see a “typing” indicator so I can know if they are typing a reply at a particular moment.

This is certainly an application that appears to be mature from the start rather than one that is bug-ridden and failing too frequently. Give this a go on your Windows 8 laptop as something to work the Modern UI with.

Computers or other devices perform better after a reboot–why this?

Article

Why Rebooting Your Computer Fixes Problems | Lifehacker Australia

My Comments

Why is it that your laptop, tablet or smartphone performs so much better when you restart it? Why is it that some devices implement a watchdog circuit to force them to restart by themselves when they are critically underperforming?

This is typically to make sure the computer is working on a clean slate as regards to its primary storage (RAM – random access memory). Most software, especially if it is poorly written, can take up more of this memory as it is used. But when you close that program, it releases the memory it used. But a lot of recent regular-computer and mobile operating systems encourage the ability to run multiple programs at the same time, with the ability for programs to “sink” in to the background when they are not being used.

If this situation is allowed to get out of control, most operating systems undertake “paging” or “virtual-memory” procedures where they use space on the secondary storage as primary storage. At this point, most computer start to underperform and become devilishly slow. The worst-case situations that come about include programs or the computer simply “freezing” or “locking up” thus becoming unresponsive, a situation commonly described as “hanging”.

Even placing that PC or other device in to a “sleep” or “hibernate” mode or allowing the device to fall to sleep wouldn’t really rectify the problem because these modes cause the device to preserve its current operating state either to the RAM or its secondary storage (hard disk or solid-state drive). This is typically to provide a quick start-up for the device.

But when a computer or device is restarted using the operating system’s restart option or having it then shut down properly before you restart it, this causes all the programs it runs to start on a clean slate. For mobile devices, it may require the user to press the hardware Power button for a long time to bring up a “power-option” menu with the shutdown or restart option or pressing two buttons together for a long time to force a full shutdown or restart of an obstinate device.

You know when this restart has occurred when you see a longer boot time and see the startup screens or other startup graphics appear on your device’s display. You typically will then notice that the device is performing with a bit more “pep” in it. This is because the device is working on a clean slate with fresh “known” data.

A good practice to do in order to keep your computer running smoothly is to have it restart at least once a fortnight. This may be something you have to do when you install or update software. I also see this being more important for laptop users who typically close the lid when they have finished with their machine, causing it to go to a sleep or hibernate mode, or desktop users who turn off the monitor or use the sleep or hibernate modes at the end of a computing session.

This is also a good practice with well-used smartphones and tablets, especially if these devices are being used with poor-quality apps from the app store.

Feature Article–DLNA Media Network Series: The three-box DLNA network model

Updated 16 October 2013

3-box DLNA setup with control point deviceThis is an advanced way of setting up a DLNA Home Media Network and requires a network media player to be able to be controlled by other devices on the same network.

It is a function integral to DLNA 1.5 compatible devices and is part of TwonkyMedia Manager (which I have reviewed here) since it started. Now it will be an integral part of Windows 7 where you can select “Play To” to have music playing on another device that you have specified. There will be many handheld terminals that have this functionality, either as part of the operating system or as add-on software and is considered an essential function for mobile devices and the new crop of Wi-Fi-based wireless network speakers, some of which have been reviewed on HomeNetworking01.info.

The open-frame alternative to Apple AirPlay which can handle pictures and video content as well as music

The three boxes in this DLNA media network

Three are three logical units in this equation

Media Server

This holds media files or references to media streams and is typically represented by Windows Media Player 11 or TwonkyMedia Server which is part of TwonkyMedia Manager which I have reviewed in this blog.

Also, in a PC-less solution, it can be a network-attached storage or music server device, which is become a very important trend as we move towards a highly-portable home network with a book-sized NAS holding our music, photos and video.

Media Control Point

This is primarily a software program or hardware device that can find material on any Media Servers on the home network and allow the user to “push” the content to any Media Render device on the network. Some of these programs such as most of the smartphone Media Control Point apps also have the ability to “push” device-local content to the Media Render device.

Examples of these include Twonky Manager, Windows Media Player with its “Play To” function, and Linn Kinsky for Windows; Twonky Mobile, PlugPlayer and Gizmoot for the iPhone or iPad; and Twonky Mobile and BubbleUPnP for Android devices. For that matter, this feature is also being considered as a desired for any highly-capable music player or similar application for the Android platform.

Media Renderer

Boston Acoustics MC-200Air wireless speaker whcih can be controlled by a DLNA control app

Boston Acoustics MC-200Air wireless speaker whcih can be controlled by a DLNA control app

The Media Renderer is similar to a UPnP-capable Media Player except that it can accept instructions via the home network to play particular media files or streams. Typically this setup is represented by three boxes but a device can have two or three of the functions built in to its housing.

An example of this is the TwonkyMedia Manager program or the PlugPlayer DLNA controller for the iPhone or any of the recent Nokia N-Series mobile phones. Here, the program has a built-in software media renderer function as well as a software media server function and control point.

Or you have most recent DLNA-capable AV equipment like the Denon CEOL Piccolo that allow you to choose the content to play using their control panel or remote control; or let you “push” content to them using a DLNA Media Control Point.

What can you do

Put the netbook, tablet or another computer to good use as a media controller

An idea that would appeal to many geeks and media enthusiasts is to load a program like TwonkyMedia Manager 1.2 or Linn Kinsky on to a netbook or subnotebook computer and use this computer as a remote media controller for the DLNA Home Media Network.

This could mean that you could bring up pictures and video on a DLNA-capable TV or electronic picture frame using this terminal. This would end up being much easier than finding the remote control for the TV and working through an unwieldy user interface.

As well, handheld devices like smartphones, mobile Internet devices or PDAs that are equipped with WiFi functionality can work as a remote control, whether natively (in the case of phones like most of the Nokia N-Series phones) or through one of many software programs available through their standard app stores Web channels.

Similarly, you could use your office PC to show merchandising videos / images on your DLNA-equipped TVs and picture frames in the shop’s public space rather than going around to each TV or picture frame to bring up the right merchandising material. Again, you could use the “Play To” function in Windows 7 or 8, or “Cast To Device” in Windows 10 for this purpose.

Use of AV network media adaptors for music or other audio content

Typically, an AV network media adaptor like the D-Link DSM-320 or the Zyxel DMA-1100P typically doesn’t have any form of display on it. Instead it requires the user to control it using the remote control while using the attached TV as its display. This wouldn’t equate very well if you intend to play music rather than show pictures or videos using the device. Here, these devices can be managed by having the music playlists pushed to them without need for the attached television to be on.

“Follow Me”, “Party Mode” and other advanced playback techniques

Some of the DLNA media controllers allow for advanced playback techniques where program material can be “pushed” to other Media Renderer devices from a particular point in the track. This can allow for “follow-me” playback where the content which was already playing on one device is played on another user-specified device with the content stopping at the previous device; or “party mode” where content is broadcast to a group of devices. The last mode may have problems due to the data-oriented network protocols not being able to work well in supporting synchronous playback from one source. Similarly, there could be other playback techniques like exhibiting different pictures from the same cluster on different screens.

Portable devices being part of the DLNA digital media network

Smartphone-based DLNA setupAnother application for this kind of operation is for a digital camera or mobile phone to “push” digital images held on that device to DLNA-compliant TV screens or picture frames. This would typically work well for “there-and-then” showing of pictures and videos taken with the device rather than downloading of pictures to a network-attached storage device.

Similarly a mobile phone or MP3 player could “push” digital music held therein to better speakers via a digital media adaptor. To the same extent, these devices are also being used as a key interaction terminal for the Social Web with the likes of Facebook being replete with albums of photos created by everyone on these networks. What would be a good idea to show that album that your Facebook Friend filled from their holiday on your large TV screen and page through each of those pictures using your smartphone as the control surface.

The main issues and hurdles

Is the playback device able to be controlled by the home network

Not all DLNA-capable playback equipment is capable of supporting “3-box” push-mode operation at the moment. Typically, most DLNA equipment from the big names that was issued over the last two years, especially televisions and network media adaptors and home theatre receivers will support this functionality “out of the box” or through a firmware update that the customer does. Some existing equipment may support the functionality through a customer-performed firmware update or may do so out of the box.

One of the best references for this capability is this list in the TwonkyForum discussion board run by TwonkyMedia, in relation to TwonkyMedia Manager.

Is the playback device set up to be controlled by the home network

Another thing to look for with playback devices is whether the function is enabled even though the device has the function. This may be looked at in the form of a Settings menu option in the Network Settings Menu or similar menu which may be labeled “Digital Media Renderer Mode”, “DLNA Remote Control”, “Network Media Control” or something similar. Some devices may put up a prompt that asks if you want this function to happen the first time content is pushed to that device using the DLNA method. This includes a few wireless speakers that support AirPlay and DLNA having them as selectable operating modes.

If this mode is set to on, the device can respond to DLNA requests. Some devices have the function disabled in the default factory setup while others may allow this kind of control by default.

Conclusion

Once you have this issue worked out, you can then use a handheld device, computer or dedicated remote controller to cause media to play on other home network devices.

Skully to develop a motorcycle helmet with heads-up display

Articles

Skully demonstrates GPS, rear-view camera in motorcycle helmet | The Car Tech blog – CNET Reviews

Skully fits heads-up display into motorcycle helmet | PC World

From the horse’s mouth

Skully Helmets

Home Page

My Comments

Those of us who use cars often take features like GPS satellite-navigation and rear-view cameras for granted. But motorcyclists feel left out because there isn’t a way to implement these technologies in a safe manner that works well for two wheels.

If a motorcyclist wants to use GPS navigation while riding their bike, they have to buy and use an expensive portable navigation device that is designed for motorcycle use and mount this to their machine’s handlebars. Or they have to seek out and purchase a smartphone dock that is designed to mount on a motorcycle’s handlebars and install their smartphone in that dock. Some of these accessories may not even look the part on certain bikes such as European-style scooters or “open-style” tourer bikes such as the Harley-Davidsons or Yamaha Viragos.

Now Skully have developed a motorcycle helmet that has an integrated GPS and rear-view camera. Here, this device uses a heads-up display that works independently of how you position the helmet’s visor to show the navigation graphics or the picture from the rear-view camera.

It has a Bluetooth link to your smartphone for updating map data but also provides access to telephony, music and voice-control features that your smartphone offers. THink of having a long ride while listening to your favourite music then telling your smartphone via Siri, S Voice or Google Voice to call the people whom you are seeing to let them know you’ll be there.

The Android-driven helmet has a battery runtime of 9 hours and can be charged using a microUSB data/charging cable connected to a computer or USB charger. It certainly shows that this is an invention that solves a problem many motorcyclists face and brings them on an even par to car drivers.

AVM releases HomePlug AV500 access point that is ready for home automation

Article – in German language

Internet per Stromleitung: Anschluss der Powerline an Steckerleisten kann die Leistung beeinflussen | NetzwerkTotal.de

From the horse’s mouth

AVM

Product Page (German language)

My Comments

AVM, known for their premium Fritz!Box routers have launched their latest HomePlug AV500 wireless access point which is a device that I consider important for stone-built European country houses that are “Wi-Fi difficult”. This unit, known as the AVM FritzPowerLine 546E provides a Wi-Fi segment to the dual-stream 802.11n specification for the 2.4GHz band and supports WPS push-button client-device setup as has been talked about in this article concerning WPS in a multi-access-point network.

But it is also ready for the IPv6 home networks which are a reality for anyone using a recent high-end consumer or small-business router and will become common as more countries roll out next-generation broadband.

But the FritzPowerline 546E is one of the few HomePlug access points equipped with a filtered mains outlet which you can plug equipment in to. AVM takes this further by making this socket a switched socket which works with their home-automation software. For that matter, this function is manageable through the device’s Web user interface and provides not just instant remote “on-off” but a time-switch function.

What I see of this device is that it isn’t just like other HomePlug wireless access points but is offering more functionality in a different way. This is especially as the HomePlug powerline network is being considered very clearly in the UK and Europe as a viable no-new-wires network segment.

Feature Article-DLNA Media Network Series: Setting up a PC-Less Network AV setup

Updated: 15 October 2013

Why set up a PC-less networked AV setup

DLNA Media Network with NAS A PC-less networked AV setup doesn’t need a particular computer to be present and running to provide AV media to DLNA client devices.

The media is provisioned by a box that is designed for providing AV media to client devices 24/7. This avoids situations where the media is not available due to the PC crashing or being infested with malware; both events that can be very common occurrences with most home computers. There is no need to worry about a PC which is being used for playing games or doing other system-intensive activities limiting media availability. Similarly, these setups use less energy than a PC working as a media server.

This setup also suits today’s mobile computing environment where laptop computers, smartpbones and tablets are more likely to be moved from place to place. It also suits environments like holiday houses where there is no real use in keeping a desktop computer on the premises but there is the desire to have occasional Internet access at such locations.

As well, this kind of setup appeals to computer-shy people who may want to benefit from digitally-hosted media. This is because there is no need to have a noisy ugly computer in the house for this kind of activity to occur.

Another bonus is that when you add more media client devices to the network, a dedicated media server can handle the increased demand more capably. Contrast this with an average desktop or laptop PC where the odds of failing when serving more devices can increase rapidly.

What kinds of PC-less media server exist?

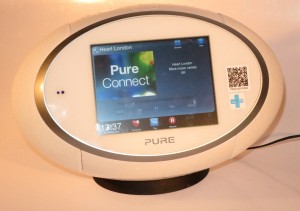
Dedicated DLNA media server (Philips Streamium WACS-7000, Sony GigaJuke  NAS-S55HDE, etc)

This unit is typically in the form of a hi-fi system or component that is part of such a system. It has a single hard disk that is primarily for storing media, typically music files and have a network interface, either in the Ethernet or 802.11g wireless form.

Such units will have a built-in CD drive and can “rip” audio tracks from CDs loaded in that drive. They will have access to a metadata service like Gracenote so that the tracks are properly indexed by song title, artist (both album and contributing), genre and album title. As well, they could record audio to the hard drive from a device connected to the server’s line-level input or, where applicable, from a built-in radio tuner. This is in a similar manner to recording music to tapes from the radio using that good old cassette deck.

A lot of these systems expose features and functions that only work best with selected client equipment sold by the server’s manufacturer. They may have limitations concerning transferring audio files to and from the unit’s hard disk, which may limit backup or secondary-storage opportunities. Usually they require a computer to run a special utility in order to transfer music files to or from the unit.

Similarly, it is becoming a trend for some PVR-capable set-top boxes to work as a dedicated DLNA media server for the TV shows that are recorded by these devices. This is a trend being pushed forth by the FCC in America to allow consumers to use their smart TVs to pull up live or recorded video content offered by their pay-TV providers.

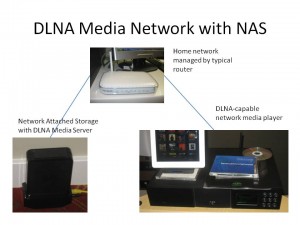
Standalone NAS (network-attached storage) box

WD MyCloud consumer network-attached storage

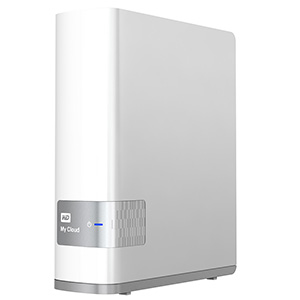
WD’s latest Personal Cloud NAS which works as a DLNA server

These devices are simply a dedicated file-storage device that is connected to the home network and handles files according to standard network-based file-handling protocols. They often provide backup file storage and secondary file storage for computers on the network as well as media-server functionality.  Some users may use the hard disks in these units as a “holding bay” for their computer’s hard-disk contents while they are upsizing that computer’s hard disk.

These boxes will typically come either as a single-disk unit which is the size of a book or as a multi-disk unit that is typically the size of a toaster or breadmaker. These units  either uses the hard disks as a huge storage volume or sets aside some of the disks as a “shadow store” for the data should any of the disks fail. This latter technique, which also provides higher data throughput is known as RAID which stands for Redundant Array of Independent Disks.

They are available as a unit fitted out with the necessary hard disks to the capacity you pay for or as an enclosure where you install hard disks that you buy separately. Earlier versions of these enclosures required the user to mess around with a screwdriver and end up losing screws in the assembly process, but the newer units just require the user to slide in or “clip in” the hard disks.

This class of device includes “headless” small-scale server platforms like Windows Home Server and some Linux distributions which can be expanded by the user to perform different functions. They may include this kind of software being loaded on an otherwise-redundant PC that is being repurposed as a small-form file server.

Most NAS units on the market offer a “personal cloud” or “remote access” function which works with a server that provides private log-in and access to the data on the NAS from a mobile device used out in the field. Some implementations may also allow remote syncing of content data between two NAS units at different locations.

This device will be the way to go eventually because of its ability to provide a flexible media-sharing solution for most small networks. It is infact part of a personal “shortlist” of devices that I would consider essential for a home network to be equipped with.

“Ripping” NAS units

RipNAS "ripping" NAS with built-in optical drive - RipNAS press image

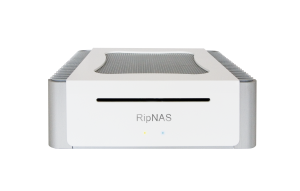
RipNAS “ripping” NAS with built-in optical drive

There are a class of NAS boxes that are just like a regular NAS box, having the same number of hard disks as these devices and having the same capacity and functionality as these boxes. But these units, such as the ZoneRipper Max, RipNAS and the Naim UnitiServe have a built-in optical disk drive and software which “rips” CDs loaded in to the unit’s optical drive, in a similar manner to a dedicated DLNA music server. They will use a music metadata service like Gracenote to index the tracks that are ripped from the CDs loaded in the unit’s optical drive. These units would be considered as a “bridge” between the dedicated DLNA music server and a general-purpose NAS box.

USB hard disk connected to a DLNA-compliant USB file server

Another common method is to use a USB network file server device that is connected to a USB external hard disk. The device can typically be part of another network device like a lot of the newer high-end routers including the Freebox Révolution and its peers offered in France, or just become a standalone box. These units, again, handle files according to the standard network-based file-transfer protocols.

They work best with one self-powered USB hard disk because most of these server devices usually run on a low-output power supply that typically powers the electronics within. Most of these units also don’t have the logic to properly handle a USB hub or multiple USB hard disks. If you are using a small hard disk that doesn’t have its own power supply, you may need to connect it via a self-powered USB hub. Similarly, you may find that using a self-powered USB hub can assure reliable service with any of the USB file servers that can support USB hubs,

These setups are useful for a temporary media-sharing arrangement where you are providing media to one or two devices or as an auxiliary media server for other media that isn’t always used.

Storing your media on these devices

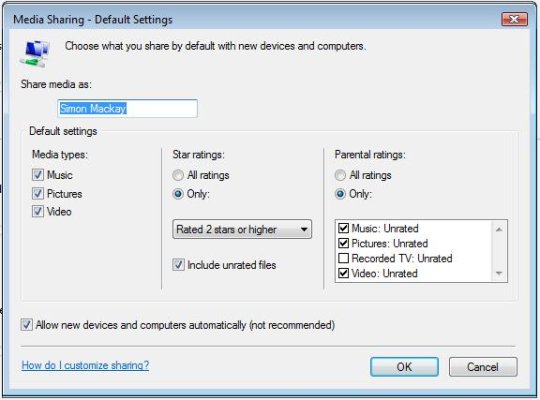
If you use a dedicated NAS unit without a built-in optical drive, you will need to make sure that you have SMB (Windows, MacOS X, Linux) or NFS (Linux) read/write access to the media share on that NAS unit. As well, make sure that there is a desktop shortcut, mapped drive letter or other mount point to that share on your computer(s) that you are preparing the media on.

Prepare your media as you normally would, with it ending up in your computer’s media directories. This includes providing the appropriate metadata to describe the content being offered. Then copy the media directories to the NAS media share using the standard practices that you use for copying files and directories. You may need to set up a “sync” routine to automatically copy new media to the media share so you can be sure that the new media is available on the network.

For that matter, I am using the open-source “FreeFileSync” program for this purpose and have a sync routine set up to contribute additions and modifications to my media folders to my WD My Book World Edition NAS.

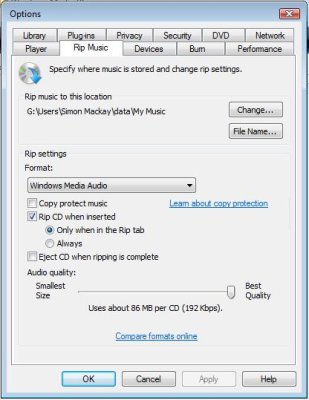
Avoid the temptation to “rip” a CD directly to the network share because there is the increased likelihood of errors and slow performance due to multiple points of failure existing between the CD and the NAS’s hard disk, being the optical drive, the ripping and encoding processes and the network transfer process. This is more so with cheaper and older NAS devices as well as USB file-server setups that may be unreliable.

If you use Dropbox, Box.com, SkyDrive or similar services to share media with others or transfer media between computers, it is a good practice to copy the media that is available through the “cloud” storage service to a folder on your NAS used by its DLNA media server. This then allows you to enjoy the media from that service on your DLNA-capable equipment.

Increasing and evolving the DLNA networked media system

One media Server, work towards a NAS unit

This is more analogous to a business’s file server where the IT department want to make sure that all company data is seen as one collection to back up and manage and is at one location. This may appeal to you if you want to have only one primary storage point for your media.

The only limitation about this is that if you need to “do anything” with the NAS unit like upsize it or replace a failed hard disk, you will have to have the media library out of action.

Two or more Media Servers serving different content

This is a situation that may come about as you start to outgrow your existing NAS’s capacity as I have written about when I received a new higher-capacity NAS due to the fact that my existing unit had nearly reached capacity. Here, I was talking about where you keep an existing NAS working as another server alongside your newly-acquired unit.

You may want to have the media on two or more media servers rather than one media server. This may appeal to a household which has young adults or adolescent children living in it. In this situation, they may want to keep their media on an NAS that they have responsibility for and can take with them when they move on. This avoids you having your media server being “clogged up” with their media which you will less likely want to touch whether they are with you or when they have left your place.

Similarly, you may have media to do with your personal activity as well as media to do with your business or community-engagement activity. Here, you can run a separate media server which houses your business media and this one can be managed under business standards and be financially underwritten by your business. This includes Web developers who run a NAS box as a “Web-page workbench” and want to view primary pictures for their Web page on a DLNA media client attached to the big-screen TV.

Here, you create the different media servers but you make sure they have different names so that your DLNA client devices can differentiate between the server devices. You may use different types of server such as a USB hard disk connected to a DLNA-capable USB file server for a small project or a business-class NAS unit for your business data.

An increasing number of NAS devices pitched at the domestic market are starting to support the ability to aggregate multiple DLNA media libraries in to one large media library. This allows the user to point their media client device at one reference point for all the media that exists on the one home network.

Media Servers in different geographical locations

There may be the possibility of running another DLNA-based media network in another geographic location like a business premises or another house.

The main issue about this is keeping both locations in sync with the desired content. You may have to use an Internet-based sync utility which is supported by your media server to synchronise content between locations.

On the other hand, you could set up an IP-based NAS-NAS backup set for incremental or differential (only files that are new or have changed) backup, but the backup jobs could still be large if any metadata is changed. This must be a file-by-file backup where each file on the destination NAS is its own copy of the source file rather than a “file-of-files” that most backup software works with.

You would have to make sure that both NAS units are accessible from the Internet. This may involve establishment of a “dynamic DNS” setup through the use of “DynDNS” or similar utilities; or having each location have a fixed IP address. Then there is the issue of setting up a port-forwarding rule in your router, which may be easy if your NAS units implements UPnP-based port forwarding and you are using a UPnP-compliant router in each location. On the other hand, you may have to visit the router’s Web page to set up the port-forward rules.

This situation hasn’t been made easy because typically the concept of using multiple NAS boxes for applications like multi-location file storage hasn’t been defined as a key application. Similarly NAS manufacturers prefer users to set up ecosystems based around their devices especially certain device ranges.

Conclusion

Once you have moved towards the PC-less DLNA-based media network, you will thank yourself that you have headed down that path. You won’t need to keep a noisy computer on all the time just to enjoy your music over the network.

Product Review–Denon UrbanRaver AH-C100 in-ear headset

Introduction

I am reviewing the Denon UrbanRaver AH-C100 in-ear stereo headset which is the cheaper in-ear model of the UrbanRaver series of bass-enriched headsets. These are intended to appeal to people who value the in-ear style of headphones or like their portability compared to a pair of over-the-head headphones.

Denon UrbanRaver AH-C100 in-ear headset

Price

RRP: AUD$109

Type

Headphone Assembly Earphones
Driver Positioning Intra-aural (in the ear)
Microphone Position In-line
Connectivity
Headset 3.5mm four-conductor plug
Adaptors Nil

The headset itself

Connectivity

The Denon UrbanRaver AH-C100 headset works as expected with most devices no matter whether they have the headphone jack or the full headset jack.

Comfort

Earpieces for the Denon UrbanRaver AH-C100 headset

Earpieces for the Denon UrbanRaver headset

This may be a subjective remark but the Denon Urban Raver AH-C100 can be difficult to wear especially if the headset ear-adaptors that come with it don’t suit your ear canals. Once in place, they don’t cause any fatiguing even for a long journey.

Sound

Like a lot of in-ear headsets and earphones, the quality of the sound for the Denon Urban Raver AH-C100 headset is totally dependent on the earbuds fitting in your ear properly with the supplied ear-caps in place. I even tried using these earphones without the ear-caps in place as if you were to use them like earplugs but I didn’t get the full desireable response from them.

There is the tight bass response that is identifiable with the UrbanRaver headphone lineup but you still hear the “rest of the music” in the songs such as the vocals and melody-bearing or harmony-bearing instruments.

As for non-music content, there is the clear dialogue, and the tight presentation of sound effects coming out of the headphones which makes them work appropriately for private viewing of videos or private gameplay.

I have taken a call using the headset and can hear the correspondent’s voice clearly and they could hear me clearly.

Noise reduction and handling in noisy environments

I have used these headphones during a train journey from Ballarat to Melbourne using a Vline “Vlocity” diesel railcar train. These have a similar engine noise level to most transit buses or coaches as heard from inside the cabin. Here, I was able to hear the music material from my Samsung phone at a reasonable volume without the engine noise competing with the sound.

Motorcyclists who are most likely to buy headsets like this due to them being able to be worn in conjunction with their helmet may appreciate the noise reduction because they can hear what’s going on around them but not as much the noise from the machine under them.

Limitations and Points Of Improvement

There could be further work done on making the Denon UrbanRaver AH-C100 headset fit for most people especially if it could serve also as an “earplug” headset for colder climates.

As well, like with most of the headsets I had reviewed, a break-out plug and/or USB communications audio module would be nice to have to make these headsets work well with online gaming environments. This is more so with “gaming-rig” PCs or console audio adaptors that aren’t likely to have the four-conductor jack.

Conclusion

The Denon UrbanRaver AH-C100 headset comes across as a compact in-ear headset that you can stow away but need to make sure it fits properly every time you wear it for best bass response.

Here, they can come in handy for cyclists and motorcyclists who value using a headset in conjunction with their favourite helmet as they ride their bike on longer distances or want to keep on touch through that bike ride.

Firmware updates to be available to fix D-Link router vulnerability

Articles

D-Link to padlock router backdoor by Halloween | PC World Business

D-Link plans firmware update to disable backdoor | The Register

From the horse’s mouth

D-Link

Update On Router Security Issue

My Comments

Recently, the computer press was awash with articles pointing to an exploit in some of the popular D-Link routers. Here, this has a computer on the local network pushing through a malformed URL to the router’s Web management page to bypass the login screen for the router’s management dashboard. This is more vulnerable with improperly-setup Wi-Fi network segments hosted by these routers or computers on the local logical network that are loaded with malware that takes advantage of this vulnerability.

Now D-Link are working towards offering revised firmware that fixes the exploit for each of the router models that are affected by this issue and is releasing this on their product support pages.

But of course, it is important to make sure that the wireless network segment that is part of your home or small-business network is secure with WPA2-Personal security and a random passphrase along with an SSID that doesn’t reflect the make or model of the router. Similarly, it is good practice not to enable remote administrative access on these routers and confine administrative tasks to the local network only.

This is in addition to other good computer housekeeping practices like running anti-malware software on your regular computers and being careful what you click on.

For that matter, I would encourage people to keep the firmware on their routers or other network hardware up-to-date in the same way we would keep operating systems and application software up-to-date.

Use QR codes to point someone to your Facebook Profile

Articles

Facebook Adding QR Codes To Android App, Directing Scanners To Users’ Profiles? – AllFacebook

Facebook Adds QR Codes To Android App | 2D Code

My Comments

You are at the party or favourite bar and you have started to chat with someone very well. But you mention that you are on Facebook and they say that they are also on that same social network. You ask if it is OK to “friend them” on Facebook and they agree.

The next thing you do is ask for their name to search for them in your Facebook mobile app. This can be very difficult in a noisy environment or if they have a name that has a particular spelling or is one of many common names. Pick, pick, pick, pick, pick – you have found that person and are sending a “Friend Request”to them.

Now Facebook have improved on this for the latest version of their Android mobile client by using the QR code to simplify the profile-sharing process. Here, you bring up “Friends” in the drop-down menu. Then you tap “Find Friends” which shows the “People You May Know” list. Touch the “QR Code” button on the top right of your display to show a QR code that represents a link to your Profile.

If you are adding your companion to your Friends list, you then tap “Scan Code” and point your Android phone’s camera at the QR code that your companion is showing on their Android phone’s screen using this same client. This takes you to their Timeline which would have any “public” posts that are on it as well as the option to add them as a Friend.

I don’t see this as a controversial feature for Facebook because you have to be pulling up your Facebook Profile’s QR code in the presence of your companion who then has to use their device running the client app to scan that code – you are not intending to “friend them” behind their back.

This function could be taken further for businesses who have Facebook Pages or people who use Facebook Pages as a way to maintain a sanitised “public” profile. As well, if a person maintains a Page for their business or blog along with their personal Profile, the QR code could lead the user to a screen with an option to go to the Page which you then “like” to follow or the Profile with an option to “subscribe” (see only public Posts and Photos) or “add Friend” (be seen as a Facebook Friend with standard privileges).

Similarly, other social networks like Twitter and LinkedIn could implement this technology to allow people to attract followers or connections. NFC technology can also be exploited to achieve the same functionality as these QR codes for “there-and-then” access to contact profiles.

Feature Article–DLNA Media Network Series: Getting Started With DLNA Media Sharing

Updated: 13 October 2013

Pure Sensia 200D Connect Internet radioMost of us will end up with a large collection of picture, music or video files on our computers, especially if we use our computers as a large media library. It would be nice to have access to this content without having to copy it out to thumbdrives, SD cards or iPods before we can enjoy it.

As for music, this is more so as we buy music as digital-download files rather than buy physical media and copy it to our conputer’s hard disk. It will also become a trend if we visit video sites that offer video content on a download-to-own basis.

The instructions in this article are more focused with a person who is pressing a regular desktop or laptop computer running Windows, MacOS X or Linux as a media server and may be the way to go when you start out with DLNA especially if you are using a desktop comptuer.

Why share your music, pictures and video the DLNA way?

Sony BDP-S390 Blu-Ray Disc Player

Sony BDP-S390 Network Blu-Ray Player – a Blu-Ray player that adds DLNA to an existing TV

An increasing number of dedicated network media client devices are on the market and nearly all of these devices work according to the UPnP AV / DLNA media-client standards.  Most manufacturers who are selling premium table radios are supplying at least one which can pick up Internet radio broadcasts through a home network and these sets are also capable of picking up media made available to them from a UPnP AV media server. We are also seeing an increasing number of wireless speakers that connect to your home network and receive music via Apple’s proprietary Airplay system or the common DLNA system. These units can be controlled by mobile devices equipped with controller apps.

Similarly, DLNA is becoming an important feature for any well-bred “smart TV” or similar video peripheral like a Blu-Ray player or home-theatre system that is connected to the Internet. The ubiquitous Xbox 360 and Sony PlayStation 3 games consoles that every teenage boy dreams of having both work according to these standards and this feature is becoming a requirement for up-and-coming TV-connected games consoles.

By using a DLNA-based setup, you don’t need to install different media-server programs for each network-media client that you happen to buy. In some situations, you may only need to run whatever is supplied with the computer’s operating system.

Setting up your network for DLNA media

Basic DLNA Media Network

Basic DLNA Media Network

Most home, small-business and some branch-office networks don’t require any revision because they typically are one logical network that spans the premises with the router that exists at the network-Internet “edge” being the device that handles basic network housekeeping. This doesn’t matter whether the network has one or more media segments like WiFi wireless, Cat5 Ethernet or HomePlug powerline cabling.

You will need to know the ESSID and the WEP or WPA security key for your wireless network. This may be obtained through the router’s Web administration page or through your client PC’s wireless-network-setup parameters such as in Windows Connect Now. If you are connecting your DLNA media client to the network via wireless, you will need to make sure that the wireless access point or router is broadcasting the ESSID so you can pick it from a list using the device’s user interface and be sure you are “in reach” of the network. This practice would be important when you run a multi-access-point wireless network or simply to help with making sure that neighbouring wireless networks are set up properly. As well, you will need to be ready to enter the WEP or WPA security passphrase by “picking out” characters from a list using buttons on the device or its remote control.

Some networks such as the public-access networks provided by cafes and the like, including the headline “Wi-Fi Internet” that resort apartment developments provide won’t work well with DLNA. This is due to implementation of a Web-based login system as well as client isolation which doesn’t work with most DLNA-capable devices.

Setting up your PC jukebox or media server software for DLNA

Settings for ripping CDs in Windows Media Player

Settings for ripping CDs in Windows Media Player

If you are running any Microsoft Windows version since Windows XP, you can use Windows Media Player 11 or newer versions as your media server. Before you start “ripping” CDs to the hard disk, make sure the program is set to rip without DRM (Copy Protect Music checkbox in the Rip Music options tab is cleared) and that it is set to rip CDs at 192kbps WMA or 320kbps MP3. The reason I would rip at these settings is to be assured of sound reproduction that is as close to the CD album as possible. You may use the MP3 codec for maximum compatibility or WMA for efficient storage if your DLNA media clients can handle WMA.

As well, you will have to set Windows Media Player 11 to automatically permit devices to benefit from its media library. This is done by going to “Library”, then selecting “Media Sharing” and clicking on “Settings”. The “Media Sharing – Default Settings” dialog box will open whereupon you make sure that the “Allow new devices and computers automatically” checkbox is selected.

If you don’t use any sort of ratings in your media as far as sharing is concerned, you may have to select “All ratings” in both the “Star Ratings” and “Parental Ratings” options. This will make sure all media is available for all of the devices.

Windows Media Player Sharing settings for DLNA

Windows Media Player Sharing settings for DLNA

For your pictures and videos, you will have to add the folder that contains your photos to Windows Media Player’s media library. Similarly, you will have to do this for your video folders.

Linux users have access to a large plethora of media-server software such as TwonkyMedia and TVersity as well as a large collection of open-source media-server software. You will still have to use a CD jukebox program set up to rip CDs at 320kbps MP3.

Apple and Windows users who use iTunes as their CD jukebox but will need to use either TwonkyMedia, PS3 Media Server or NullRiver MediaLink. They will need to make sure that the iTunes directory is the one to be provided by the media server. Again, iTunes will need to be set up to rip at 320kbps MP3 for best compatibility and quality. The program may support transcoding to lower bandwidth settings for use whenever music is being transferred out to an iPod.

Infact, I have written up some more detailed information about setting up an Apple Macintosh computer to work as part of a DLNA-based home media network because of the increasing popularity of these computers. The article, “UPnP AV (DLNA) for the Apple Macintosh platform”, covers other media server programs that exist for that platform.

The media server would need to be set up to work with the folders that are being used as the primary folders for music, photo and video storage.  I have explained how to go about this for your music, especially if you use iTunes or Windows Media Player. For your photos and videos, you simply add the folders used by your photo management and video management software to store your images.

As well, if you, a friend or associate uses SkyDrive, Dropbox or similar cloud-based storage services to share a media collection, you may need to copy the media that you received through the sharing to your media library to share them via DLNA. Similarly, images shared through the Social Web may need to be downloaded from the service to your media folder.

The DLNA media-server programs typically index music files according to artist, album, track, genre, and some may support separate identification of composers, contributing artists (important for soundtracks and compilation albums) and other metadata for pictures and videos. Some, like TwonkyMedia, allow for alphabetical clustering and other efficient sorting arrangements. This is typically because UPnP AV / DLNA allows for the server to determine how it presents the library to the client devices.

As far as playlists are concerned, they will typically be listed in a “Playlists” collection with each playlist being its own collection in that tree. By having a playlist as a collection of tracks rather than a reference to a playlist file, it means that the media clients don’t have to be compatible with the playlist file format that the jukebox program works with.

Some of the media servers like Windows Media Player 11 or TwonkyMedia support transcoding to common file formats for situations where a DLNA media client cannot handle a particular media type. This can come in handy for file types like WMA or high-definition audio files which aren’t handled by all UPnP AV media players.

Setting up the DLNA clients

Enrolling the DLNA clients in to your network

You will need to make your DLNA media client become part of the network. This can be a simple task of plugging it in to your Ethernet network segment or into your HomePlug powerline network segment using a HomePlug-Ethernet bridge.

Integrating wireless-enabled DLNA clients to the wireless network

If you are connecting your wireless-enabled DLNA media client to the WiFi network, you will need to configure it for this network. This will require you to enter the device’s setup menu and select the option pertaining to wireless network setup. Then you get the device to search for your network’s ESSID which is commonly referred to as the SSID, Network Name or something similar. Once your device has detected your wireless network, you will be prompted to enter the WEP or WPA security passphrase. At this point, enter the passphrase in to the device. These procedures will have to be done as mentioned in the “Setting up your network for DLNA media” section.

Nearly all of the recent DLNA network media clients may use a “quick set-up” method like Windows Connect Now or WPS. This will typically involve either transferring a USB memory key between a Windows XP or Vista wireless-equipped notebook computer and the device; or registering the device with the wireless router. This procedure may be as simple as pressing a “register” or WPS button on the router and the device or copying the device’s PIN number (which would be on the device itself or in a WPS setup option in the device’s setup menu) in to the wireless router’s setup menu.

If you use MAC-address filtering on your wireless router, you will need to register the DLNA media device as an “accepted” network device. This will require you to copy the device’s wireless MAC address, which will be on a sticker attached to the device itself, in to the router’s trusted MAC-address list.

Making sure the DLNA clients detect the media server

DLNA media directory provided by server PC

DLNA media directory shown on TV screen as provided by PC

You will need to make sure that the media server program is running on the PC that has the media that you are sharing. Most such programs may run a media server component as a background task while the computer is fully on but some may require the jukebox program to be running all the time. Similarly, you may bave to stop your computer going to sleep or hibernate mode under automatic control for this to work properly.

Another thing to check is the desktop firewall software. This should be set to allow the media server software outbound and inbound access to the network as a server. The Windows Firewall software that is part of all Microsoft desktop operating systems since Windows XP Service Pack 2 makes this easy by allowing immediate access to Windows Media Player or asking you if you want to allow the application to have network access. Other third-party firewalls may require the server application to be allowed Internet access by you adding the software to their application “white lists”.

DLNA collections listed as sources on the TV

DLNA content collections listed as sources on a Samsung Smart TV

You may have to select “Network Music”, “PC Music” or something similar on most network-enabled music devices like Internet radios in order to gain access to the music library that you have made available.  Then you select the “hostname” of the PC, which may be commensurate to its standard computer name or its primary owner’s name. The DLNA client will then show the media type that it can work with. You then select that type and use the controls to select the media you are interested in.  Some devices like the recent crop of Samsung Smart TVs list each DLNA server on the home network they are connected to either as a source alongside the integrated TV tuner or external connections on that device.

Summary

Once you have your network and media-server computer set up properly, you can work with providing music and other media to network media receiver devices without much hassle.